
DETEX 105106 Trim for Narrow Stile Instruction Manual
Overview
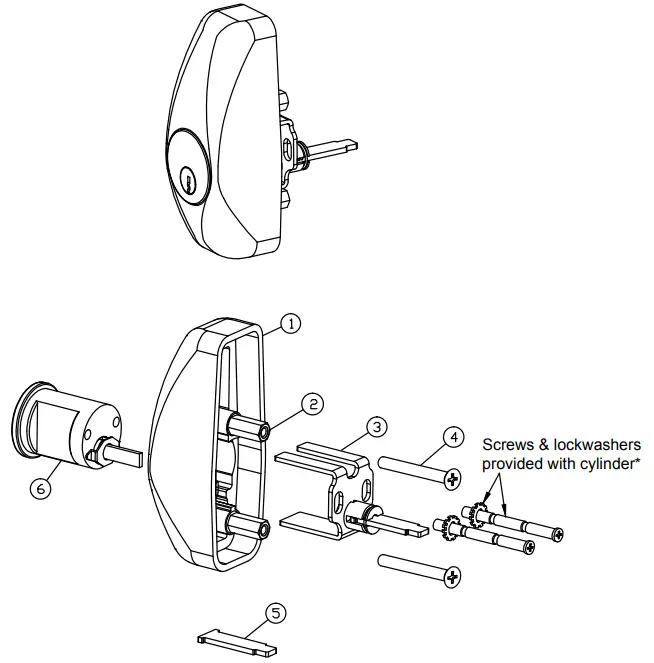
| PARTS BREAKDOWN | |||
| Item | P/N | QTY | Description |
| 1 | 105104-7 | 1 | 03R TRIM HOUSING, CVR NARROW, 626 FINISH |
| 2 | 105105 | 2 | HEX STANDOFF, CVR 03 TRIM NARROW |
| 3 | 105238-1 | 1 | TRIM TAILPIECE ASSY, 03 FUNCTION, CVR, 03R |
| 4 | 105622-124 | 2 | SCREW, 10-24 X 1-1/2″ LONG, PFH, S.S. (for 1-3/4″ door) |
| 105622-128 | 2 | SCREW, 10-24 X 1-3/4″ LONG, PFH, S.S. (for 2″ door) | |
| 105622-132 | 2 | SCREW, 10-24 X 2″ PFH, LONG, S.S. (for 2-1/4″ door) | |
| 5 | 105239-1 | 1 | TAILPIECE, 2-1/4″ THK DOOR, CVR |
| 6 | ECL-445-7-DD | 1 | CYLINDER, RIM, 5 PIN, SATIN CHROME (*sold separately) |
| RC7-626 | CYLINDER, RIM, 7 PIN, SATIN CHROME (*sold separately) | ||
| 7 | 105285 | 1 | TEMPLATE, PAPER, 03R TRIM PREP (not shown) |
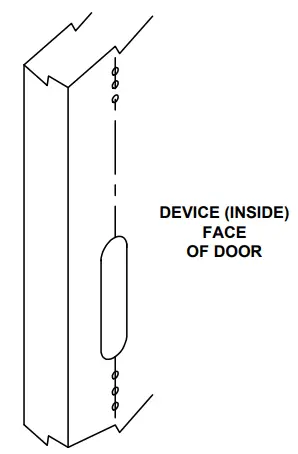
PREPARE THE DOOR – DEVICE SIDE
If not already done, prep the door per the instructions provided with the exit device.
TOOLS AND SUPPLIES
Safety Glasses
(Always put on safety glasses prior to beginning installation of unit)
Pencil
Center Punch
Hammer
Power Drill
1-1/4″ Hole Saw
Drill Bit & Tap Set
Screw Driver (Phillips Drive)
Tape Measure
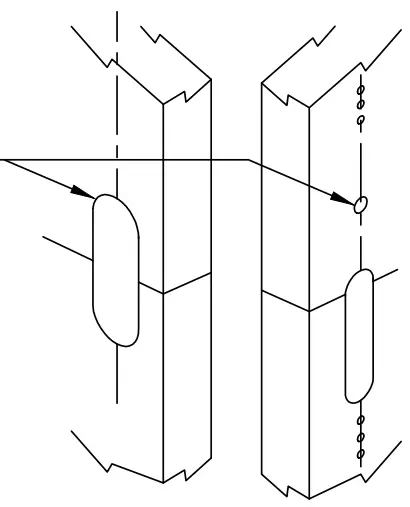
TRANSFER DEVICE CENTERLINES TO TRIM SIDE OF DOOR
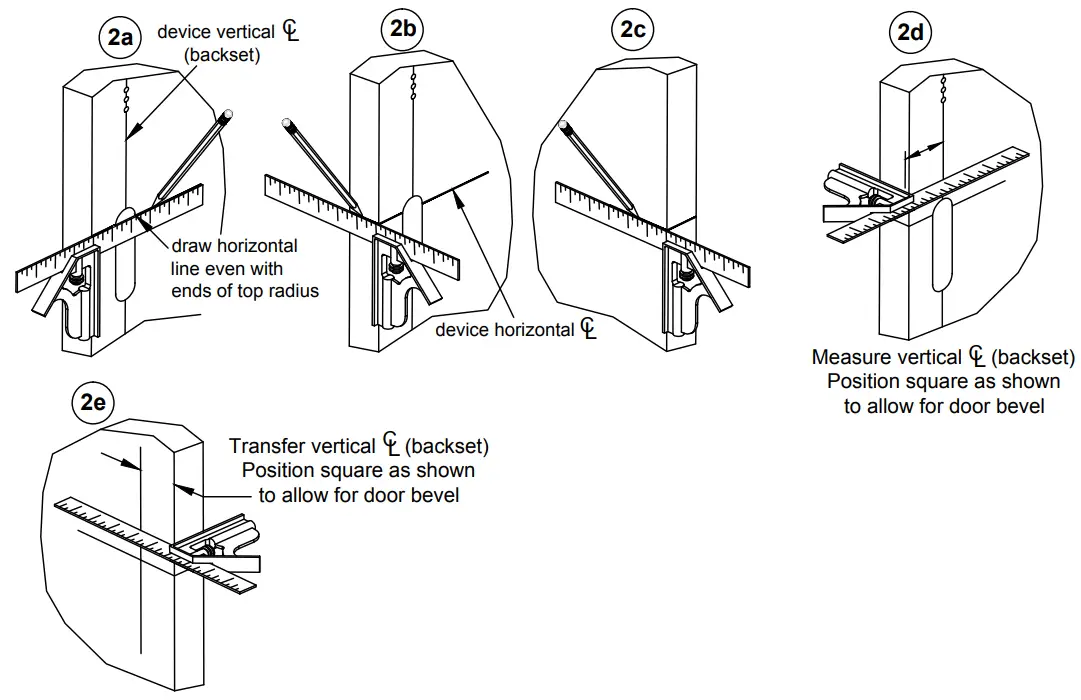
PREPARE THE DOOR – TRIM SIDE
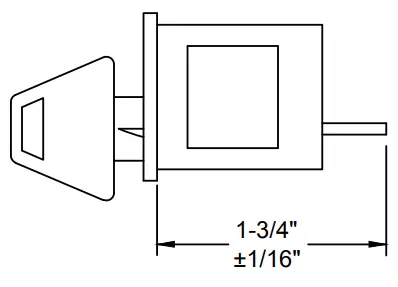
Next, prep the hole and slotted opening shown at right for the trim per the template (p/n 105285) provided with this trim.
(Template also available on Detex website See template T2314)
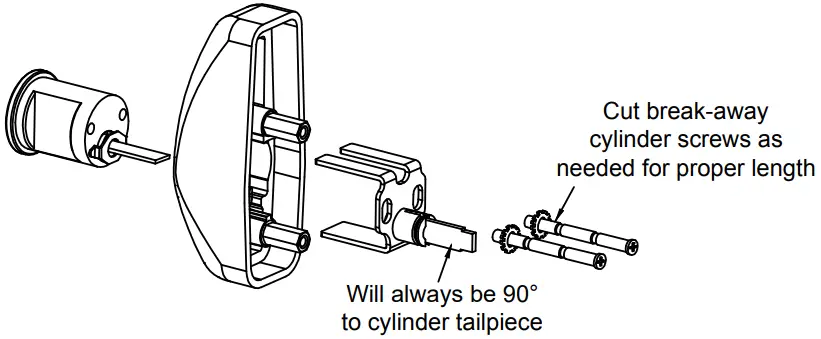
PREPARING THE CYLINDER
Cut rim cylinder tailpiece as shown below.
ASSEMBLE THE TRIM
Assemble the cylinder (with key removed), trim housing & tailpiece assembly.
The unit comes assembled with the tailpiece used on 1-3/4 to 2″ thick doors.
For 2-1/4″ thick doors, replace with the longer tailpiece provided (p/n 105239-1).
GO BACK AND FOLLOW EXIT DEVICE INSTRUCTION STEPS up to, but not including ASSEMBLE DEVICE TO DOOR. Trim must be installed BEFORE device is assembled to door.
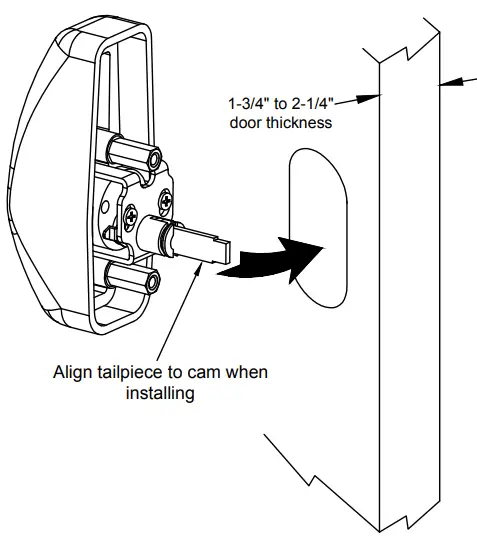
INSTALL TRIM ON DOOR
With the required BP12 backplate secured, use the appropriate length screws in the TOP HOLE in each pair of backplate holes above and below the cam (as shown) to install trim.
CONTINUE ON WITH DEVICE INSTRUCTIONS

Should you have a Question/Problem with your Detex device please call Detex Technical Support from job site at 1-800-729-3839 and choose option 2 on our menu. Please do not return the product to the distributor.
For WARRANTY information, scan code below or
go to www.detex.com/warranty

For device installation videos,
scan code below or
go to www.detex.com/videos