
BARN DOOR HARDWARE SDH-SW03-SS-KD Townhouse Knock-Down Hardware Kit for Sliding Single Wood Door
OVERVIEW
TOOLS REQUIRED
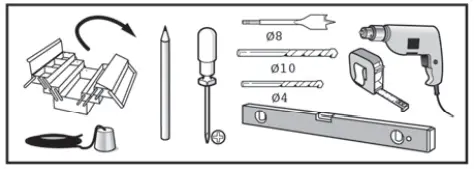
- Plumb Line
- Pencil
- Phillips Head Screwdriver
- 8mm Routing Drill Bit
- 10mm Drill Bit
- 4mm Drill Bit
- Level
- Tape Measure
- Power Drill
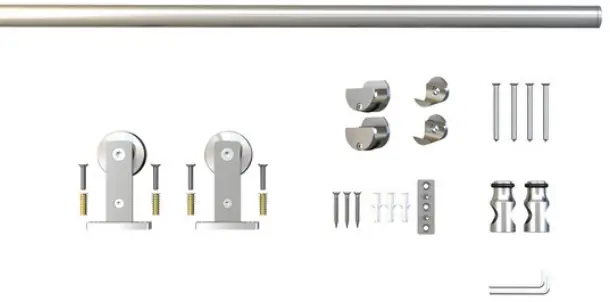
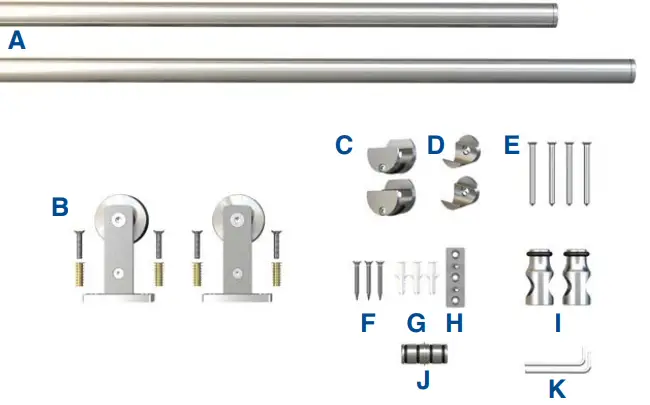
INCLUDED IN KIT
| A | 39-3/8″ Rail | x2 |
| B | Door Roller Hardware | x2 |
| C | End Bracket | x2 |
| D | Center Bracket | x2 |
| E | ST4.8×50 Bolt | x4 |
| F | ST5.5×32 Screw | x3 |
| G | Floor Anchor | x3 |
| H | Routed Floor Guide | x1 |
| I | Door Stops | x2 |
| J | Splicer | x1 |
| K | 4mm/6mmAllen Keys | x1 |
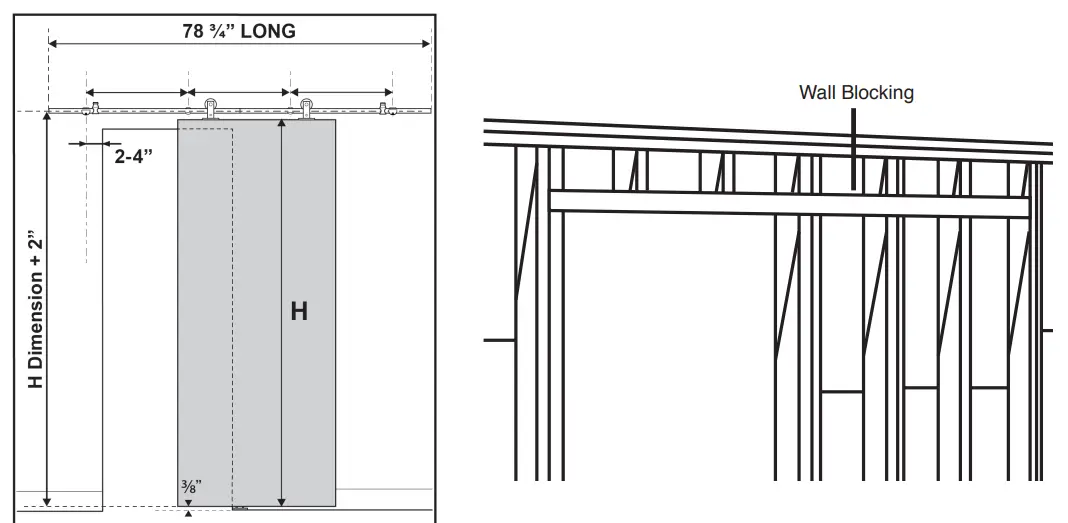
DIMENSION
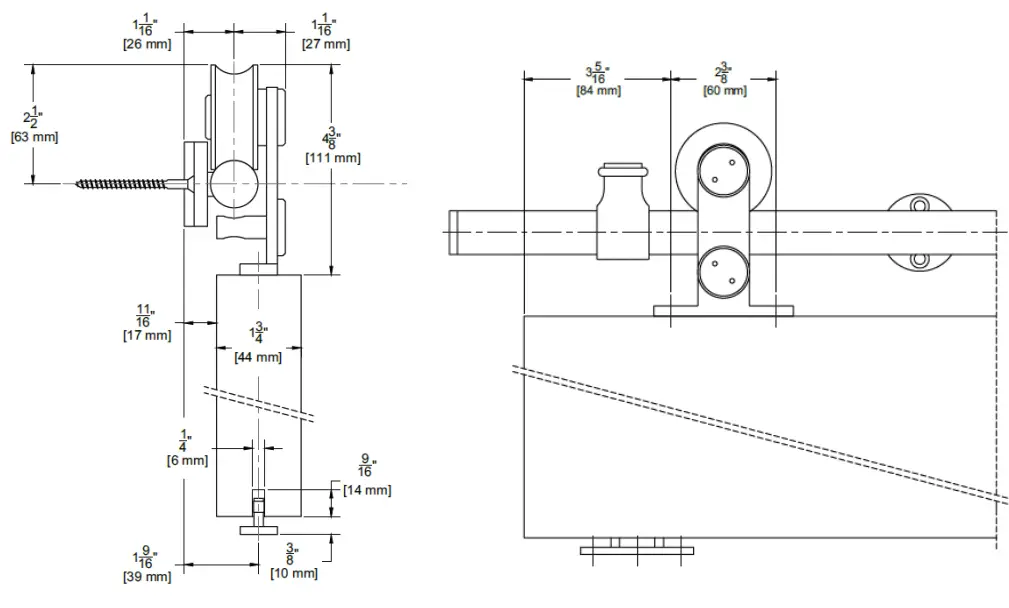
NOTES
- To obtain maximum weight capacity, all fasteners must be mounted into solid wood studs or wall blocking or mounted to a header board.
- Adjustable mounting brackets allow for standard 16″ U.S. stud spacing, or any variation.
Find the centerline of the track. Using a level, mark a horizontal line twice the door width long. Mark the bracket screw locations into the wall blocking. Attach the wall portion of the brackets as shown. Consult a structural engineer if you have questions about what type of wall blocking is required.
INSTALLATION
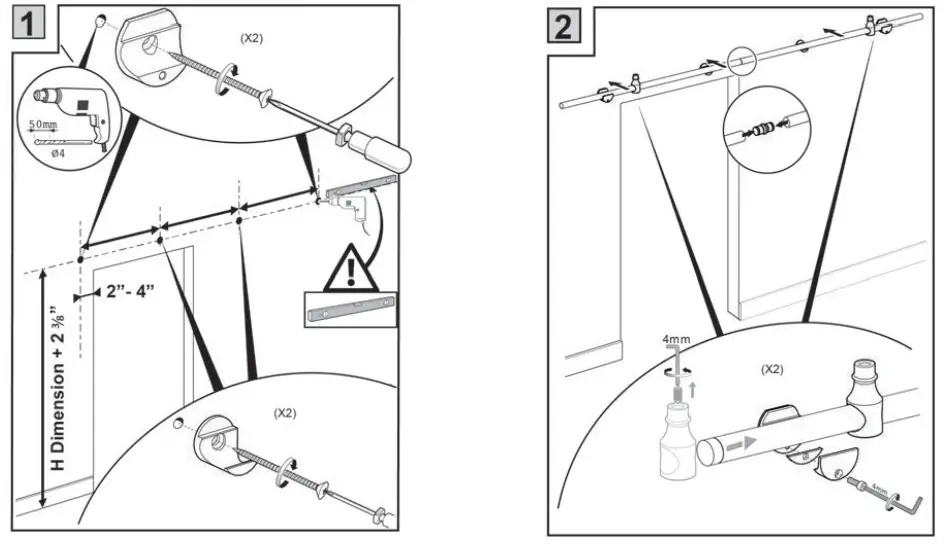
- Suggested wall bracket spacing. Brackets must be secured into wall blocking.
- Attach rail to wall as shown.

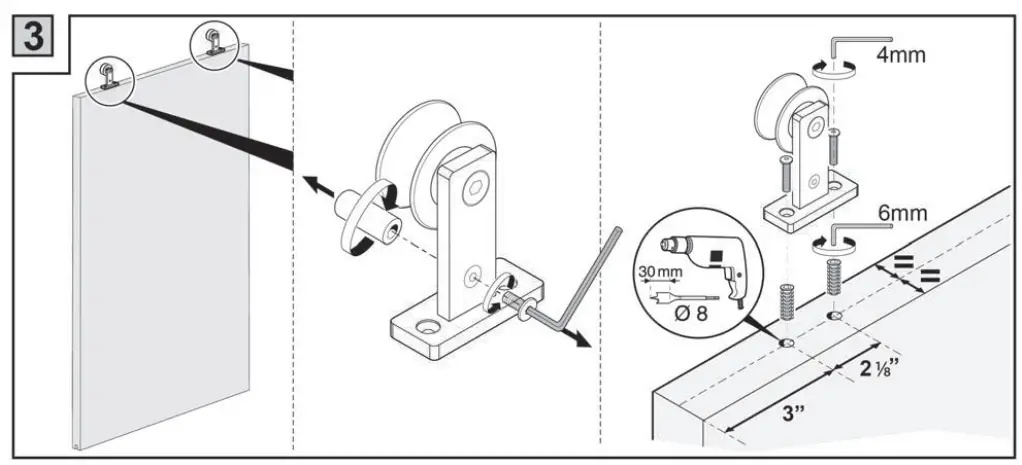
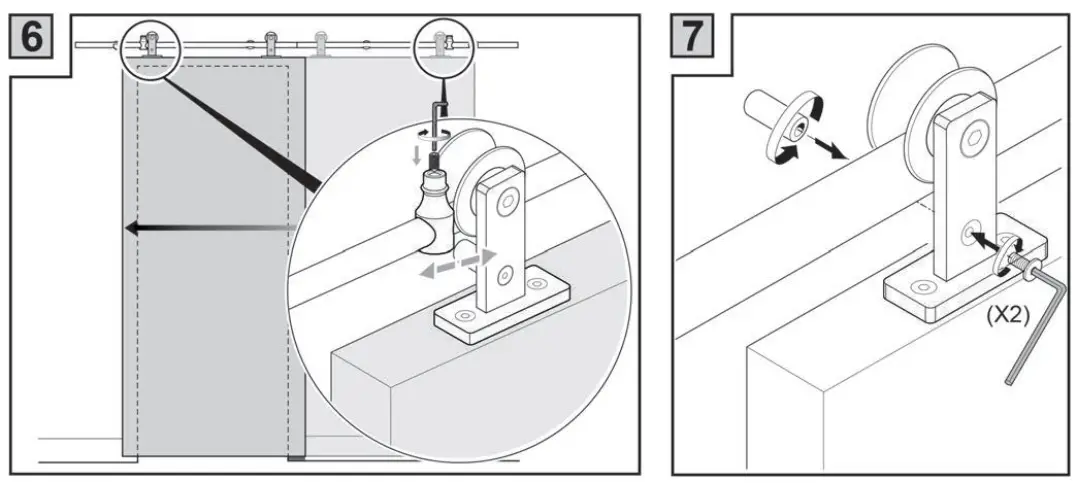
- Remove the anti-rise pin using the provide Allen key. Drill holes in the top of the door from the edge as pictured to accommodate the door rollers. The bottom of the doors should be routed at this time in order to accept the floor guide.

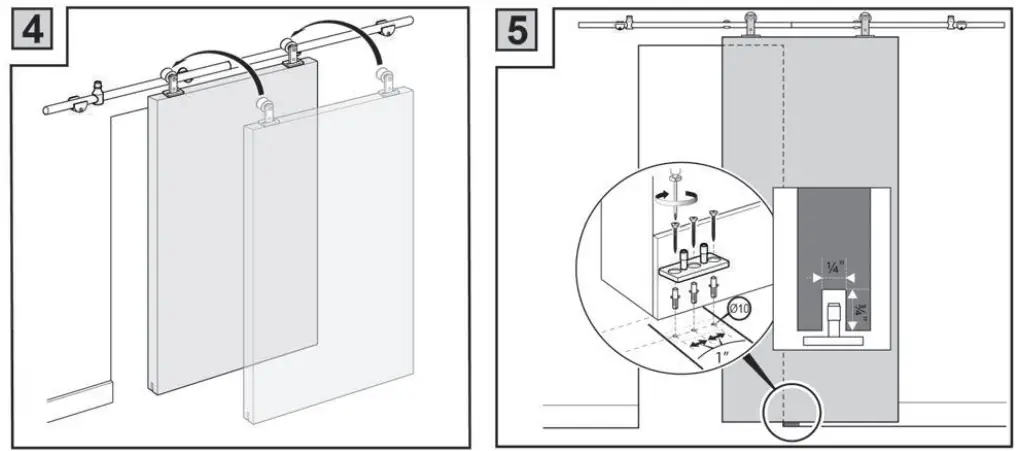
- Position the doors on the rail.
- Plumb the door and mark the positions of the floor guides. Mount the floor guides to the floor.

- Adjust the door stops accordingly. Tighten the set screw with sufficient force to drive the set screw into the bar after making the final adjustment.
- Reattach the anti-rise pin to the door rollers
Architectural Products by Outwater assumes no liability for improper installation.


