BARN DOOR HARDWARE SDH-SW4-BLK-8 Hardware Kit for Sliding Single Wood Door

Hardware kit for sliding single wood door
MODEL No. SDH-SW4-BLK-8
INSTALLATION MANUAL
TOOLS REQUIRED
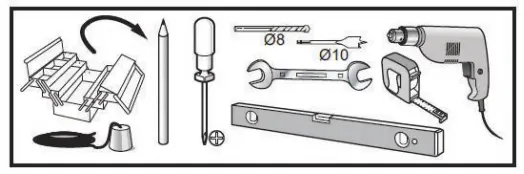
- Plumb Line
- Pencil
- Phillips Head Screwdriver
- 8mm Drill Bit
- 10mm Routing Drill Bit
- Wrench
- Level
- Tape Measure
- Power Drill
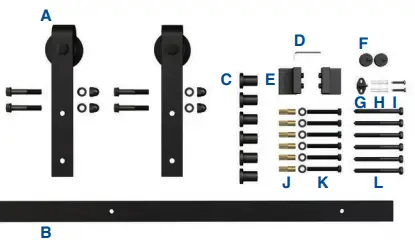
INCLUDED IN KIT
| A | Door Roller Hardware | x2 |
| B | 96″ Rail | x1 |
| C | Wall Bracket | x6 |
| D | 2.5mm Allen Key | x1 |
| E | Door Stop | x2 |
| F | Anti-Jump Disk | x2 |
| G | Routed Floor Guide | x1 |
| H | Floor Anchor | x2 |
| I | ST4.2×25 Screw | x2 |
| J | M8x30 Wall Anchor | x6 |
| K | M8x60 Bolt + Washer | x6 |
| L | M8x90 Bolt | x6 |
Architectural Products by Outwater assumes no liability for improper installation.
CLASSIC STRAP
NOTES
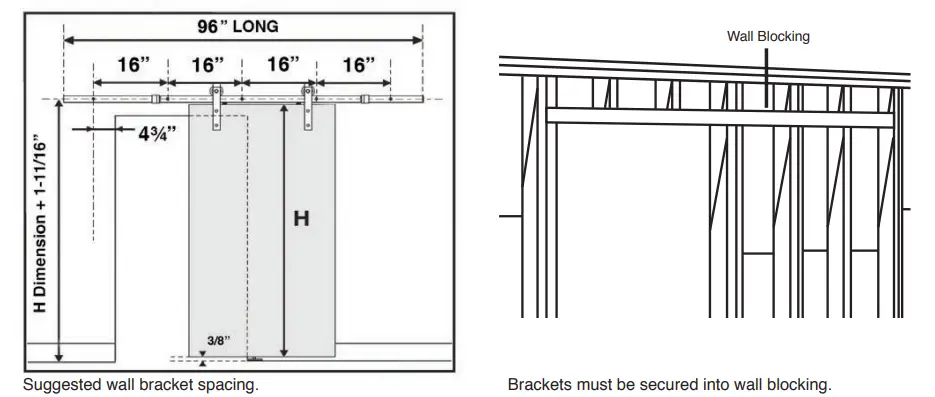
- Minimum door overlap on guide is 4-3/4″
To obtain maximum weight capacity, all fasteners must be mounted into solid wood studs or wall blocking or mounted to a header board. - Consult a structural engineer if you have questions about what type of wall blocking is required.
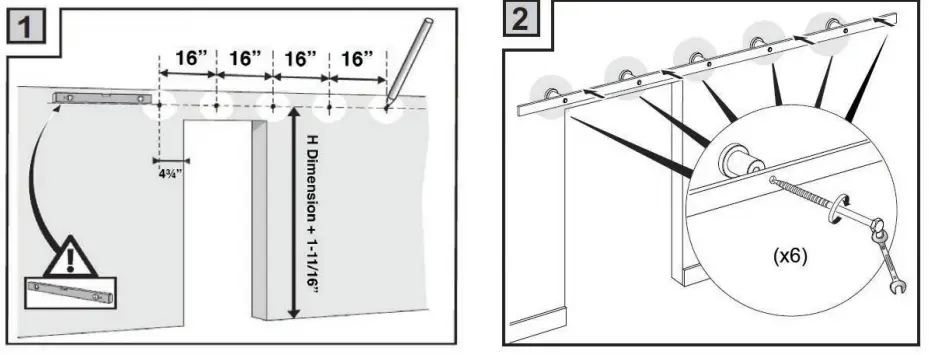
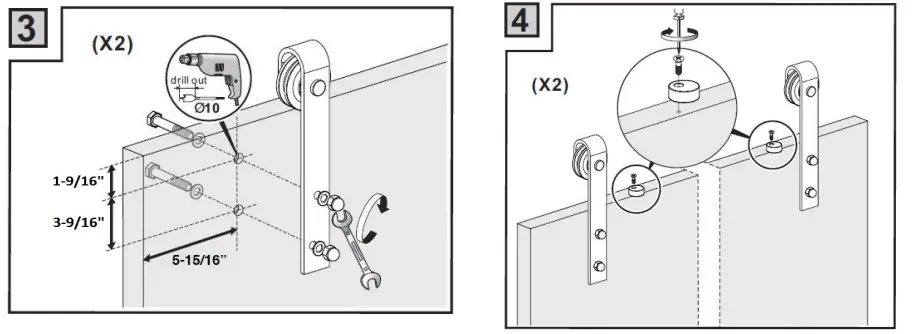
- Find the centerline of the track. Using a level, mark a horizontal line twice the door width long. Mark the bracket screw locations into the wall blocking. Attach the wall portion of the brackets as shown.
- Attach the rail to the wall brackets using a wrench to fasten the bolts as shown.

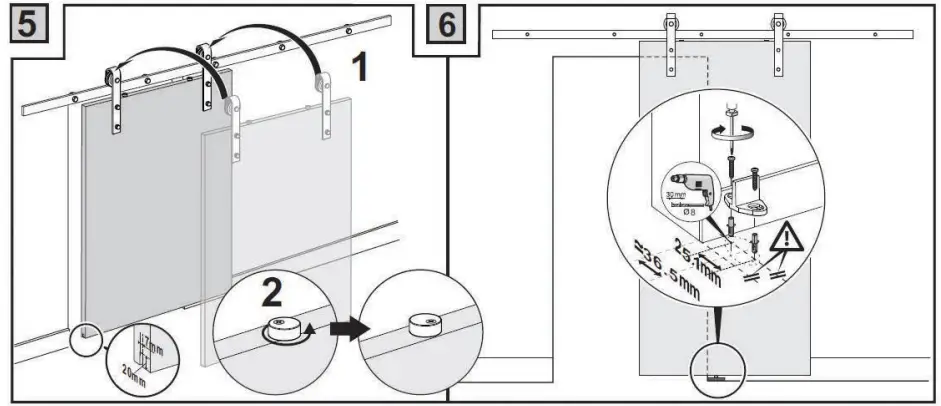
- Drill out holes in the door using a 10mm routing drill bit as pictured. The bottom of the door should be routed at this time in order to accept the floor guide.
- Attach the anti-jump disks to the tops of the door.

- Attach the doors to the rails making sure that the anti-jump disks are engaged to avoid a serious accident.
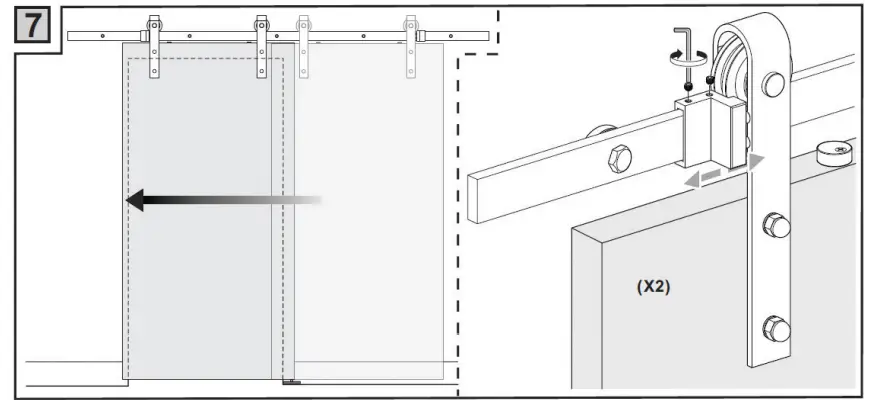
- Plumb the door and mark the positions of the floor guides. Mount the floor guides to the floor.

- Adjust the door stops accordingly using the provided 2.5mm Allen key.