FURNITURE FSDH-STRAPKIT-5 Sliding Barn Door Hardware Kit

TOOLS REQUIRED
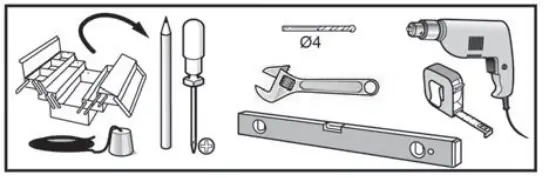
- Plumb Line
- Pencil
- Phillips Head Screwdriver
- 4mm Drill Bit
- Wrench
- Level
- Power Drill
- Tape Measure
INCLUDED IN KIT
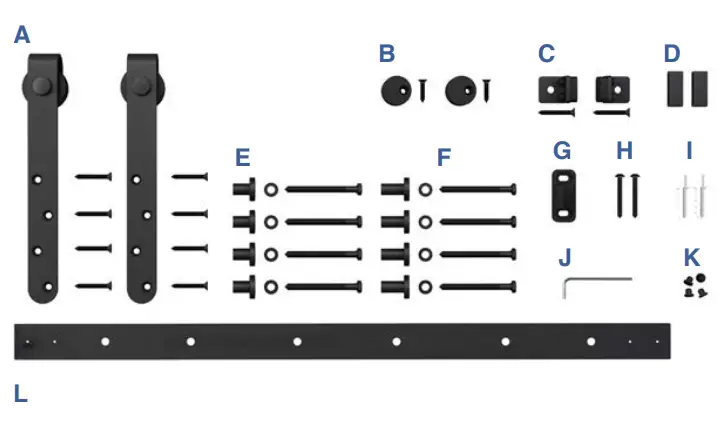
- A Door Roller Hardware x2
- B Anti-Jump Disk x2
- C Door Stop Hardware x2
- D End Cap x2
- E Mounting Bracket for ¾” and 1″ Doors x4 ea.
- F M6x60 Bolt + Washer x8
- G Routed Door Guide x1
- H ST4.2×35 Screw x2
- I Anchor x2
- J 1.5mm Allen Key x1
- K Hole Cover x4
- L 60″ Rail x1
PLEASE NOTE: The installation manual is a suggested guideline. Adjustments may need to be made based on your specific application.
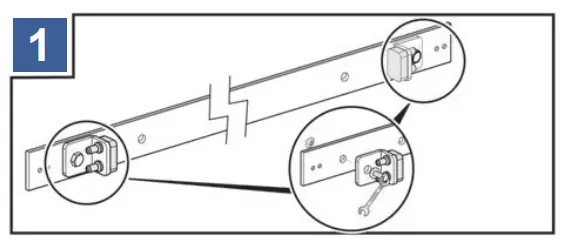
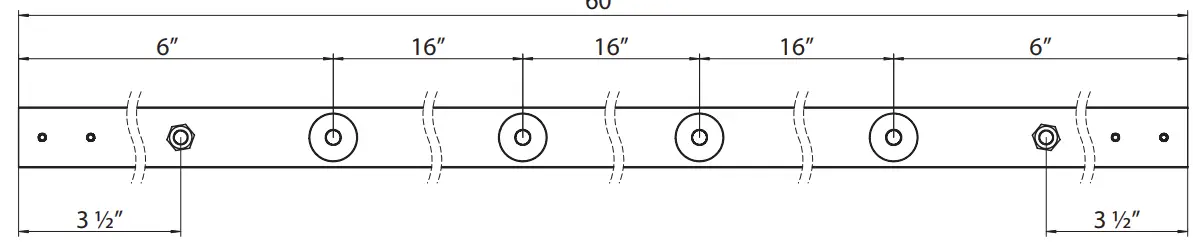
UNDERSTANDING YOUR RAIL
INSTALLATION
Using a pencil, mark the locations where you will drill holes as indicated.
- Before beginning installation, attach the door stops [C] to the rail [L].

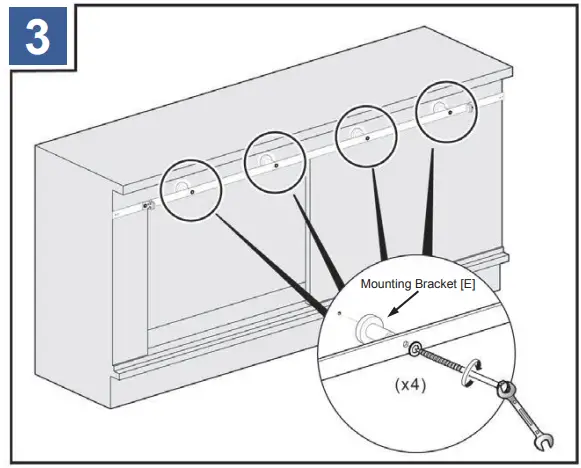
- Using a power drill with a 4mm drill bit, drill holes as indicated.

- Install the rail, and mounting brackets [E].

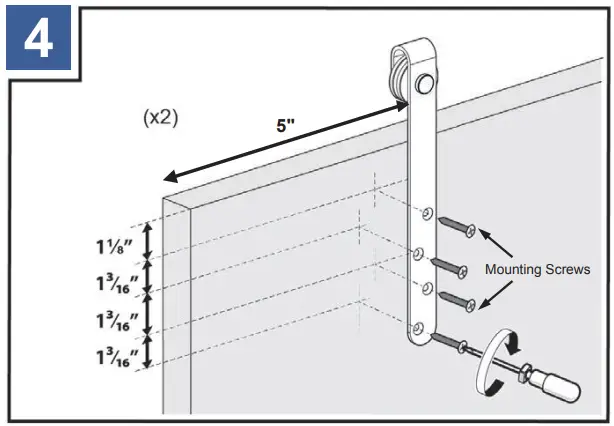
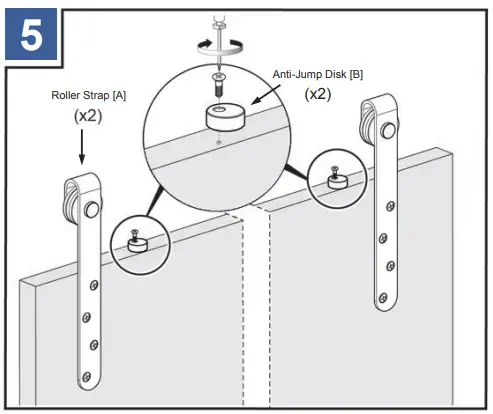
- Drill holes into the doors as indicated. Attach the roller straps [A].

It is suggested that the roller strap [A] be mounted 5″ from the edge of the door to the neck of the roller strap.
NOTE: Trimming the rail will alter the position of the roller hardware. Adjust accordingly.
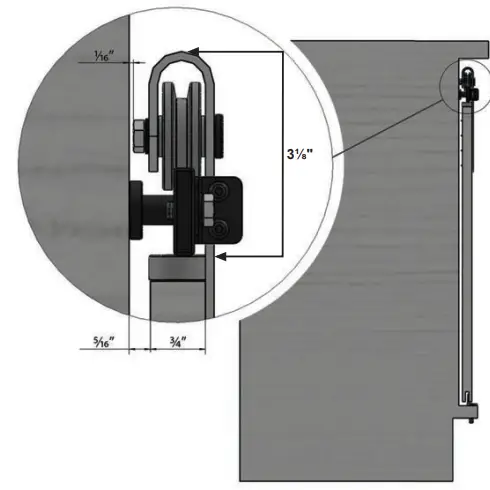
FOR ¾” DOORS
FOR 1″ DOORS
- Attach the anti-jump disks [B] to the doors.

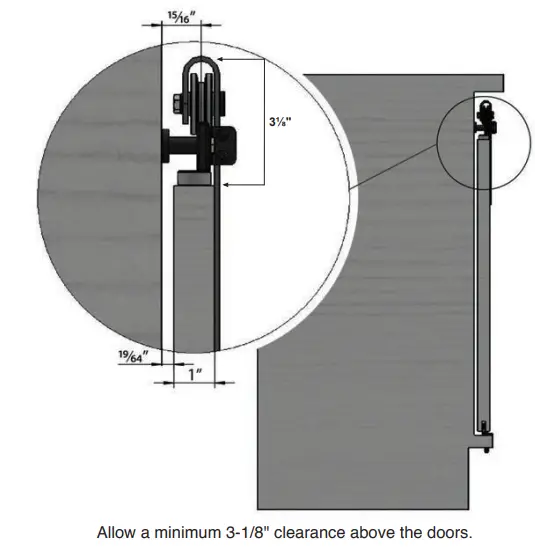
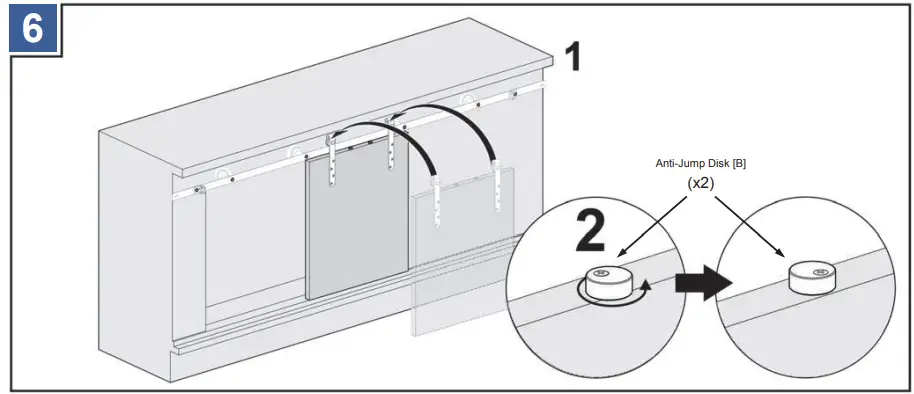
- Attach the doors to the rail [L] and lock the anti-jump disks [B] into position. Doors should be routed beforehand if using the routed door guide [G].

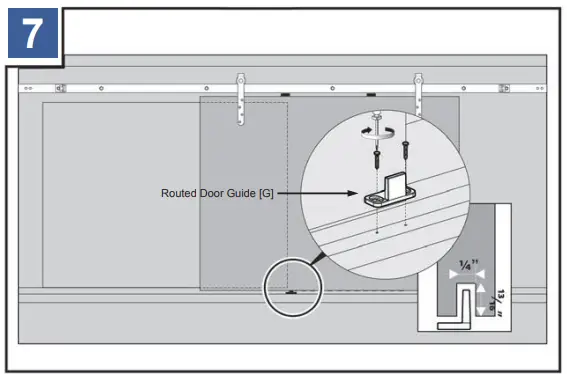
- If using the routed door guide [G], install at this time.

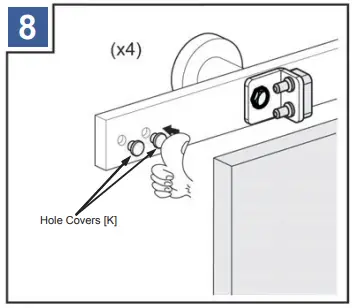
- Use the hole covers [K] to give the rail a finished look.

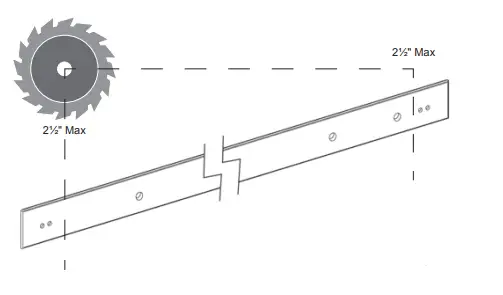
The rail can be trimmed if necessary using a band saw. Use blades suitable for iron or stainless steel depending on your rail.
NOTE: If you are trimming the rail, do so equally. Each rail can be trimmed equally up to 2½” on both sides. However; trimming will alter the position of the roller hardware. Adjust accordingly.
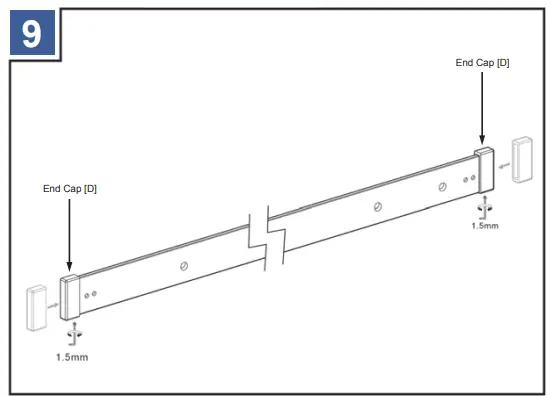
- Once cut, add the end caps [D] to the ends of the rail and secure with a set screw.