![]()
Quick Start Guide
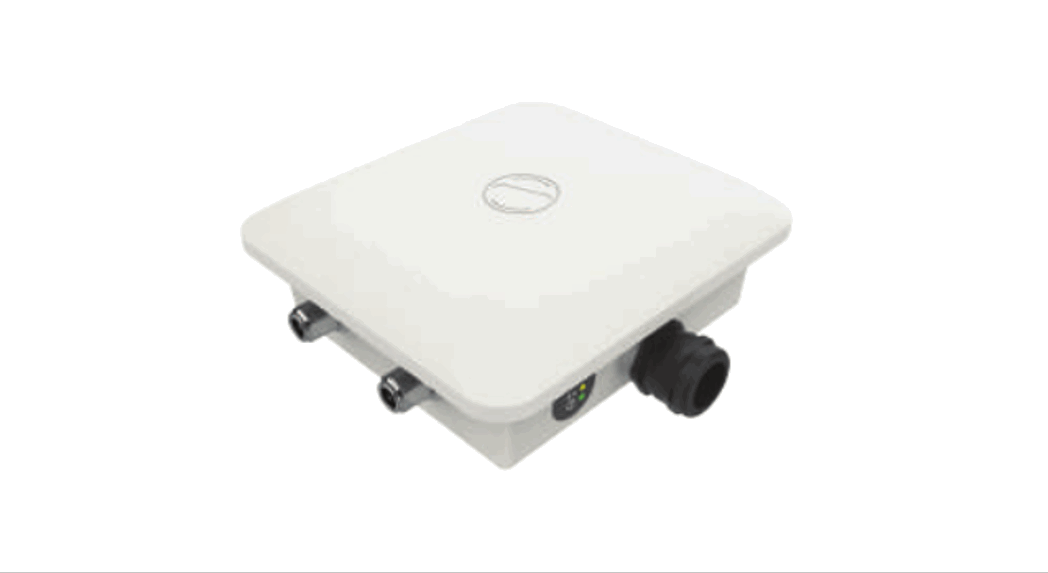
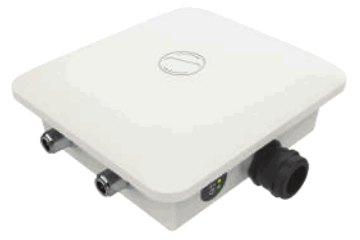
ion4e
Access Point
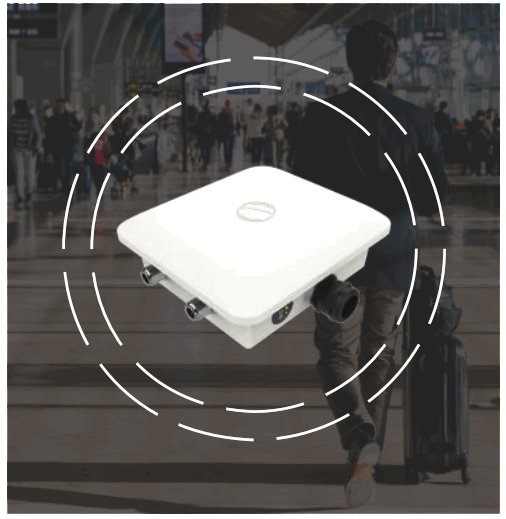
Wi-Fi 5 2×2 outdoor access point
ANYWHERE EVERYWHERE
Introduction
Thank you for purchasing our ion4e Access Point. ion4e is a cloud-managed 2×2.2 MU-MIMO Wi-Fi 5 certified Access Point that raises the bar for wireless performance and efficiency.
Packaging Content
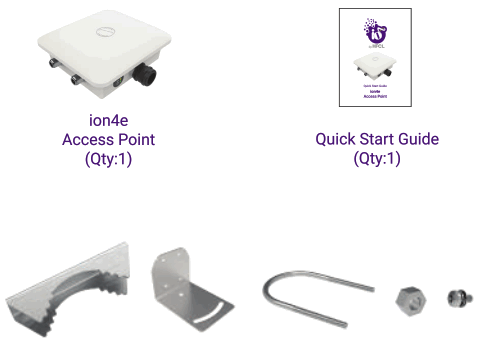 Mounting Kit
(Pole Clamp (1),L Plate(l ), LI Bolt (1)
Hex nut (4), Screws (4))
ion4e Specifications
| ion4e Specifications | |
| Peak Throughput(aggregate) | 7 z) bps for 5 GHz and 4U10,1oto.1,.,2p7s Gf obrp2s. (48G6,M |
| Wi-Fi Standard Support | 802.11a/b/g/n/ac/ac Wave 2 |
| Interface | 1 X 10/100/1000 BASE-T Ethernet |
| Radio Mode | 2×2 MU-MIMO with 2 spatial streams |
| Mesh Support | Self-creating, Self-healing Mesh |
| Maximum number of SSID (per radio) | 16 |
| Maximum User Support | 128 on 5 GHz & 64 on 2,4 GHz |
| Power Supply | IEEE 802.3af PoE |
| Power Consumption (Max) | 12 W (approx.) |
| Max Transmit Power | 23 dBm for 2.4 GHz , 27 dBm for 5 GHz (will depend on country-specific guidelines) |
| Antenna Type | Option for external antenna |
| Management | Standalone (via GUI) or through on-premise based solution or cloud-based |
| Enclosure Dimensions | 189 x 170 x 71 mm or 7.44 x 6.69 x 2.79 inches |
| Weight | 0.75 kg |
| Operating Temperature | -15°C to 60°C |
| Certifications | FCC Class A, CE, Passpoint 2.0, IP67, RoHS 3.0 |
Product Overview
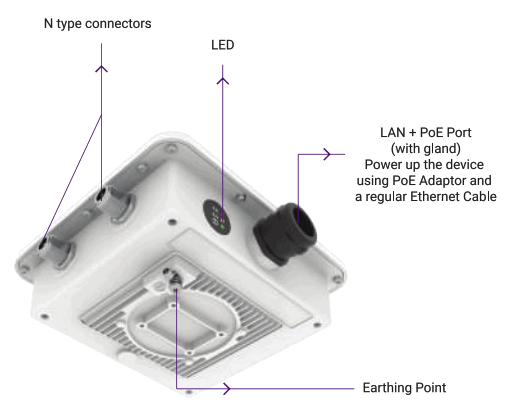
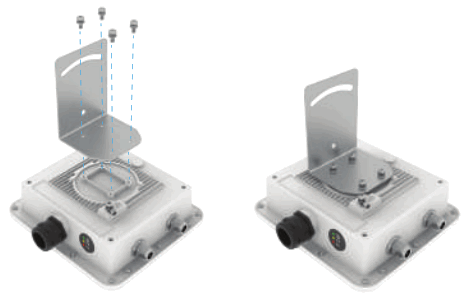
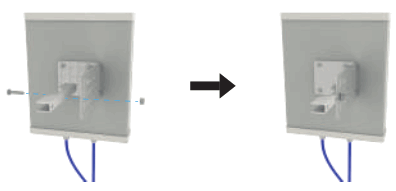
Mounting of ion4e Access Point
The ion4e can be mounted on a pole or to a wall. Perform the following steps for appropriate installation.
- Align L Plate with the holes at the back of Access Point
- Use the provided screws to fix the plate onto the Access Point.
The mounting bracket is fixed onto the mounting holes on the Access Point
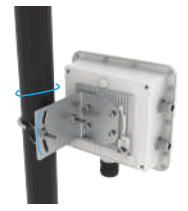
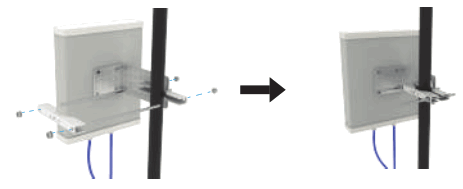
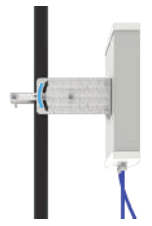
Pole Mount
- Align the bracket mounted Access Point with pole holder & U-Bolt
- Pass the LI-Bolt through the cuts of pole holder & mounting bracket.
Secure it in place with the screws.
- Access Point has the freedom of movement along with the vertical & horizontal axis

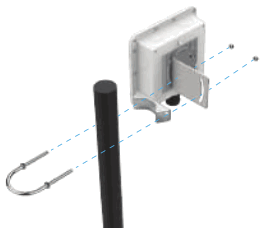
Note: The pole mounting is designed for poles of diameter 40 mm to 60 mm. For mountings on larger size poles upto 140 mm, contact at [email protected]
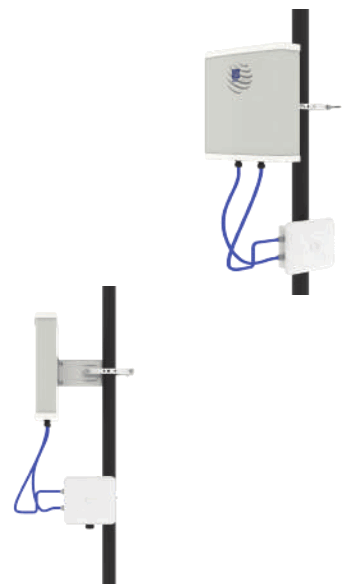
Attaching External Antennas
Sector Antenna
Attach the sector antenna to expand coverage to 60, 90 or 120 degrees.
- Secure the wall mount bracket on the back of the sector antenna

- Align the bracket mounted sector antenna with the pole clamp

- This type of mounting enables vertical and horizontal movement by loosening few of the bolts as shown below

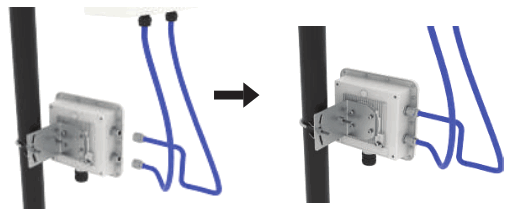
- Attach one end of the RF Cables to the sector antenna & the other end on the N type connectors of the Access Point

- The final view is as shown below

WARNING: HFCL is not held liable for any damages incurred during the process.
Getting the ion4e Online
Step 1: Power up
The Access Point can be powered up using PoE adaptor (48V) as shown below:
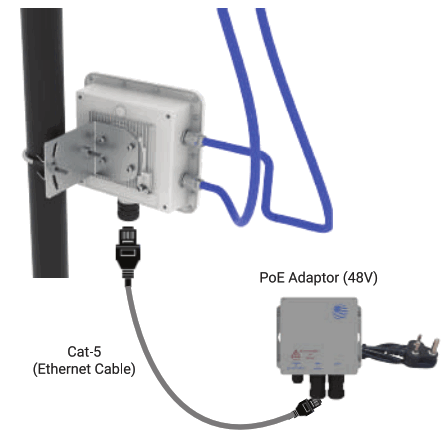
Note: Plug and Adaptor will vary by country/ region
— Power up using PoE Adaptor —
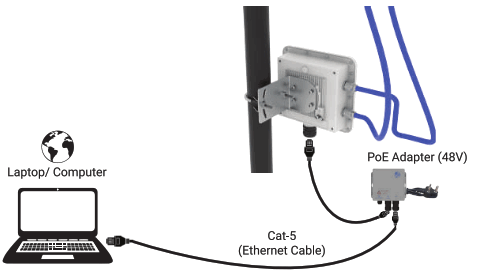
Step 2: Connect to the network
Section 1: Standalone AP
Follow the steps mentioned below and connect the Access Point to a network
- Connect an ethernet cable to the computer.
- Connect the other end of ethernet cable to the data port on PoE adapter
- Connect ion4e PoE supported ethernet port to PoE adapter power port. Device will be powered on

- Configure the computer with a same domain static IP 192.168.1.X and a subnet mask of 255.255.255.0 (X is from 2 to 255)
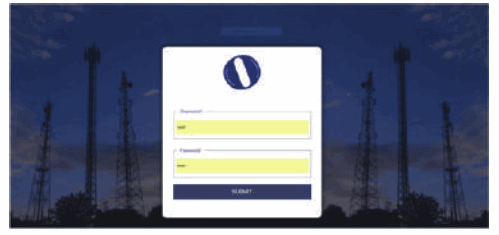
- Open the web browser and enter the Access Point static IP address in the address bar. 192.168.1.1
- A login screen will appear.
- Enter the default login credential details:
User- root, Password- hfcl!@ion
Section 2: Controller Managed AP
Follow the steps mentioned below and connect the Access Point to a network
- Power-up the AP through PoE adapter or PoE switch
- Connect the AP to DHCP network and Internet
- Login to HFCL IO cloud controller (cNMS) cnms.ionetworks.in with credentials provided
- Refer our website io.hfcl.com for detailed information to configure AP through cNMS
Step 3: Check the LED status
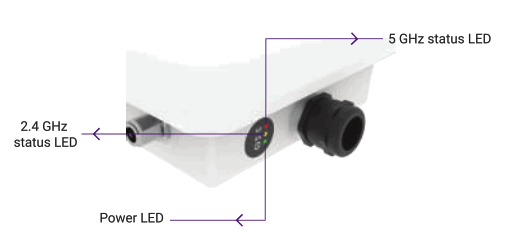
| LED Color | Status |
| Power LED Green | Green color notifies the user that the device is powered ON |
| 2.4GHz Status LED | Solid yellow color notifies the user that the 2.4 GHz radio is active and blinks while data is being transmitted on 2.4 GHz radio |
| 5 GHz Status LED | Solid red color notifies the user that the 5 GHz radio is active and blinks while data is being transmitted on 5 GHz radio |
Safety Precautions
Observe the following safety precautions to avoid damage to the ion4e Access Point:
![]() Do not power the device during installation
Do not power the device during installation![]() Keep away from high voltage cables
Keep away from high voltage cables![]() Do not power off the unit in the middle of an upgrade process
Do not power off the unit in the middle of an upgrade process![]() The gland should be ground facing all the time
The gland should be ground facing all the time![]() Do not open the enclosure
Do not open the enclosure![]() Fasten the device tightly
Fasten the device tightly![]() Make sure the earthing wire is connected properly to the earthing points
Make sure the earthing wire is connected properly to the earthing points
Part Number: QSG-01-0023
Revision: A ![]() Contact Us:
Contact Us:
Email: [email protected]
Website: www.hfcl.com
www.io.hfcl.com
8, Commercial Complex, Masjid Moth,
Greater Kailash-lI, New Delhi- 110048
HFCL Limited All Rights Reserved. 10 Networks and the 10 logo are registered trademarks of HFCL Limited.
Specifications are subject to change without notice.


