
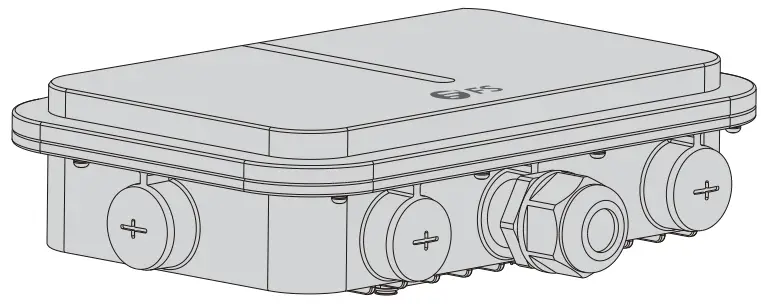
 FS AP-T567 2400 Mbps Outdoor Access Point
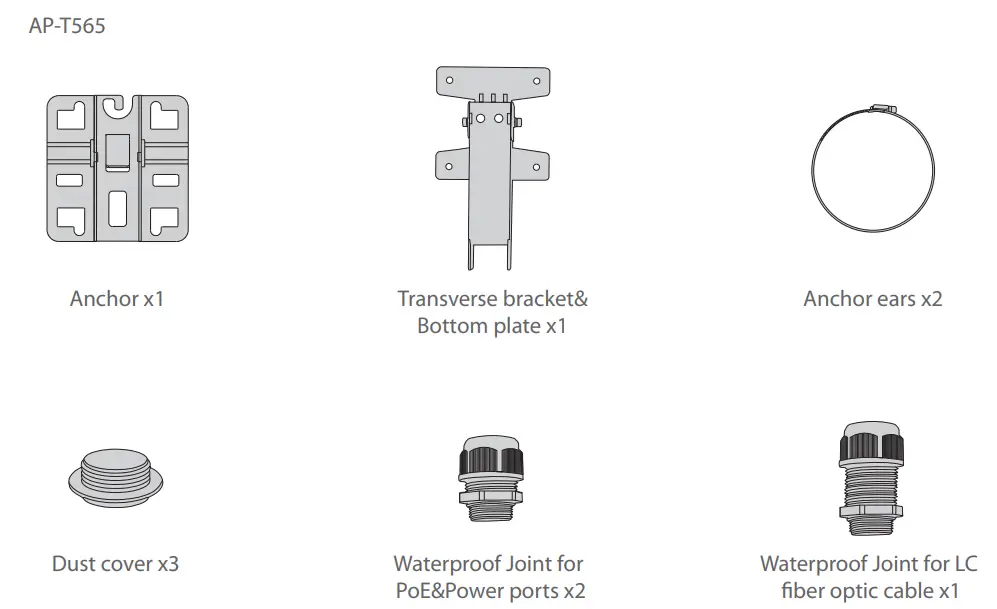
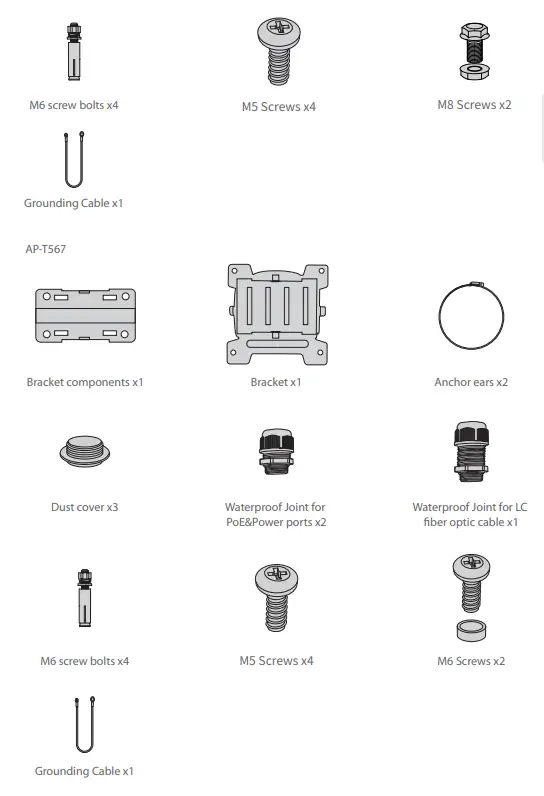
Accessories
 Hardware Overview
 Hardware Overview
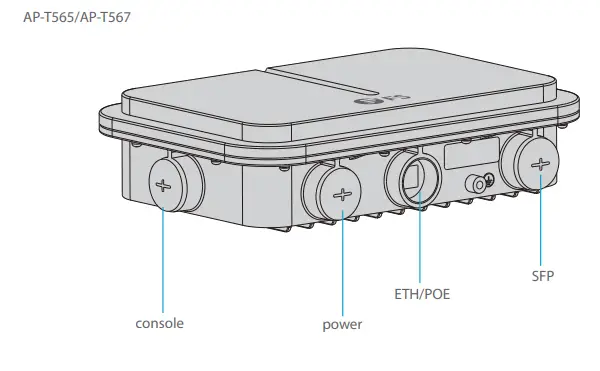
| Ports | Description |
| ETH/PoE | Ethernet cable power supply |
| Console | An RJ45 console port for serial management |
| SFP | SFP ports for 1/2.5G connection |
| Power | 48V DC power port |
Button

| Button | Description |
| Reset | Restart: Press the Reset button for less than 2 seconds. |
| Restore to Factory Default Settings: Press the Reset button for more than 3 seconds. |
LEDs
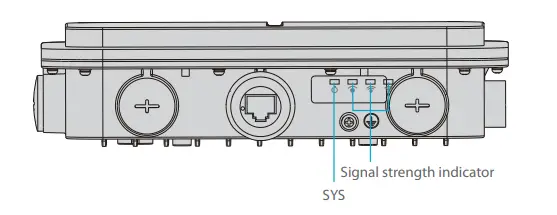
| LEDs | State | Description |
|
SYS | Blinking Green | In progress of initialization. |
| Solid Green | Normal operation. | |
| Solid Orange | Initialization is complete without a CAPWAP connection. | |
| Blinking Red | Initialization is complete, but the Ethernet link is down. | |
| Signal strength indicator (3 lights only light up while bridging) | 1 Light On | Signal strength: ≤-70dBm |
| 2 Lights On | Signal strength: -70dBm~ -50dBm | |
| 3 Lights On | Signal strength: ≥-50dBm |
Installation Requirements
- Install the AP indoors.
- Make sure the floor of the installation site is dry and flat.
- Place the AP in a dry area and avoid liquid intrusion.
- Keep the AP and installation tools away from walkways.
- Do not power the AP during installation.
- Install the AP in a well-ventilated location.
- Keep away from high voltage cables.
- Keep the AP clean and dust-free.
Mounting the Access Point
Ceiling Mount
AP-T565
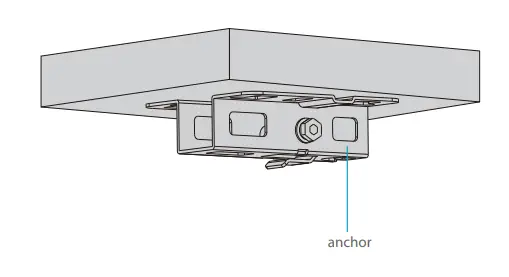
- Fix the anchor on the ceiling with four M6 screws.

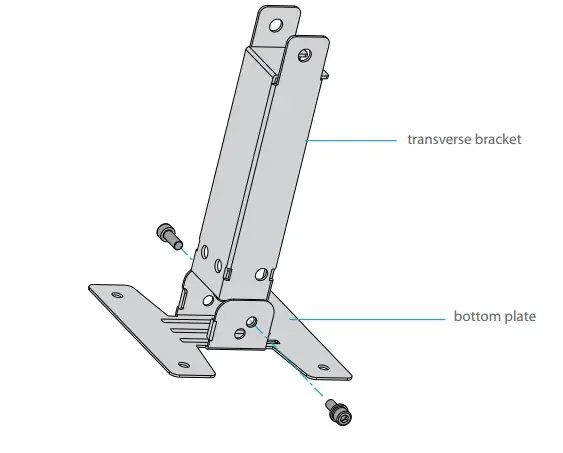
- Remove screws of the bottom plate and vertically insert the transverse bracket into the bottom plate, then screw it with two M6 screws.

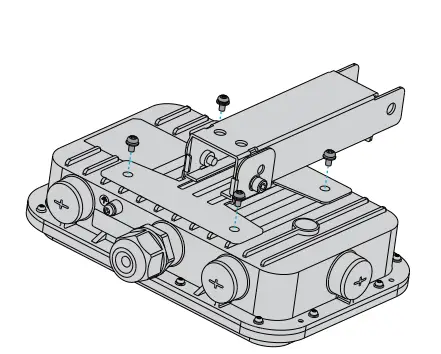
- Fix the bottom plate and transverse bracket on the back of the access point with four M5 screws.

- Fix the bottom plate and transverse bracket on the back of the access point with four M5 screws.

Masting Mount
- Fix the bottom plate and transverse bracket on the back of the access point with M5 screws.

- Fix the anchor onto a mast with 2 anchor ears.

- Fix the anchor on the rod with the transverse bracket with M8 screws

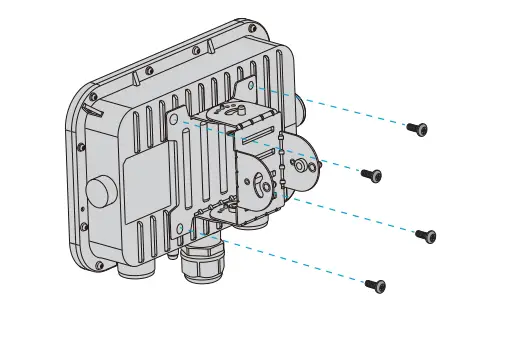
AP-T567
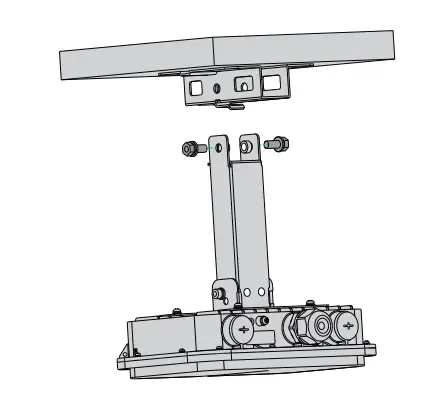
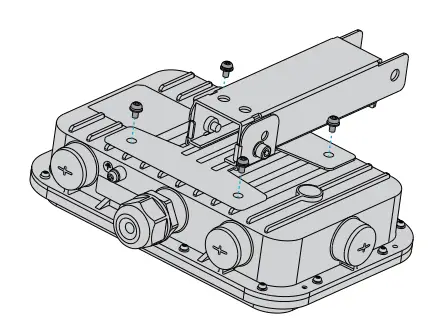
- Fix the host bracket components on the back of the access point with four M5 screws

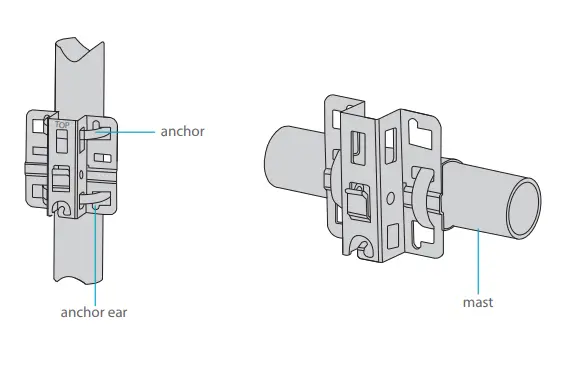
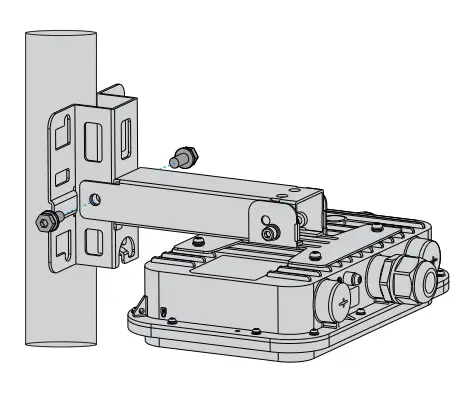
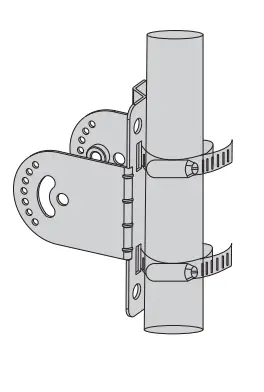
- Masting Mount: Fix the bracket on a rod with two anchor ears.
 Wall Mount: Fix the bracket on the wall with four M6 screws.
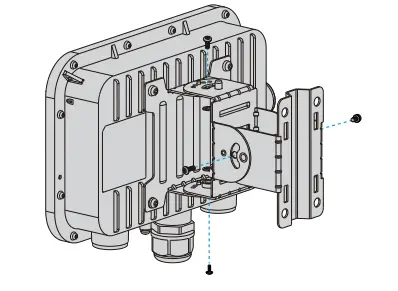
- Insert the host bracket components into the bracket and screw it with four M6 screws. (This step in wall mounting is the same as below. )
 NOTE: 1. After installation, check that the AP is securely fastened. 2. Carefully choose matched screws in different steps.
 Wall Mount: Fix the bracket on the wall with four M6 screws.
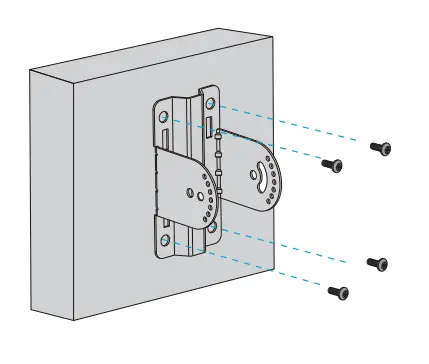
 NOTE: 1. After installation, check that the AP is securely fastened. 2. Carefully choose matched screws in different steps.
Grounding the Access Point
AP-T565/AP-T567
Connect one end of the grounding cable to the grounding hole on the access point and the other end to a proper ground site.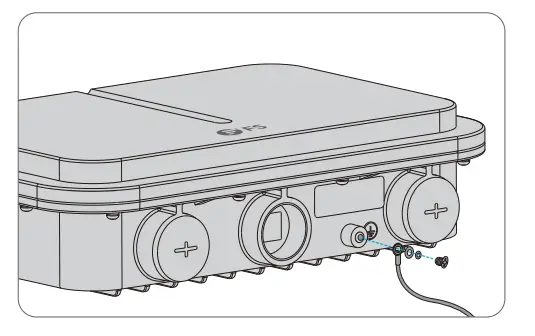
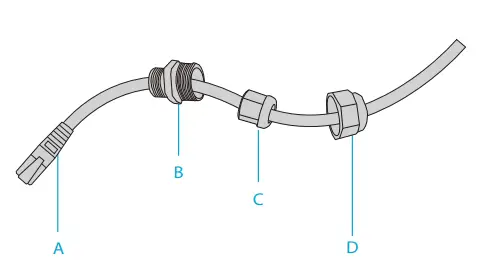
Connecting the Ethernet cable
- Thread the Ethernet cable without crystal head through the waterproof joints in sequence as shown in the following figure.

- Fix a crystal head on the Ethernet cable and bind waterproof materials between B and C.

- Insert the crystal head into the ETH/PoE port and screw up A, B, C, and D in sequence.

Configuring the Access Point
Configuring the AP via the Web-based Interface
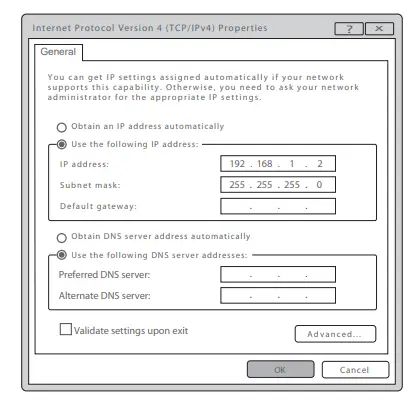
- Step 1: Connect a computer to the business port of the AP using the network cable.
- Step 2: Set the IP address of the computer to “192.168.1.x” (“x” is any number from2 to 254).

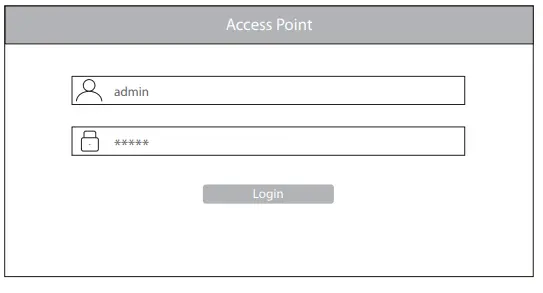
- Step 3: Open a browser, type “http://192.168.1.1” and enter the default username and password(both are “admin”).

- Step 4: Click “Login” to display the web-based configuration page.
- Step 5: Click “System Mode Switch” to switch the FIT/FAP working mode.
 NOTE: The AP works in Fit AP Mode by default.
 NOTE: The AP works in Fit AP Mode by default.
Configuring the AP via the Console Port (FAT AP Mode)
- Step 1: Connect a computer to the AP’s console port using the console cable.
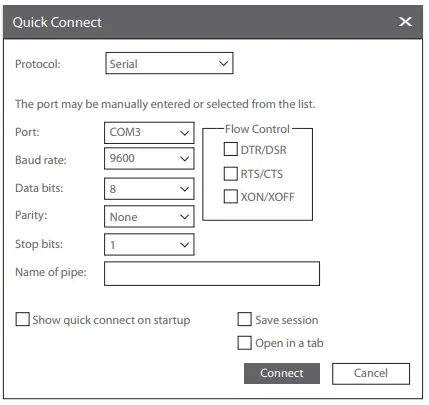
- Step 2: Start the terminal simulation software such as “HyperTerminal” on the computer.
- Step 3: Set the parameters of the “HyperTerminal”: 9600 bits per second, 8 data bits, no parity, 1 stop bit and no flow control.

- Step 4: After setting the parameters, click “Connect” to enter. And then enter the password(“admin” by default).
NOTE: For more details, please refer to the Configuration Guide on the website.
Troubleshooting
The screen displays request timed out
- Check whether the network cable is intact.
- Check whether the hardware connection is correct.
- Check whether indicators of AP and the computer are normal.
- Check whether the IP address setting of the compute is correct.
LED is off after the AP is powered on
- for PoE power supply, check whether the power source is IEEE 802.11af/at compliant, or whether the Ethernet cable is properly connected.
- For DC adapter power supply, check whether the adapter is connected to an active power outlet, or whether the adapter works properly.
Ethernet port is not working after connecting
Check whether the device at the other end of the Ethernet cable is working properly, the Ethernet cable is capable of providing the required data rate, or it is properly connected.
Wireless client cannot find the AP
- Check whether the power supply works properly.
- Check whether the Ethernet port is properly connected.
- Check whether the AP is correctly configured.
- Move the client device to adjust the distance between the client and the AP.
Online Resources
- Download https://www.fs.com/products_support.html
- Help Center https://www.fs.com/service/fs_support
- Contact Us .html https://www.fs.com/contact_us.html
Product Warranty
FS ensures our customers that if there are any damage or faulty items due to our workmanship, we will offer a free return within 30 Days from the day you receive your goods. We will also offer free software update service. This excludes any custom-made items or tailored solutions.
Warranty: This product enjoys 3 years limited warranty against defect in materials or workmanship. For more details about warranty, please check at
https://www.fs.com/policies/warranty.html
Return: If you want to return item(s), information on how to return can be found at https://www.fs.com/policies/day_return_policy.html
References
 FS.com - Data Center, Enterprise, Telecom
-
Contact Us - FS.com
-
Kontakt - FS.com Deutschland
-
Rückgaberecht - FS.com Deutschland
-
Ein weltweit führender Anbieter von Hochgeschwindigkeits-Konnektivitätsgeräten und -lösungen. - FS.com Deutschland
-
Technische Dokumente - FS.com Deutschland
-
Hilfezentrum - FS.com Deutschland
-
Comment Nous Contacter - FS.com France
-
Politique de retour - FS.com France
-
Fournisseur leader de solutions et matériels de connectivité à haut débit - FS.com France
-
Documents techniques - FS.com France
-
Centre d'aide - FS.com France
-
Return Policy - FS.com
-
Products Warranty - FS.com
-
Technical Documents - FS.com
-
Help Center - FS.com


