![]()
HIPAA-120
OUTDOOR LED PAR CAN BW
Item ref: 154.324UK User Manual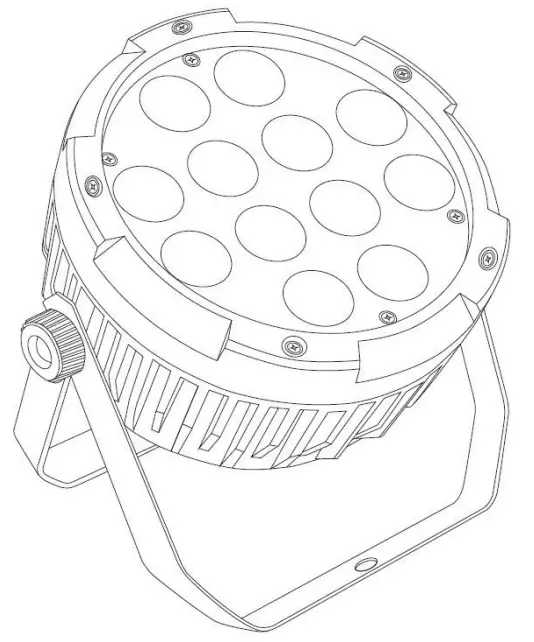
![]() Caution: Please read this manual carefully before operating Damage caused by misuse is not covered by the warranty
Caution: Please read this manual carefully before operating Damage caused by misuse is not covered by the warranty
Introduction
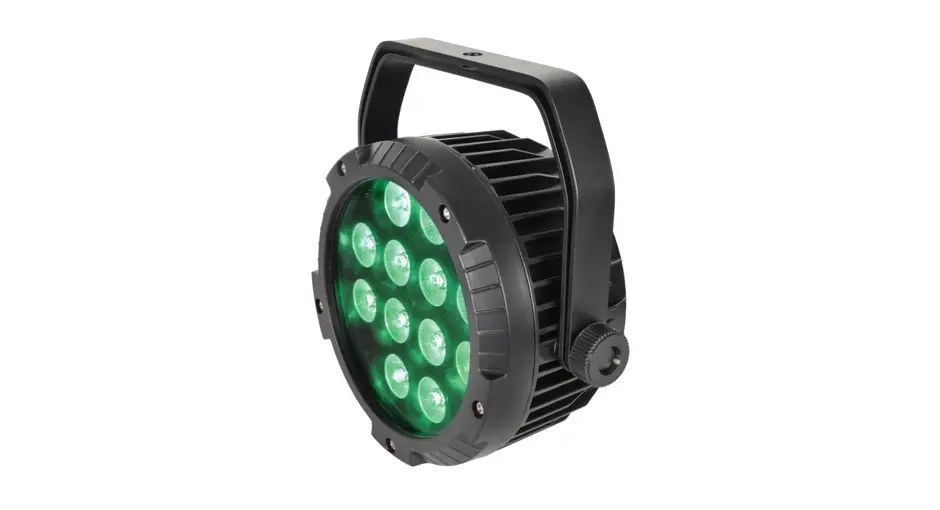
Thank you for your purchase of the QTX HIPAR-120 outdoor LED PAR light. This fixture has been designed to provide powerful and colourful light coverage to a wide area for indoor or outdoor areas Please read and keep this manual for reference to gain the best results from this product and avoid damage through misuse.
SAFETY SYMBOL AND MESSAGE CONVENTIONS
![]() CAUTION RISK OF ELECTRIC SHOCK DO NOT OPEN
CAUTION RISK OF ELECTRIC SHOCK DO NOT OPEN
![]() AVIS RISQUE DE CHOC ELECTRIQUE NE PAS OUVRIR
AVIS RISQUE DE CHOC ELECTRIQUE NE PAS OUVRIR
![]() This symbol indicates that dangerous voltage constituting a risk of electric shock is present within this unit
This symbol indicates that dangerous voltage constituting a risk of electric shock is present within this unit
![]() This symbol indicates that there are important operating and maintenance instructions in the literature accompanying this unit.
This symbol indicates that there are important operating and maintenance instructions in the literature accompanying this unit.
Warning
To prevent the risk of fire or electric shock, ensure all power connections are watertight. No user-serviceable parts inside Do not open the case refer all servicing to qualified service personnel.
Safety
Check for correct mains voltage and condition of power lead before connecting to a power outlet.
Placement
- Use the included dual mounting bracket to fix to a stand/truss or free-standing on a stable surface
- Use secondary safety fixings if mounting overhead.
- Ensure adequate airflow around the fixture housings
- Ensure adequate access to controls and connections
Cleaning
- Use a soft cloth with a neutral detergent to clean the casing as required
- Do not use strong solvents for cleaning the unit
In the box
Please open the package carefully and check that all contents are present and in good condition. Contact your retailer if any part is missing or broken.
- HIPAA-120 LED PAR can
- Dual mounting bracket
- UK mains plug to waterproof socket lead
- DMX XLR plug to waterproof socket lead
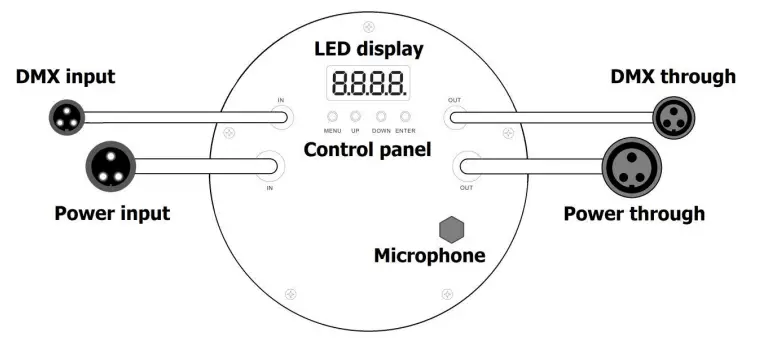
Rear panel
Installation
The HIPAR-120 is supplied with a dual hanging bracket, which can also be used as a free-standing support.
When installing the fixture, ensure all fixings are secure, controls and connections are accessible and allow enough space for air to circulate around the housing. Do not aim directly in the line of sight or very close to people where the extremely bright output of the fixture may be harmful to eyesight.
The HIPAR-120 is IP65 weatherproof and all electrical connections are hard-wired with waterproof connectors. An XLR to the waterproof connector is provided for adapting the DMX input lead to a standard DMX signal input. A mains plug to the waterproof connector is provided to adapt the power input lead to a standard mains supply.
Connect the waterproof connectors securely, ensuring that the notches are aligned for correct polarity.
The waterproof plugs have a threaded collar which must be fully tightened onto the waterproof socket.
The HIPAR-120 also has DMX through and power through leads for connecting onto further HIPAR cans in a daisy-chain manner. Ensure that the mains power supply is capable of the total load of all cans connected.
Setting up
Check all connections are properly made and power up the HIPAR-120 can.
The LED display will light and show the current mode or status.
Use the control panel keys to adjust the stand-alone or DMX control settings.
Press MENU to step through the menu options and press ENTER when you reach the required page.
Press the UP and DOWN keys to adjust the value of the parameter and press ENTER again to confirm.
Press MENU again to go back to stepping through menu options.
Please see the table on the following page for the full list of menu options.
| Display | Value | Description |
| DMX start address | ||
| Static red | ||
| Static green | ||
| Static blue | ||
| Static white | ||
| Static yellow (R+G) | ||
| Static cyan (G+B) | ||
| Static purple (R+B) | ||
| Static flood (R+G+B+W) | ||
| 8 colour jump | ||
| Colour scroll | ||
| Sound activated colour jump | ||
| Sound activated colour strobe | ||
| No strobe | ||
| Au09 – Aul0 strobe slow to fast | ||
| Au09 – Aul0 speed slow to fast | ||
| Manual colour red level 0-100% | ||
| Manual colour green level 0-100% | ||
| Manual colour blue level 0-100% | ||
| Manual colour white level 0-100% |
Standalone operation
To operate the HIPAR-120 in standalone (autonomous) mode, choose any of the settings other than DMX. Auto, sound-activated, strobe and manual colour modes described above will operate without DMX control.
To control further HIPAR cans in master-slave mode, connect the DMX through from a master HIPAR-120 in standalone mode to the DMX input of a “slave” HIPAR can that is set to DMX mode with the address![]() .
.
Further HIPAR cans set to![]() maybe connected from DMX through to DMX input in a daisy chain.
maybe connected from DMX through to DMX input in a daisy chain.
Auto programs![]() are static preset colours.
are static preset colours.![]() is an 8-colour jump sequence and
is an 8-colour jump sequence and ![]() is a colour scroll, both controlled by
is a colour scroll, both controlled by ![]() speed setting.
speed setting.
If the strobe setting is![]() , a flashing strobe effect will be applied to the Auto program (slow to fast)
, a flashing strobe effect will be applied to the Auto program (slow to fast)
![]() is a sound-activated 8 colour jump sequence and
is a sound-activated 8 colour jump sequence and ![]() is a sound-activated colour strobe effect.
is a sound-activated colour strobe effect.
Adjusting the values ![]() gives a manual colour mix for a custom static colour.
gives a manual colour mix for a custom static colour.
DMX operation
The HIPAR-120 is compatible with standard DMX512 control.
Connect the supplied XLR plug to the waterproof socket lead to the DMX input lead of the first HIPAR can in line to be controlled. Connect further HIPAR cans from the DMX through of the first canto the DMX input of the second can and DMX through of the second canto the DMX input of the third can etc. until all HIPAR cans are
connected in a daisy-chain.
Connect the XLR plug to a DMX controller, ensuring that this connection is protected from the elements.
(the XLR plug is not a waterproof connector)
The HIPAR-120 has 8 DMX channels as described in the table below. Set the DMX value to the appropriate start address via the control panel and this will become the DMX address of channel 1.
DMX Channels
| Ch.1 | 000 – 255 | Master dimmer 0-100% |
| Ch.2 | 000 – 255 | Red level 0-100% |
| Ch.3 | 000 – 255 | Green level 0-100% |
| Ch.4 | 000 – 255 | Blue level 0-100% |
| Ch.5 | 000 – 255 | White level 0-100% |
| C .6 | 000 | Strobe off |
| 001 – 255 | Strobe slow to fast | |
| Ch.7 | 000 – 255 | Macro speed slow to fast |
| Ch.8 | 000 | Macro off |
| 001 – 017 | Static red | |
| 018 – 035 | Static green | |
| 036 – 053 | Static blue | |
| 054 – 071 | Static white | |
| 072 – 089 | Static yellow (R+G) | |
| 090 – 107 | Static cyan (B+G) | |
| 108 – 125 | Static purple (R+B) | |
| 126 – 127 | Static flood (R+G+B+W) | |
| 128 – 169 | 2 colour jump | |
| 170 – 210 | 8 colour jump | |
| 211 – 238 | Colour scroll | |
| 239 – 245 | Sound activated colour strobe | |
| 246 – 255 | Sound activated colour jump |
Master dimmer setting affects the overall output in any mode.
A custom static colour can be mixed manually on channels 2 to 5 and strobe setting via channel 6.
Macro settings are similar in operation to the stand-alone auto settings with static preset colours, auto sequences, strobe and sound-activated programs all accessible from the setting of channel 8.
The speed of the selected effect (macro) is determined by the setting of channel 7.
Specifications
| Power supply | 110-240Vac, 50/60Hz |
| IP rating | IP65 |
| Modes | Auto, sound-activated, master/slave, DMX512 |
| Connections | Power in, power out, DMX in, DMX out |
| Power consumption max. | 120W |
| LED: quantity | 12 |
| LED: type | 10W RGBW (4-in-1) |
| DMX channels | 8 |
| Beam angle | 45° |
| Dimensions | 275 x 225 x 218mm |
| Weight | 4.57kg |
![]()
This product is classed as Electrical or Electronic equipment and should not be disposed of with other household or commercial waste at the end of its useful life. The goods must be disposed of according to your local council guidelines.
Errors and omissions excepted.
Copyright© 2021 AVSL Group Ltd, Unit 2 Bridgewater Park, Taylor Road, Trafford Park, Manchester. M41 71Q.
AVSL (Europe) Ltd, Unit 3D North Point House, North Point Bus. Park, New Mallow Road, Cork, Ireland.
154.324UK User Manual


