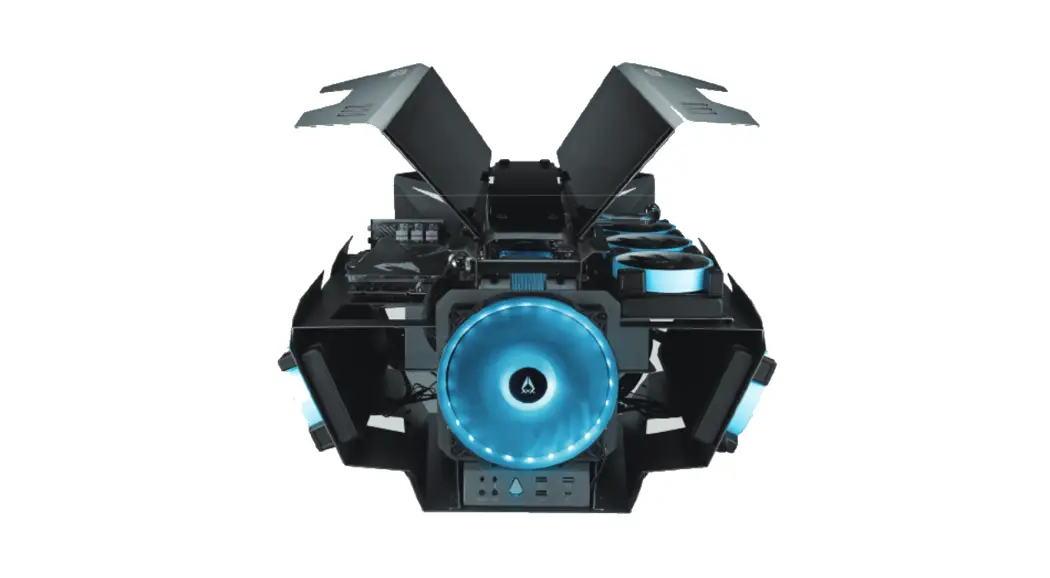
![]() CSAZ-807 Overdrive Innovative ATX Case
CSAZ-807 Overdrive Innovative ATX Case
Instruction Manual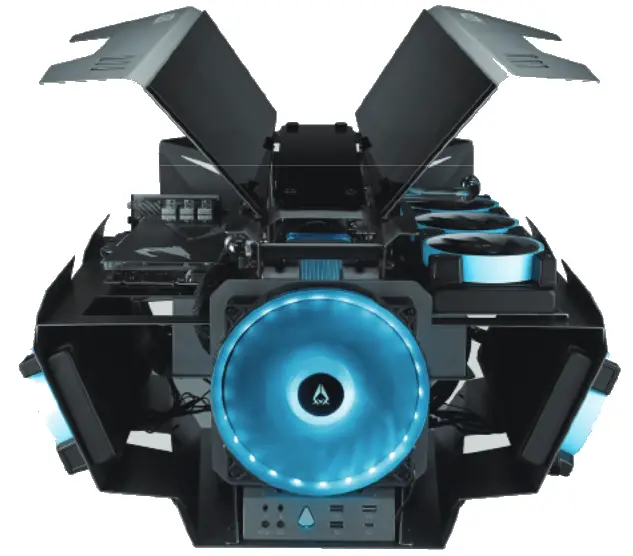
CSAZ-807 Overdrive Innovative ATX Case
| Model | |
| Model Name: | OVERDRIVE |
| Name: | CSAZ-807 |
| Specifications | |
| Type: | ATX Tower |
| Color: | 1.5~2.0mm SPCC+ 2.5mm Aluminum |
| Top Panel: | Aluminum and tempered glass wing |
| Max CPU Cooler Height: | Up to 80mm |
| Max GPU Length: | Up to 400mm long Video card (Horizontal) |
| Max Cooling Tube Reservoir Length: | UP to 300mm |
| Power Supply: | ATX |
| Motherboard Compatibility: | <305x280mm E-ATX 、ATX 、Micro ATX 、 Mini ITX |
| Expansion | |
| External 5.25″ Drive Bays: | 0 |
| Internal 2.5″ Drive Bays: | Up to 2 |
| Internal 3.5″ Drive Bays: | Up to 2 (Convertible with 2.5″SSD x 2 ) |
| Expansion slots: | 3+3 |
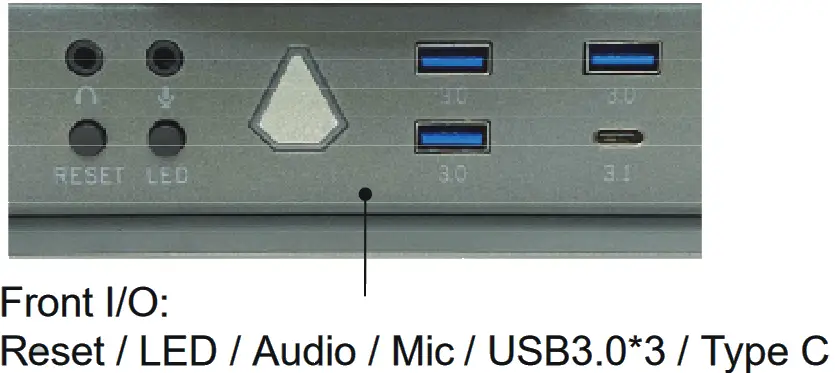
| Front Ports: | 3xUSB 3.0 、 HD Audio 、Type C、Metal power button |
| Physical Specifications | |
| Metal Chassis Dimensions (HxWxD) | 440x570x590mm/17.3×22.4×23.2 inch |
| Weight: | 23kg /50.7lbs |
| Features | |
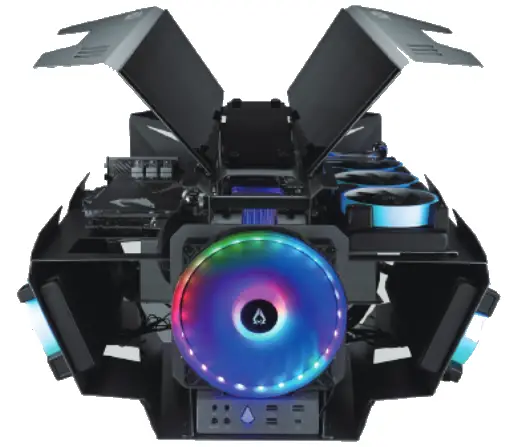
| Outer Appearance: | All external panels are made of aluminum with two glass top panel, gull-wing panel design makes it easy to adjust and clean on usually. |
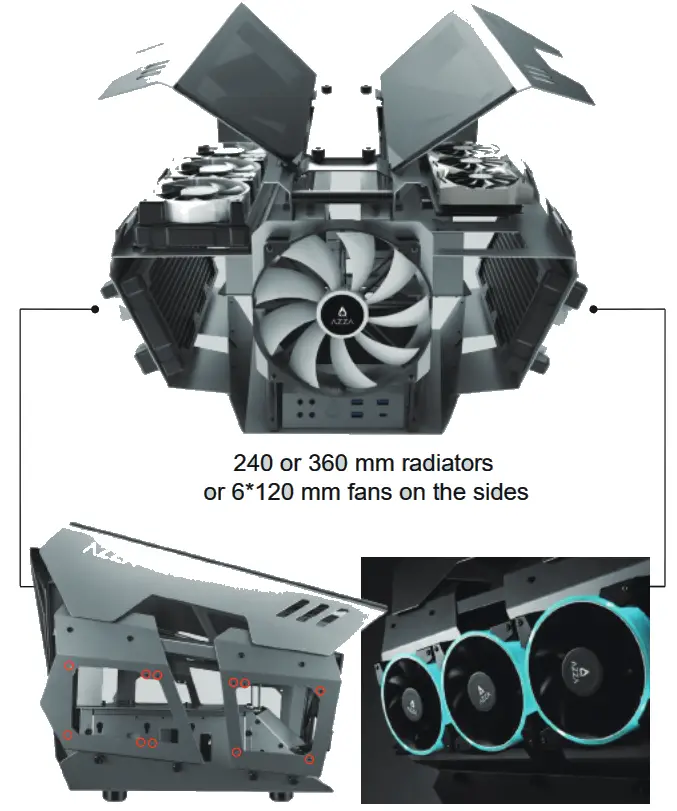
| Available Fan Ports: | Front: 1 x 200mm fan port (1x 200mm Addressable RGB fan included ) Top: 6 x 120mm/ 4 x 140mm fan ports Sides: 6 x 120mm fan ports |
| Water Cooling: | Top: Supports radiators up to 280/360mm x 2 Sides: Supports radiators up to 360mm x 2 |
| Isolated Chamber: | ATX Power supply inside its own isolated chamber, preventing its heat from affecting other components |
| Easy Installation Cooler: | A pre-cut hole for easy installation of CPU Cooler, eliminating the need to remove the motherboard |
| Accessories | Radiator bracket x 2 – Support 280/360mm on top two sides. 300 mm PCI-e 3.0 Riser Cable Another 300mm PCI-e 4.0 extension cable version is available AZZA Hub (RGB+Fan Controller) x1 PCI-e Slot Brackets x2 Decorative Backplates x2 |
Front Panel Functionality :
Front Fan:
200mm Addressable RGB Fan included
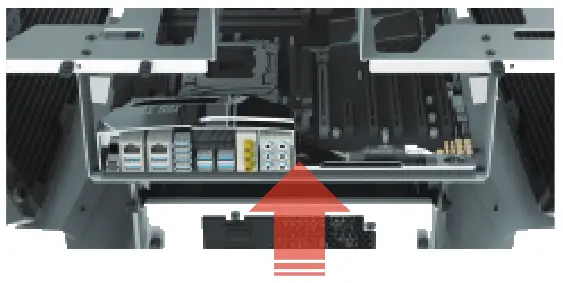
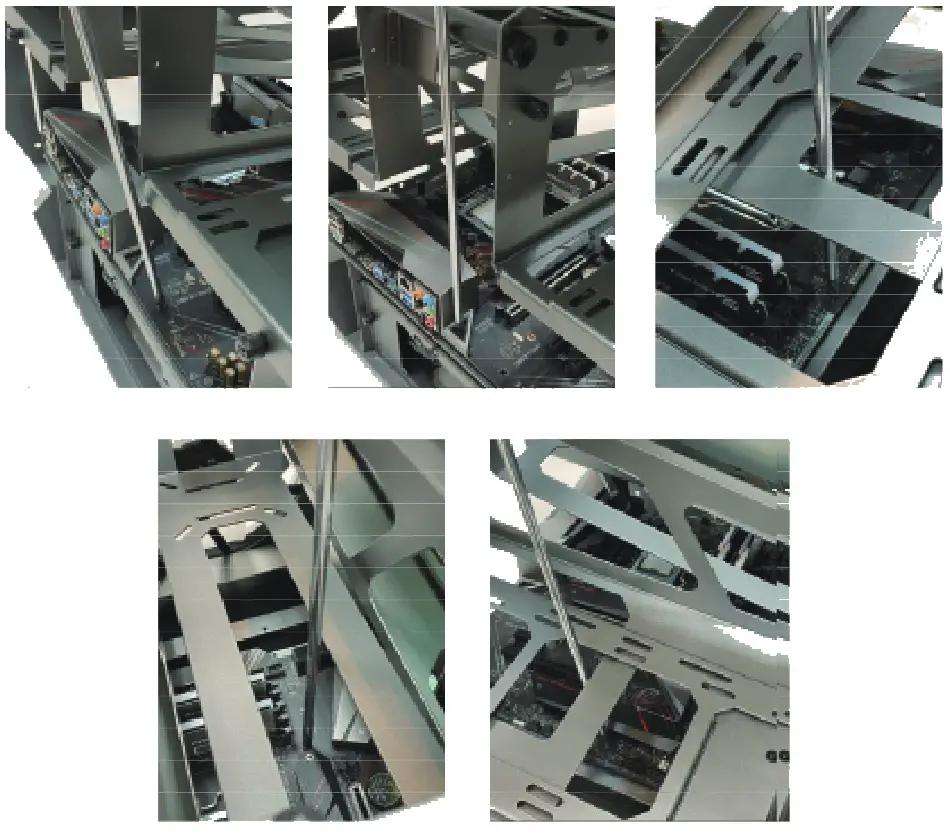
Motherboard Installation :
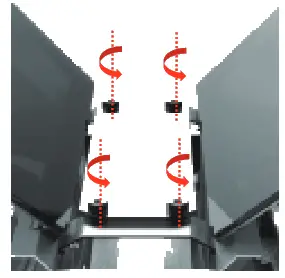
- Turn the screws counterclockwise to remove the glass

- Put the motherboard in from behind.

- Screw the motherboard onto the tray through the chassis.

Power Supply Installation :
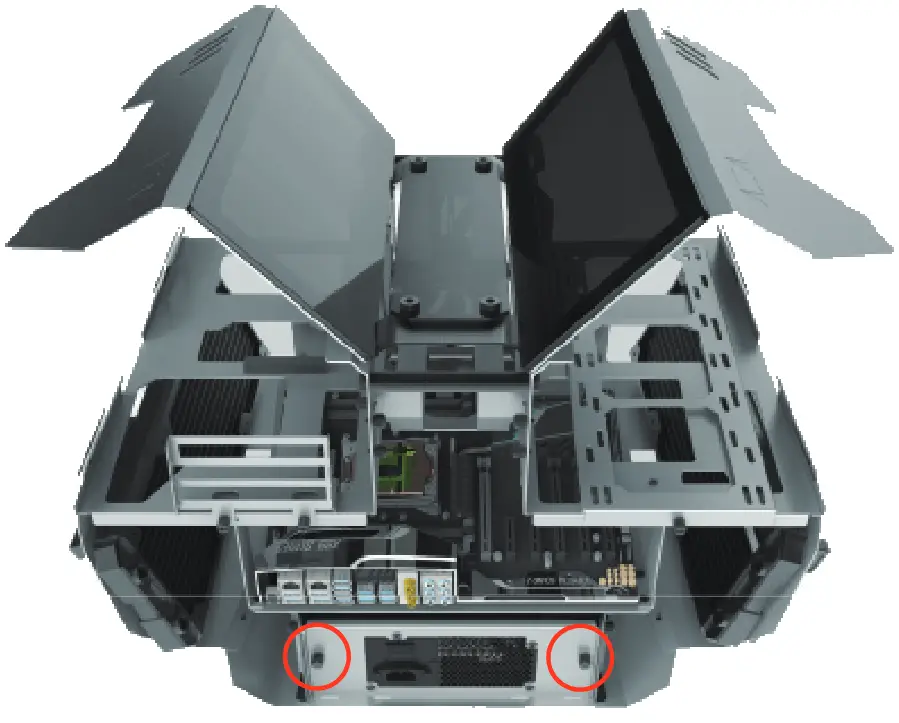
Loosen the hand screws to remove the power supply bracket. Attach the power supply to the bracket before placing it back in.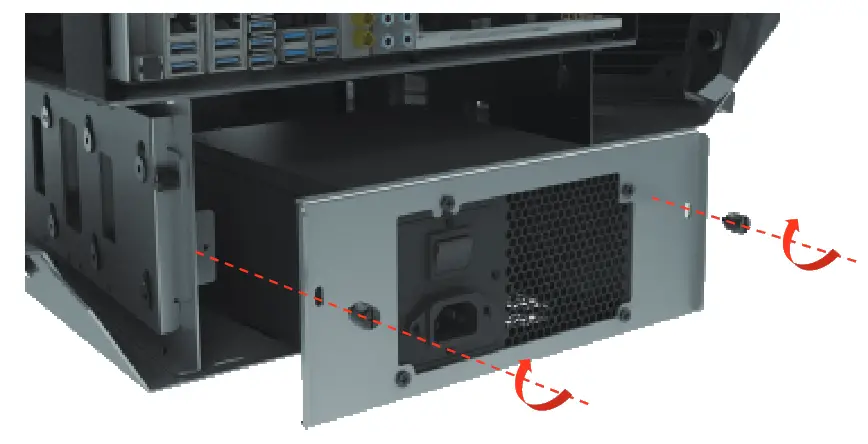
Fan & Radiator Installation :
When installing a radiator: Use long screws to affix the fan and radiator onto the chassis as shown.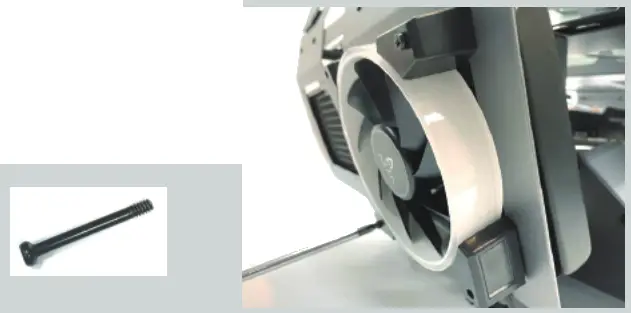 When installing fans only: Use nuts on the rear of the screw to affix the fan onto the chassis as shown.
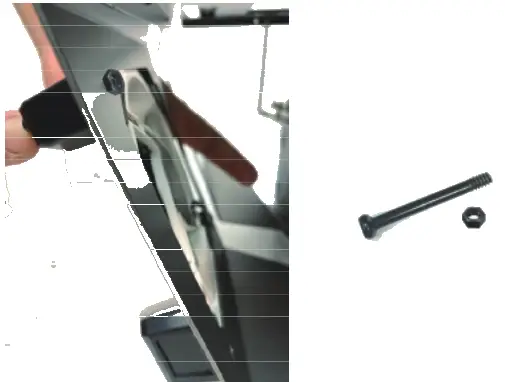
Reservoir & Pump Installation :
Turn the handscrews counterclockwise to remove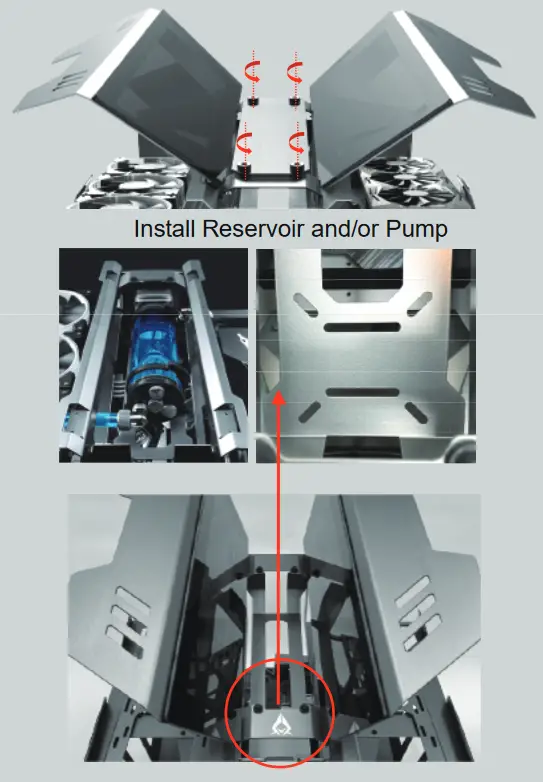
Graphics Card or Radiator Installation :
Supports up to 280 mm or 360 mm radiator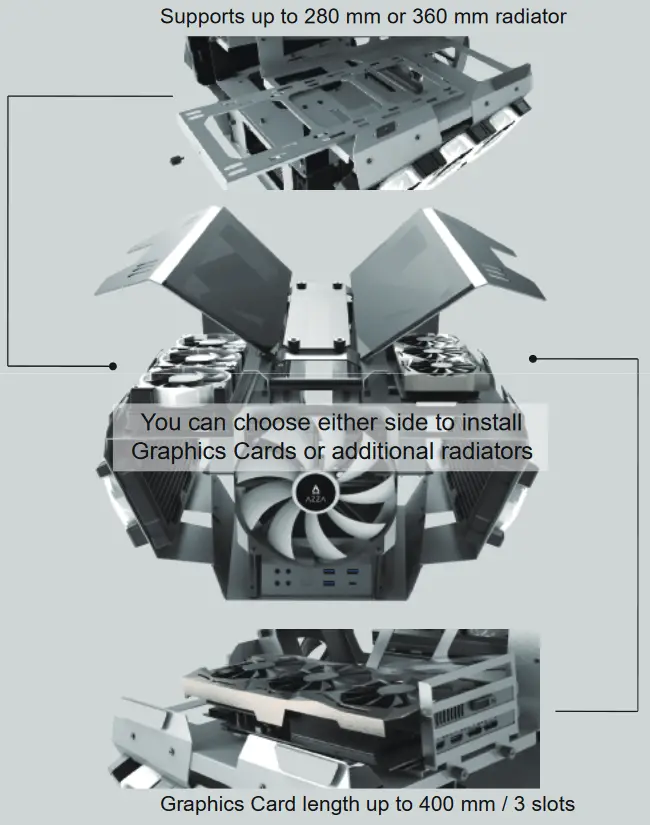
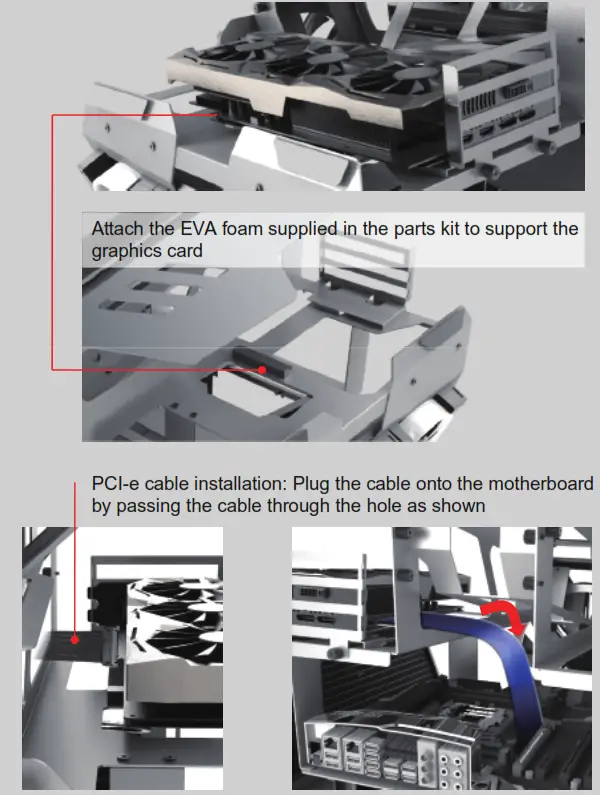
Graphics Card Installation:
Storage Drive Installation :
isk Drive Mounts on both sides:
Two 2.5” drives or one 3.5” drive
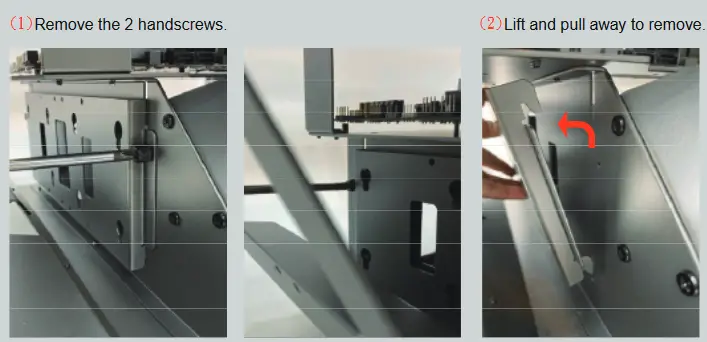
Rear Cover Installation :
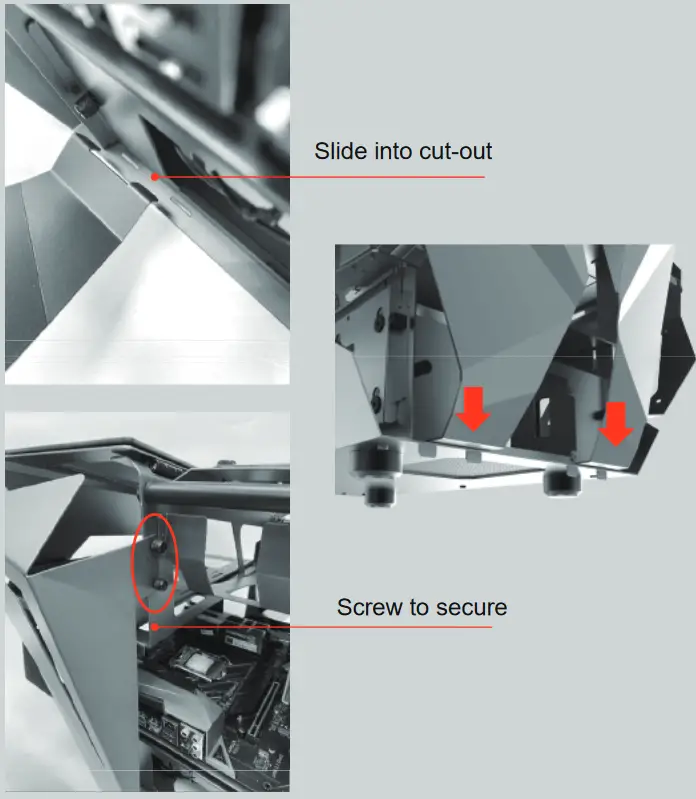
Ports and connectors
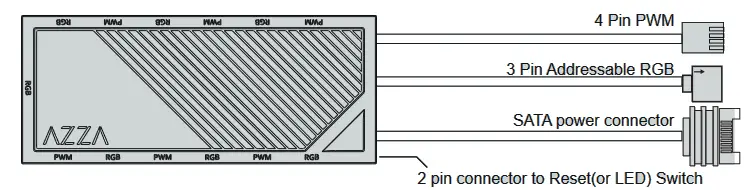
- 7×3 pin ARGB ports(supports ARGB devices: ARGB fan, ARGB strips…etc)
- 6×4 pin PWM fan ports
- 1×2 pin connector to Reset (or LED) switch
- 1xSATA power connector
- 1×3 pin ARGB connector to MB
- 1x4pin PWM fan connector to MB
Functions:
- Total of 17 lighting modes
Lighting modes can be controlled by Reset (or LED) switch, or can be controlled by MB.
(Hold the LED button for 3 seconds to switch the RGB control function between motherboard RGB software and LED button)
A.) Magnet on the back of the hub box or using velcro on the back of the hub box, it can put in any place inside the metal part of the case.
B.) 6 sets of ARGB port next to PWM port to ease the connection on fans 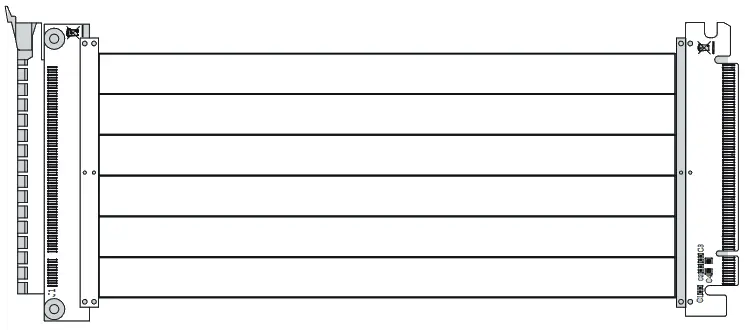
300 mm PCI-E 3.0 Cable(Support EATX、ATX Motherboard)
Another 300mm PCI-e 4.0 extension cable version is available ![]()


