ZALMAN T7 ATX MID Tower R Computer Case User Manual
* To ensure safe and easy installation, please read the following precaution.
* Product design and specifications may be revised to improve quality and performance without notice.
Contents hide
Precautions
- Read this manual carefully before installing.
- Check the product and components before installing. If you find any abnormality, contact the location where you purchased the product for a replacement or refund.
- Wear gloves to prevent accidents when installing the product.
- Severe damage may occur when mounting the system, so do not apply excessive force.
- Connecting the cable incorrectly may cause a fire due to a short circuit. Make sure to refer to the manual when connecting the cable.
- Be careful not to block the ventilation hole of the product when using the system.
- Avoid locations with direct sunlight, water, moisture, oil, and excessive dust. Store and use the product in a well-ventilated location.
- Do not wipe the surface of the product using chemicals. (organic solvents such as alcohol or acetone)
- Do not insert your hand or other object into the product during operation, as this may injure your hand or damage the object.
- Store and use the product out of children’s reach.
- Our company assumes no responsibility for any problem that occurs due to the use of the product for purposes other than its designated purposes and/or the carelessness of the consumer.
- The exterior design and specifications of the product are subject to change without prior notice to consumers for quality improvement.
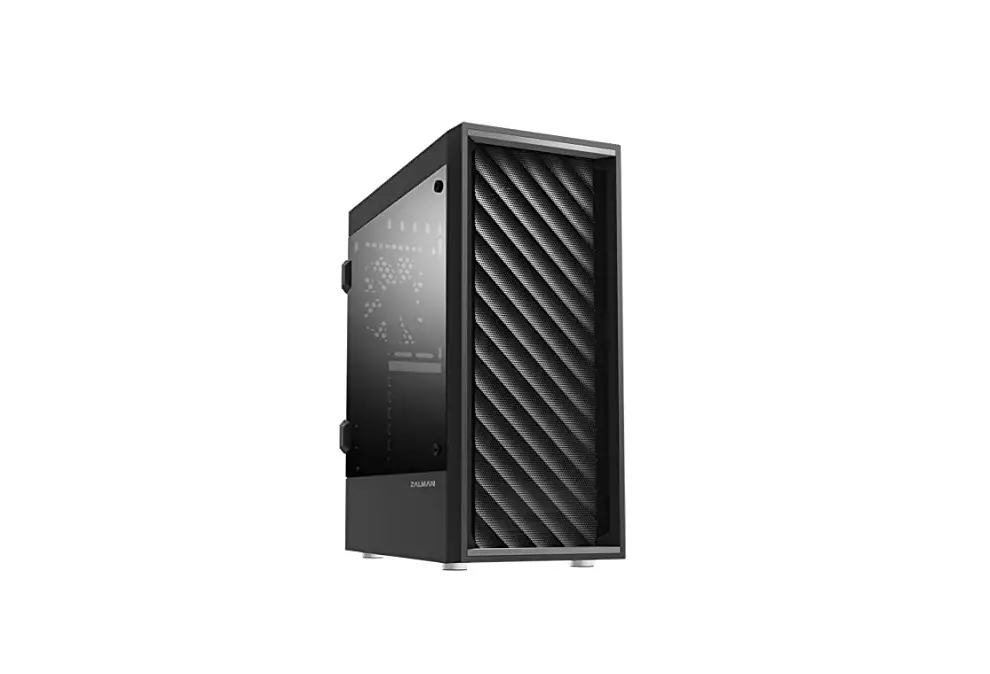
Features
| Model | T7 | |
| Case Form Factor | ATX Mid-Tower | |
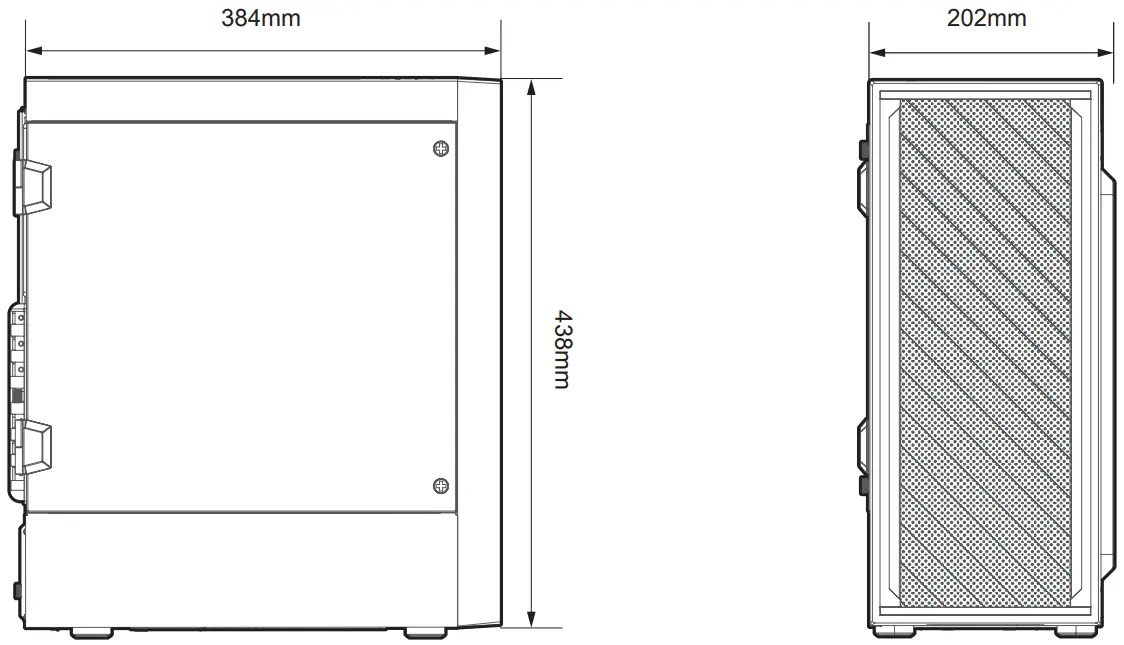
| Dimensions | 384(D) x 202(W) x 438(H)mm | |
| Weight | 3.2kg | |
| Case Materials | Plastic, Steel, Acrylic | |
| Motherboard Support | ATX / mATX / Mini-ITX | |
| Maximum VGA Length | 305mm | |
| Maximum CPU Cooler Height | 160mm | |
| Maximum PSU Length | 150mm | |
| PCI Expansion Slots | 7 | |
| Drive Bays | 2 x Combo(3.5” or 2.5”), 4 x 2.5” | |
| Fan Support | Top | 2 x 120mm |
| Front | 3 x 120mm | |
| Rear | 1 x 120mm | |
| Bottom | 2 x 120mm | |
| Pre-Installed Fan(s) | Front | 1 x 120mm |
| Rear | 1 x 120mm | |
| I/O Ports | 1 x Headphone, 1 x Mic, 2 x USB 2.0, 1 x USB 3.0, Reset Button, Power Button | |
Accessories
- Manual

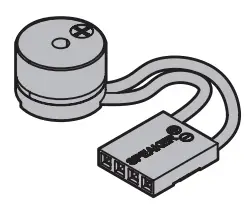
- Horn sound

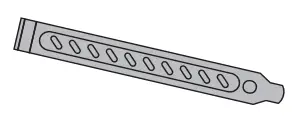
- Lid of PCI slot

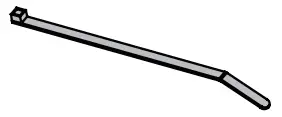
- Attachment of cable x 5

- Disc screw hard x 20

- Thumb screws x 2
- Vis SSD / MB x 25

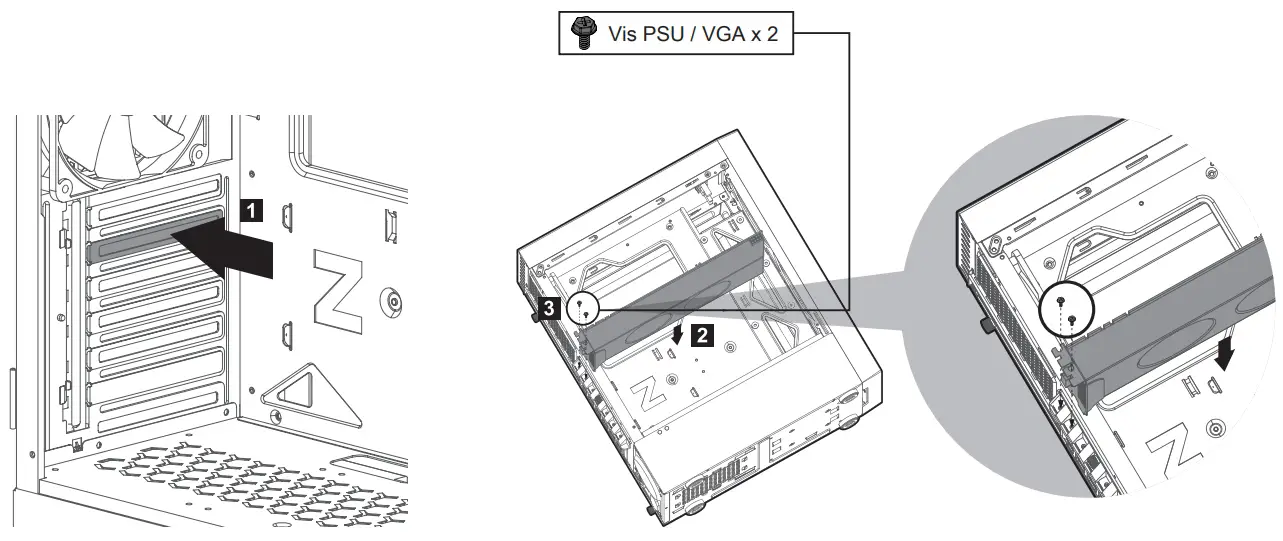
- Vis PSU / VGA x 6

- Motherboard Standoffs x 3


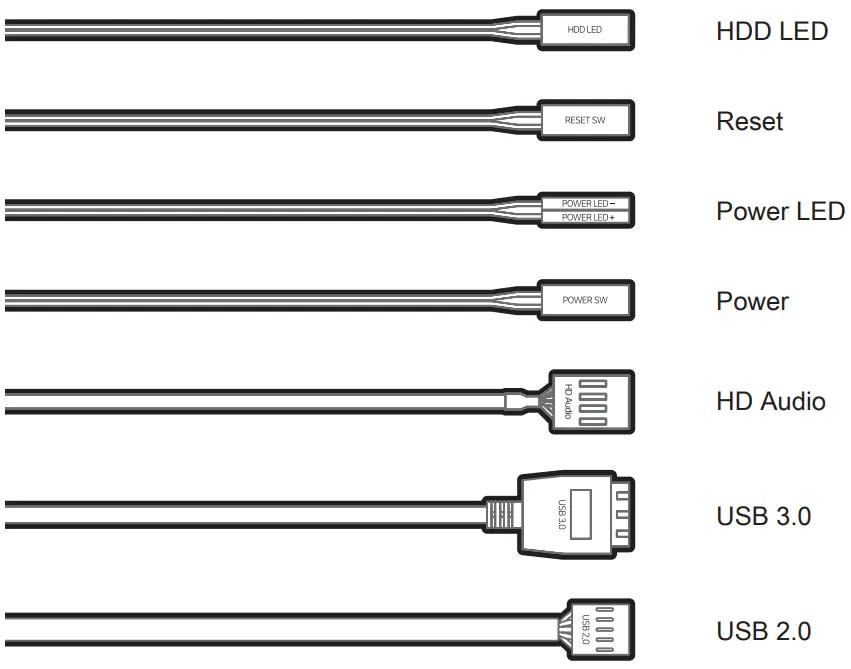
I/O Ports
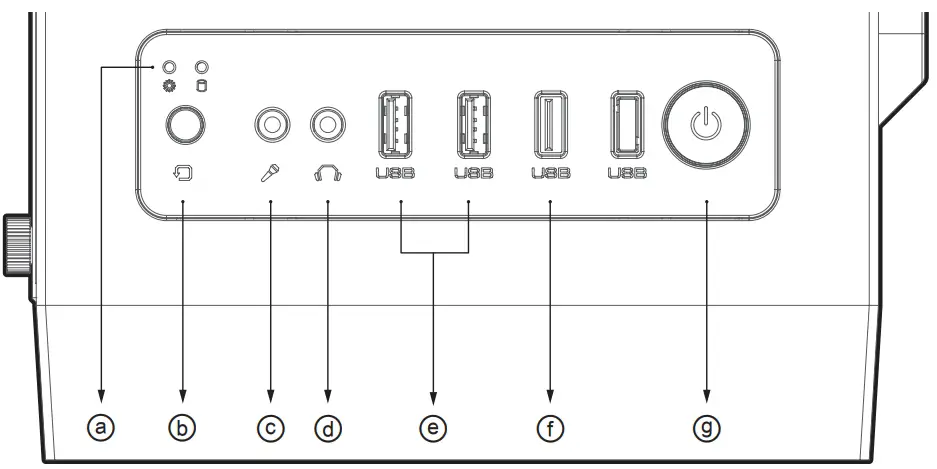
# | Part | # | Part | # | Part | # | Part |
| ⓐ | HDD / Power LED | ⓑ | Reset Button | ⓒ | Microphone Jack | ⓓ | Headphone Jack |
| ⑥ | USB 2.0 Ports | ⓕ | USB 3.0 Port | ⑨ | Power Button |
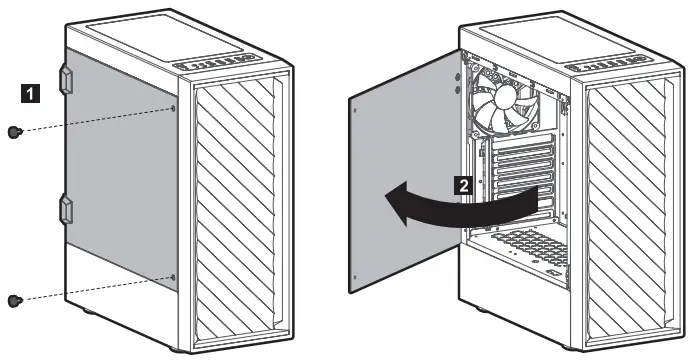
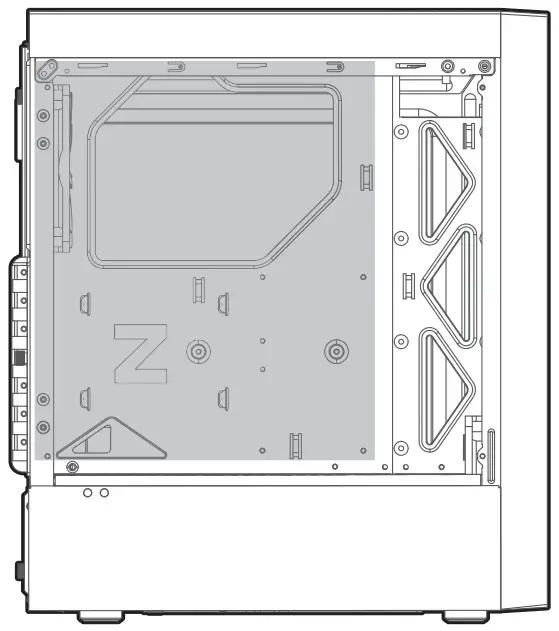
Dismantling the side panels
- Tempered Glass

- Steel Panel

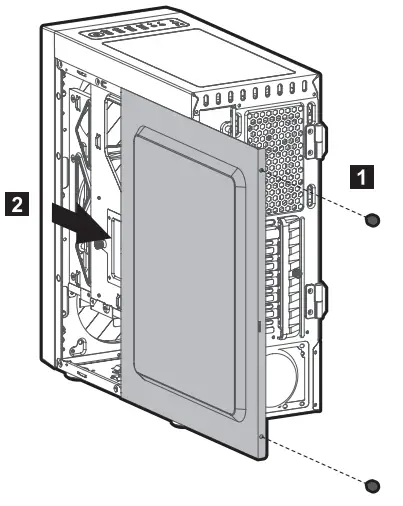
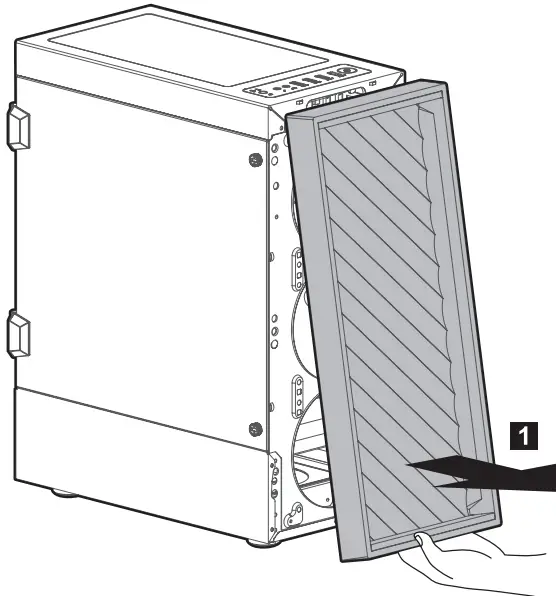
Dismantling the front panel
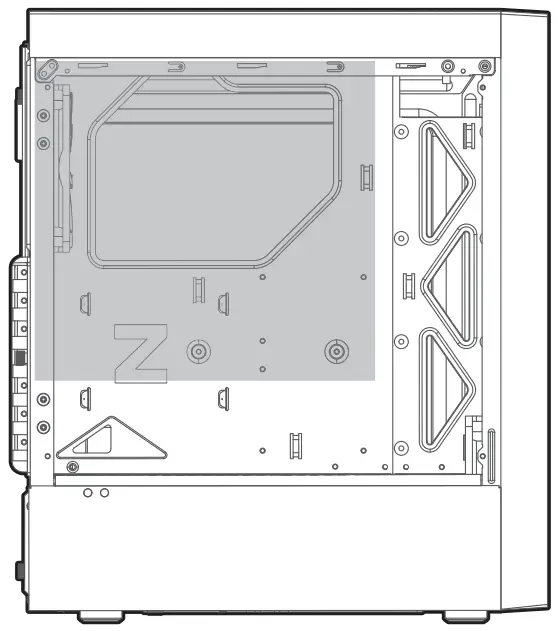
Mounting the motherboard
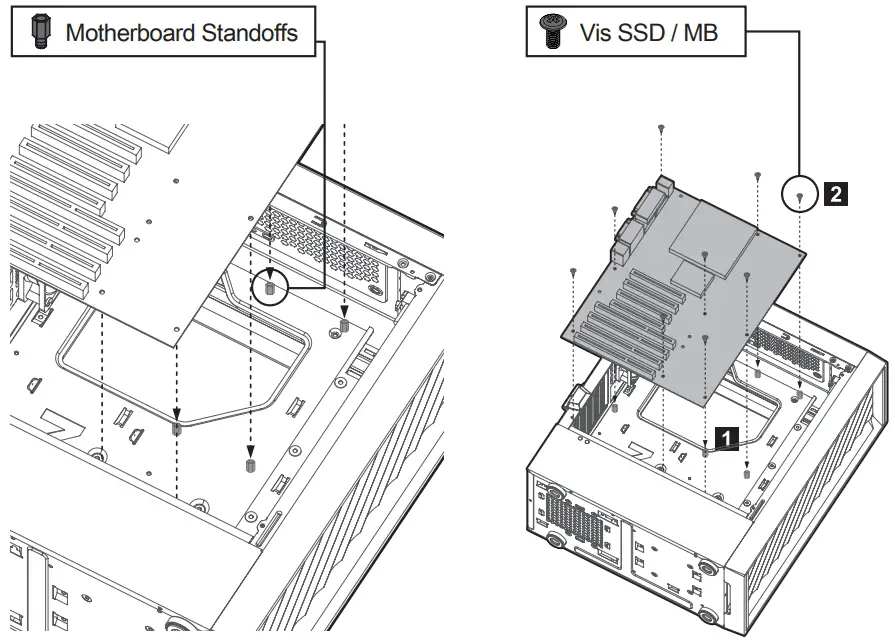
Motherboard size
- ATX

- mATX
- Mini-ITX
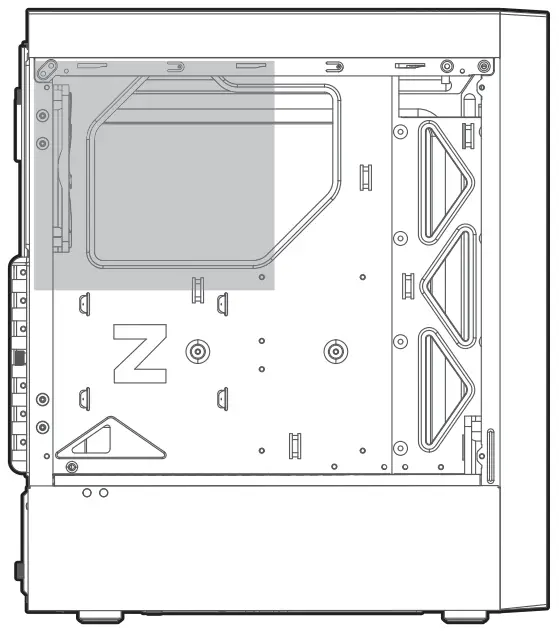
Mounting the power supply

Mounting the PCI-E (VGA) Card
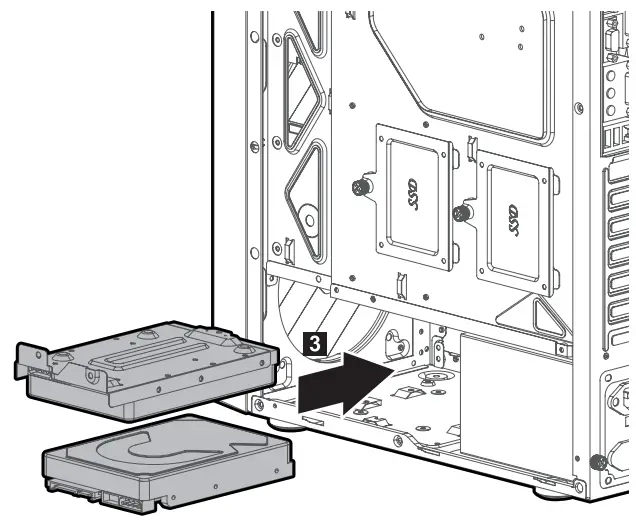
Mounting 3.5” and 2.5” SSD / HDD
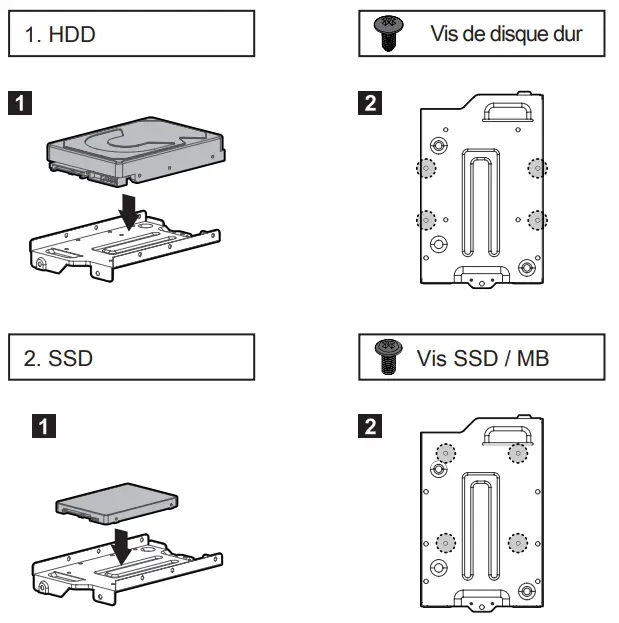
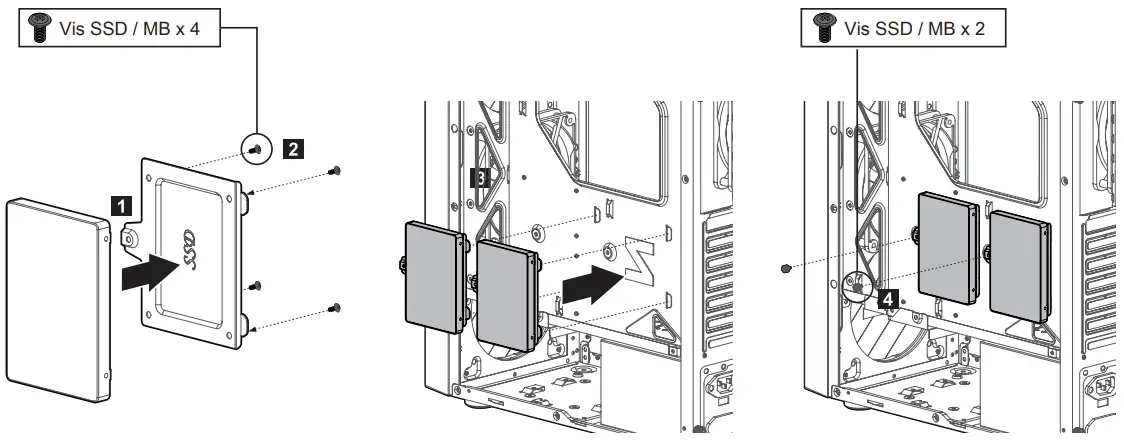
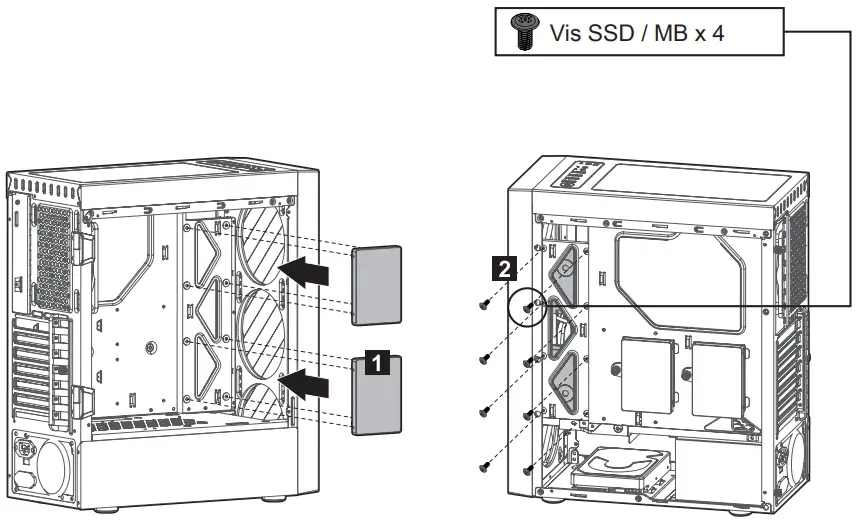
Mounting the 2.5” SSD / HDD
Fans Included / Features
RPM: 1100± 10%
Input: 12V 0.24A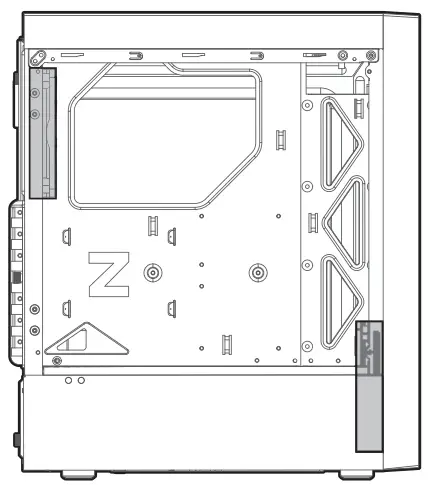
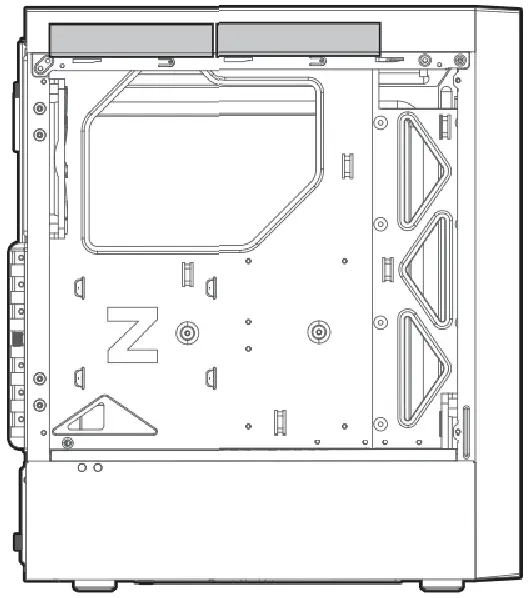
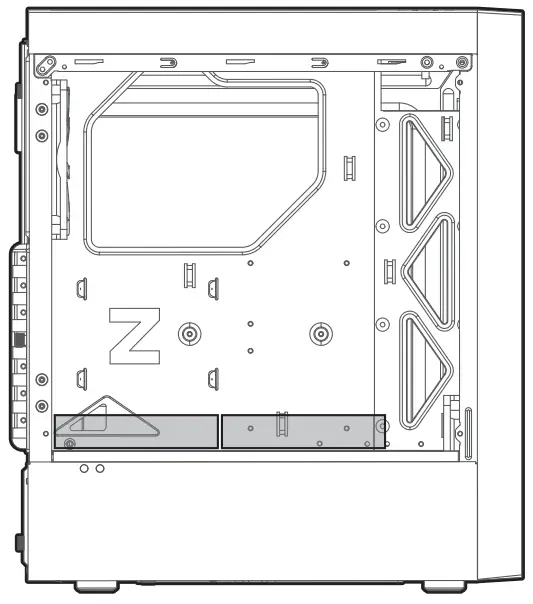
Mounting the fans
- Mounting the top fans

- Mounting the front fans

- Mounting the bottom fans
I/O connectors
Warranty
- Warranty period: 1 year from the date of purchase. (However, when there is a purchase receipt)
- Free A/S: In case of defects or defects in the product’s own performance within the warranty period.
- Paid A/S: When a problem occurs in using the product after the warranty period. However, free A/S processing is not available for the following matters even within the warranty period. It is handled at the consumer’s expense.
- If you do not follow the precautions and precautions before installation specified in this user manual.
- In case of deformation, damage/destruction due to the user’s intention, negligence or negligence.
- In case of deformation or malfunction due to user’s arbitrary modification.
- When the quality assurance sticker is removed or damaged.
- In case of malfunction due to natural disaster.
- In case of malfunction due to use in an abnormally humid environment or a space with a lot of dust and other foreign substances (worms, etc.).
- Parts retention period: 2 years from the date of product discontinuation (However, the time of discontinuation is based on the final shipment date of the discontinued product.)
- A/S information 1) Operating Hours: Weekdays 10:00 ~ 16:00 (Closed on holidays, Saturdays and Sundays) 2) How to apply
- Visit to: Visit www.zalmansvc.com and register for service.
- Delivery by courier: After accessing www.zalmansvc.com and registering as a member, service application is received. After entering your name, contact information, and symptoms, delivery is sent in advance.
- Reception desk ※ After checking the exact location and address of the A/S center on the website, visit or send by courier.
- Product transportation cost
- In case of initial defect: In case of initial defect, round-trip freight cost will be borne by us.
- In case of free A/S: In principle, the cost of courier delivery within the free period shall be borne by the customer once (prepaid).
- Paid A/S and after warranty period: All round-trip costs are borne by the customer.
- How to check the date of manufacture