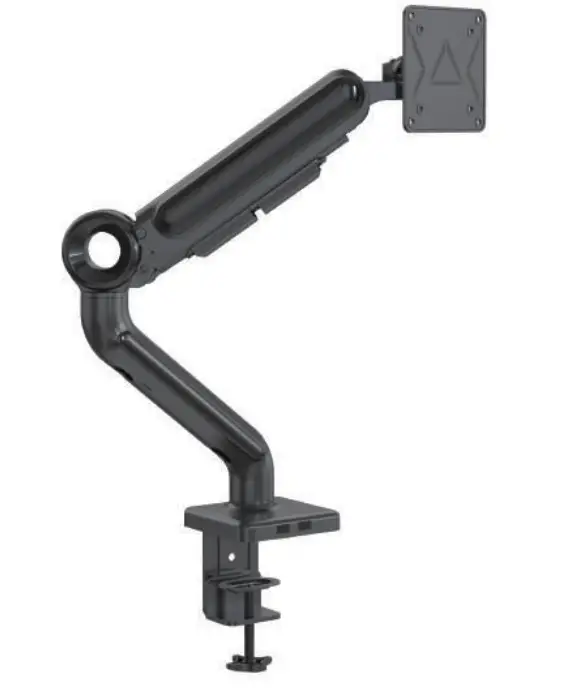
AMERICAN EXPRESS VM-GE61 Premium Single Monitor Desk Mount
FEATURES
WARNING STATEMENTS
Warning
![]() Prior to the installation of this product, the installation instruction must be read and completely understood. Failure to do so may result in personal injury, property damage or voiding of factory warranty.
Prior to the installation of this product, the installation instruction must be read and completely understood. Failure to do so may result in personal injury, property damage or voiding of factory warranty.![]() Do not install on a structure that is prone to vibration, movement or chance of impact. Reinforce the structure as required before installation.
Do not install on a structure that is prone to vibration, movement or chance of impact. Reinforce the structure as required before installation.
Make sure that the edge of table top is load-bearing enough.![]() The desk clamp can support a maximum thickness of 8.5 cm.
The desk clamp can support a maximum thickness of 8.5 cm.
Confirm the desk edge before installation.![]() Pay attention to the weight capacity of the mount. Exceeding the limitation can result in function unworkable or even serious personal injury and property damage.
Pay attention to the weight capacity of the mount. Exceeding the limitation can result in function unworkable or even serious personal injury and property damage.![]() Never operate the mount if parts are missing or damaged. Please contact our customer service team.
Never operate the mount if parts are missing or damaged. Please contact our customer service team.
PRODUCT LINE GRAPH
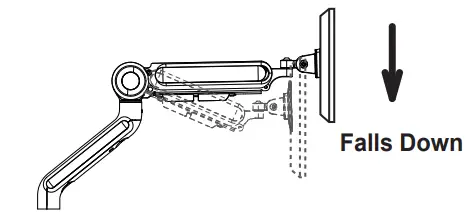
Problem:
After being attached to the arm, the monitor falls down and can not stay at the desired height by itself.
Solution:
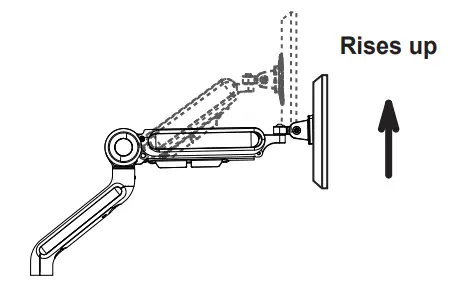
Problem:
After being attached to the arm, the monitor rises up and can not stay at the desired height by itself.
Turn clockwise(“-” direction) to reduce gas spring tension until the monitor can stay at the desired height by itself.
Step 1: Clamp Installation OR Grommet Base Installation
Option A:
Clamp Installation.
After this step, then Step 2 on Page 6.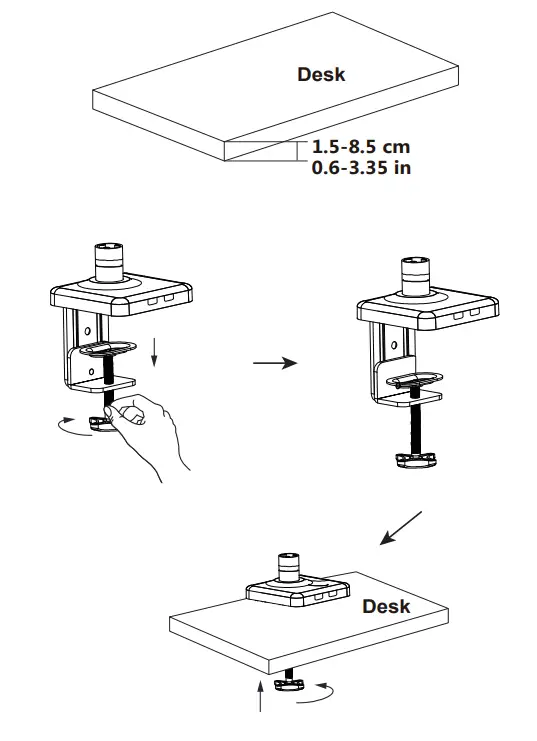
Adjust the Clamp width to fit with desk. Secure stand to desktop by tightening Clamp.
Option B: Grommet Base Installation
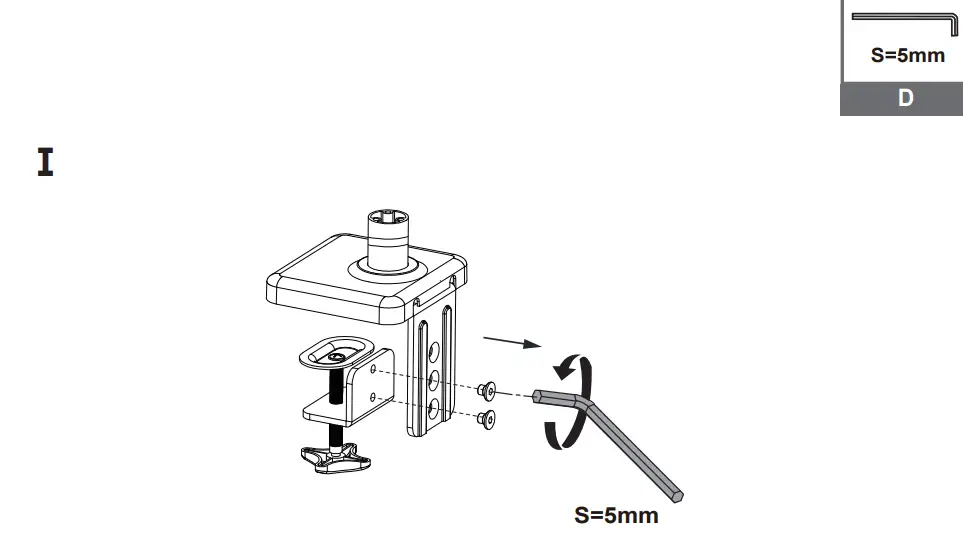
Remove the Two screws from the base by the short-head 5mm Allen key(D).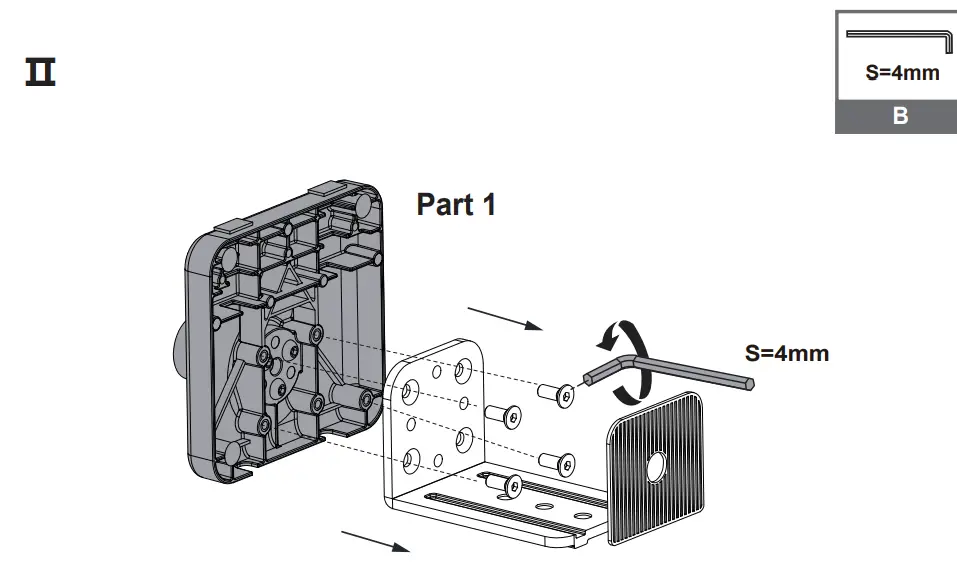
Remove the Four screws from the base by the short-head 4mm Allen key(B). Get Part 1 for using to step Ⅴ.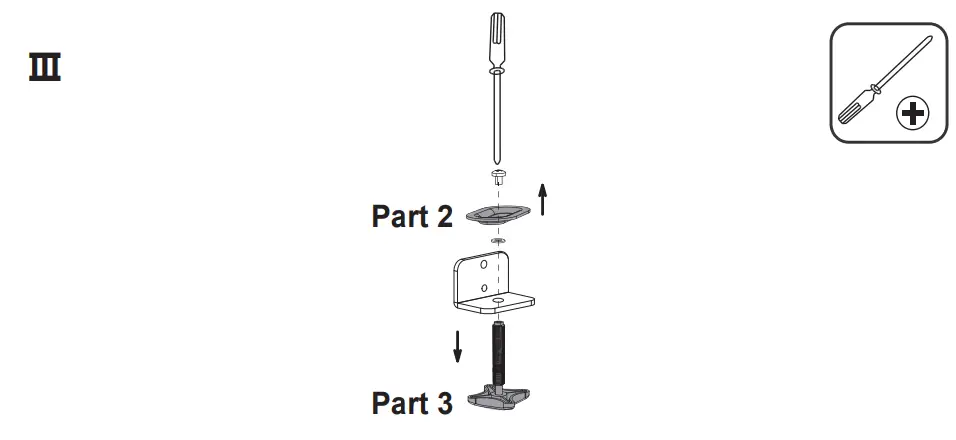
Remove the top screw with a Phillips screwdriver. Get part 2 and Part 3.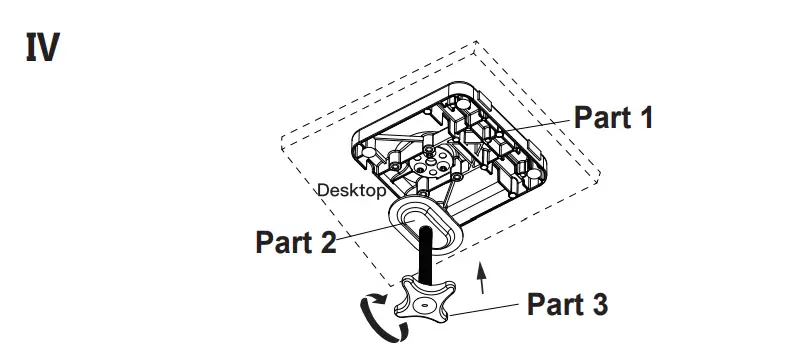
Run Carriage Bolt (Part 3) through Support Plate (Part 2) ,Grommet Hole on desktop and Part 1 .
Last step, tighten Carriage Bolt (Part 3).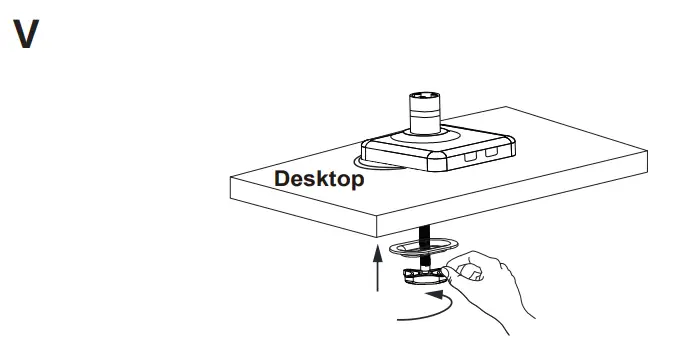
Step 2 :Arm Installation
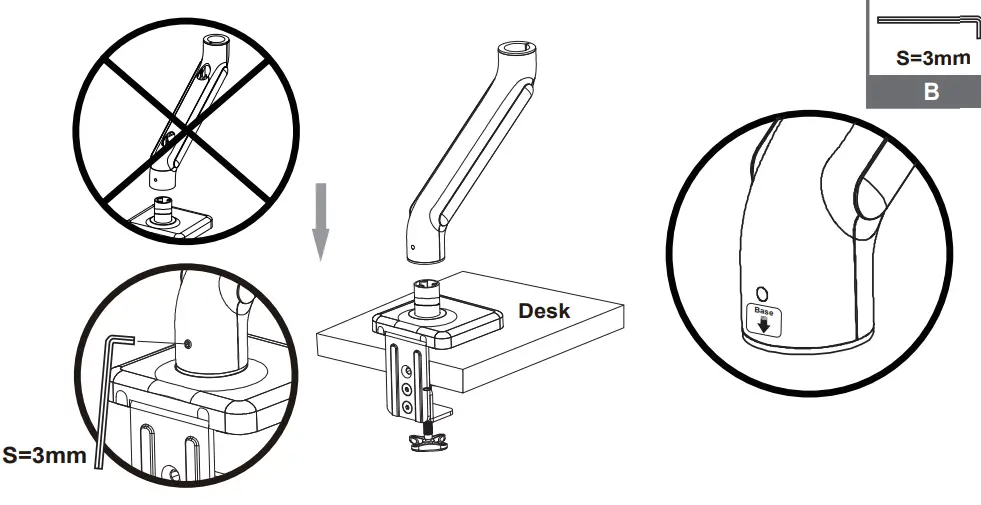
![]() DO NOT tighten the screw excessively or it might be stripped.
DO NOT tighten the screw excessively or it might be stripped.
![]() Note: Please note that the side with the label”
Note: Please note that the side with the label” ![]() ” is installed on the base(a) when installing the lower arm(d) to the base (a).
” is installed on the base(a) when installing the lower arm(d) to the base (a).
Install the lower arm (d) to the base (a).
Secure the arm by tightening the inside screw using 3mm Allen key (B).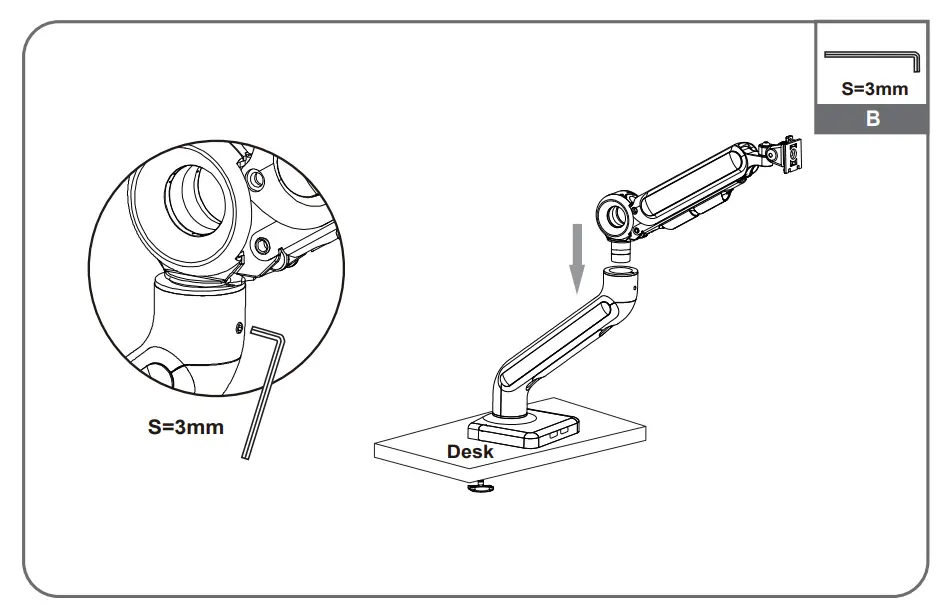
![]() DO NOT tighten the screw excessively or it might be stripped.
DO NOT tighten the screw excessively or it might be stripped.
Insert the gas spring arm (C) above the lower arm and fasten the screw in the front.


