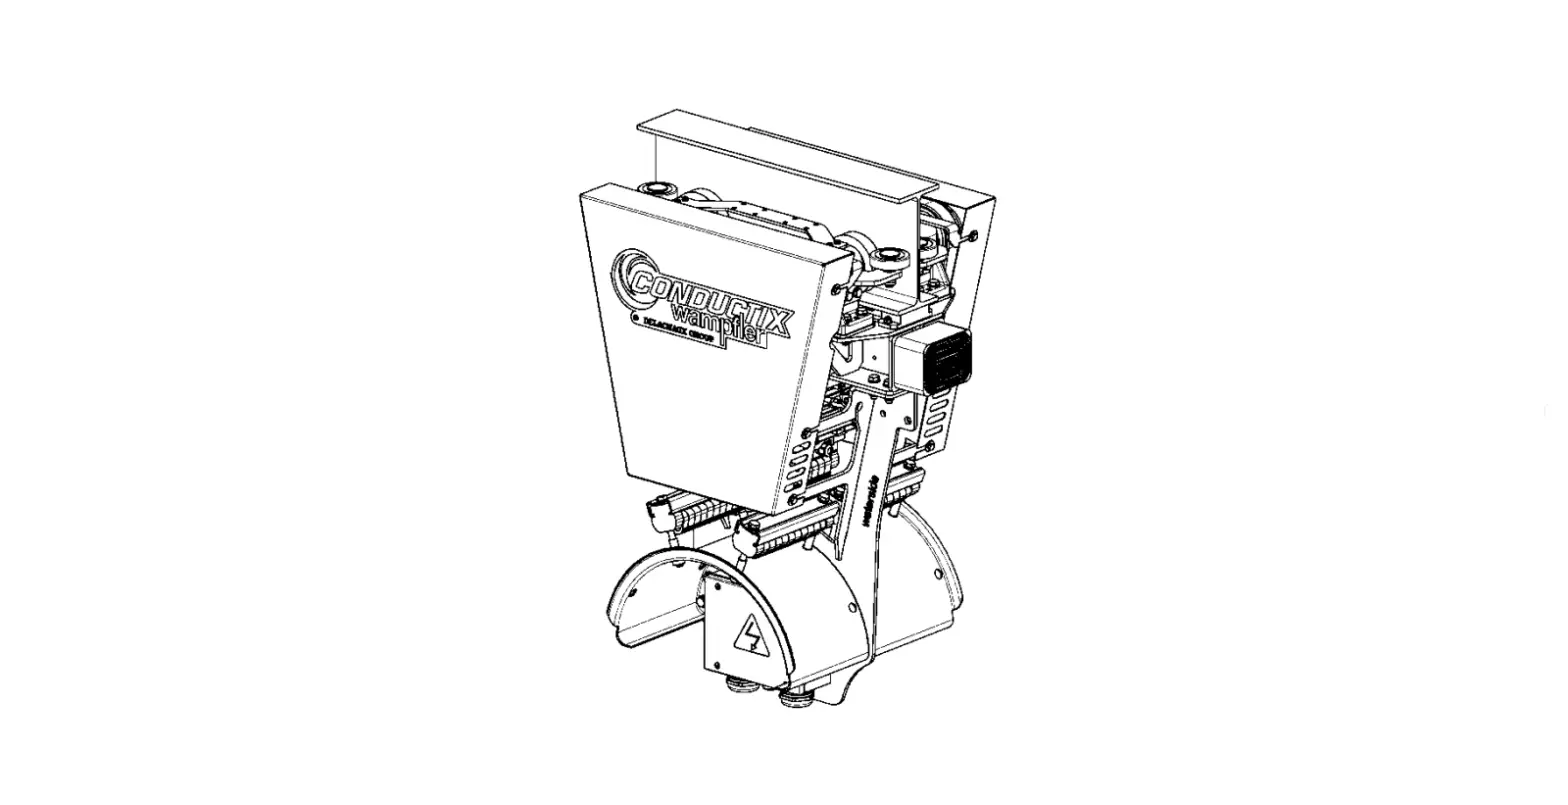
CONDUCTIX wampfler Program 0380 Motorized Cable Trolley
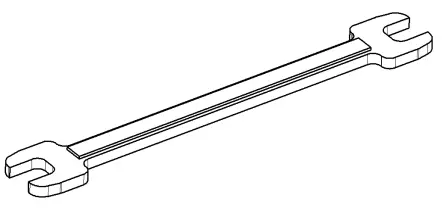
Required Tools
- Wrenches for Sizes
- 10 mm (all types suitable)
- 13 mm (all types suitable)
- 17 mm all types suitable
- 19 mm (open-end wrench needed for one step; all other types suitable for other steps)
- 36 mm (open-end wrench)

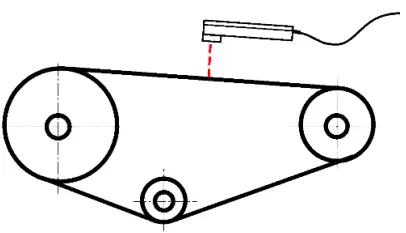
- Belt Tension Measuring Device

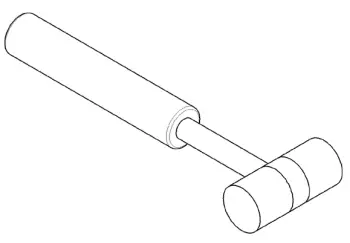
- Soft Head Hammer

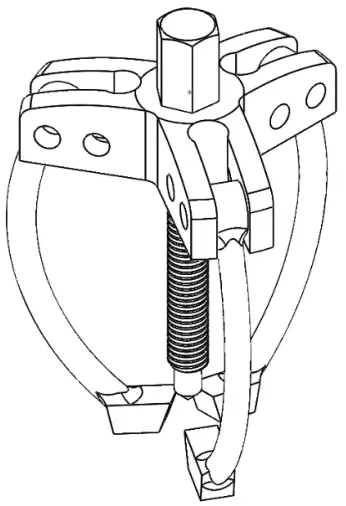
- Gear Puller

Working Steps
CAUTION
- Risk of injury!
- Secure the motorized festoon system from unexpected switch-on
- Safety devices that have removed must be immediately remounted and inspected after work has been completed
- Any used measuring tools must be cleaned up/collected after completion and their inventory must be checked
- Before approaching systems with damping devices, they must first be released
NOTICE!: The main roller can only be replaced together with the drive shaft for the main roller.
Disassembly Steps
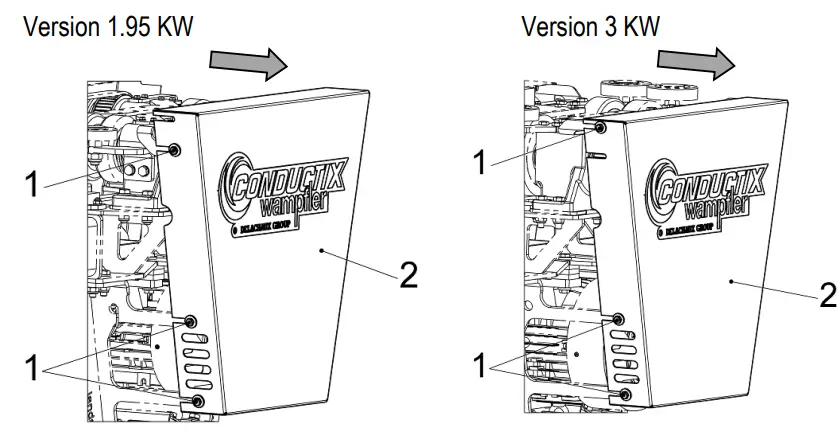
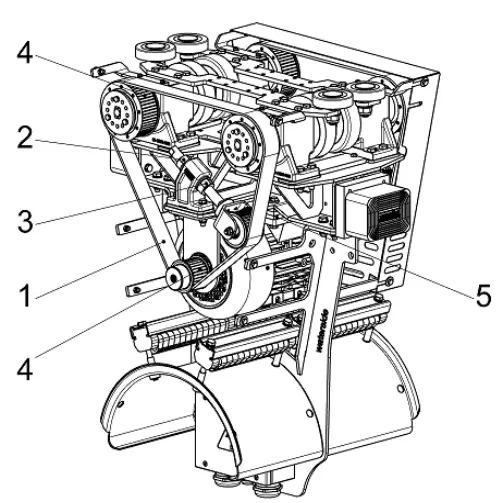
- Dismount protective cover.
Loosen the 6 screws (1), 3 turns and dismount the cover (2).
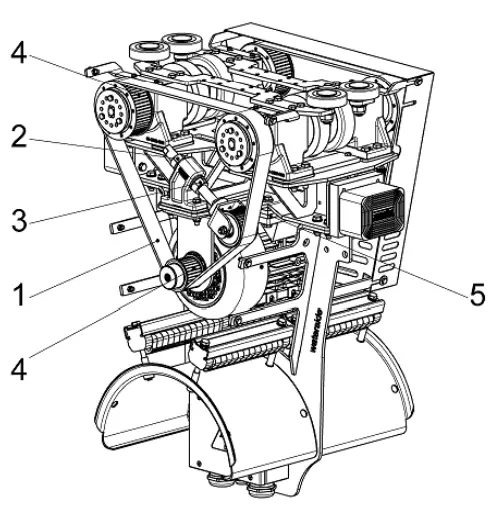
- Dismount tooth belt (1).
Untighten nuts (2 and 3) to retract tension pulley.
Remove tooth belt (1) without applying force to it
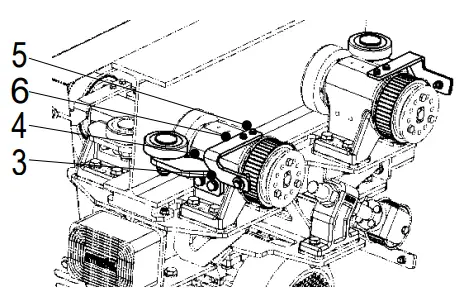
- Remove screws (3) and dismount bracket (4)

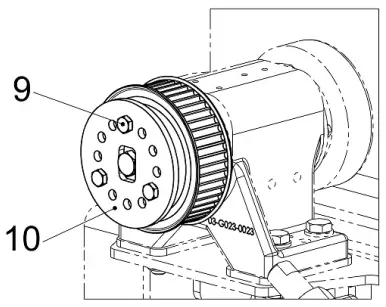
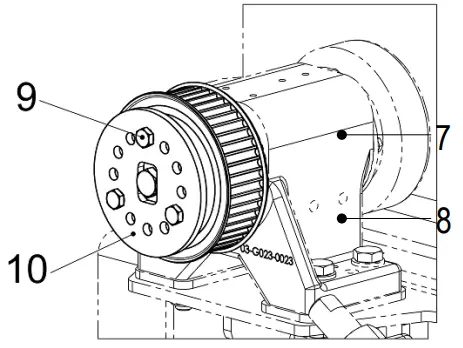
- Remove screws treated with chemical thread (9) and dismount locking washer (10).

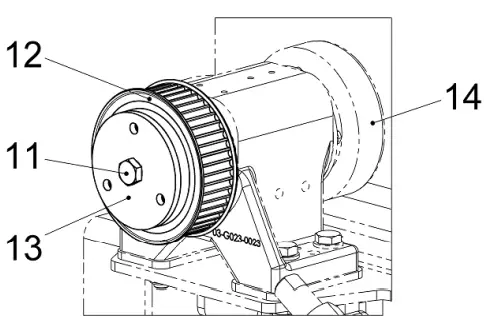
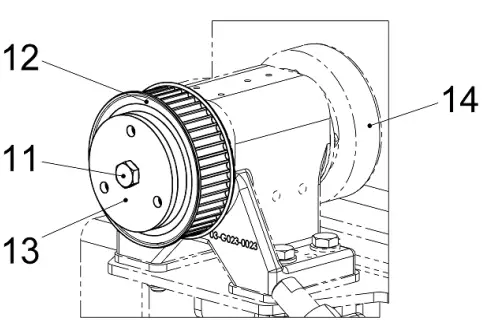
- Remove screw (11) and take off toothed belt disk (12) with covering disk (13).
- Lift up the motorized cable trolley until the main roller to be replaced (14) is no longer positioned on the track beam.

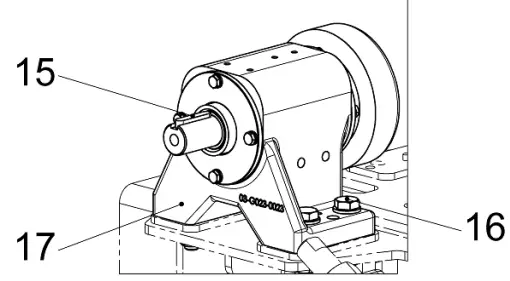
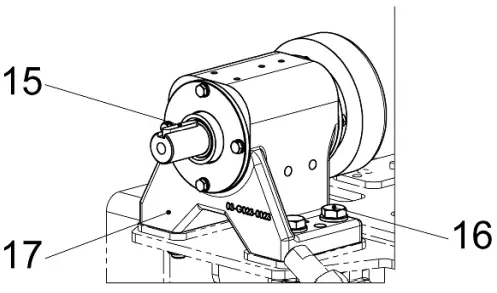
- Remove feather key (15).
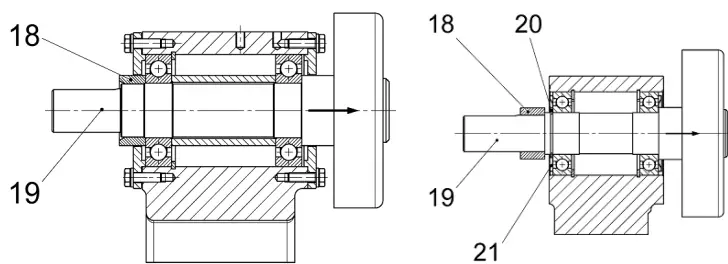
- Remove screws (16) and dismount complete bearing housing (17).

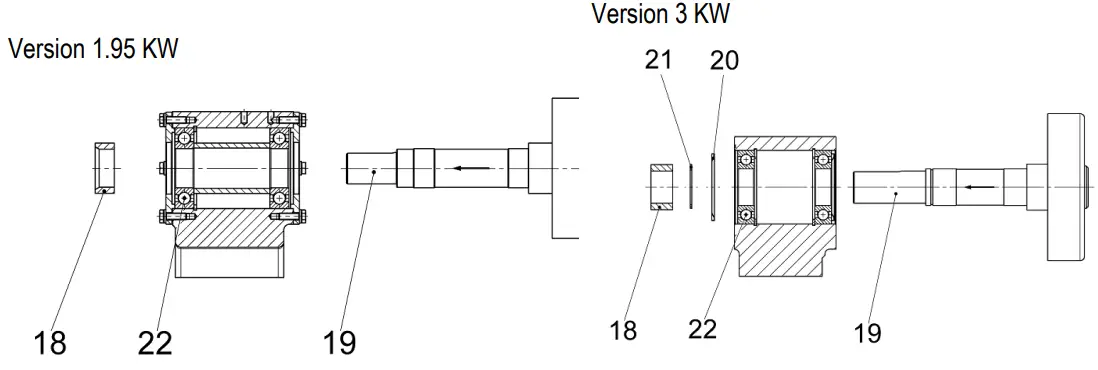
- Remove distance sleeve (18).
Dismount safety ring (21). Remove nilos-ring (only 3 KW). - Push drive shaft (19) out of the bearing housing in the direction of the arrows.

Assembly Steps
The assembly is made in reverse order. Use the new standard and connecting elements.
- Press new drive shaft (19) into the bearing housing.
To do this support the bearing housing on the inner ring of bearing 1 (22). - Mount nilos-ring (20) and safety ring (21) (only 3 KW). Afterwards press on the distance sleeve (18)

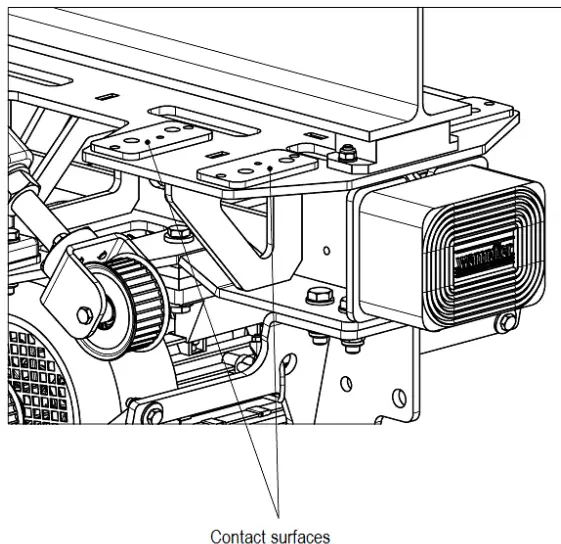
- Clean contact surfaces. The surfaces must be absolutely clean.

- Install the bearing housing (17), it aligns via the two cylindrical pins.
- Mount the screws (16).
- Place the feather key (15) into the groove.

- Push toothed belt disk (12) onto the drive shaft.
- Mount cover disk (13) with screw (11).

- Mount locking washer (10) with screws treated with chemical thread locker (9).
- Put down the motorized cable trolley on the beam.

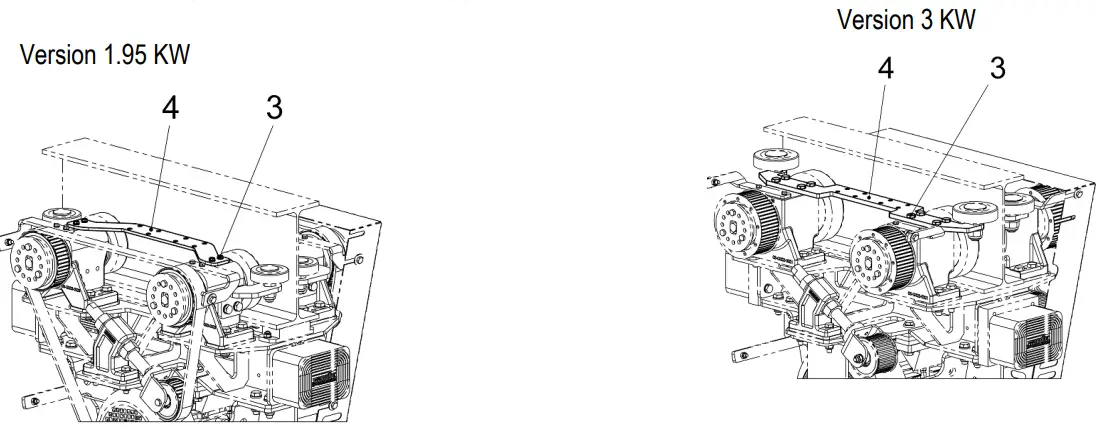
- Mount bracket (6) for guide roller with screws (5) (only 1.95 KW).
- Mount bracket (4) for protective cover with screws (3). Lock the screws with LOCTITE 243.

Mount bracket (4) with screws (3). Lock the screws with LOCTITE 243.
NOTICE!- After 6.000 crane operating hours both tooth belts must be replaced.
Assembly works at the tooth belt drive must comply with the particularities of the belt design. The operating behavior, utilization and the lifetime are dependent on the quality of the producer’s recommendations. - In case of worn out or defective tooth belt, always replace both tooth belts.
- After 6.000 crane operating hours both tooth belts must be replaced.
- Mount tooth belt.
Put on tooth belt (1) without applying force to it.
Tighten nut (3) to extend tension pulley.
Check and adjust tooth belt (1) tightening (for details see Mounting Instructions).
Secure belt tensioner by tightening nut (2)
- Mount protective cover.

ABOUT COMPANY
- Conductix-Wampfler GmbH
- Rheinstraße 27 + 33
- 79576 Weil am Rhein – Märkt
- Germany
- Phone: +49 (0) 7621 662-0
- Fax: +49 (0) 7621 662-144
- [email protected]
- www.conductix.com
- Importer for the United Kingdom:
- Conductix-Wampfler Ltd.
- 1, Michigan Avenue
- Salford
- M50 2GY
- United Kingdom
- Phone: +44 161 8480161
- Fax: +44 161 8737017
- [email protected]
- www.conductix.com


