![]() AR-PB-321/AR-PB-323
AR-PB-321/AR-PB-323
Don’t Disturb Switch (outdoor/indoor)
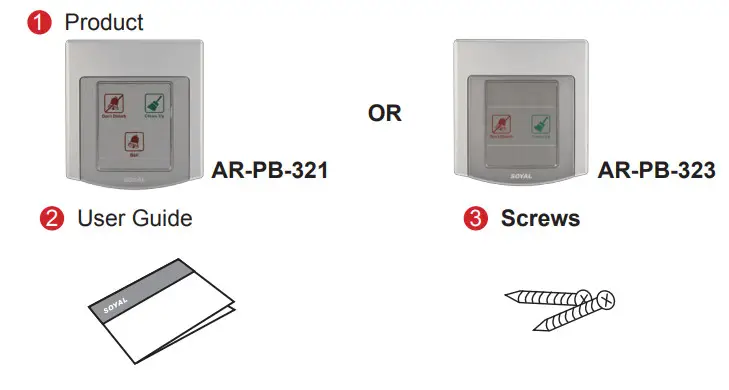
Contents
Installation

Turning back the housing, prying two tenons open as marked in circle. Please take off B. carefully to prevent cables broken by forced pull.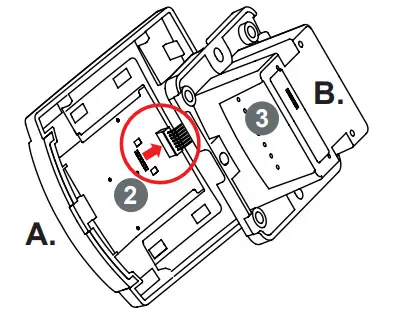
Loosening connector from socket of A. And then, screwing cables.
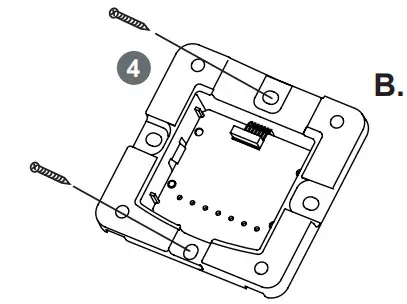
Using a screwdriver, screw the B. to the wall.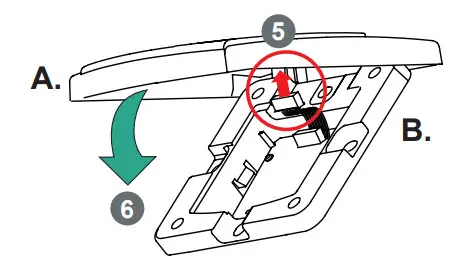
Connect cable back and push Part A. to Part B..
Specification
| AR-PB-321 | ||
| Input | V+ | 9-16VDC |
| V- | OV | |
| DO NOT Disturb LED | Low Active / 20mA Max | |
| Clean up LED | Low Active / 20mA Max | |
| Output | Bell Relay | Form A Clean Contact 30VDC/7A, 250VA/7A |
| AR-PB-323 | |||
| Input | V+ | 9-16VDC | |
| V- | OV | ||
| DO NOT Disturb LED | Touch Panel | ||
| Clean up LED | Touch Panel | ||
| Output | DO Not Disturb | LED Driver | Open Collect 12VDC/50mA Max |
| Relay | Form A Clean Contact 24VDC/2A, 125VAC/1A | ||
| Clean up | LED Driver | Open Collect 12VDC/50mA Max | |
| Relay | Form A Clean Contact 24VDC/2A, 125VAC/1A | ||
Connector Setting
| AR-PB-321 | AR-PB-323 | ||||
| GND | 1 | DC OV | GND | 1 | DC OV |
| VCC | 2 | DC 9-16V | VCC | 2 | DC 9-16V |
| COM | 3 | COM of Door Bell Relay | COM | 3 | COM of DO NOT Disturb and Clean up Relay |
| NC1 | 4 | N.C. of Door Bell Relay | NO2 | 4 | N.O. of Clean up Relay |
| NO1 | 5 | N.O. of Door Bell Relay | NO1 | 5 | N.O. of DO NOT Disturb Relay |
| LED1 | 6 | LED signal of Clean up | LED1 | 6 | LED signal of Clean up |
| LEDO | 7 | LED signal of DO NOT Disturb | LEDO | 7 | LED signal of DO NOT Disturb |
AR-PB-323 Jumper Setting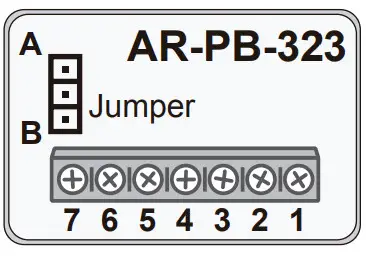
| DO NOT Disturb | |
| Remain Clean up fuction after “DO NOT Disturb”. | |
| Disable clean up fuction after pressed “DO NOT Disturb”. | |
Wiring Diagram
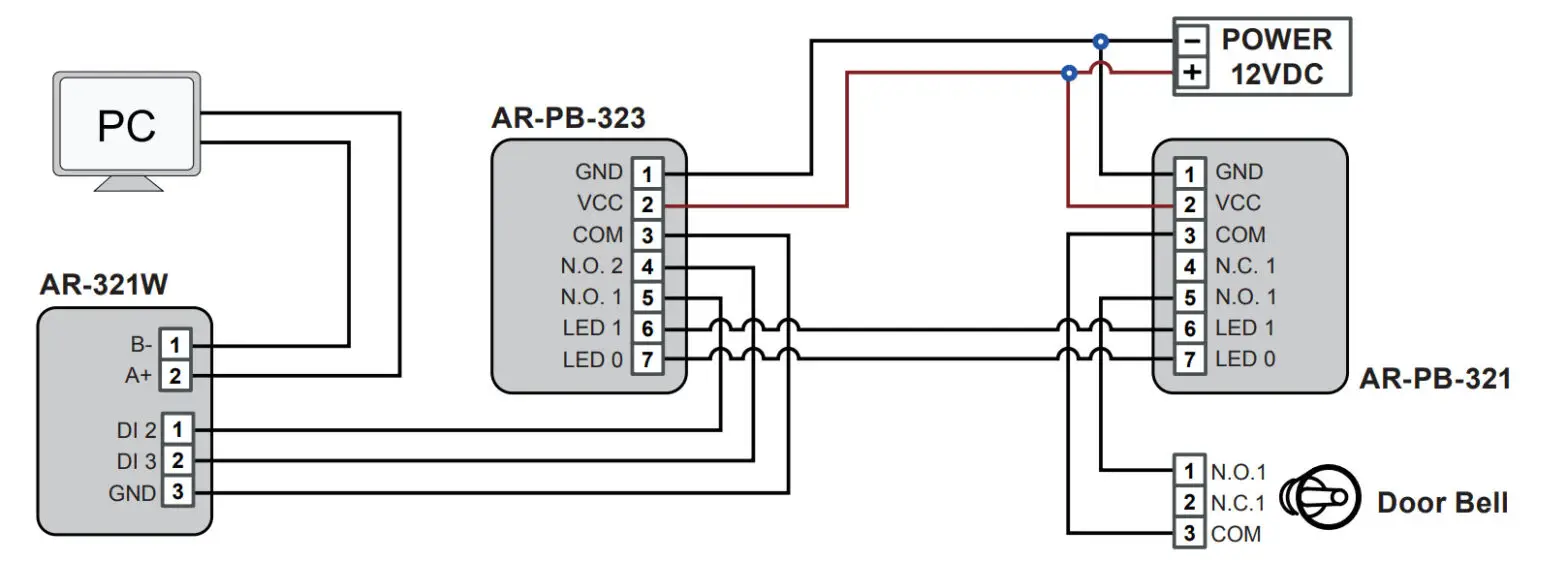
![]() The sensitivity of button will be affected by environment, and touch IC has function of auto-proofread sensitivity.
The sensitivity of button will be affected by environment, and touch IC has function of auto-proofread sensitivity.
If you have a bad contacting on button, please release the power and connect it again.


