 SOYAL AR-888-PBI Touchless Infrared Button
Installation

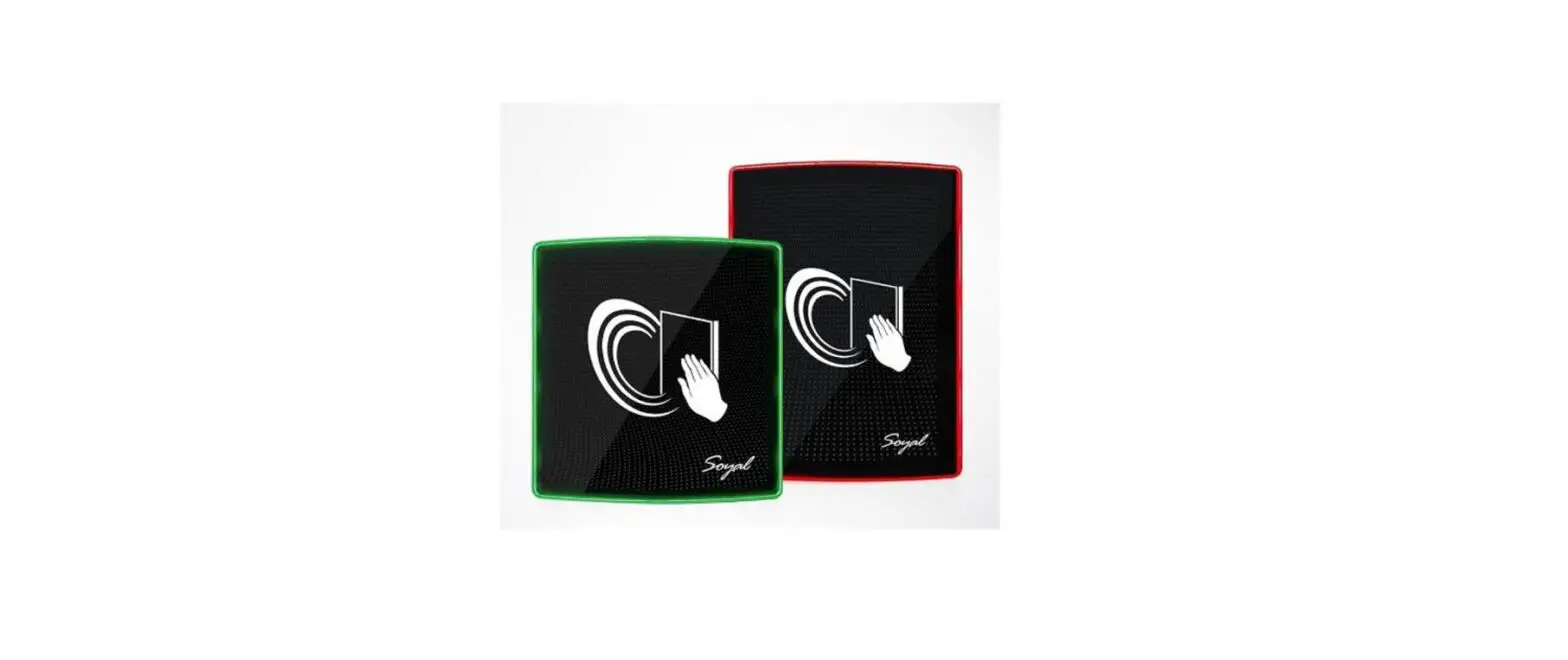
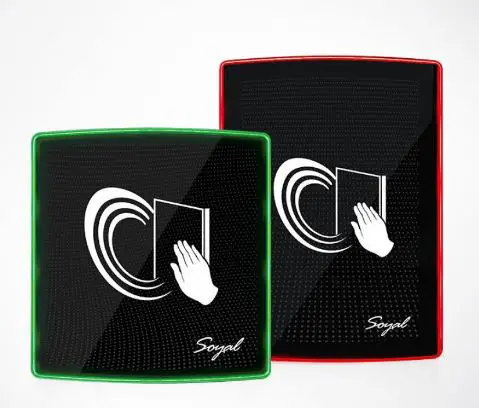
AR-888-PB: Touchless Infrared Button – LED Ring (Standard: Green/Red ; By Order: Blue/Red)
Connector Table / Dip_switch
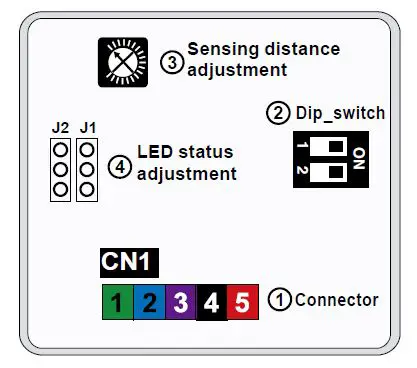
Connector
| Function | Cable | Color | Description | |
| Relay | COM | 1 | Green | DC24V / 1A |
| N.O. | 2 | Blue | DC24V / 1A | |
| N.C. | 3 | Purple | DC24V / 1A | |
| Power | 4 | Black | DC 0V | |
| 5 | Red | DC 9-24V | ||
Dip switch Output Mode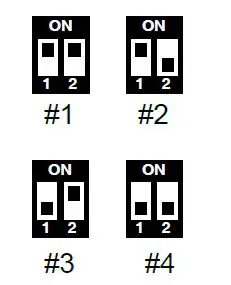
| SW1 | SW2 | OUTPUT | |
| ※1 | ON | ON | Pulse |
| 2 | ON | OFF | Delay 3 Sec. |
| 3 | OFF | ON | Latch |
| 4 | OFF | OFF | Delay 6 Sec. |
Sensing distance adjustment
LED status adjustment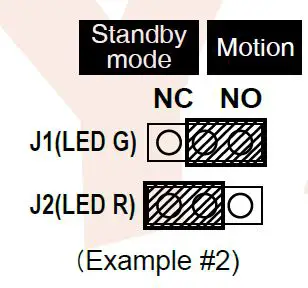
| Standby mode | Motion | |
| 1 | LED G(Green) | LED R(RED) |
| ※2 | LED R(RED) | LED G(Green) |
| 3 | LED GR (Green/RED) | — |
| 4 | — | LED GR (Green/RED)) |
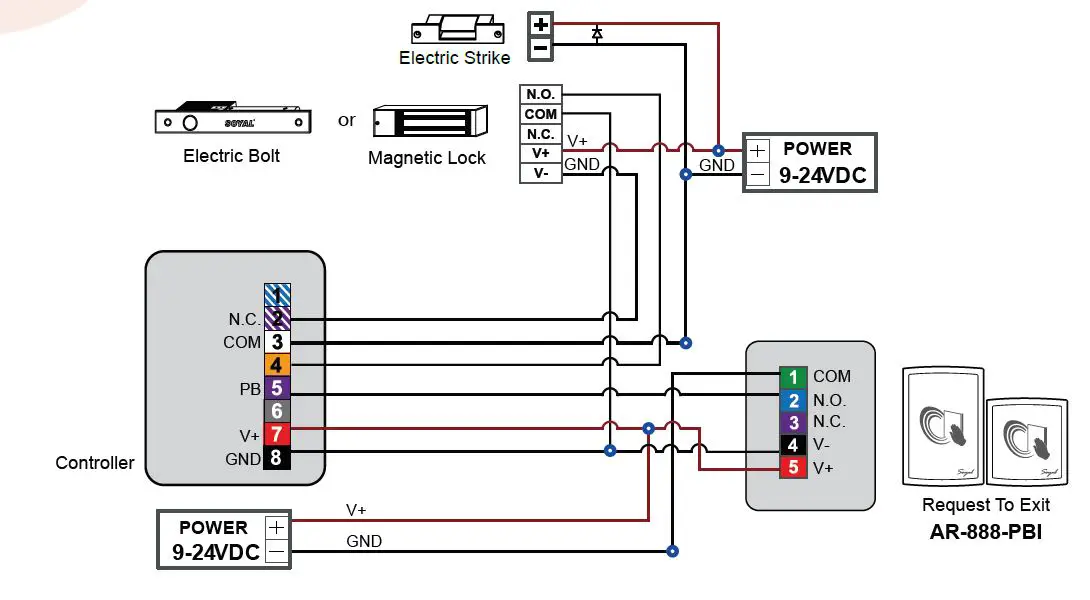
Wiring Diagrams
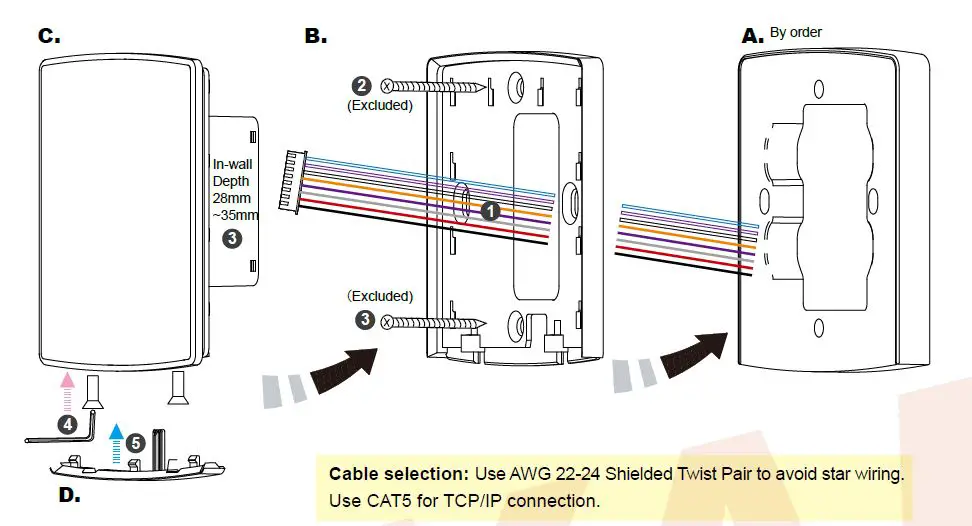
- Pull the cables from the square holes of the eva foam gasket and mounting plate.
- Use a screwdriver to screw the mounting plate B onto the wall with Flat Head Cap Philips Tapping Screws (Excluded, the Installer should prepare before installation.
- Connect the cables to the backside of body C and attach C to B at lower postion of B. Push C up to make the cogging hooked completely.
- Use the Allen key and screws to assemble the body C onto the mounting plate B. Attach the Back Cover D to C.


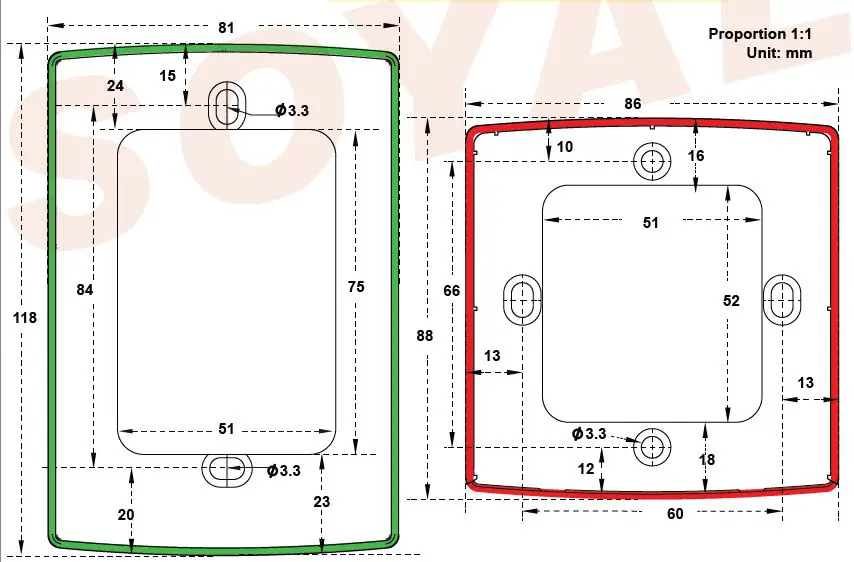
- US Mounting Hole: 73x48x40mm(HxWxD)
- Screw hole pitch : 84mm
- Suitable for 70X118 1-module flush-mounting box.
(Australian, Italy, USA(501E) Standard) - EU Mounting Hole: 57x53x40mm(HxWxD)
- Screw hole pitch: 60mm
- Suitable for 86X86 flush-mounting box.
(UK, Continental Europe, Germany Standard)