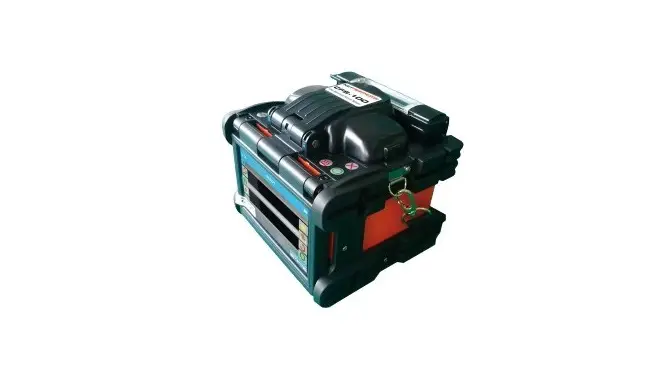
NETPEPPERS CFS-100 Optical Fusion Splicer User Guide
Instructions
Turn on the splicer
- Press and hold the power button
 for at least two seconds.
Creating a splice mode
- Press the Main Menu button
 .
. - Select the menu item splice mode
 .
. - Select an empty slot and press
 to edit.
 - Specify a fiber type by pressing
 Select AUTO if you want the device to set all parameters automatically.
 - Press to return to the main menu.
Creating a heating mode
- Select heating mode
 from the main menu.
 - Select one of the predefined modes which fits the length of your splice protection sleeve.
- Press to load the selected mode.
- Press
 to return to main menu, press again to switch to live view.
Preparing fibers
- Put on a shrink sleeve on to one of the fibers first.
- Prepare the fibers:
- Use the Miller three-hole stripper (hole 1) to remove the outer cable jacket (2-3mm) to a length of at least 6 cm.
- Cut the aramid fibers flush with the cable sheath.
- Remove the secondary coating (900 μm) 3.5 cm with the Miller three-hole stripper (hole 2).
- Use the Miller three-hole stripper (hole 3) to remove the primary coating (250 μm) on the exposed fiber piece.
- Clean the fiber with an alcohol-soaked, fusel-free cleaning cloth.
- Use the NetPeppers OFC-30 Cleaver to break the fiber so that at least 1.1 cm of fiber remains.
MAKE SURE THAT THE CLEAVED FIBER PIECE FALLS INTO THE RESIDUE CONTAINER OF THE OFC-30 CLEAVER TO AVOID INJURIES FROM EXPOSED FIBER PIECES!
- Repeat the above steps with fiber the second fiber.
Insert fibers
- Make sure that the fiber end faces do not come into contact with anything to avoid contamination!
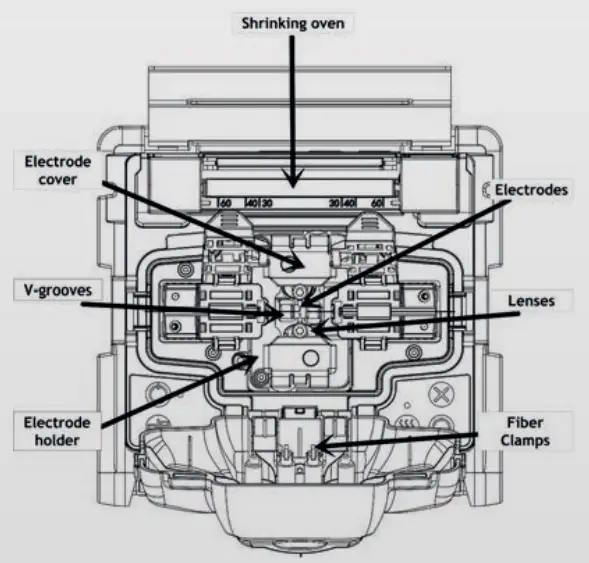
- Open the protective cover above the splicing area on the device.
- Open the two universal fiber holders to the left and right of the illuminated electrodes.
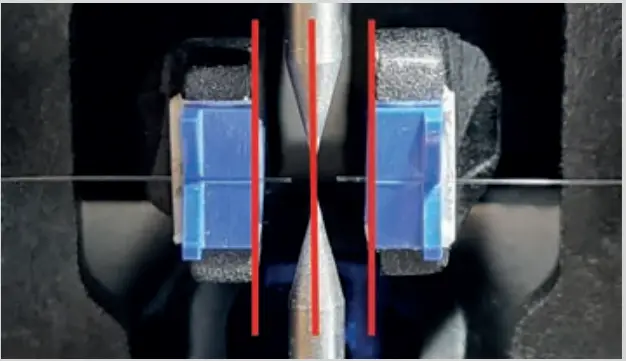
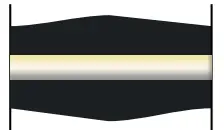
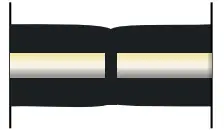
- Insert the two fiber ends into the V-groove of the fiber holders. Make sure that the fibers are located between the V-grooves and the electrode tips (see picture on the right).
Splice fibers
- Close the protective cover above the splicing area.
- Press
 to start the splicing process.
Shrink splice protection sleeve
- After splicing, open the protective cover and carefully open the fiber holders.
- Strip the shrink splice protection centrally over the exposed fiber.
- Insert the protective sleeve into the shrink furnace and press
 to start shrinking.
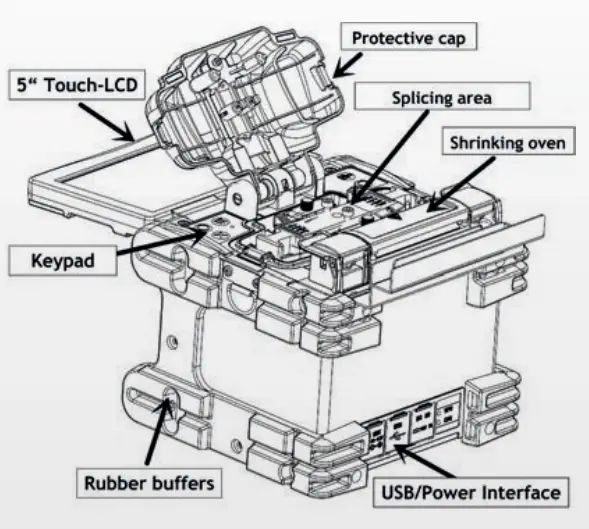
Overview
WARRANTY
NetPeppers GmbH guarantees for a period of 12 months from date of sale that the product, if used properly in accordance with the operating instructions is free of material and processing errors.
RECYCLING
![]() Do not place equipment and its accessories in the trash. Items must be properly disposed of in accordance with local regulations.
Do not place equipment and its accessories in the trash. Items must be properly disposed of in accordance with local regulations.
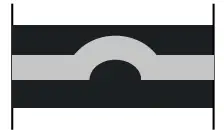
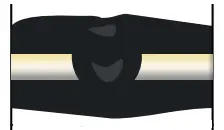
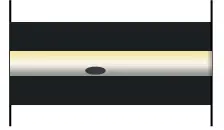
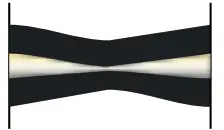
SPLICE ERRORS AND THEIR CAUSES
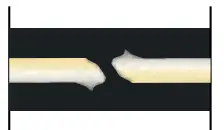
| Splice | Phenomenon | Cause | Solution |
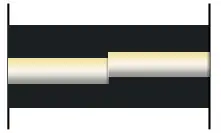 | Axial offset of the fiber cores | Dust or dirt on the V-groove or protective cover clamps | Cleaning of the V-groove and the protective cover clamps |
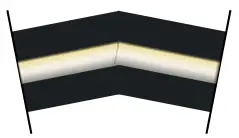 | Bending | Dust or dirt on the V-groove or protective cover clamps Irregular fracture pattern of the fiber end surfaces | Cleaning of the V-groove and the protective cover clamps Check the cleave quality of the fiber cleaver |
 | Core step displacement | Dust or dirt on the V-groove or protective cover clamps | Cleaning of the V-groove and the protective cover clamps |
 | Core Bending | Irregular fracture pattern of the fiber end surfaces Fiber types mismatch | Check the cleave quality of the fiber cleaver Increase the prefuse power and/or increase the prefuse time in selected splice mode |
 | Core fields do not match | Core fields do not match Fiber types mismatch Motor is not calibrated | Check that both fibers are of the same type Perform a motor calibration |
 | Dirt combustion | Irregular fracture pattern of the fiber end surfaces Insufficient fiber cleaning | Check the cleave quality of the fiber cleaver Clean the fiber thoroughly or increase the cleaning ARC ON time |
 | Blistering | Irregular fracture pattern of the fiber end surfaces Insufficient arc power or splicing time | Check the cleave quality of the fiber cleaver Increase the prefuse power and/or increase the prefuse time in selected splice mode |
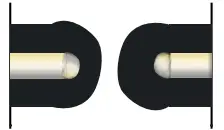 | Separate fibers | Fiber overlap is too low Excessive arc power | Increase fiber overlap in selected splice mode Reduce ARC power |
 | Thickened cladding | Fiber overlap is too large | Reduce fiber overlap and perform motor calibration |
 | Constricted cladding and core | Excessive arc power The fiber overlap is too low | Reduce the melting performance, the pre-discharge time Increase fiber overlap |
 | Vertical | ARC power too low | Adjust [Prefuse power], [Prefuse time], or [Fiber overlap |
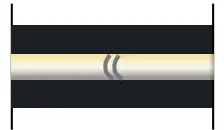 | Core artifacts | Insufficient ARC power or splicing time | Increase arc power or splicing time A slight shadow is normal, check splice loss |
SPLICE NOTIFICATIONS
| Message | Solution |
| Clean left fiber! Clear right fiber! Clear left&right fibers! | Clean the fiber(s) thoroughly and repeat the cleave process. Clean the V-grooves, the fiber holders of the protective cover and the lenses |
| Fiber push error! | Reinsert the fiber(s) and make sure that the fibers are in the V-grooves. Make sure that the fibers outside the device are not under tension |
| X Motor out of range! Y Motor out of range! | Reinsert the fiber(s) and make sure that the fibers are in the V-grooves. Perform a display calibration so that both fibers are fully displayed on the screen |
| Reset left fiber! Reset right fiber! Reset left&right fibers! | Reinsert the fiber(s) and make sure that the fibers are in the V-grooves. Check the axis offset limit in your splice mode. Make sure that the fibers outside the device are not under tension. |
| Left fiber X/Y set error! Right fiber X/Y set error! Fiber X/Y set error! | Clean the fiber(s) thoroughly and repeat the cleave process. Clean the V-slots, the fiber holders of the protective cover and the lenses. Perform a motor calibration. |
| ARC center offset too large! | Perform an ARC calibration. Check the electrodes and replace them if necessary. |
| LENS offset too large! | Perform a „Screen adjust“ process to make the fibers fully appear on the screen. |
| Please turn off the cover! | Close the protective cover. Check if something is preventing the protective cover from closing completely. If the message persists despite the cover being closed, please contact our support. |
| Please replace electrodes | Replace the electrodes and perform an “electrode stabilization” in the maintenance menu. |
| Left fiber shape error! Right fiber shape error! L-R fibers shape error! | Clean both fibers thoroughly and repeat the cleave process. Clean the V-grooves and fiber holders of the splice protective cover. Check the cleave quality and, if necessary, turn the blade of the cleaver one notch further. |
| Left fiber angle error! Right fiber angle error! L-R fibers angle error! | Check the cleave quality and, if necessary, turn the blade of the cleaver one notch further. Reduce the cleaning arc ON time. |
| Clear left v-groove Clear right v-groove | Clean the V-grooves. Clean the fiber(s) thoroughly and repeat the cleave process. |
CUSTOMER SERVICE
NetPeppers GmbH
Perchastr. 8e
82319 Starnberg
Phone +49-89-219097300
[email protected]