![]()
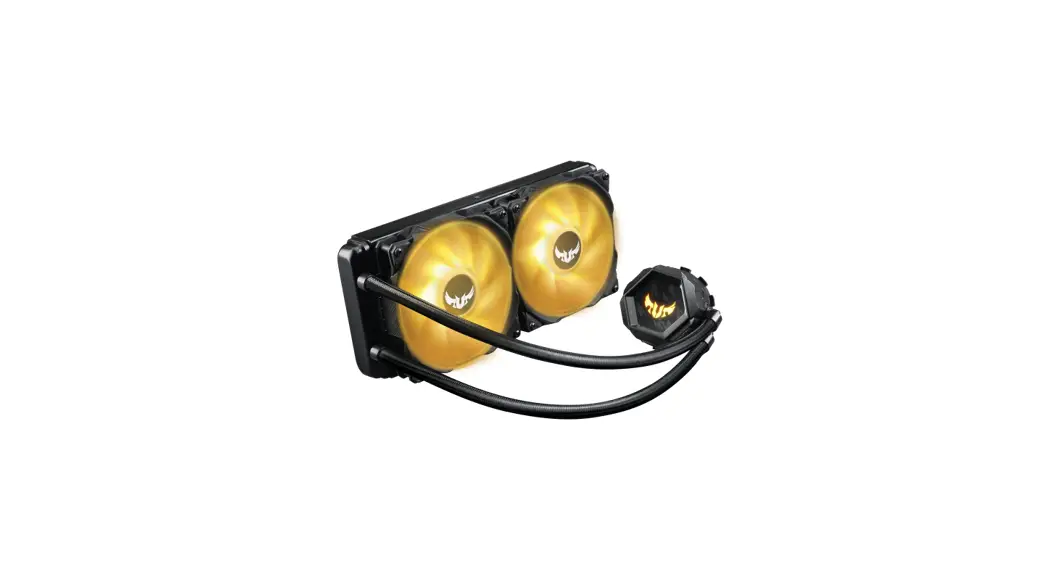
TUF Gaming LC RGB Series Liquid CPU Cooler
User Guide
TUF Gaming LC RGB Series Liquid CPU Cooler
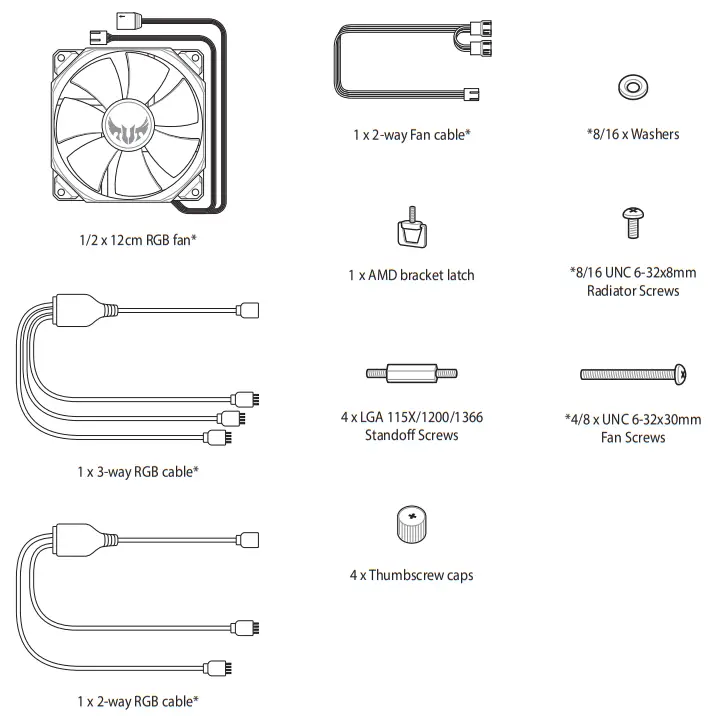
Package contents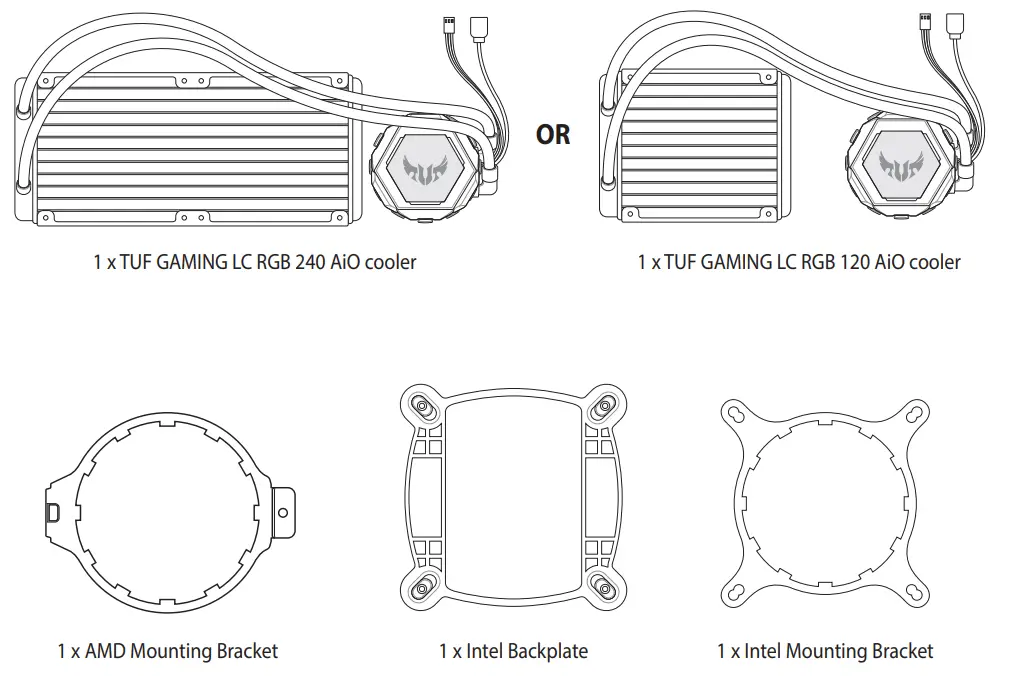
 The Intel Mounting bracket comes pre-installed on the AIO Cooler.
- *The amount of these packaged items may vary between models.
Installing the AIO cooler
![]() The illustrations in this section are for reference only, but the installation steps remain the same.
The illustrations in this section are for reference only, but the installation steps remain the same.
Prepare the motherboard and AIO Cooler. The steps may vary between Intel and AMD motherboards.
For Intel motherboards
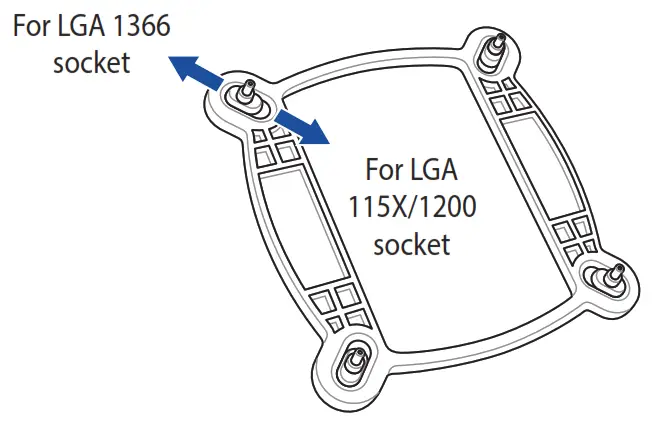
A. Slide the Intel backplate pins according to the CPU socket of your motherboard.
 B. Attach the Intel backplate to the bottom of the motherboard.
 C. Install the standoff screws onto your motherboard. Ensure to use the correct standoff screws for your CPU socket.
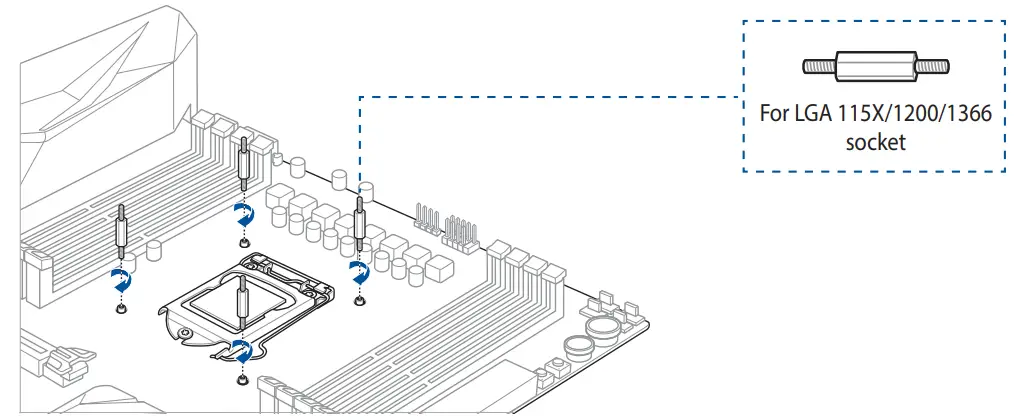
For AMD motherboards
A. Push the clips on the pre-installed plastic ring securing the Intel Mounting Bracket inwards and remove the plastic ring.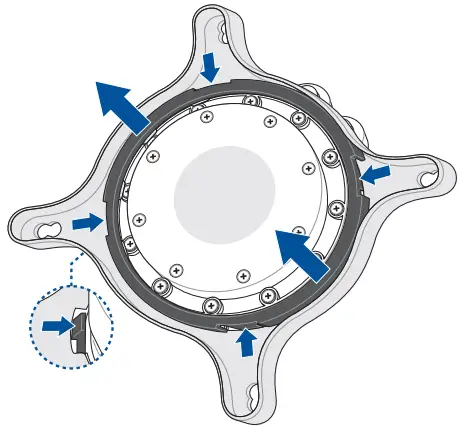 B. Remove the pre-installed Intel Mounting Bracket by lifting the bracket upwards and then rotating it slightly.
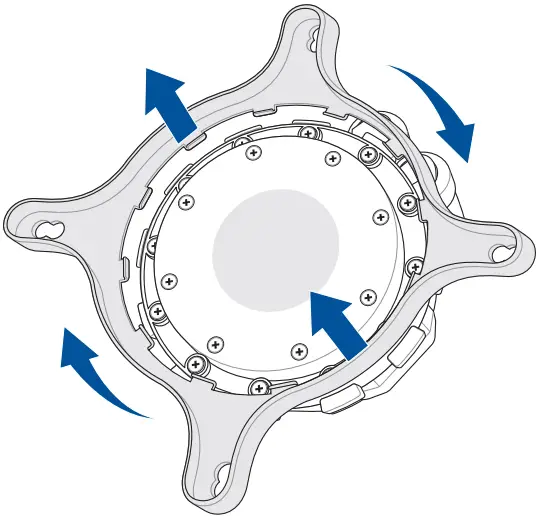 C. Attach the AMD Mounting Bracket onto the AIO cooler by rotating the bracket slightly.
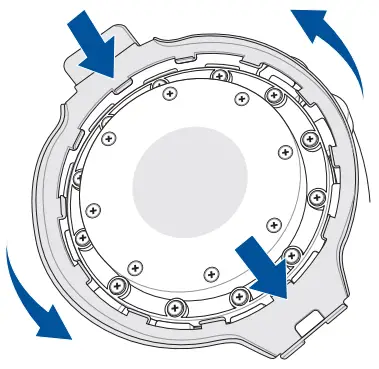 D. Install the plastic ring and ensure the clips are latched on properly to secure the AMD Mounting Bracket.
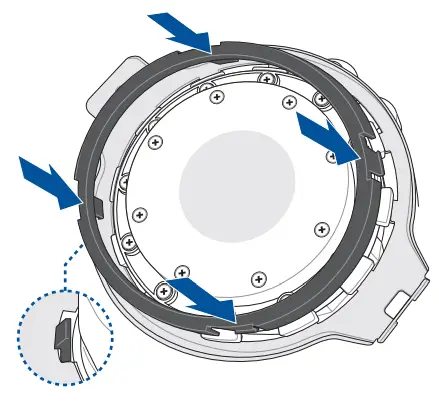 Install the fans onto the radiators, then install the fan and radiator combo to your PC chassis.
![]() Ensure to use the washers when installing the fan and radiator combo to your PC chassis
Ensure to use the washers when installing the fan and radiator combo to your PC chassis![]() Utilize as anilhas quando instalar o ventilador e o radiador no chassis do PC.
Utilize as anilhas quando instalar o ventilador e o radiador no chassis do PC.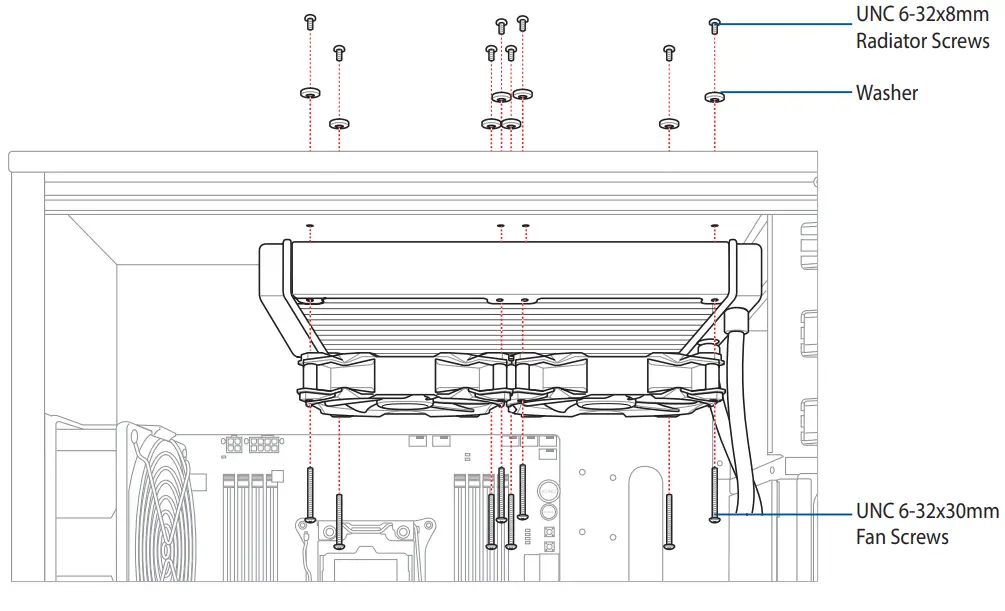 Install the AIO cooler on the motherboard. The steps may vary between Intel and AMD motherboards.
For Intel motherboards
Align the AIO cooler with the standoff screws installed previously, then secure it with four (4) thumbscrew caps.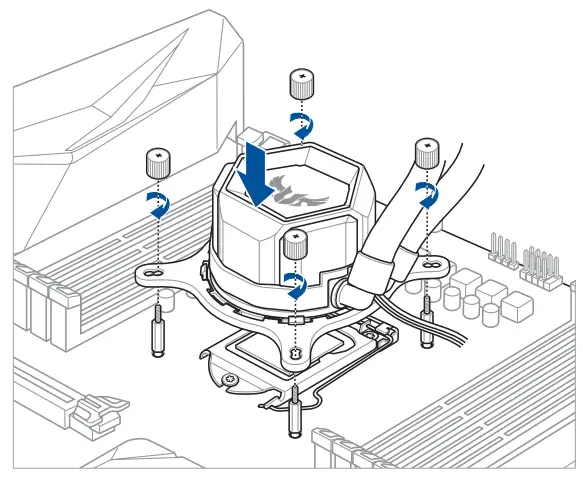 For AMD motherboards
A. Insert the AMD bracket latch into the screw hole from the bottom of the AMD mounting bracket, then screw on a thumbscrew so that the AMD bracket latch hangs loosely from the AMD mounting bracket.
B. Latch the AMD bracket hook onto one side of the heatsink mount.
C. Latch the AMD bracket latch onto the other heatsink mount, then tighten the thumbscrew and ensure the AIO cooler is secured properly.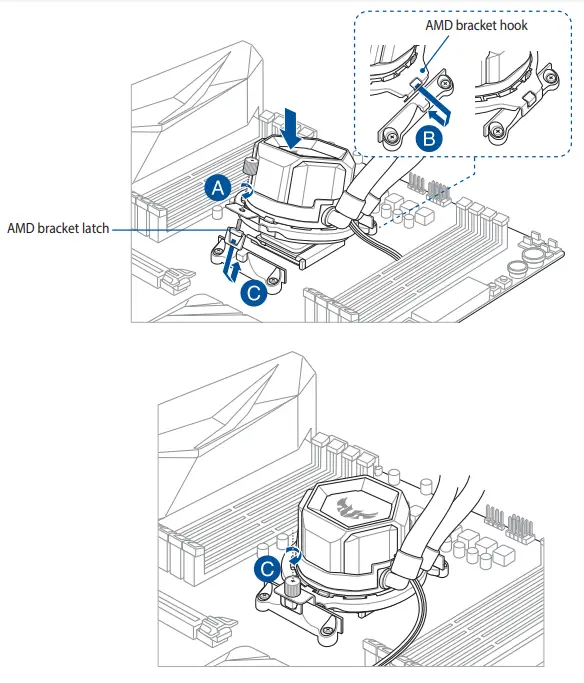
4. Connect the bundled fan cable to the fan connectors on your installed RGB fans and your motherboard, then connect the AIO Cooler fan connector to the AIO_PUMP, CPU_FAN, or another onboard fan header on your motherboard.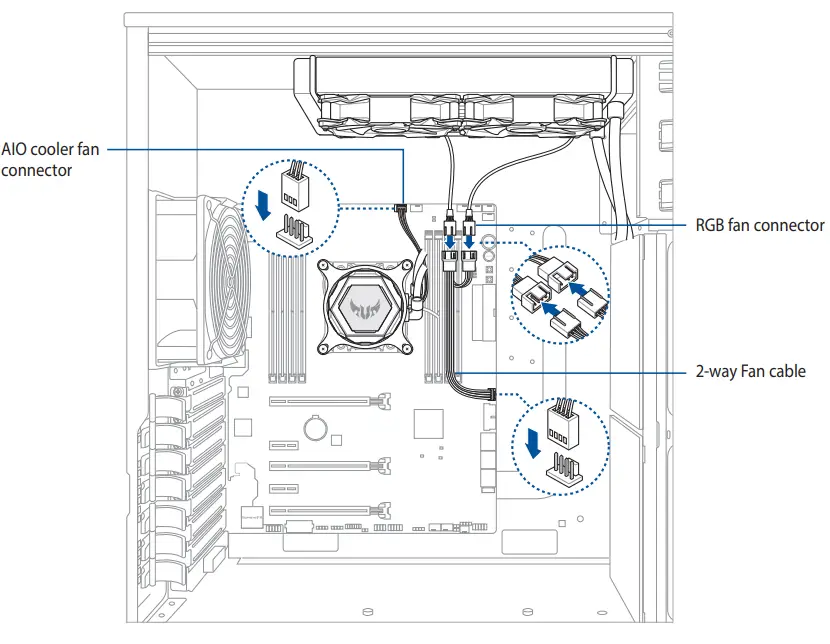 Connect the bundled RGB cable to the installed RGB fans, AIO cooler, and RGB connector on your motherboard.
![]()


 Owner's Manual")