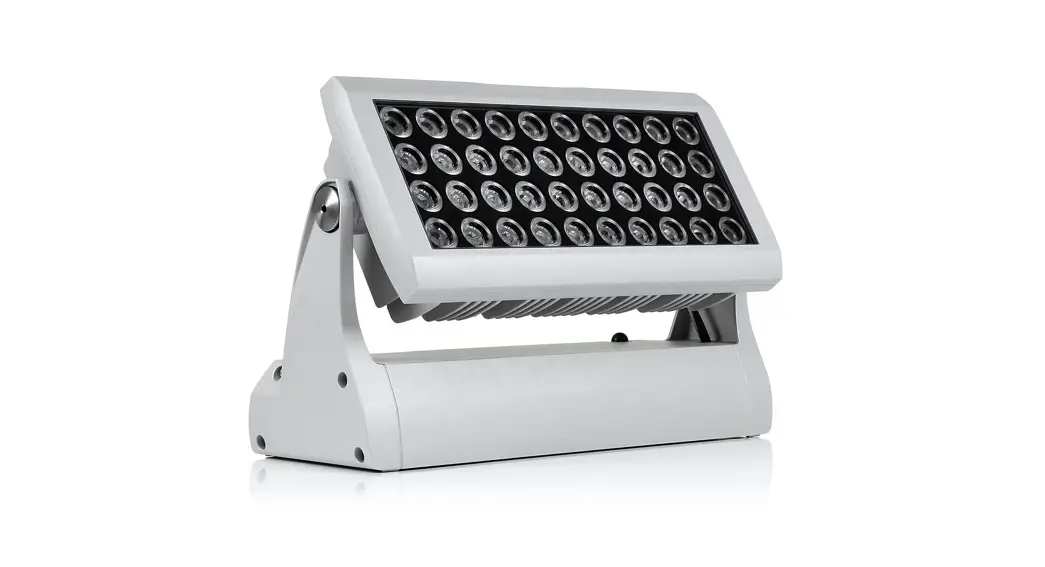
![]() 160 LED Lighting
160 LED Lighting
Instruction Manual
DIVINE 160 LED Lighting
![]() The unit must be installed by a qualified electrician in accordance with all national and local electrical and construction codes and regulations. This device falls under class one and must be grounded!
The unit must be installed by a qualified electrician in accordance with all national and local electrical and construction codes and regulations. This device falls under class one and must be grounded!
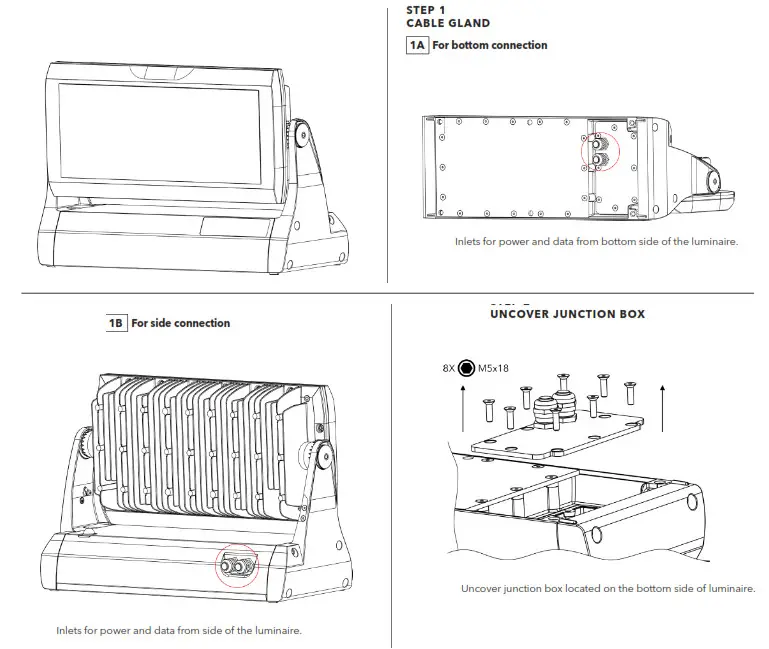
INSTALLATION INSTRUCTIONS
STEP 3
CONNECTION
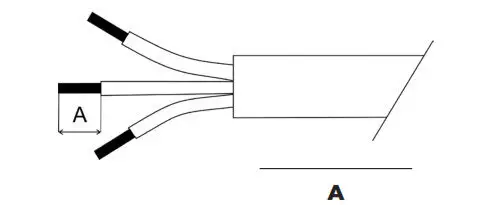
- Strip these lenghts for cable connections.

Power Connection 9mm Data Connection 7mm - Connection – colour coding
To connect the Divine 160 to mains and a DMX controller, use a 5-cored cable Flamar Li9YC11Y. The 3 colors serve for the power supply and 2 shielded cores are ntended for DMX connection.
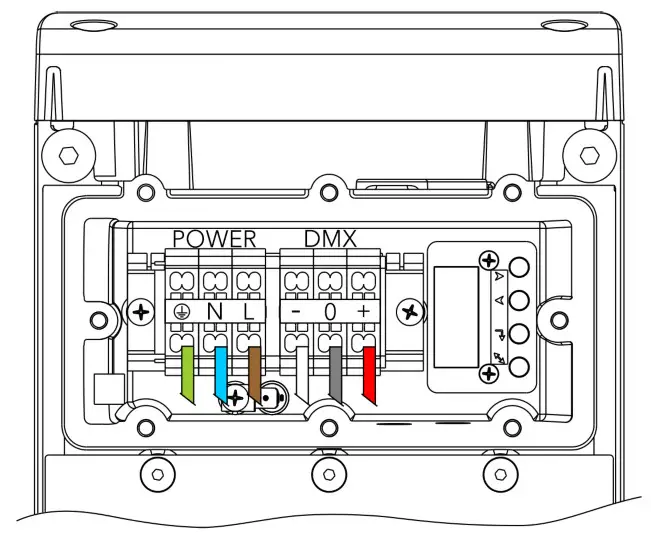
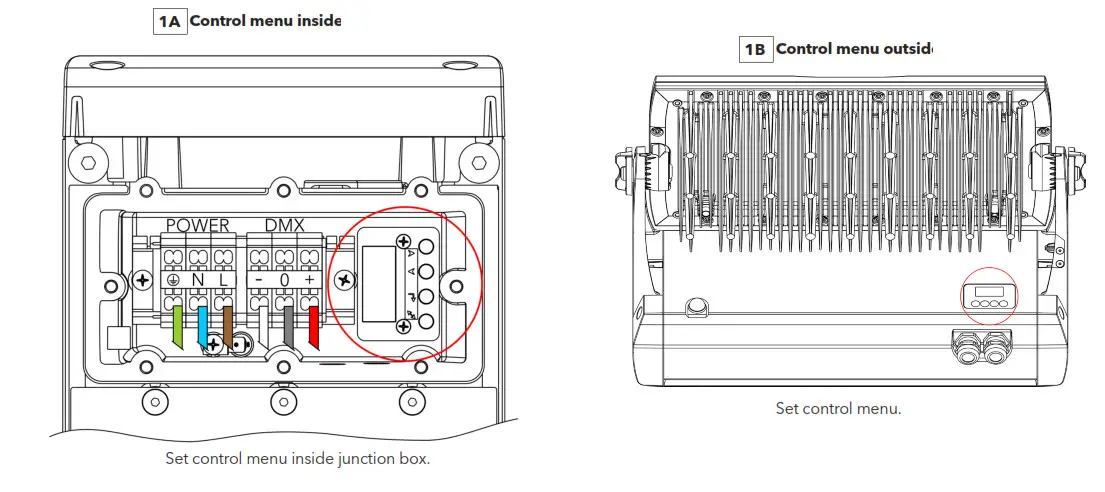
Power and Data ConnectionWIRE POWER CONNECTION WIRE DATA CONNECTION Brown L White Data – (D-) Blue N Red Data + (D+) Yellow/Green Ground Shielding Data Ground (0V) 3AWiring connection (control menu inside)
 3B Wiring connection (control menu outside)
 3B Wiring connection (control menu outside)
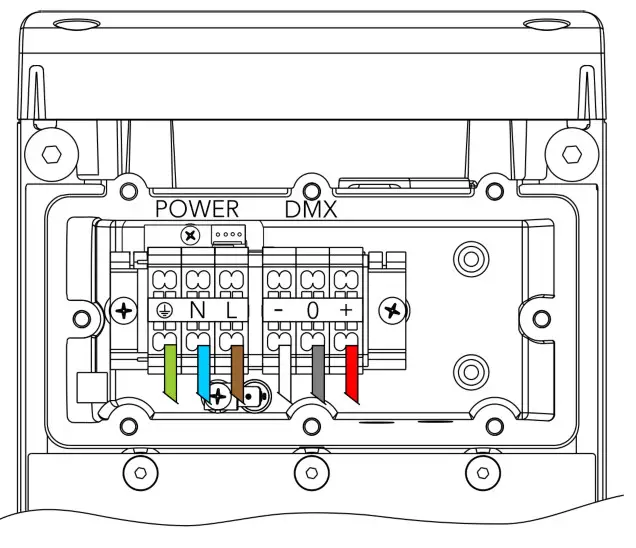
STEP 4 CONTROL MENU
STEP 5
CLOSE JUNCTION BOX
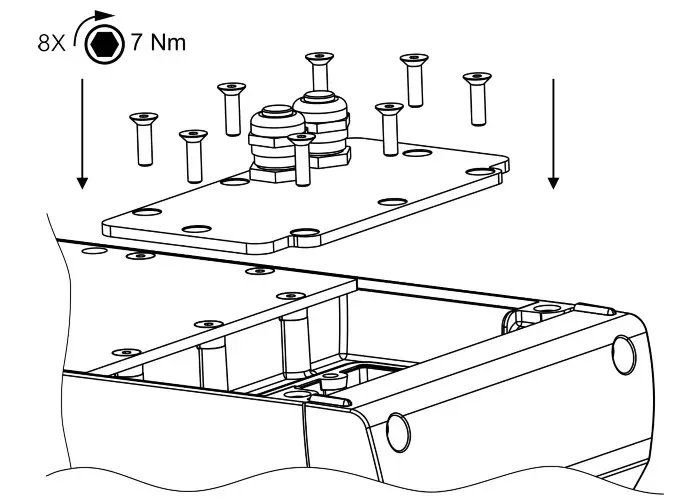
Before applying the torque, make sure the thread is clean and functional.
STEP 6
CABLE GLAND INSTALLATION
Use wrench size 24 for cable gland M20x1.5
Use wrench size 16 for cable gland M12x1.5
Install Cable glands individually!
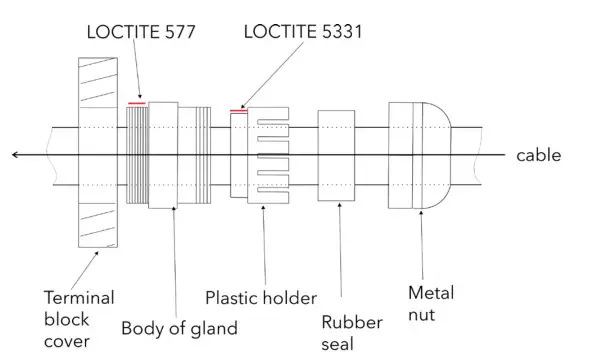
We recommend to apply an adequate layer of the paste
LOCTITE 5331 on the plastic holder of the cable gland before inserting in into the body of the gland and an adequate layer of the paste LOCTITE 577 on the thread ofthe land body. Failure to properly install cable glands will result in failure of the water tight seal!
STEP 7.A
INSTALLATION WITH SURFACE MOUNT ADAPTOR
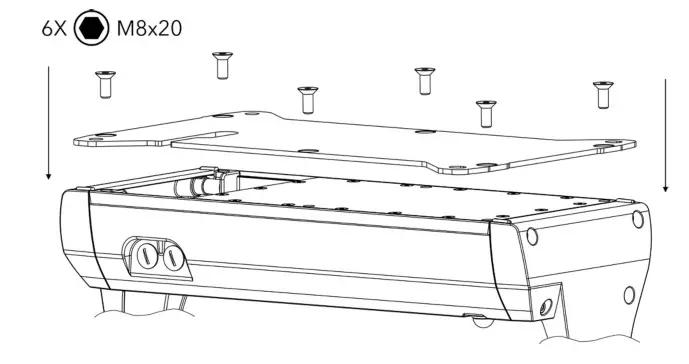
Mount the adaptor using 6 mounting screws.![]() Use fasteners that for use your mouting surface
Use fasteners that for use your mouting surface
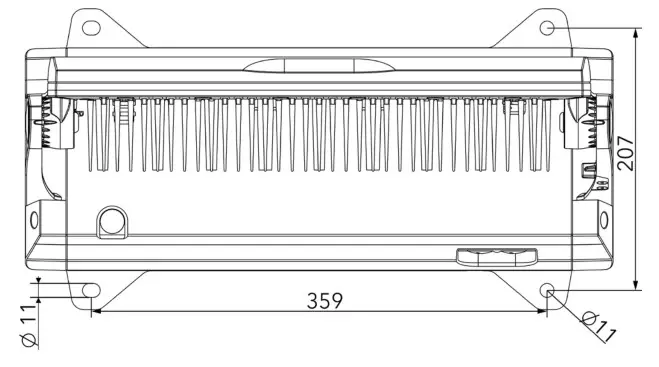
Drill holes to the surface according to holes spacing. Mount Divine via mounting holes on the surface.
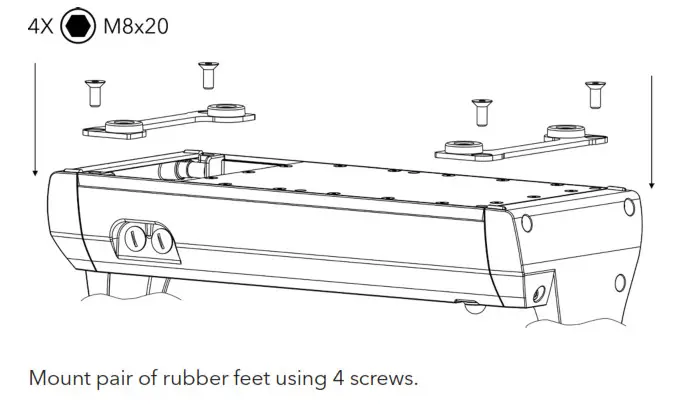
STEP 7.B
INSTALLATION WITH SET OF RUBBER FEET
STEP 7.C
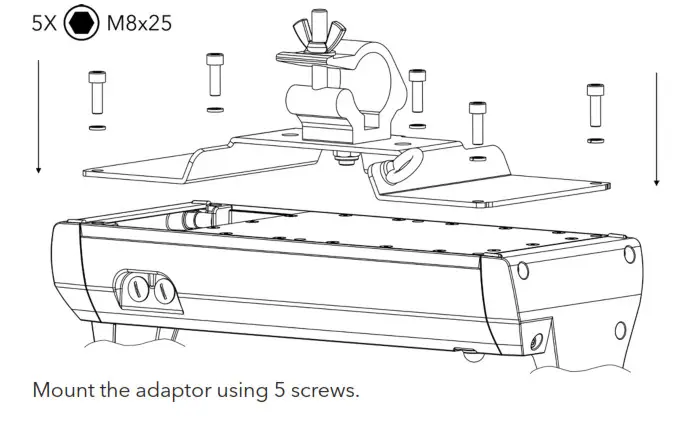
INSTALLATION WITH C-CLAMP ADAPTOR
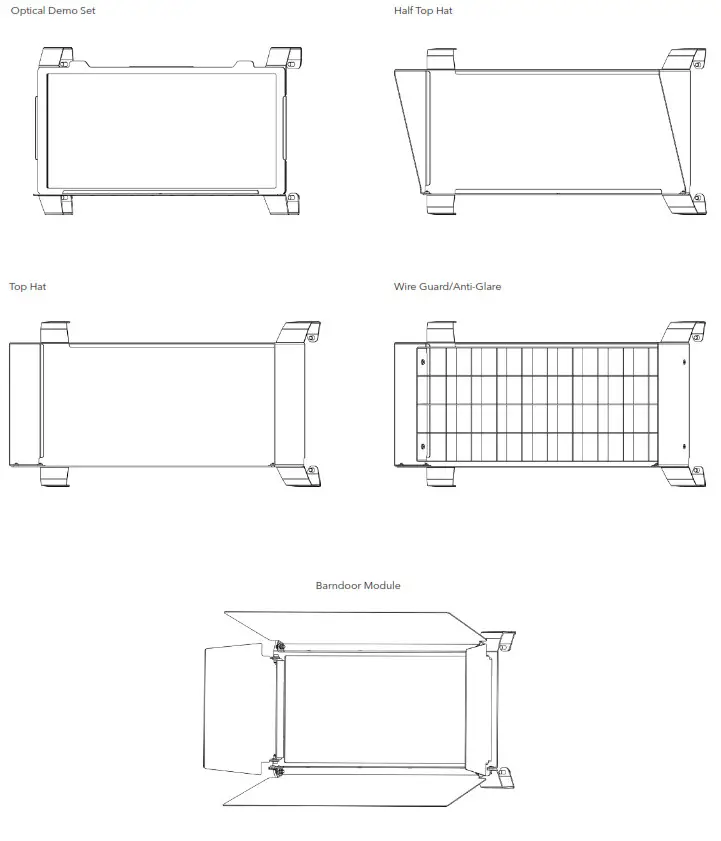
TYPE OF ACCESSORIES
STEP 8
INSTALLATION OF ACCESSORIES
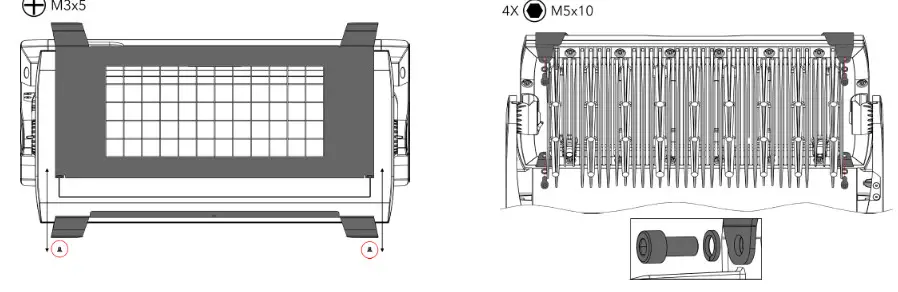 | |
| Unscrew two screws and split accessory to two parts. Place each part nto the luminaire´s head and screw them together. | Secure accessory by 4 screws with spring washer at the back side of luminaire´s head. |
STEP 9
NASTAVENÍ POZICE HLAVY
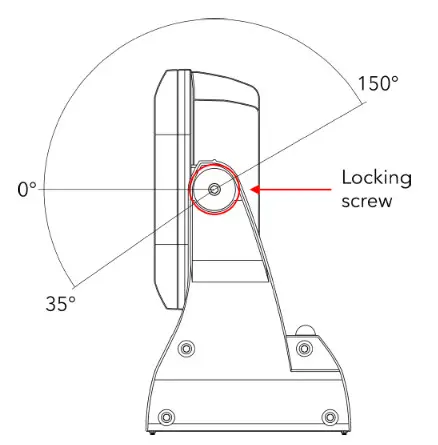
Release locking screw on each sides. Angle fixture to desired position and tighten locking screw on each sides.
![]() ROBE lighting s. r. o.
ROBE lighting s. r. o.
Palackeho 416
757 01 Valasske Mezirici
Czech Republic
Tel.: +420 571 751 500
E-mail: [email protected]
www.anolis.eu
www.anolislighting.com


