3/Y 5.16 Inch Mini Dash Screen

Product Information
The Model 3/Y 5.16-inch Mini Dash Screen is an add-on accessory for Tesla Model 3 and Model Y cars. It provides an additional display screen for the driver to view important information while driving. The product comes in two versions: Intel and AMD. The installation instructions may differ slightly from the actual operation, and customers are advised to follow the actual situation or contact the manufacturer if there are any differences. Customers are also advised not to disassemble any part by themselves, as any improper operation will not be covered by the manufacturer’s warranty.
Product Usage Instructions
Intel Version
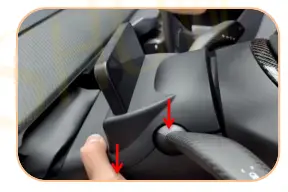
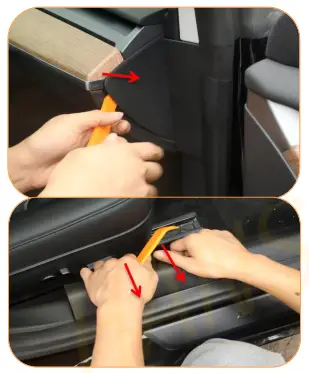
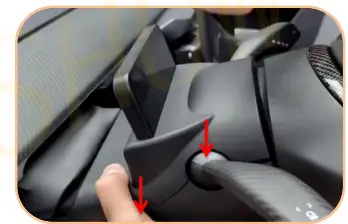
- Slide the steering wheel to the bottom and then turn left to move the steering wheel to the outermost position.

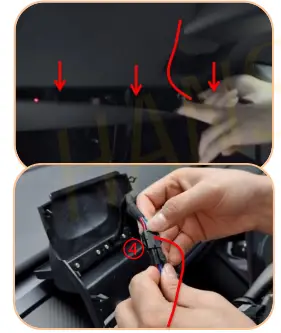
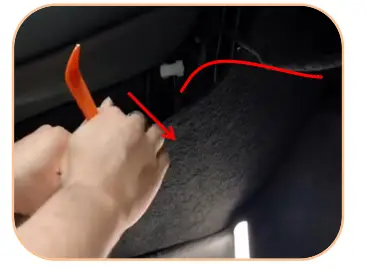
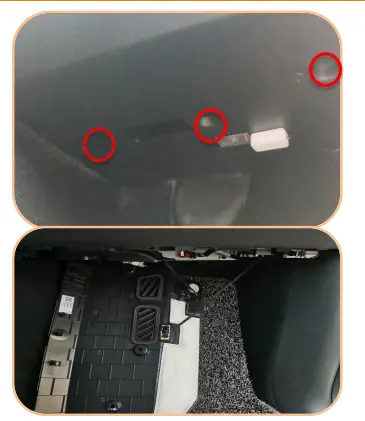
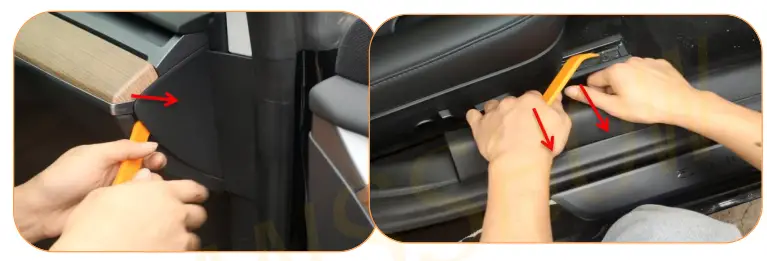
- Pry up the cover with a pry board.

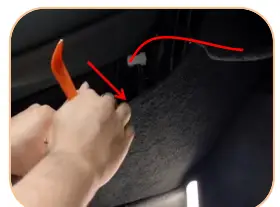
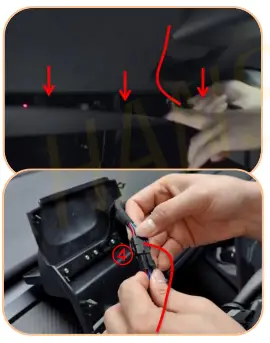
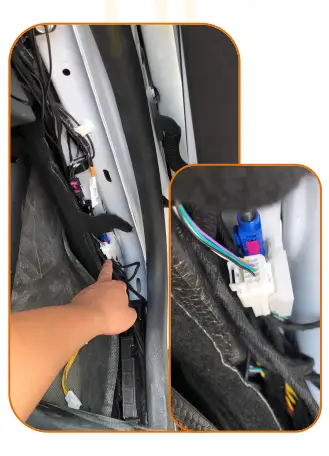
- Pry the harness plug from the upper cover plate of the driver’s footwell and pull the harness to the upper part according to the instructions in the picture and plug it into the screen
 harness wiring diagram.
- Install the cover.

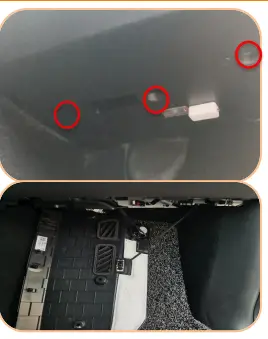
- Pull the harness to the side of passenger’s footwell.

- Remove the upper cover of the passenger’s footwell.

- Remove the side cover of the passenger’s footwell.

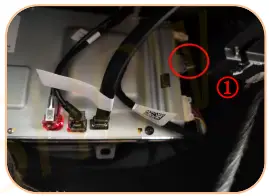
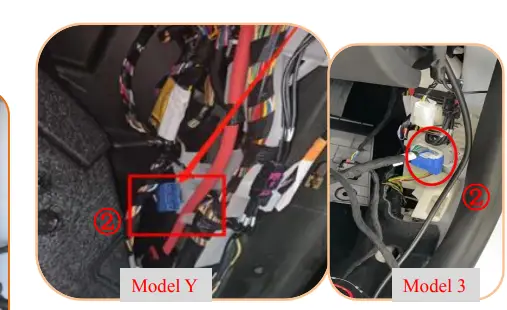
- Find the second gray plug of the host above the passenger’s footwell and connect it to plug1.


 harness wiring diagram.
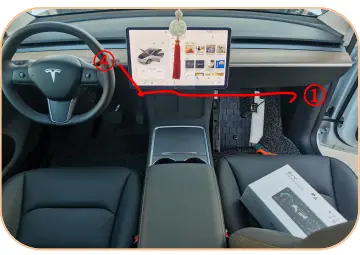
AMD Version
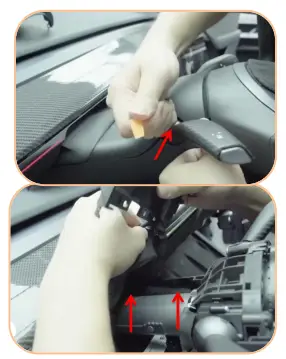
- Slide the steering wheel to the bottom and then turn left to move the steering wheel to the outermost position.

- Pry up the cover with a pry board.

- Pry the harness plug from the upper cover plate of the driver’s footwell and pull the harness to the upper part according to the instructions in the picture and plug it into the screen
 harness wiring diagram.
- Install the cover.

- Pull the harness to the side of passenger’s footwell.

- Remove the upper cover of the passenger’s footwell.

- Remove the side cover of the passenger’s footwell.

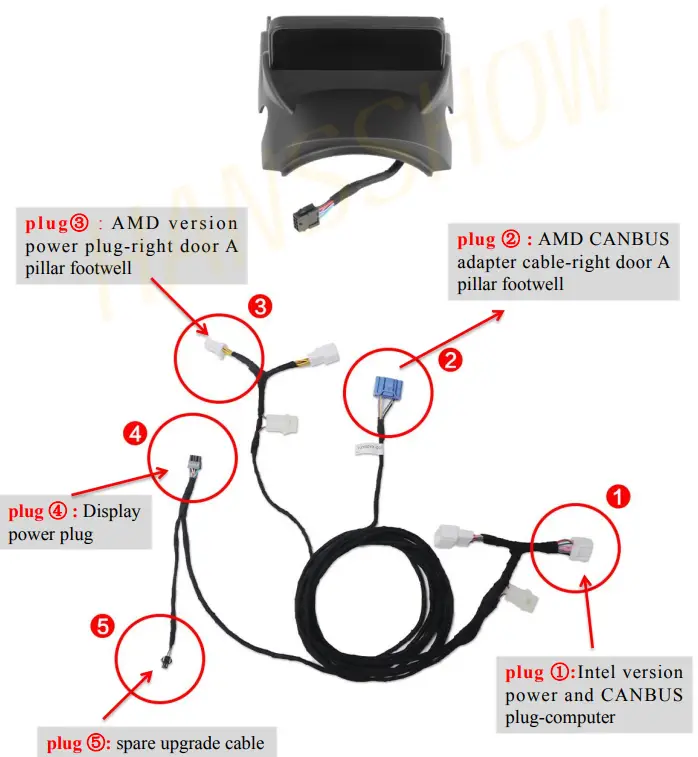
- Connect the plug ③ to the white plug under the A pillar of the front right seat

- Connect the plug ② to the blue plug under the A pillar of the front right seat

 harness wiring diagram.
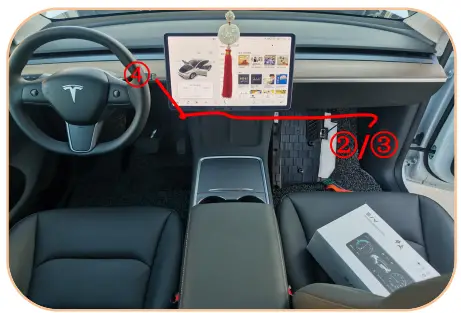
Note:
- The installation instructions may differ slightly from the actual operation. If there are any differences, please follow the actual situation or contact HANSSHOW for assistance. HANSSHOW can be contacted through phone/WhatsApp at +86 130 4421 9654 or via email at [email protected]. Their working hours are from 9:00AM to 18:30PM (UTC+8) every day, and customers can leave a message at other times.
- Warning: Please do not disassemble any part by yourself,any improper operation will not be covered by our warranty.
 Aftersale Contact:
phone/whatsapp : +86 130 4421 9654 Email: [email protected]
Working Hours (UTC+8): 9:00AM – 18:30PM (Monday to Sunday) Please leave a message at other times