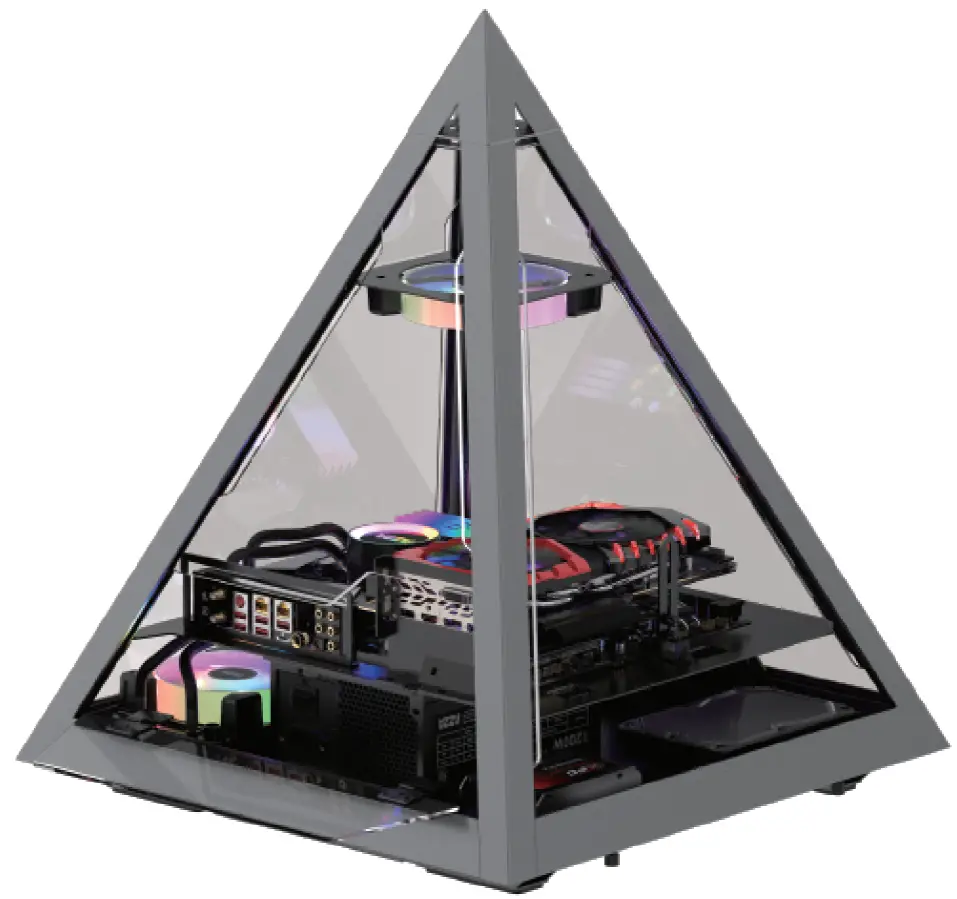
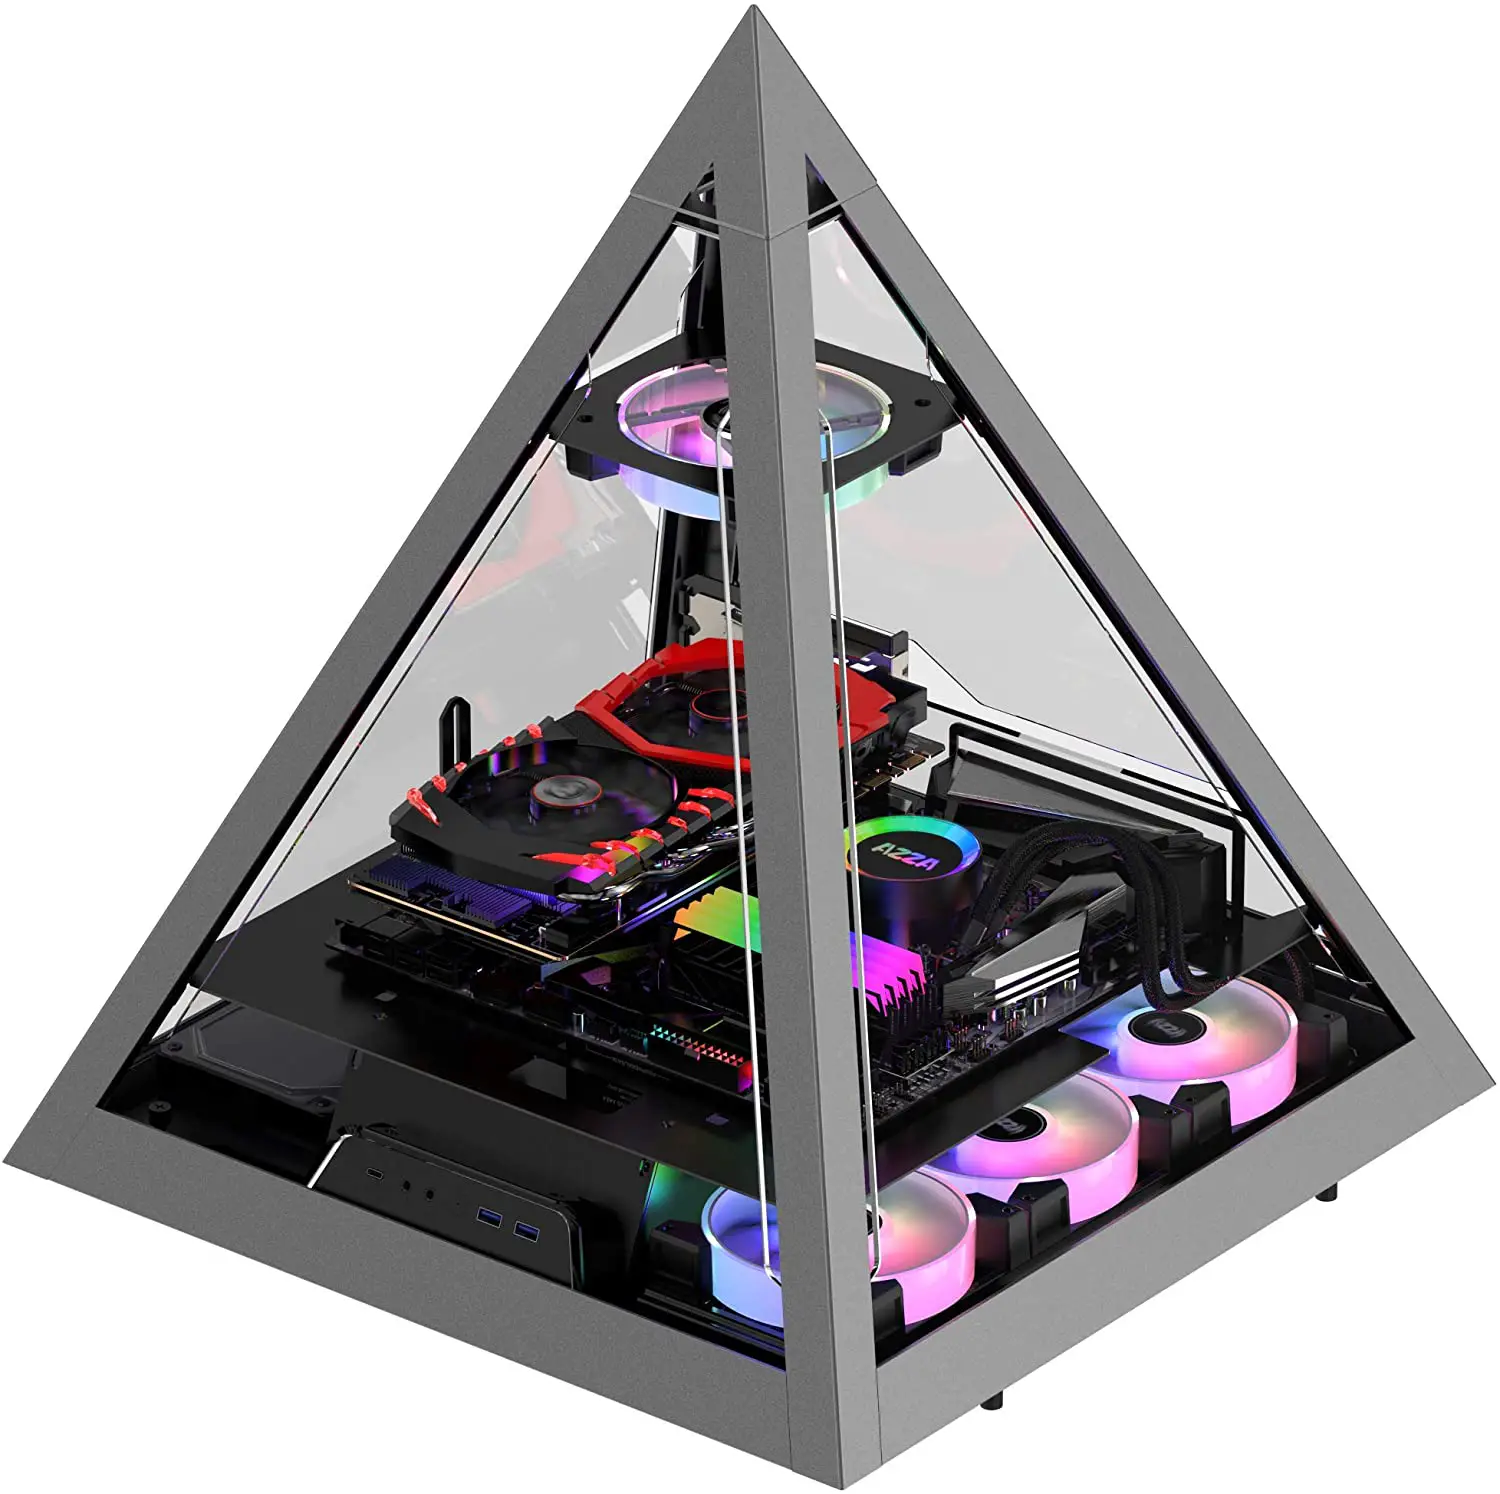
AZZA PYRAMID 804 CSAZ-804
Installation Instructions
| Model | |
| Model Name: | PYRAMID 804 |
| Name: | CSAZ-804 |
| Specifications | |
| Type: | ATX Tower |
| Color: | 1.5~2.0mm SPCC+ 2.5mm Aluminum |
| Side Panel Window: | 4 sides of top panel are tempered glass |
| Max. CPU Cooler Height: | UP to 80mm |
| Max. GPU Dimensions: | L=300 mm / W=132 mm / H=47 mm (Horizontal) |
| Power Supply: | Not included |
| Motherboard Compatibility: | <305 x280mm SSI-CEB 、ATX |
| Expansion | |
| External 5.25″ Drive Bays: | 0 |
| Internal 2.5″ Drive Bays: | Up to 2 |
| Internal 3.5″ Drive Bays: | Up to 1 (Convertible with 2.5″SSDx1 ) |
| Expansion Slots: | 2 |
| Front Ports: | 2xUSB 3.0、 HD Audio、Type C、Metal Power Button |
| Physical Specifications | |
| Metal Chassis Dimensions (HxWxD) | 558x490x490/22×19.3×19.3 inch |
| Physical Dimensions (HxWxD) | 585x490x490mm/23×19.3×19.3 inch |
| Weight: | 14kg /30.9lbs |
| Features | |
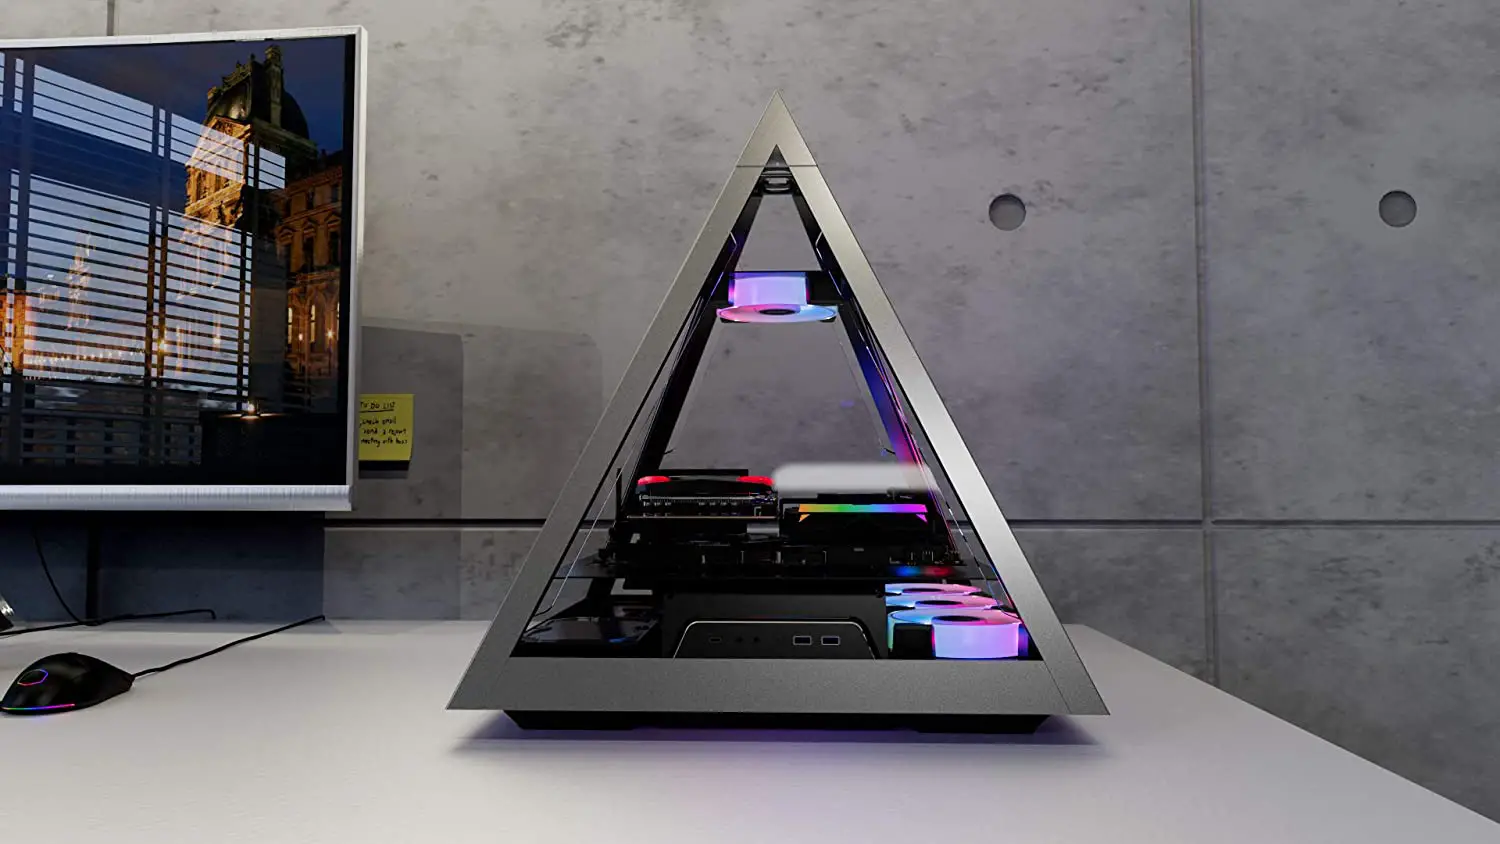
| Tempered Glass Side Window: | High-quality tempered glass side window allows for clear visuals to inner components |
| Available Fan Ports: | 1x120mm Fan port in the Top(1x 120mm Hurricane II Digital RGB Fan included ) 3x120mm Fan port on the Bottom |
| Water Cooling: | Supports radiators up to 360mm on the bottom |
| Isolated Chamber: | ATX Power supply inside its own isolated chamber, preventing its heat from affecting other components |
| Easy Installation Cooler: | A pre-cut hole for easy installation of CPU Cooler, eliminating the need to remove the motherboard |
| Accessories | 15cm PCI-E 3.0 extension cable for VGA card(Support EATX 、ATX MB) Adjustable video card holder Stand & Tempered glass (optional) |
Chassis parts
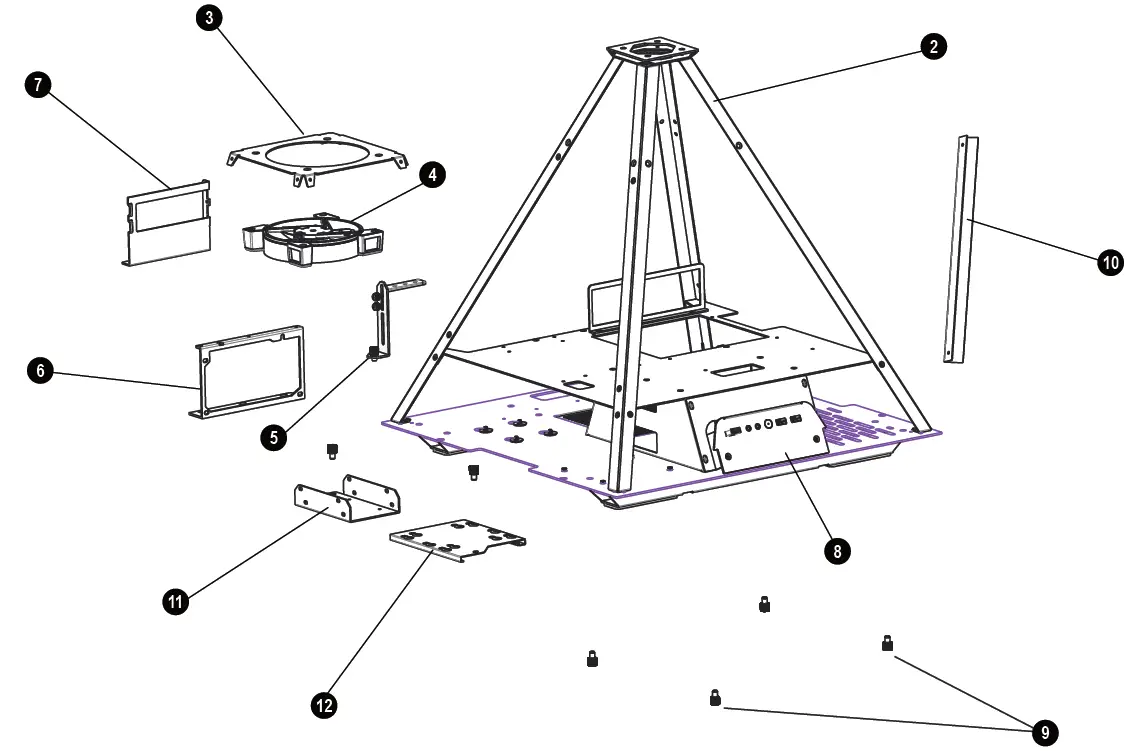
| 1 | TOP tempered glass panel cover | 7 | Horizontal PCIe slot |
| 2 | Pyramid structure | 8 | I/O Ports: USB 3.0 x 2 , Type C, HD Audio |
| 3 | Fan bracket | 9 | Spring bolt screw of top panel cover |
| 4 | 12cm ARGB Fan | 10 | Fan Cable management Cover |
| 5 | Adiustable Video Card Holder | 11 | 2.5″SSD brackets X1 |
| 6 | Power supply rack | 12 | 3.5″HDD /2.5″SSD Spring Bolt Tray X1 |
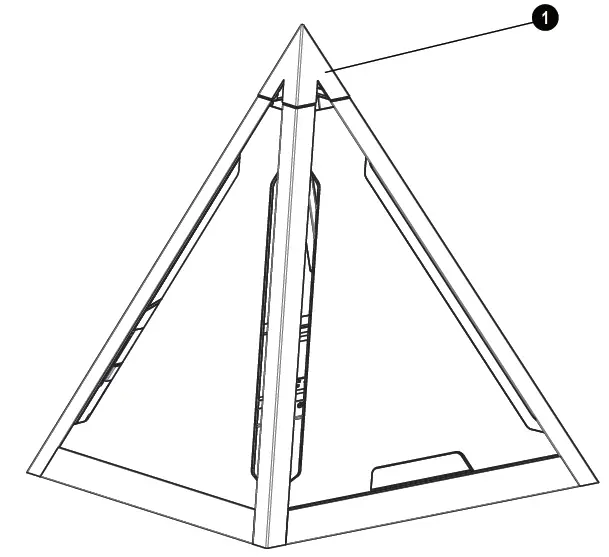
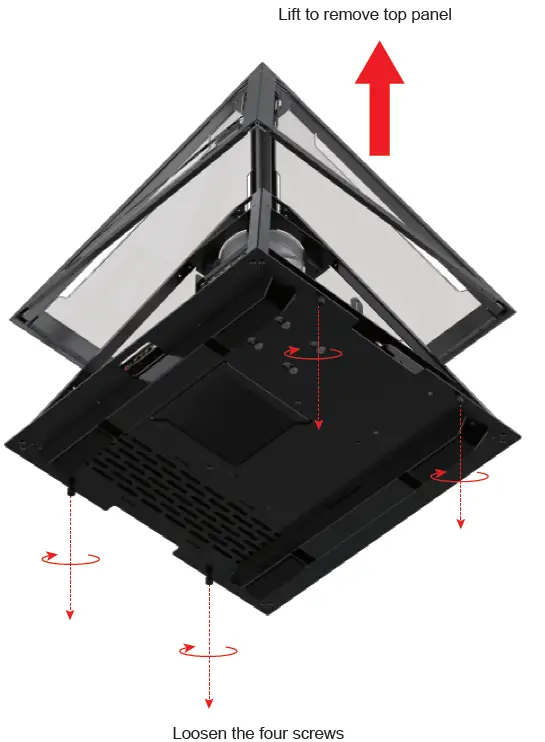
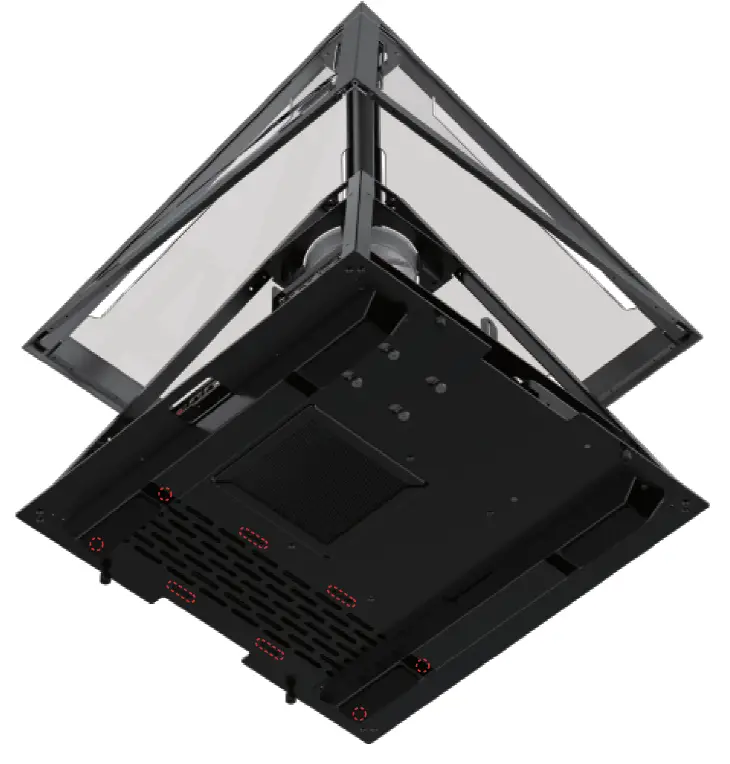
Removing The Top Glass Panel
Overview
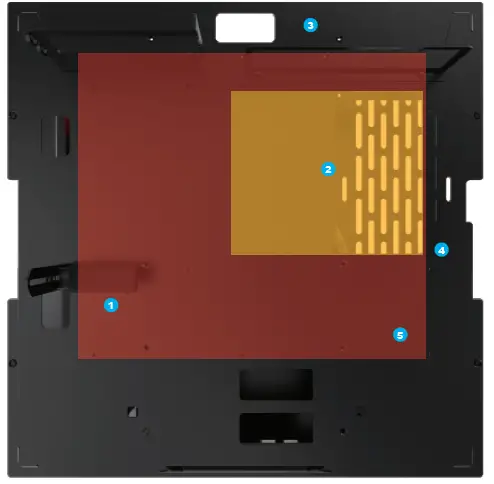
- Adjustable video card holder
- Pre-cut hole for CPU cooling
- Power cord management hole
- Water radiator management hole
- motherboard mount
Product photos are for reference only.
Supported Motherboards
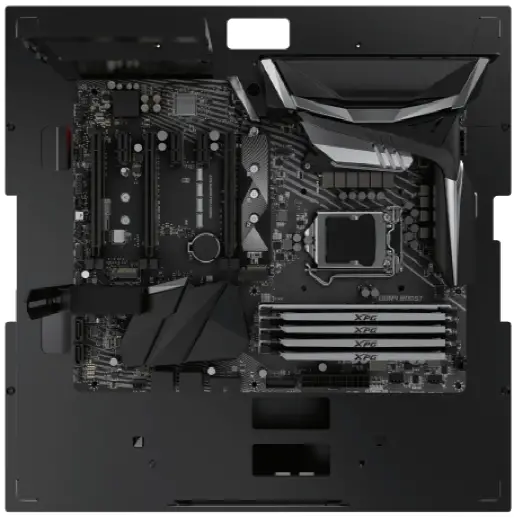 Maximum: <305 x280mm SSI-CEB
Minimum : ATX Motherboard
Product photos are for reference only.
Power Supply Installation

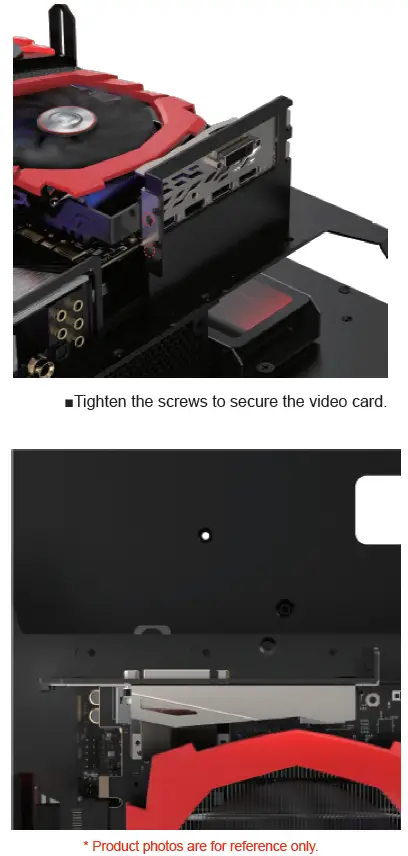
Video Card Installation
Bottom View
Water Radiator Installation
2.5″SSD / 3.5″HDD Installation
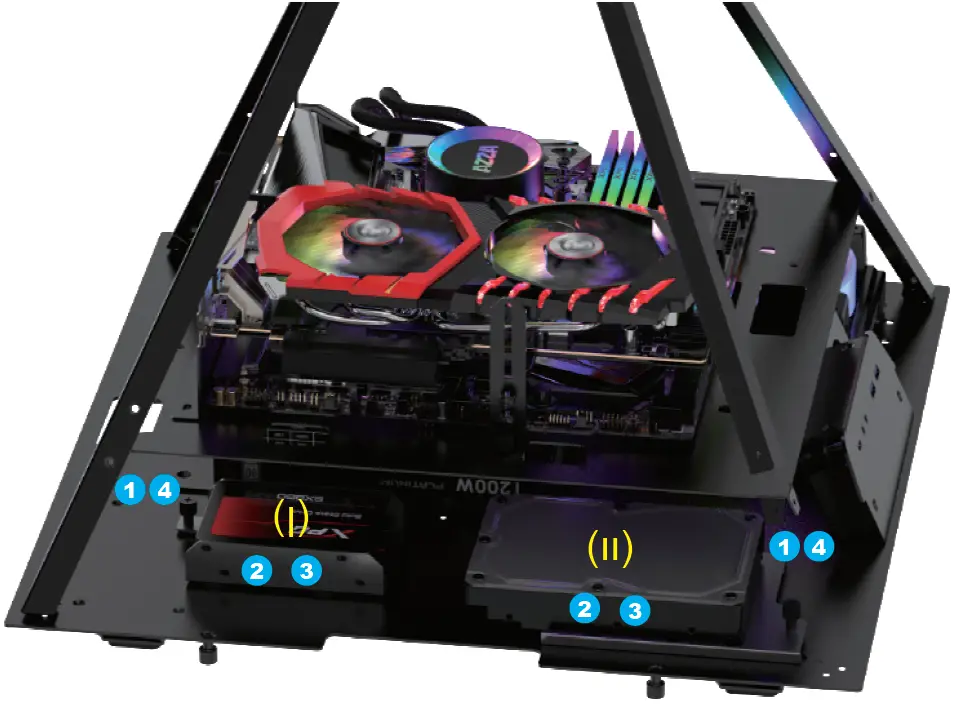
- 2.5″ SSD spring bolt tray: Supports up to 2.5″ SSD x 2
- 3.5″ HDD spring bolt tray: Supports 3.5 HDD x 1 (also compatible with a 2.5″ SSD)
STEP:
- Loosen the spring bolt screw
- Slide left or right to remove the tray.
- Install the 2.5″SSD or 3.5″HDD
- Fasten the spring bolt screw
PCI-E Cable
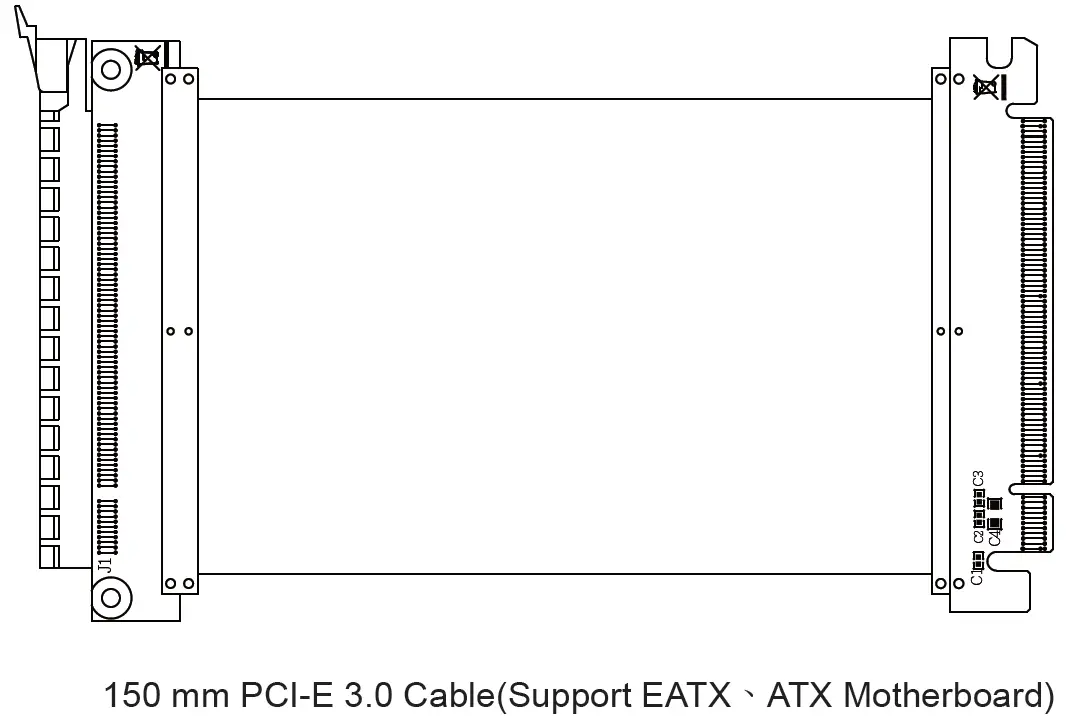
To fix potential compatibility issues with PCI-e Gen 4.0, please connect your graphics card directly to the motherboard, enter the BIOS, and change the PCI-e x16 mode to 3.0 before using the RGB PCI-e cable.
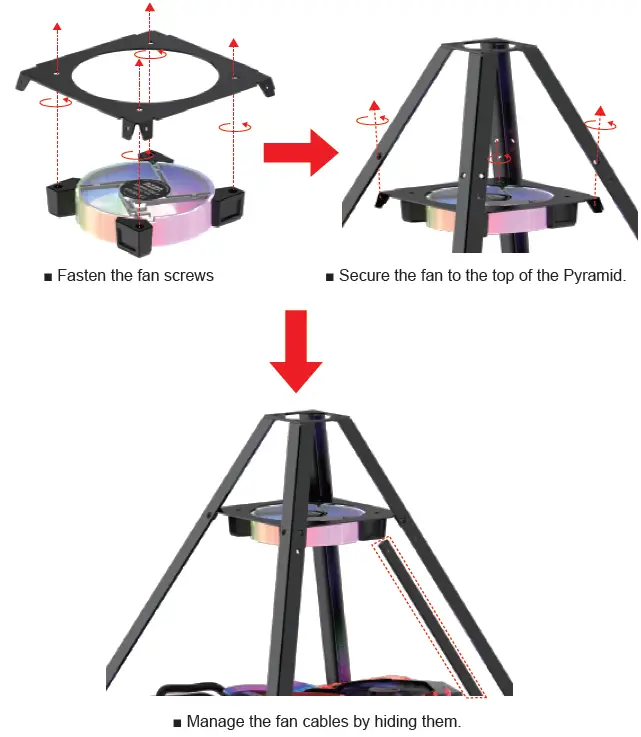
Fan Installation
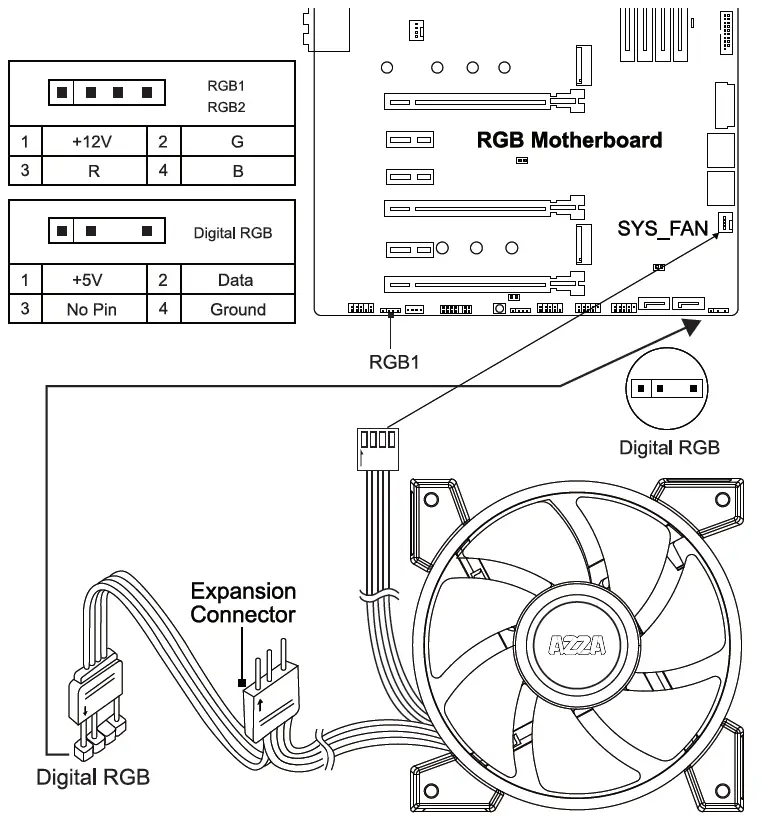
Digital RGB Fan Installation For Motherboard
The addressable RGB fans can connect directly to the 5V addressable RGB headers of compatible motherboards, such as those from MSI™, ASUS™, Gigabyte™ and AsRock™.
Please note: Only 5V addressable headers from compatible motherboards are supported. Please do NOT connect the fan to a 12V non-addressable header.
Please check your motherboard’s specifications before use. Do not go past the motherboard’s allowed limits on power rating and LED count when connecting multiple fans/LED strips.
Complete