![]()
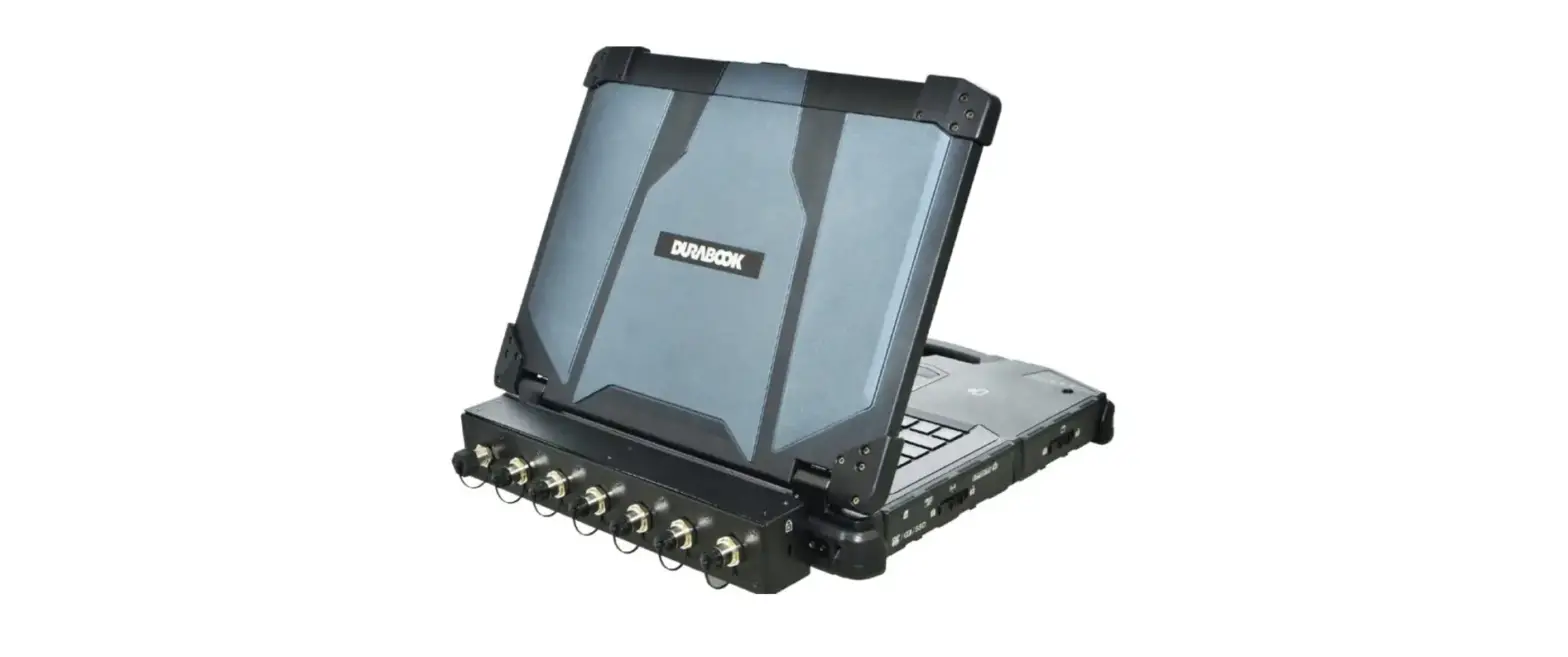
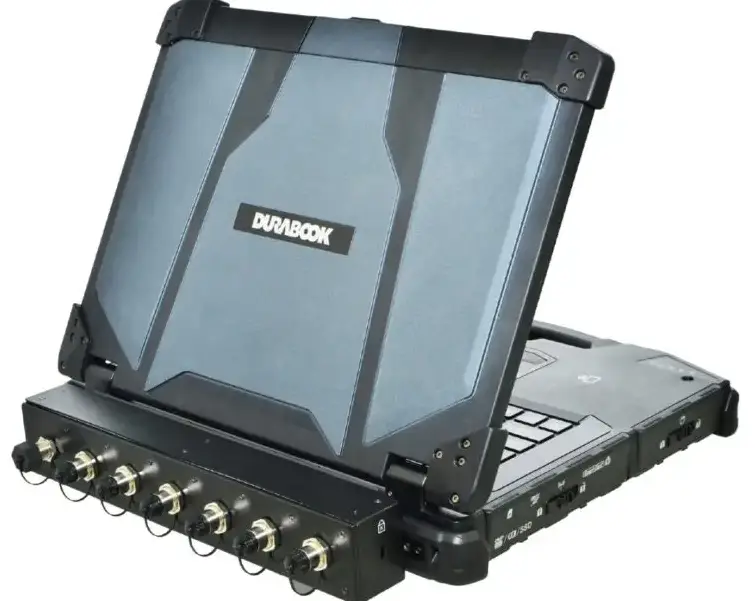
DURABOOK Z14I Rugged Laptop featured
Package Contents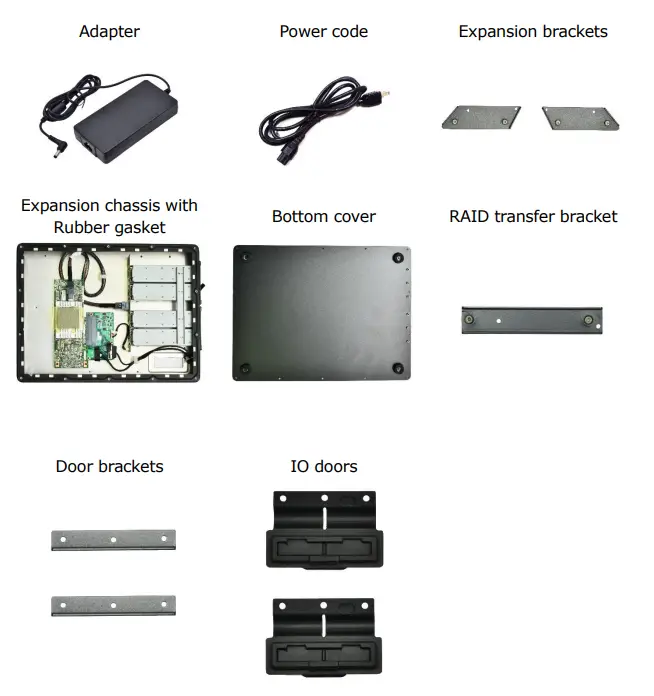
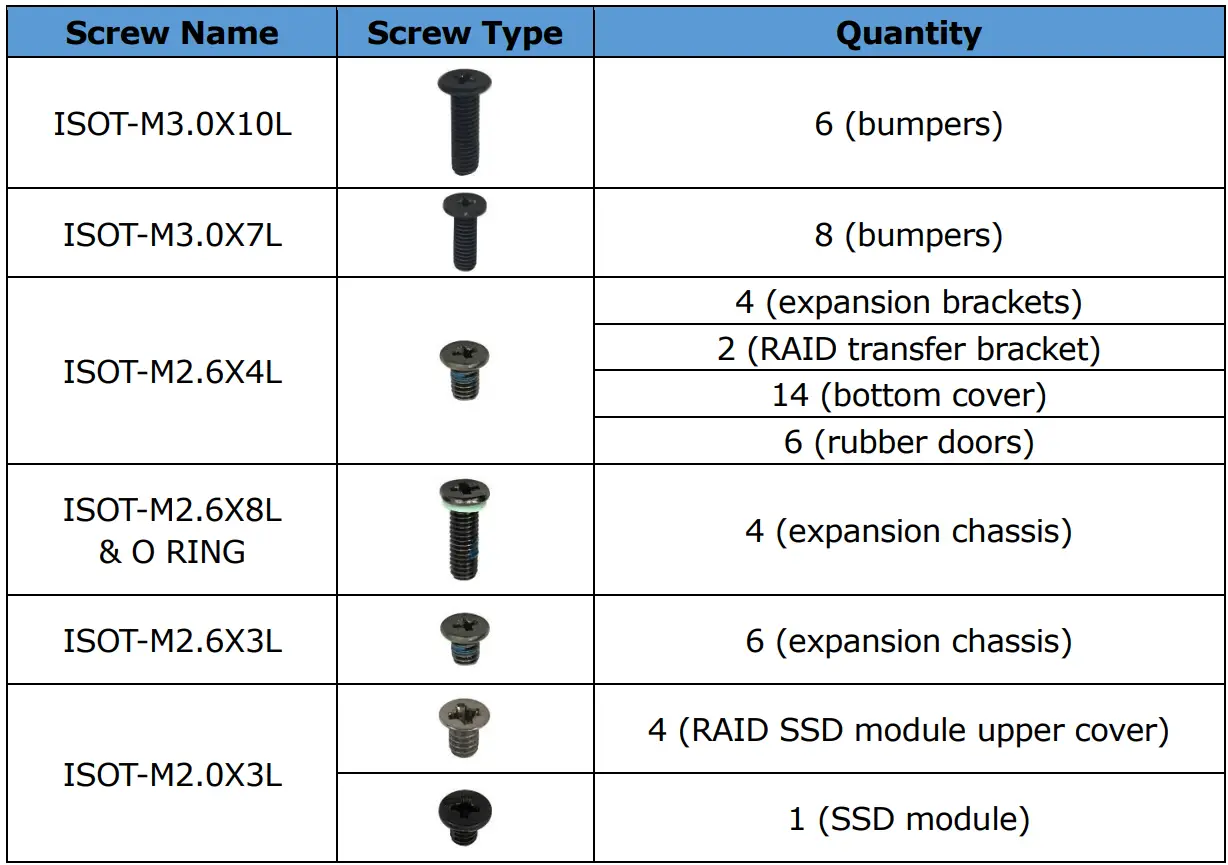
RAID Expansion Chassis & SSD Module Screws
Installation
This section will guide you on how to install the RAID expansion chassis and replace the RAID SSD module. Installing the RAID Expansion Chassis To install the RAID expansion chassis, follow the steps below:
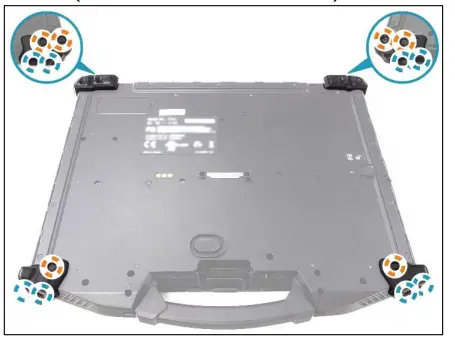
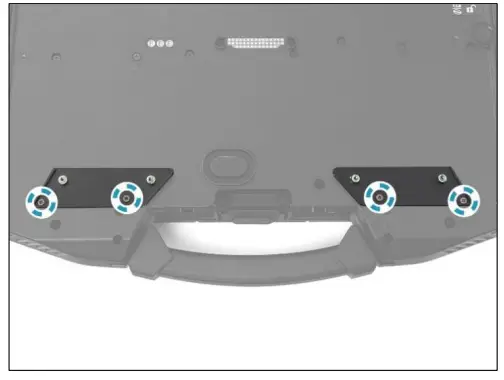
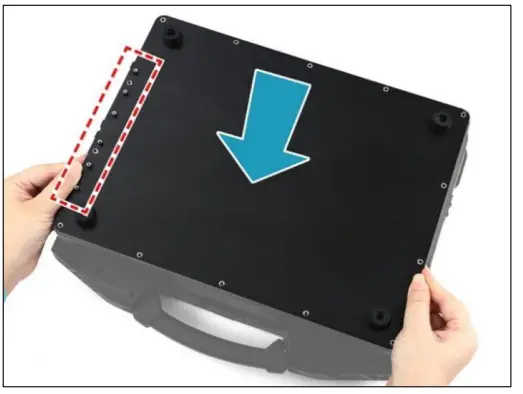
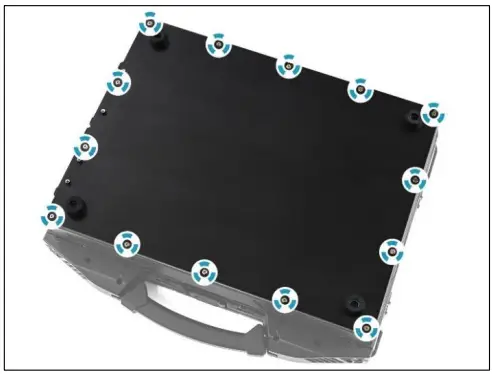
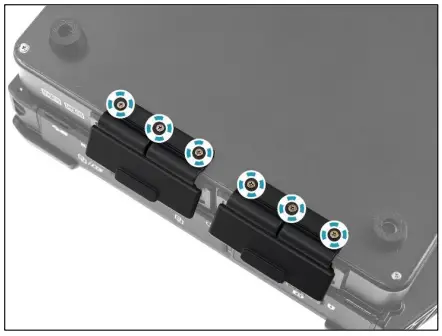
- Remove the 14 screws securing the bumpers.
- ISOT-M3.0X10L (marked with orange-white circle): 6 screws
- ISOT-M3.0X7L (marked with blue-white circle): 8 screws

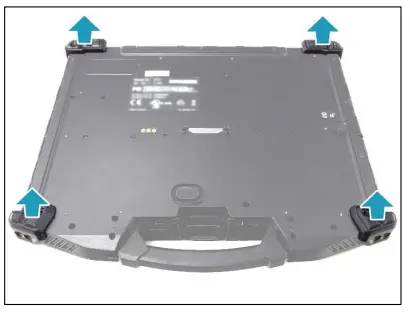
- Remove the bumpers

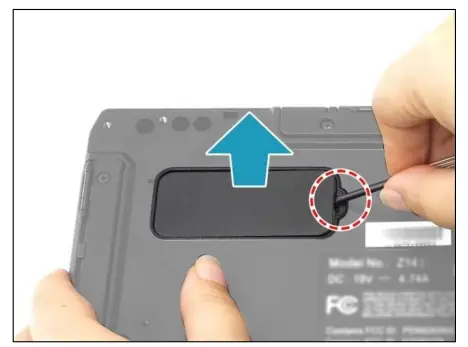
- Pry to remove the mylar from the lower case.

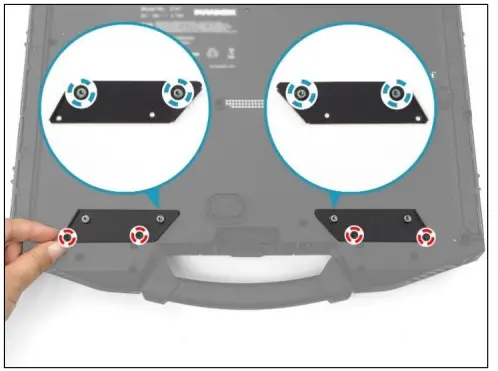
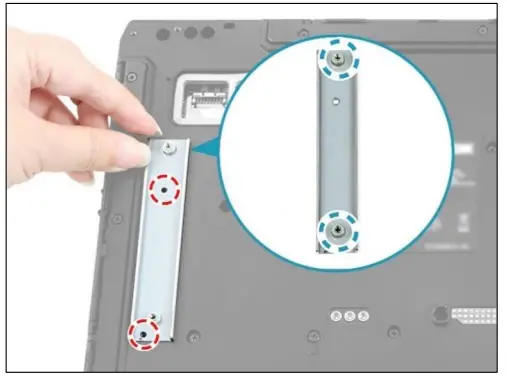
- By aligning with the screw holes, install the expansion brackets onto their respective slots.

- Attach the 4 screws (ISOT-M2.6X4L) to secure the expansion brackets to the lower case.

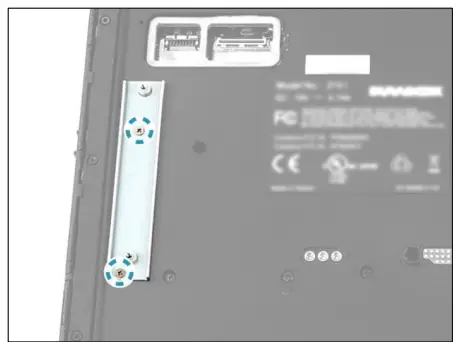
- By aligning with the screw holes, install the RAID transfer bracket onto its slot.

- Attach the 2 screws (ISOT-M2.6X4L) to secure the RAID transfer bracket to the lower case

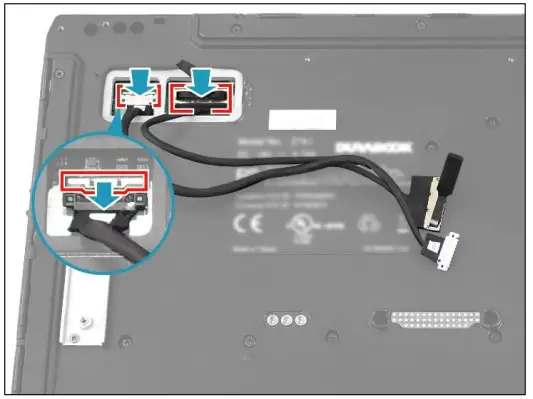
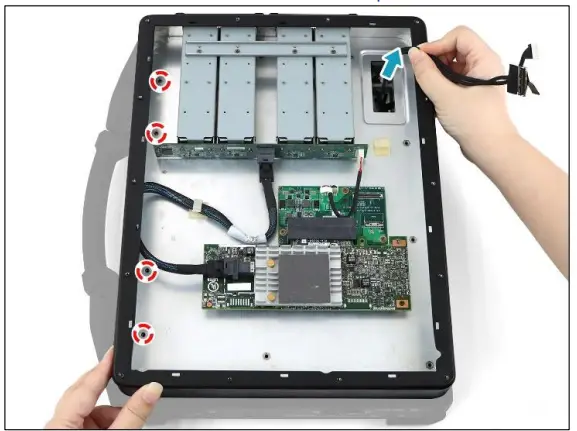
- Connect the PCIe coaxial cable to the mainboard connector. Then connect the PCIe power cable to the mainboard connector and secure the latch

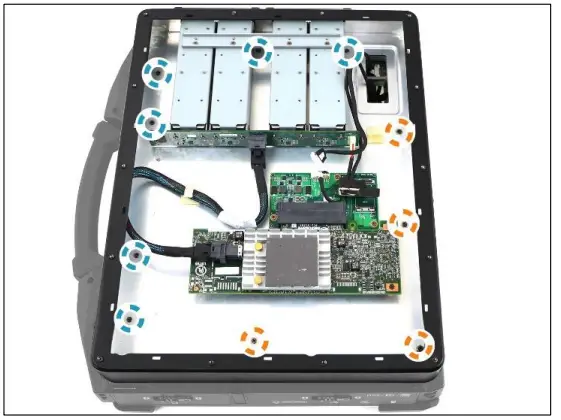
- Route the PCIe power and coaxial cables through the opening on the expansion chassis. Then, place the expansion chassis on the top of the lower case. Ensure that the screw holes are properly aligned.

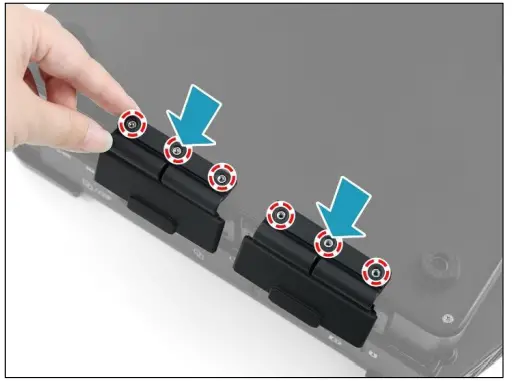
- Attach the 6 screws (ISOT-M2.6X3L) first to secure the expansion chassis to the lower case. Then continue to attach the remaining 4 screws (ISOT-M2.6X8L)
 .
.- ISOT-M2.6X3L (marked with blue-white circle): 6 screws
- ISOT-M2.6X8L (marked with orange-white circle): 4 screws
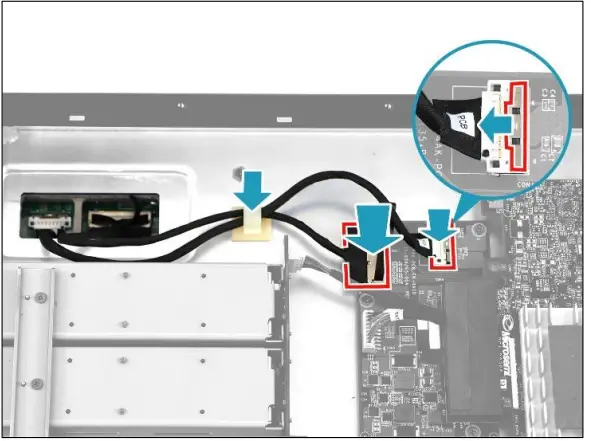
- Connect the other end of the PCIe coaxial cable to the expansion module board connector. Then connect the other end of the PCIe power cable to the expansion module board connector and secure the latch.

- Secure the cables with the cable clip
 .
. - With the protruding tabs facing down, install the rubber gasket onto its compartment. Press down each tabs to ensure that the gasket is properly seated in place.

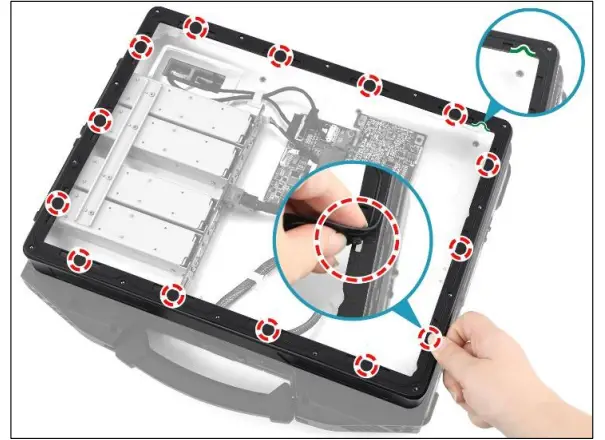
- By aligning with the screw holes, install the bottom cover onto the expansion chassis.

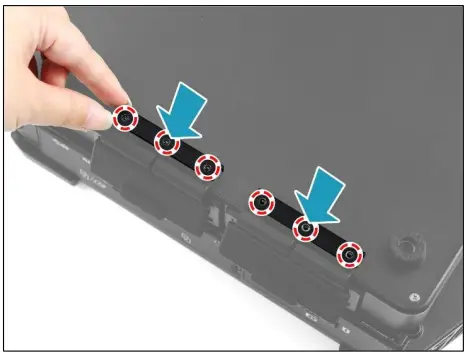
- Attach the 14 screws (ISOT-M2.6X4L) to secure the bottom cover.

- By aligning with the protruding parts of the bottom cover, install the low-profile rubber doors onto their respective slots on the bottom cover

- Place the door brackets onto their respective compartments on the installed rubber doors. Ensure that the protruding parts and screw holes are properly aligned.

- Attach the 6 screws (ISOT-M2.6X4L) to secure the rubber doors

 .
.
 .
.
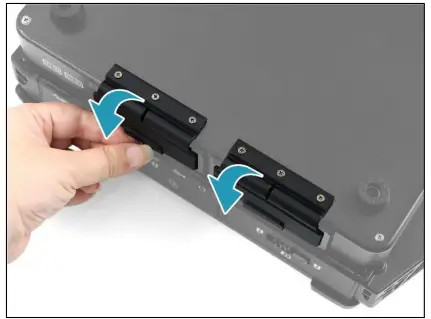
Close the rubber doors. Replacing the RAID SSD Module
To replace the RAID SSD module, follow the steps below:
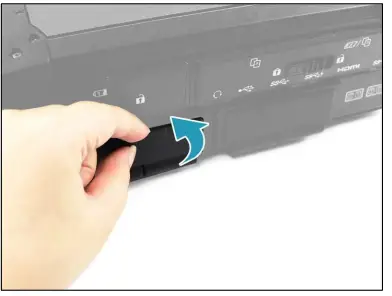
- Open the rubber door.
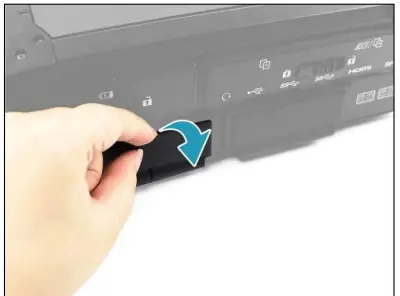
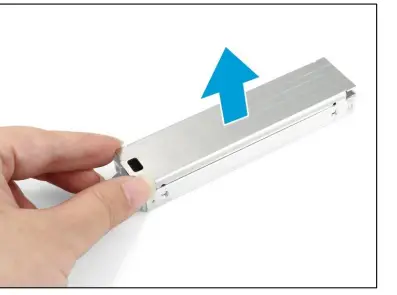
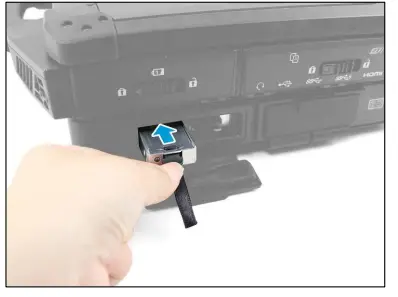
- Press the latch downwards and pull to remove the RAID SSD module assembly from its compartment.

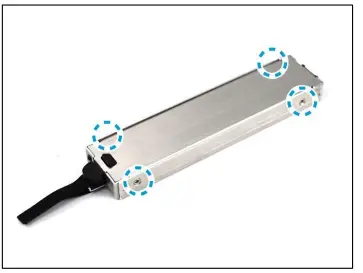
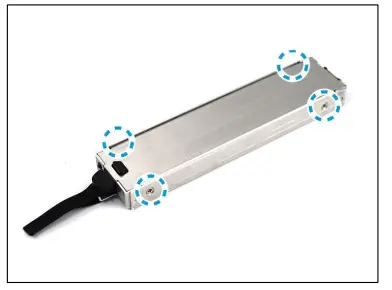
- Remove the 4 screws (ISOT-M2.0X3L) securing the RAID SSD module upper

- Remove the RAID SSD module upper cover.

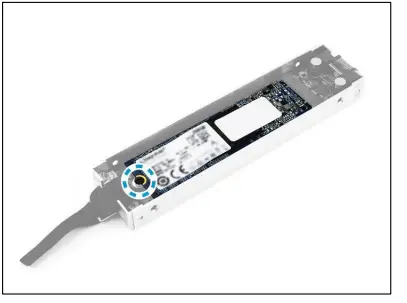
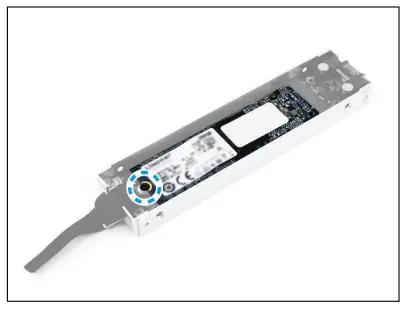
- Remove the screw (ISOT-M2.0X3L) securing the RAID SSD module.

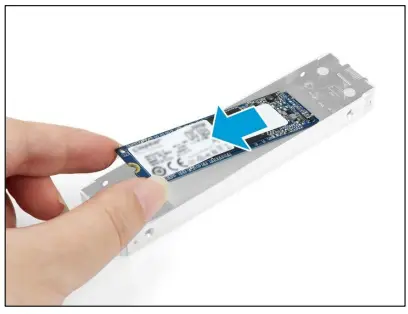
- Remove the RAID SSD module.

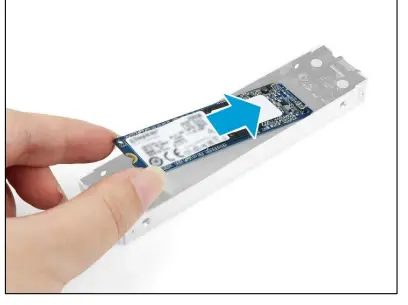
- Install the RAID SSD module.

- Attach the screw (ISOT-M2.0X3L) to secure the RAID SSD module in place.

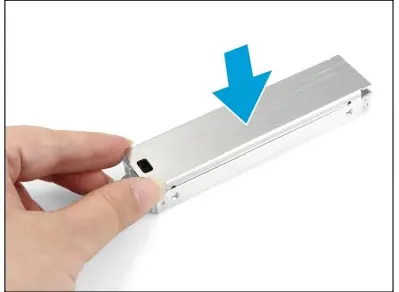
- Replace the RAID SSD module upper cover.

- Attach the 4 screws (ISOT-M2.0X3L) to secure the RAID SSD module upper cover.

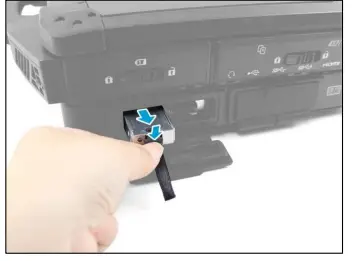
- Insert the RAID SSD module assembly into its compartment. Make sure it is firmly seated.

- Close the rubber door.3

RAID Expansion Chassis & SSD Module Screws


