
REELCRAFT CT Series Air or Water Hose Reels
Operating Instructions
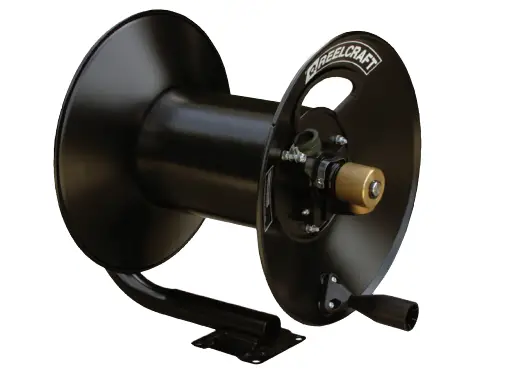
Series CT Air/Water Hose Reels
Model Numbers:
CT6050LN CT8050LN CT6050HN
CT6100LN CT8100LN CT6100HN
Specifications
| CT6050LN | CT6100LN | CT8050LN | CT8100LN | CT6050HN | CT6100HN | |
| Capacity | 50’ x 3/8” | 100’ x 3/8” | 50’ x 1/2” | 100’ x 1/2” | 50’ x 3/8” | 100’ x 3/8” |
| Reel Inlet | 1/2” Carbon Steel Nickel Plate | 1/2” Carbon Steel Nickel Plate | 1/2” Carbon Steel Nickel Plate | 1/2” Carbon Steel Nickel Plate | 1/2” Stainless Steel | 1/2” Stainless Steel |
| Hose Outlet | 1/2” Brass NPT | 1/2” Brass NPT | 1/2” Brass NPT | 1/2” Brass NPT | 3/8” Brass NPT | 3/8” Brass NPT |
| Max Pressure | 300 PSI | 300 PSI | 300 PSI | 300 PSI | 5000 PSI | 5000 PSI |
Read the following precautions and instructions before you begin assembly or use. Keep this literature in a dry place for future reference.
Safety Precautions
- Make sure incoming pressure does not exceed maximum working pressure rating of the reel.
- Use the proper eye protection when assembling and using the hose reel.
- Assemble the hose reel on a clean workbench free of debris and moisture.
- Use soap and water when checking for air leaks.
- Do not expose fingers or hands directly to a pressurized air hose or it will result in bodily injury.
- Keep children away from the work area.
Unpacking
When you receive your new reel, it will be mostly assembled. Check to ensure that you have received the following parts:
| Description | Quantity | CT6050LN | CT6100LN | CT8050LN | CT8100LN | CT6050HN | CT6100HN |
| Swivel Assembly Replacement | 1 | 602708 | 602708 | 602708 | 602708 | 602425 | 602425 |
| Crank Handle | 1 | 602426 | 602426 | 602426 | 602426 | 602426 | 602426 |
| Replacement Clip | 1 | 262655 | 262655 | 262655 | 262655 | 262655 | 262655 |
Installation
Note: You must purchase hardware and hose for mounting your new reel. Decide where you wish to mount reel before purchasing as the hardware needed will vary provided different locations.
- Match handle to the link lever and attach using handle assembly.
- Apply teflon tape or pipe compound to swivel valve then thread the valve into the reel.
- Put the bolts (3/8” or 10mm) through 4 holes in the base of the hose reel and tighten it to ceiling/wall/floor so reel can be fastened into compressor.
- Apply teflon tape or thread sealant to reel’s built in supply hose fitting. Then attach this supply hose to the outlet of air compressor.
- Apply teflon tape or thread sealant to hose fitting threads. Attach to the reel swivel valve, then feed the rest of hose through the flange opening.
- To avoid damaging the swivel valve, make sure to use an appropriate wrench to stabilize the swivel and hosing tightening the hose fitting.
Quality Guarantee
Should this reel fail to perform satisfactorily due to defect or poor workmanship within one year of purchase, return it to your place of purchase and it will be replaced or repaired free of charge. Incidental or consequential damages are excluded from this warranty.
Reelcraft Industries, Inc.
2842 E Business Hwy 30, Columbia City, IN 46725 Ph: 800-444-3134 / 260-248-8188 • Fax: 800-444-4587 / 260-248-2605 Customer Service: 855-634-9109
[email protected]
www.reelcraft.com


