![]() EZ GRIP
EZ GRIP
GATE HANDLE
Installation Instructions
 Read all instructions prior to installing the product.
Refer to manufacturers’ safety instructions when operating any tools.
To register your product, please visit: barretteoutdoorliving.com
![]() WARNING:
WARNING:
- Improper installation of this product can result in personal injury. Always wear safety goggles when cutting, drilling, and assembling the product.
- Incorrect installation may cause harm to the gate or individual.
- Not pool code approved.
NOTICE:
- DO NOT attempt to assemble the kit if parts are missing or damaged.
- DO NOT return the product to the store, for assistance or replacement parts call: 1-800-336-2383.
TOOLS NEEDED:
| Pencil | |
| Phillips Driver Bit | |
| Drill | |
| 3/32″ Bit |
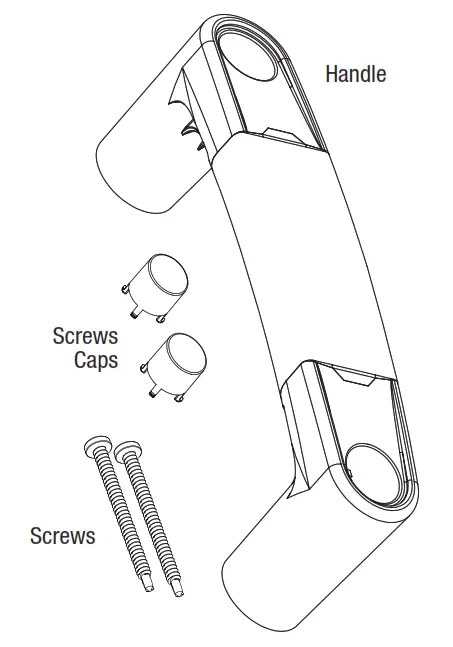
Component list:
| QTY | Description |
| 1 | Gate Handle |
| 2 | Screw Caps |
| 2 | 2 1/2″ #2 Phillips Square Combo Self-Drilling Screws(Stainless Steel) |
 To obtain and review a copy of the warranty please visit: barretteoutdoorliving.com. You may also contact us at 1-800-336 2383 or email [email protected]
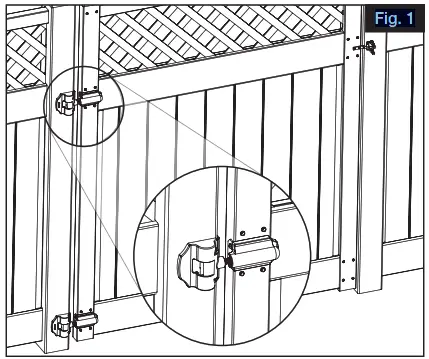
- Install Barrette Outdoor Living Gate Hinges before installing handle (Fig. 1).

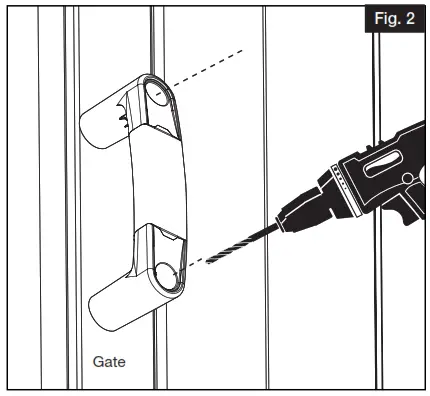
- Once hinges are installed and gate is aligned, position handle at the desired height and pre-drill holes on the gate (Fig. 2).

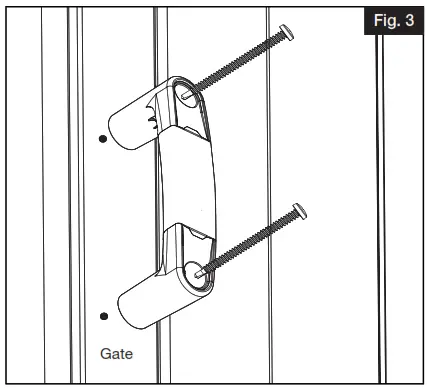
- Align handle over pre-drilled holes and secure with two screws (Fig. 3).

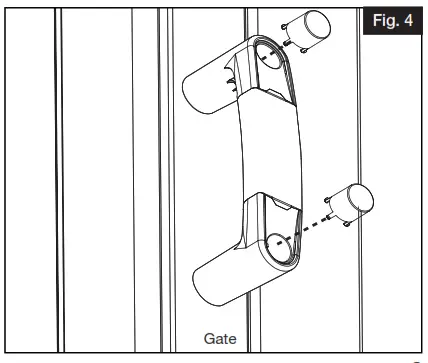
- Align screw cap slot to raised groove in handle. Push to secure screw caps (Fig. 4).

![]()
Barrette Outdoor Living
545 Tilton Rd, Egg Harbor City, NJ. 08215
barretteoutdoorliving.com • (800) 336-2383


