aquor Ground Yard Hydrant System Installation Guide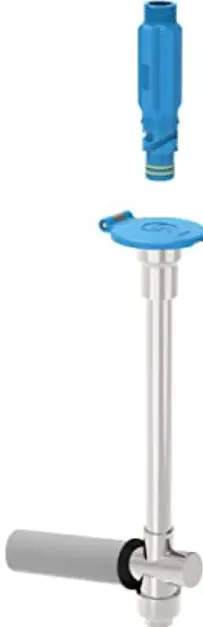
GROUND HYDRANT
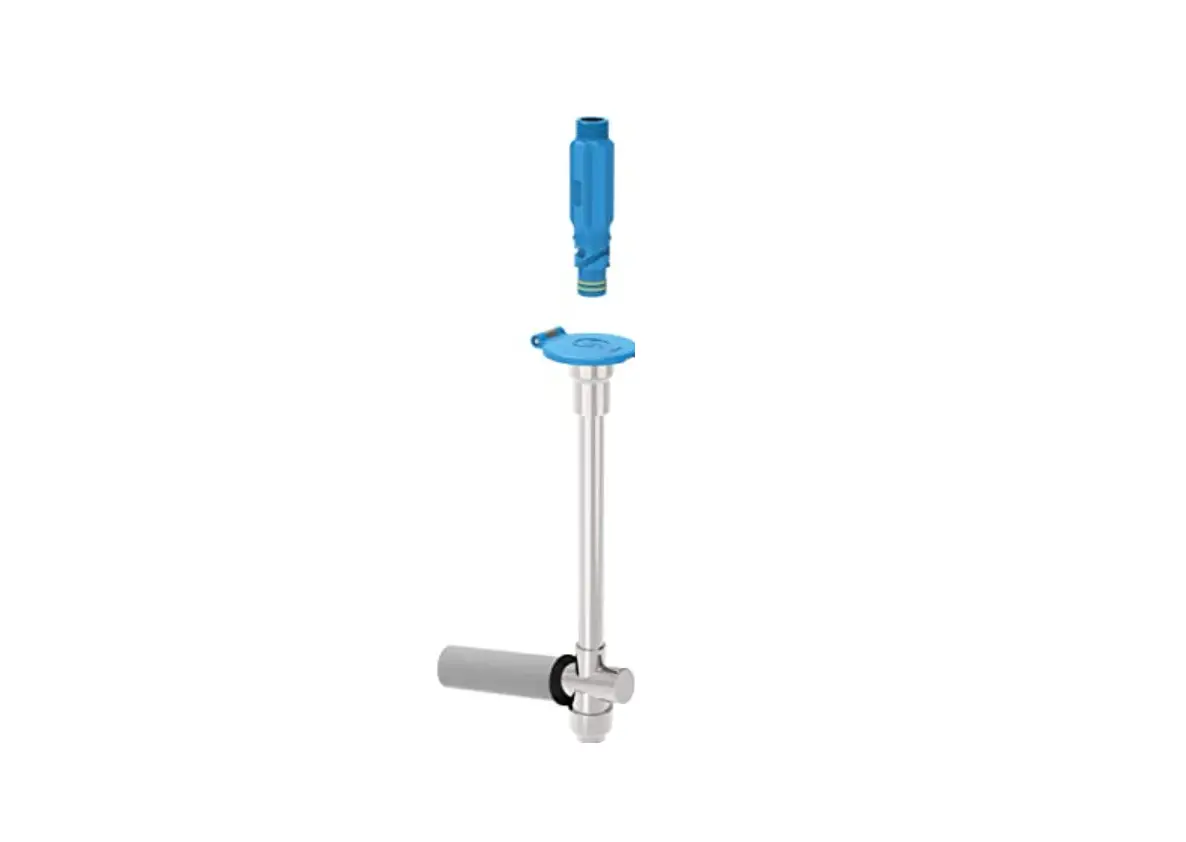
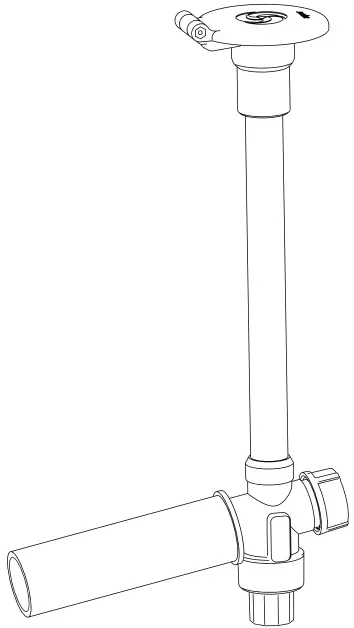
The Aquor ® Ground Hydrant is a freeze-proof yard hydrant. Easy to install, bury it or install at waist height.
The hydrant will self-drain when disconnecting to protect against freezing and will self-clean so no maintenance is required. Available in gray (or blue upon request).
FEATURES & BENEFITS
- Flush-mounted design with twist lock connection system.
- Easy to install at any height, recessed, flush with the ground, or waist level.
- 100% frost-free, leak-free, and lead-free.
- Instant access under full water pressure.
- Hydrants self-drain providing complete freeze protection all winter long.
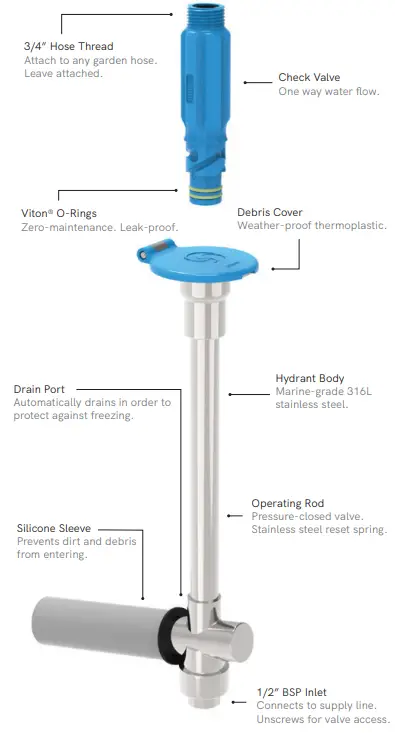
- High quality marine-grade 316L stainless steel and Delrin® acetal resin are durable and long-lasting.
- Hose connector contains integral check valve for backflow protection.
- Self-cleaning outlet requires no regular maintenance.
- Protects against water theft


TECHNICAL SPECS
| Inlet | 1/2 “ BSP |
| Outlet | 3/4” BSP |
| Weight | 1.36kg |
| Operating Temperature | 0-60 °C |
| Operating Water Pressur | 172-861 kPa |
| Hydrant Material | Stainless Steel |
| Connector Material | Acetal Resin |
| Cover Material | ASA Thermoplastic |
| O-Ring Material | Fluorocarbon Rubbe |
| SKU | UGH-SERIES |
HYDRANT
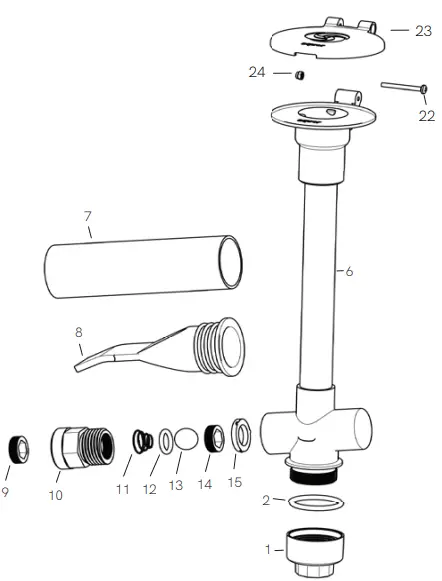
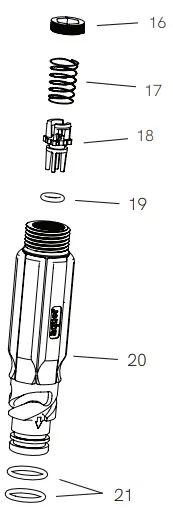
- Rear Valve Housing (inlet)
- Hydrant Body O-Ring
- Valve Spring
- Inner Valve O-Ring
- Operating Rod
- Hydrant Body
- PVC Protective Sleeve
- Silicone Flapper Valve
- Check Valve Retainer
- Check Valve Housing
- Check Valve Release Spring
- Check Valve O-Ring
- Check Valve
- Check Valve Screen
- Check Valve Housing Washer
- Check Valve Retainer
- Check Valve Spring
- Connector Check Valve
- Check Valve O-Ring
- Connector Body
- Connector O-Rings
- Debris Cover Bolt
- Debris Cover
- Debris Cover Nut
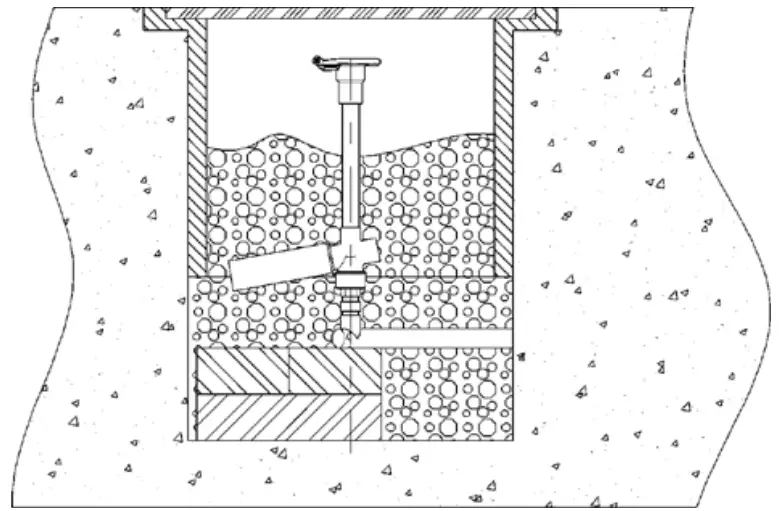
INSTALLATION
Before installation, decide on a location for the hydrant and be sure to decide how deep you want the hydrant.
- DIG A HOLE
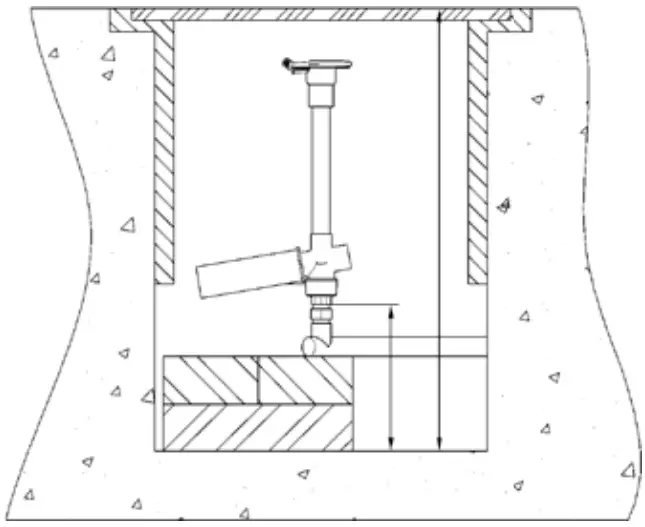
Dig a hole for the hydrant approximately 600mm in diameter and 300mm deeper than the bury depth. For additional protection and/or concealment, you can install an in-ground valve box or pull box to surround the hydrant.
Note: The valve at the bottom of the hydrant must be buried below the frost line. This ensures proper drainage so the hydrant does not freeze.
- FLUSH THE PIPES
Flush the piping in your water supply before connecting the hydrant to clear any debris that may have collected during the installation and assembly. Debris in the water supply can cause a jam in the hydrant’s closing mechanism. - CONNECT THE HYDRANT
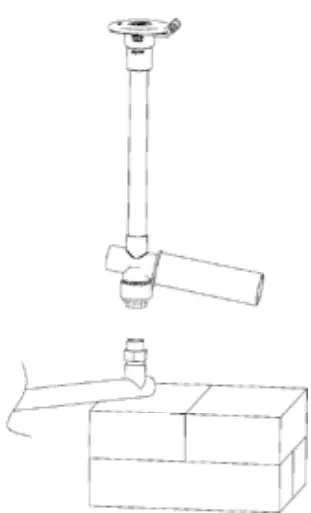
Connect the hydrant to the water supply, but do not bury the hydrant yet. Place the hydrant on top of a cinder block or other heavy, flat object for support to prevent damage to the supply line and the hydrant.
Note: Make sure to connect a garden hose to the Aquor® hose connector BEFORE connecting the hydrant. Water will start flowing instantly. - TURN ON THE WATER
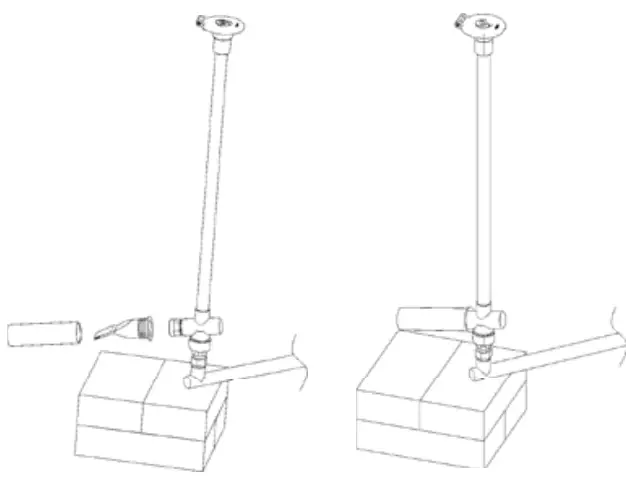
Turn on the water supply and test the hydrant to ensure it is operating correctly. Attach the included Aquor ® hose connector to a garden hose, then plug into the hydrant.
- CHECK THE VALVE
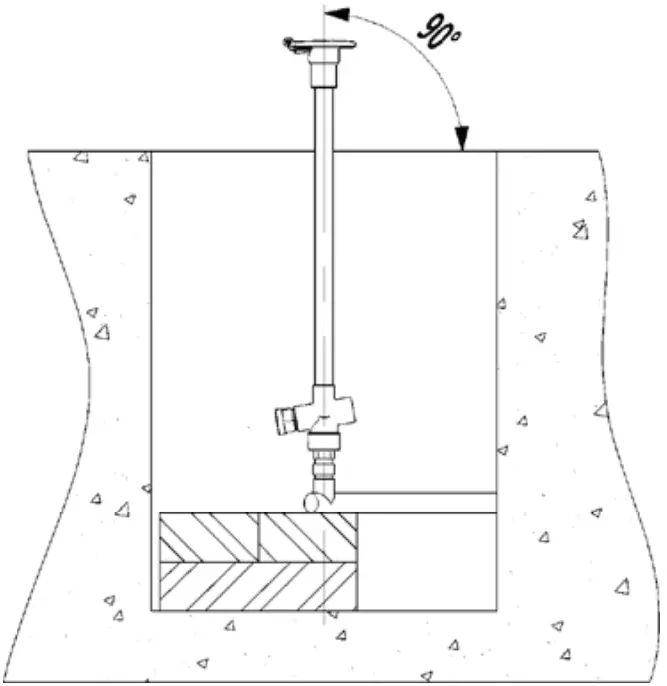
Check to make sure the hydrant’s drainage valve is clear of obstruction. The silicone flapper valve is designed to drain excess water while preventing bugs and debris from entering the valve. The PVC sleeve protects the silicone flapper valve from damage. Ensure the hydrant drains properly before burying. Ensure the hydrant is installed level, perpendicular to the ground surface.
- FILL THE HOLE
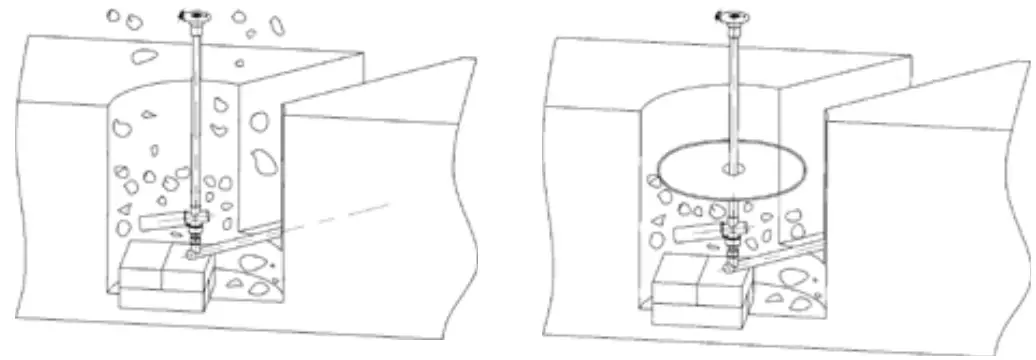
Fill the hole around and below the hydrant with medium-size gravel or drain rock. This provides a drain field for the hydrant. Without a proper drain field, the hydrant may not empty itself, and will be susceptible to freezing.
Optional: Layer a suitable plastic sheeting or landscaping fabric halfway through filling. This can help prevent soil or fine sand from settling and filling the drain field. - TEST THE HYDRANT
Test hydrant operation again go ensure everything is installed properly and functioning correctly.
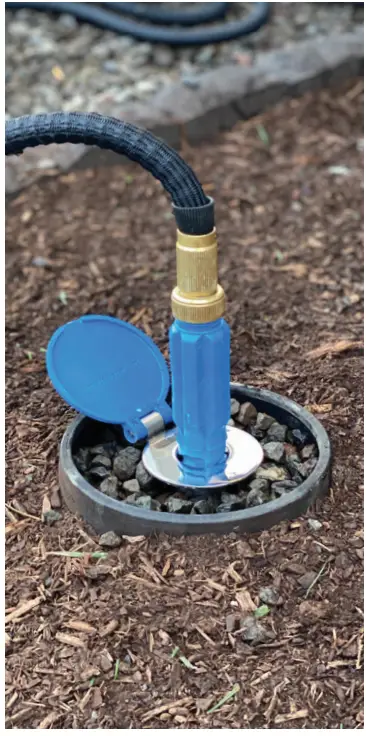
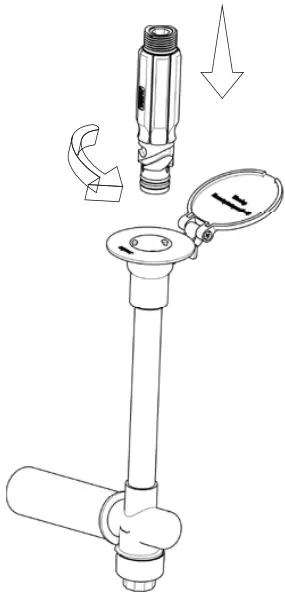
OPERATION
Firmly attach the Aquor® connector to a garden hose, using teflon tape if needed.
Connect: To connect to the hydrant, line up the 3 grooves on the connector then simultaneously push and twist clockwise into the outlet. Position your wrist as if you are about to wring out a towel, and complete the action in one smooth motion. Water flow will start instantly.
Disconnect: Perform the reverse motion to disconnect. Water will shut off instantly, and self-drain through the drain port.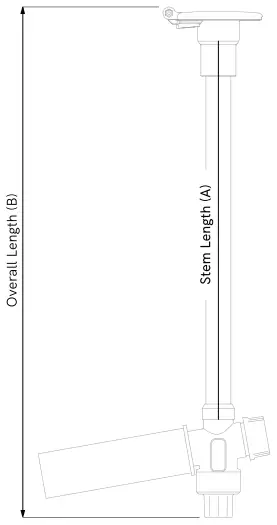
| SKU | Stem Length (A) | Overall Length (B) |
| UGH12 | 12” Hydrant | 358 mm |
| UGH18 | 18” Hydrant | 508 mm |
| UGH24 | 24” Hydrant | 662 mm |
| UGH36 | 36” Hydrant | 966 mm |
| UGH48 | 48” Hydrant | 1271 mm |
AQUGH12-G
12 Grounded Hydrant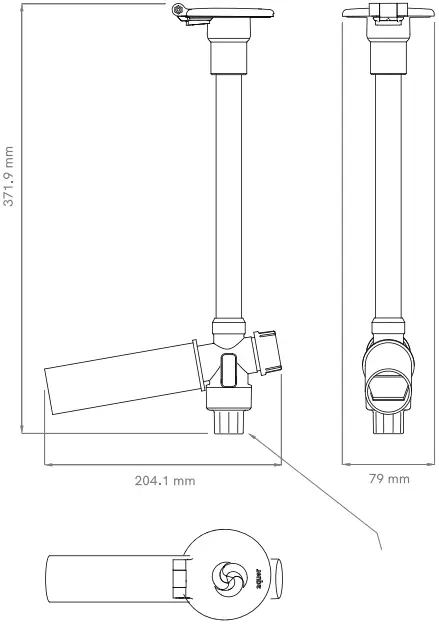
Costumer Support
Aquor Water Systems Inc.
www.aquorwatersystems.com
240 Airport Rd, Port Townsend, WA 98368
[email protected]
P: 1-800-458-1749