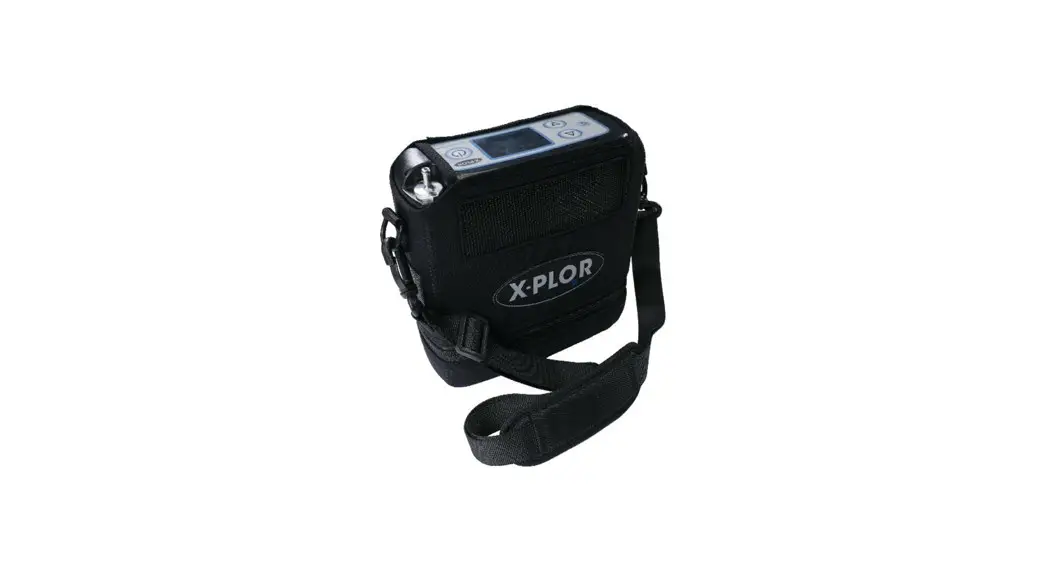
![]() X-PLO2R Portable Oxygen Concentrator
X-PLO2R Portable Oxygen Concentrator
User Guide
X-PLO2R Portable Oxygen Concentrator
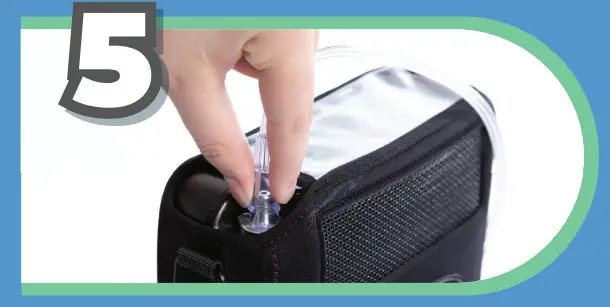
REMOVE DUST CAP & INSERT CARTRIDGE
- Remove the dust cap from the cartridge.
- Then insert the cartridge all the way into the unit so the handle lays flat.

DO NOT TURN ON THE X-PLO2R UNTIL YOU REACH STEP 4.
It is quick and easy to get your X-PLO2R started, but please read the entire User Manual before using.
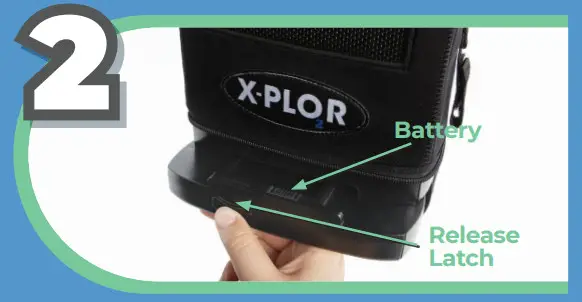
LOCATE THE BATTERY
- Insert your X-PLO2R into the carry bag. When the X-PLO2R is correctly inserted into the bag, the LCD screen is seen through the plastic window and the air intake and exhaust are aligned with mesh panels.
- To attach the battery, slide it on until the latch is in the locked position and zip the bag.
- To disconnect the battery, simply push the release latch down and slide the battery towards you.
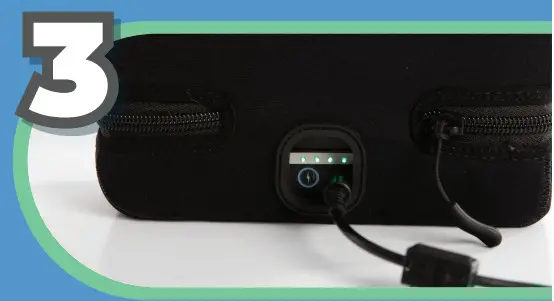
 CHARGE THE BATTERY
- Place in a well-ventilated area to fully charge the battery before using your X-PLO2R, which can take up to 5 hours for the 4-cell battery and up to 6 hours for the 8-cell battery.
- To charge, insert the AC power connector into the battery’s power receptacle and the other end into an electrical outlet.

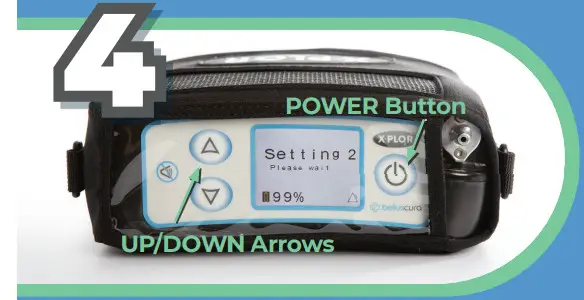
TURN ON & SET OXYGEN FLOW
- When powered on, position the unit upright to warm-up (warm-up time is less than 2 minutes.)
- Press the POWER button for 2 seconds to turn on your X-PLO2R.
- Use the UP/DOWN ARROWS to set the oxygen flow level, as specified in your oxygen prescription.

NASAL CANNULA
- NOTE: Cannula must be purchased separately.
- Connect the nasal cannula to the oxygen output nozzle located on top of the X-PLO2R.
- Place the other end in your nostrils. Oxygen will be delivered through the nasal cannula with each breath.
- Remember to breathe through your nose as normal.

GO X-PLO2R!
- Attach the shoulder strap and handle to your X-PLO2R. device and enjoy your new found mobility!


LIVE LIFE. BREATHE EASY.
GO X-PLO2R.
CHECK LIST
Locate the following items in your X-PLO2R box to get started:
| X-PLO2R Unit Includes: – Air intake filter | |
| Carrying Bag | |
| Cartridge | |
| User Manual | |
| AC Power Supply | |
| DC Power Supply | |
| Handle (Attaches to Carrying Bag) | |
| Shoulder Strap (Attaches to Carrying Bag) | |
| 4-Cell Battery or 8-Cell Battery |
TRAVEL WITH X-PLO2R
![]()
The X-PLO2R lets you travel with ease.
It’s perfect for carrying on buses, trains, cruise ships and is even FAA compliant for air travel. And with supplemental oxygen and direct-charge batteries, exploring has never been so easy.
XplorOxygen.com
©2021 Belluscura LLC. All Rights Reserved.


