
Keystone PRK-LED-24-50PS-8CSA LED Panel Doorframe Retrofit Kit Owner’s Manual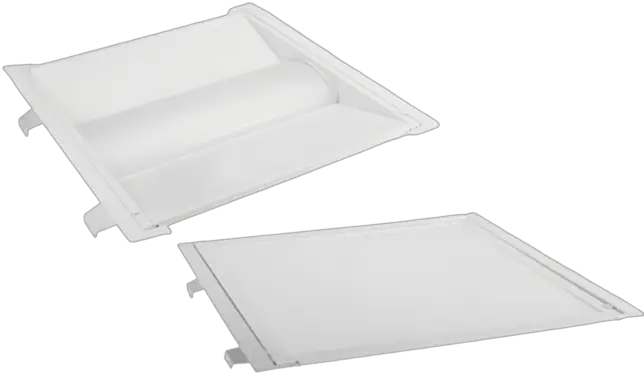
PRODUCT FEATURES
- Used to Upgrade existing 2×4 fluorescent recessed troffer, without modifying existing fixture mounting.
- CCT Selectable (3500K, 4000K, or 5000K)
- Wattage Selectabe (50W, 40W, or 30W)
- Construction features precise optical lenses over each individual LED, offering optimal light diffusion and consistent surface illumination, with no risk of yellowing over product lifetim
PERFORMANCE SPECIFICATIONS
| Catalog Number | Input Voltage | Wattage | Color Temperature | Lumen Output | CRI | Power Factor | Efficacy | Lifetime |
|
PRK-LED-24-50PS-8CSA* | 120-277V | 50W | 3500K | 5,500 |
>80 |
>0.9 | 110 lm/W |
50,000 Hours |
| 4000K | 5,600 | 112 lm/W | ||||||
| 5000K | 5,600 | 112 lm/W | ||||||
| 120-277V | 40W | 3500K | 4,400 | 110 lm/W | ||||
| 4000K | 4,500 | 113 lm/W | ||||||
| 5000K | 4,500 | 113 lm/W | ||||||
| 120-277V | 30W | 3500K | 3,300 | 110 lm/W | ||||
| 4000K | 3,400 | 113 lm/W | ||||||
| 5000K | 3,400 | 113 lm/W | ||||||
| ONE CATALOG NUMBER WITH 9 DIFFERENT OPTIONS | ||||||||
- Preset to highest lumen output (50W / 5000K)
- Color Uniformity: CCT (Correlated Color Temperature) range as per guidelines outlined in ANSI C78.377-2017.
PHOTOMETRIC SPECIFICATIONS
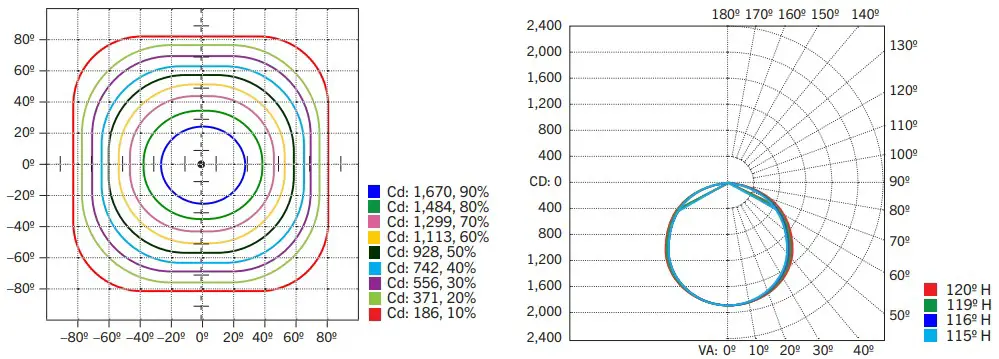
| Zone | Lumens | % Luminaire |
| 0-60 | 4,349.9 | 77.8% |
| 60-90 | 1,240.4 | 22.2% |
| 0-90 | 5,590.3 | 99.9% |
| 90-180 | 2.7 | 0.05% |
| 0-180 | 5,493.0 | 100% |
NOTE: Charts are represeneted by 5000K
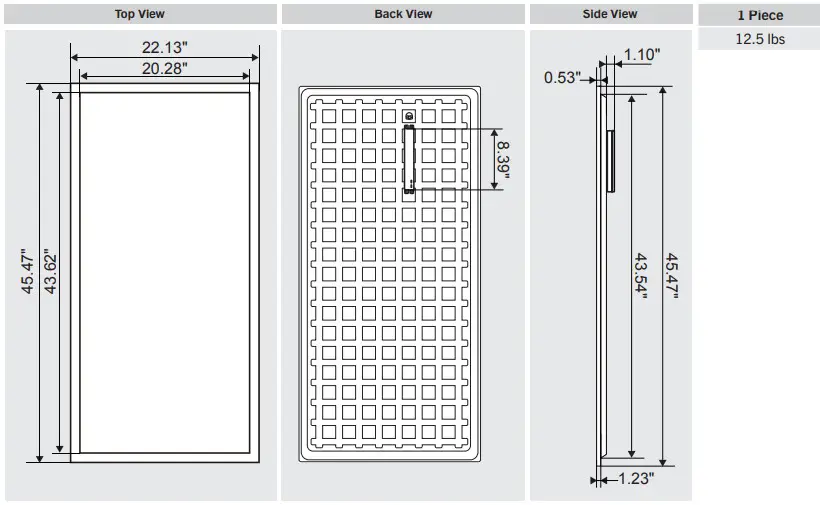
WEIGHT INFORMATION
1 Piece
12.5 lbs
INSTALLATION INSTRUCTIONS
Always turn off the power supply from main circuit breaker first!
- Dismantle accessories from the original housing (ballast, fluorescent tube, sockets, bracket and other accessories that may interfere the installation). Note: The original housing must be retained in place. Reserve the L&N wire of original housing to connect retrofit kit in later step. Plug previous holes from ballast with appropriate screws and nuts

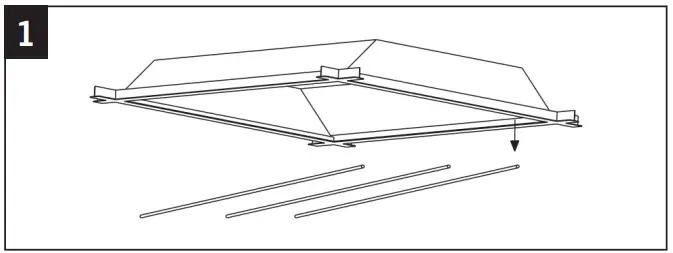
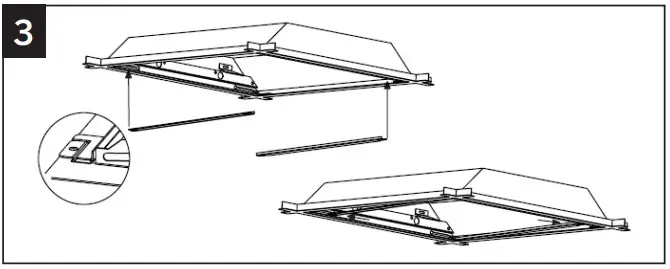
- Insert the two brackets into the clearance between the housing and T-grid

- Insert the two side bars into the clearance between the brackets and the T-grid.

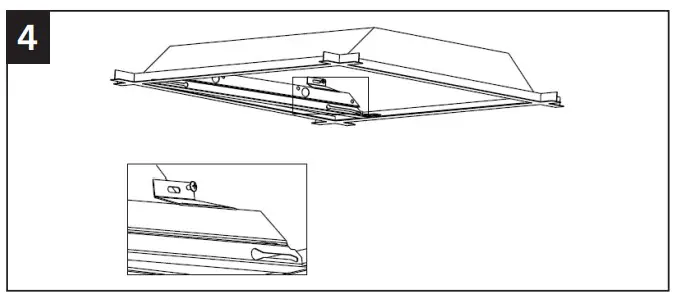
- Using the included self-tapping screws, use electronic screwdriver to secure brackets into place through bracket mounting holes from inside of the fixture. Caution: Luminaire wiring and electrical parts may be damaged when drilling for installation of LED retrofit kit. Ensure that enclosed wiring and components have not been damaged.

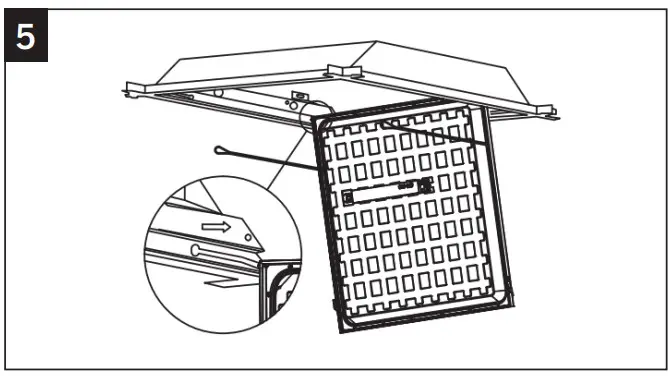
- Embed the rotary screws on the edge of the panel into the bracket chutes. Push to the end in the direction of chutes to secure panel.

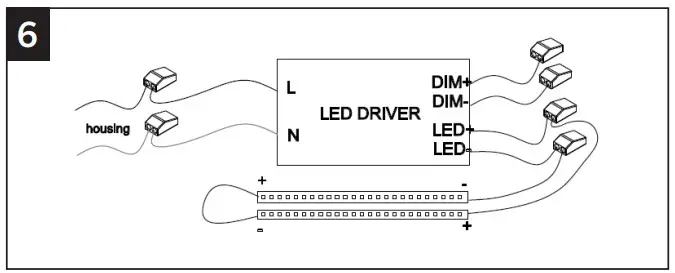
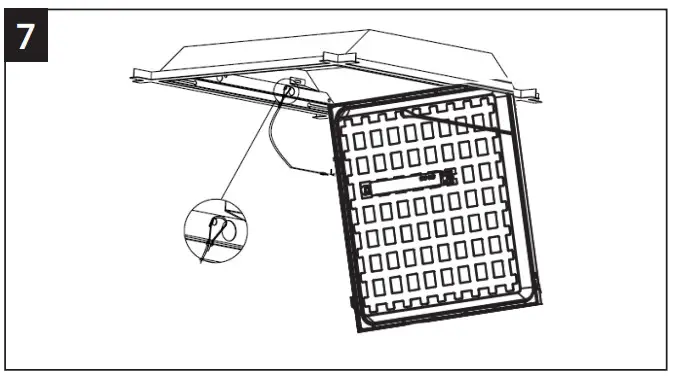
- Connect L&N wire from original housing to the driver of the retrofit using appropriate connectors. If using 0-10V dimmer, connect DIM+,DIM- to 0-10V dimmer wires. Connect the green ground wire of the retrofit kit to the fixture with a wiring cap to ensure grounding safety

- Attach clips from the retrofit kit to the brackets.

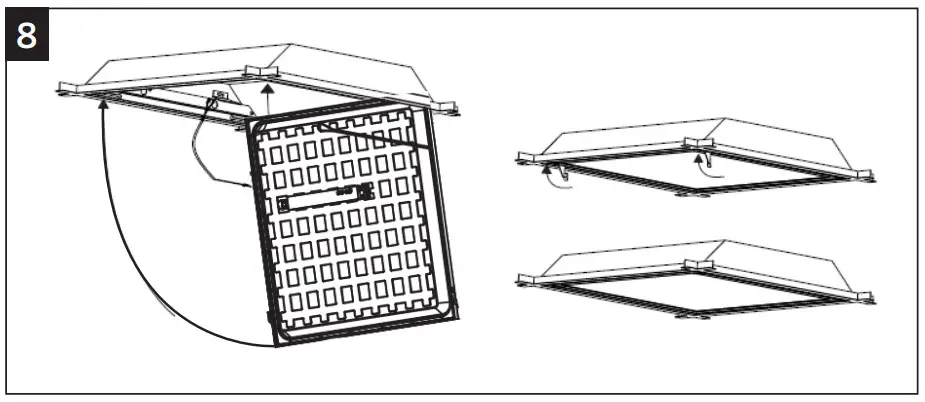
- Close the retrofit kit door into the fixture and rotate the clips to secure the door closed.


COMPONENT SUMMARY
| CATALOG NUMBER | QUANTITY |
| LED Module including – LED Driver/Power Supply and LED Array (Not Field Replaceable) | 1 |
| Mounting Bars | 2 |
| Mounting Brackets | 2 |
| Installation Instructions | 1 |
| Luminaire Marking Labels | 1 |
| Miscellaneous Hardware include 4 pcs M4.6*13 screws | 1 |
ORDERING INFORMATION
| CATALOG NUMBER | CARTON QTY. | EASY CODE | UPC |
| PRK-LED-24-50PS-8CSA | 1 | EZC-37 | 843654136714 |


