![]() INSTALLATION INSTRUCTIONS
INSTALLATION INSTRUCTIONS
PRK LED Professional Retrofit Kit – Pan Style
14043700 Rev. C
SAFETY WARNINGS
IMPORTANT SAFETY INFORMATION
![]() DANGER Risk of shock. Disconnect power before installation.
DANGER Risk of shock. Disconnect power before installation.![]() WARNING Risk of fire or electric shock. LED Retrofit Kit installation requires knowledge of luminaire electrical systems. If not qualified, do not attempt installation. Product must be installed in accordance with NEC or your local electrical code. If you are not familiar with these codes and requirements, contact a qualified electrician.
WARNING Risk of fire or electric shock. LED Retrofit Kit installation requires knowledge of luminaire electrical systems. If not qualified, do not attempt installation. Product must be installed in accordance with NEC or your local electrical code. If you are not familiar with these codes and requirements, contact a qualified electrician.![]() WARNING Risk of fire or electric shock. Check the existing wiring for damage before Installing the upgrade assembly. Do not install if existing wires are damaged.
WARNING Risk of fire or electric shock. Check the existing wiring for damage before Installing the upgrade assembly. Do not install if existing wires are damaged.
SUITABLE FOR DRY OR DAMP LOCATIONS.![]() WARNING Risk of fire or electric shock. Install this assembly only in luminaires that have the construction features and dimensions shown in the photographs and/or drawings.
WARNING Risk of fire or electric shock. Install this assembly only in luminaires that have the construction features and dimensions shown in the photographs and/or drawings.
Do not make or alter any open holes in an enclosure of wiring or electrical components during kit installation.
NOTE THE RETROFIT KIT IS ACCEPTED AS A COMPONENT OF A LUMINAIRE WHERE THE SUITABILITY OF THE COMBINATION SHALL BE DETERMINED BY CSA OR AUTHORITIES HAVING JURISDICTION.
INSTALLATION
Step 1: Unpack and inspect supplied components for defects before proceeding: (2) end caps, (1) LED panel with pre-mounted driver, (1) blank panel, (1) acrylic lens, and mounting hardware. Confirm the product ordered matches the product received.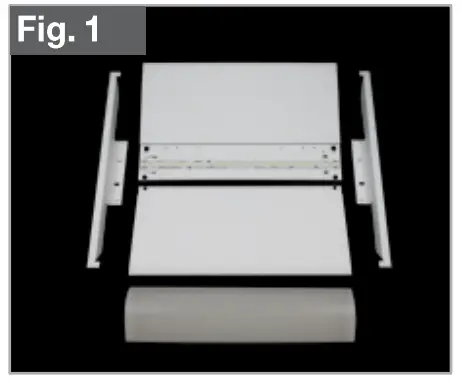
Disconnect power to the fixture. Remove all fluorescent components including fixture lenses, lamps, sockets, and ballasts, and dispose of them per local regulations.
Step 2: Insert end caps at each end of the luminaire between the ceiling grid and troffer.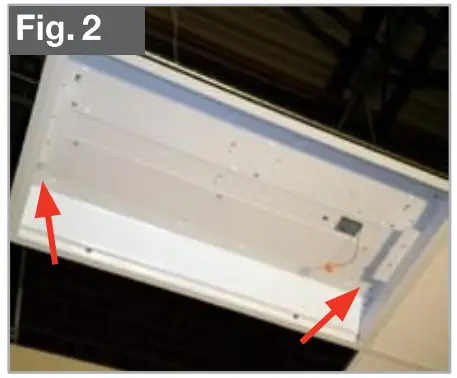
Step 3: Install a safety strap at each end of the fixture. Use one self-tapping screw to attach the strap to the endcap. Connect another end of the safety strap to the fixture using TEK screw.

Step 4: Slide LED panel between the grid and troffer, and fasten it to the end caps using the quarter turn screws provided.
For EM-equipped units only: Use the screws to secure the battery pack to the old fixture housing, then route the battery cable and make connections
Using the quick disconnect provided, make electrical connections: line to black, neutral to white, and earth ground to green.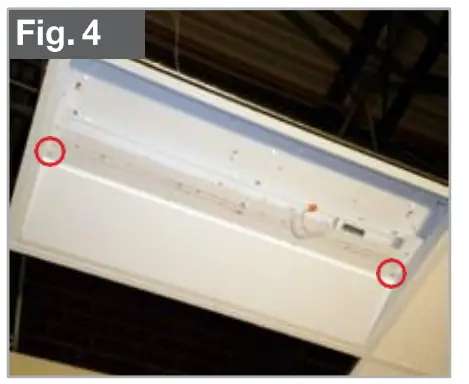
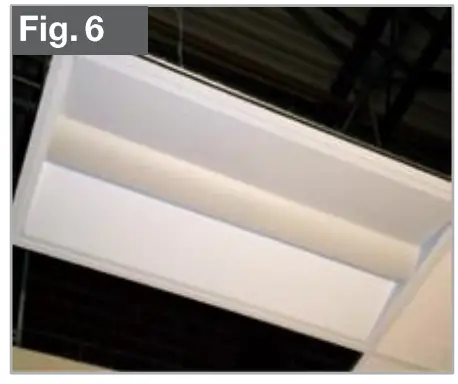
Step 5: Insert the blank panel between the grid and troffer, and fasten to the end caps using the quarter turn screws provided.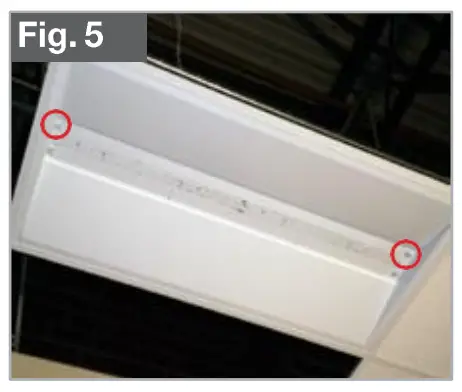
Step 6: Insert acrylic lens material into a track. Apply power and confirm normal operation.
www.universaldouglas.com Rev. 3/11/22![]()


