Combi-Steam Ovens
Operating and Installation Instructions Combi-Steam Ovens
To prevent accidents and machine damage, read these instructions before installation or use.
en-US, CA
M.-Nr. 11 924 020
Contents
IMPORTANT SAFETY INSTRUCTIONS …………………………………………………… 8 Overview………………………………………………………………………………………………. 21 Steam oven …………………………………………………………………………………………… 21
DGC 7860…………………………………………………………………………………………. 21 DGC 7780, DGC 7880………………………………………………………………………… 22 Data plate ……………………………………………………………………………………………… 24 Included accessories………………………………………………………………………………. 24 Control panel ……………………………………………………………………………………….. 27 On/Off button ………………………………………………………………………………………… 28 Motion sensor………………………………………………………………………………………… 28 Sensor buttons ………………………………………………………………………………………. 29 Touch display ………………………………………………………………………………………… 30 Symbols………………………………………………………………………………………………… 31 Using the appliance………………………………………………………………………………. 32 Selecting a menu option …………………………………………………………………………. 32 Scrolling………………………………………………………………………………………………… 32 Exiting a menu……………………………………………………………………………………….. 32 Changing a value or setting……………………………………………………………………… 32 Changing a setting in a list ………………………………………………………………….. 32 Entering numbers with the roller ………………………………………………………….. 32 Entering numbers using the numerical keypad ………………………………………. 32 Changing the setting with a segment bar ……………………………………………… 33 Entering letters ………………………………………………………………………………………. 33 Displaying the context menu……………………………………………………………………. 33 Moving entries……………………………………………………………………………………….. 33 Displaying the pull-down menu………………………………………………………………… 34 Displaying Help ……………………………………………………………………………………… 34 Activating MobileStart …………………………………………………………………………….. 34 Description of functions ……………………………………………………………………….. 35 Control panel …………………………………………………………………………………………. 35 Water container ……………………………………………………………………………………… 35 Condensate container …………………………………………………………………………….. 35 Food probe ……………………………………………………………………………………………. 35 Temperature/core temperature…………………………………………………………………. 35 Moisture………………………………………………………………………………………………… 36 Cooking duration ……………………………………………………………………………………. 36 Noises…………………………………………………………………………………………………… 36 Heating-up phase…………………………………………………………………………………… 37 Cooking phase ………………………………………………………………………………………. 37 Steam reduction …………………………………………………………………………………….. 37 2
Contents
Oven interior lighting ………………………………………………………………………………. 37 Before first use …………………………………………………………………………………….. 38 Miele@home ………………………………………………………………………………………….. 38 Basic settings ………………………………………………………………………………………… 39 Cleaning for the first time ………………………………………………………………………… 40 Setting the correct boiling point for water………………………………………………….. 41 Heating up the steam oven ……………………………………………………………………… 42 Settings ……………………………………………………………………………………………….. 43 Settings overview …………………………………………………………………………………… 43 Opening the Settings menu……………………………………………………………………… 46 Language …………………………………………………………………………………………… 46 Time……………………………………………………………………………………………………… 46 Date ……………………………………………………………………………………………………… 47 Lighting…………………………………………………………………………………………………. 47 Start screen …………………………………………………………………………………………… 48 Display………………………………………………………………………………………………….. 48 Volume………………………………………………………………………………………………….. 49 Units of Measurement …………………………………………………………………………….. 49 Keeping warm ……………………………………………………………………………………….. 50 Steam reduction …………………………………………………………………………………….. 50 Recommended temperatures…………………………………………………………………… 50 Booster …………………………………………………………………………………………………. 51 Automatic rinsing …………………………………………………………………………………… 51 Water hardness ……………………………………………………………………………………… 52 Proximity sensor ……………………………………………………………………………………. 53 Safety …………………………………………………………………………………………………… 54 Furniture front recognition ……………………………………………………………………….. 55 Miele@home ………………………………………………………………………………………….. 55 Remote Control ……………………………………………………………………………………… 56
Activating MobileStart ………………………………………………………………………… 56 SuperVision …………………………………………………………………………………………… 57 RemoteUpdate ………………………………………………………………………………………. 58 Software version…………………………………………………………………………………….. 59 Legal information……………………………………………………………………………………. 59 Showroom Program ……………………………………………………………………………….. 59 Factory default……………………………………………………………………………………….. 59 Alarm + Timer ………………………………………………………………………………………. 60 Using the Alarm function…………………………………………………………………………. 60 Using the Timer function …………………………………………………………………………. 61 Main and submenus ……………………………………………………………………………… 62
3
Contents
Energy-saving tips………………………………………………………………………………… 65 Operation……………………………………………………………………………………………… 66 Changing values and settings for a cooking program………………………………….. 67
Changing the temperature and core temperature …………………………………… 67 Changing Moisture …………………………………………………………………………….. 68 Setting additional durations ………………………………………………………………… 68 Changing set durations ………………………………………………………………………. 68 Deleting the set cooking durations……………………………………………………….. 68 Canceling a cooking program ………………………………………………………………….. 69 Interrupting a cooking program………………………………………………………………… 69 Preheating the oven ……………………………………………………………………………….. 70 Booster …………………………………………………………………………………………….. 70 Preheat …………………………………………………………………………………………….. 71 Crisp function ………………………………………………………………………………………… 71 Injecting bursts of steam …………………………………………………………………………. 72 Changing the operating mode………………………………………………………………….. 73 General notes……………………………………………………………………………………….. 74 The advantages of cooking with steam …………………………………………………….. 74 Suitable containers…………………………………………………………………………………. 74 Shelf level ……………………………………………………………………………………………… 75 Frozen food……………………………………………………………………………………………. 75 Temperature ………………………………………………………………………………………….. 75 Cooking duration ……………………………………………………………………………………. 75 Cooking with liquid…………………………………………………………………………………. 75 Your own recipes – Steam cooking …………………………………………………………… 75 Universal tray and wire rack …………………………………………………………………….. 76 Steam cooking……………………………………………………………………………………… 77 Notes on the cooking charts ……………………………………………………………………. 77 Vegetables…………………………………………………………………………………………….. 78 Fish………………………………………………………………………………………………………. 81 Meat …………………………………………………………………………………………………….. 84 Rice ……………………………………………………………………………………………………… 86 Grains …………………………………………………………………………………………………… 87 Pasta/noodles ……………………………………………………………………………………….. 88 Dumplings …………………………………………………………………………………………….. 89 Legumes……………………………………………………………………………………………….. 90 Eggs …………………………………………………………………………………………………….. 92 Fruit ……………………………………………………………………………………………………… 93 Sausage………………………………………………………………………………………………… 93 Shellfish ………………………………………………………………………………………………… 94 Mussels ………………………………………………………………………………………………… 95 4
Contents
Menu Cooking – Manual………………………………………………………………………….. 96 Sous-vide (vacuum) cooking …………………………………………………………………. 98 Special modes ……………………………………………………………………………………… 106 Reheat ………………………………………………………………………………………………….. 106 Defrost………………………………………………………………………………………………….. 108 Miele Mix & Match………………………………………………………………………………….. 111 Blanching………………………………………………………………………………………………. 123 Canning ………………………………………………………………………………………………… 123 Canning cakes……………………………………………………………………………………….. 126 Dehydrate ……………………………………………………………………………………………… 127 Proofing ………………………………………………………………………………………………… 128 Menu Cooking automatic ……………………………………………………………………… 128 Sanitizing Cookware ………………………………………………………………………………. 129 Sabbath Program …………………………………………………………………………………… 130 Warm-up Cookware ……………………………………………………………………………….. 131 Keep warm ……………………………………………………………………………………………. 131 Heating damp towels ……………………………………………………………………………… 132 Dissolving Gelatine…………………………………………………………………………………. 132 Decrystalize honey …………………………………………………………………………………. 133 Melting Chocolate ………………………………………………………………………………….. 133 Making Yogurt ……………………………………………………………………………………….. 134 Rendering Fat ………………………………………………………………………………………… 135 Sweating Onions ……………………………………………………………………………………. 135 Juicing ………………………………………………………………………………………………….. 136 Fruit jam………………………………………………………………………………………………… 137 Skinning Fruits and Vegetables ………………………………………………………………… 138 Preserving Apples …………………………………………………………………………………. 138 Preparing custard royale …………………………………………………………………………. 138 Automatic Programs …………………………………………………………………………….. 139 Categories …………………………………………………………………………………………….. 139 Using automatic programs ………………………………………………………………………. 139 Usage notes ………………………………………………………………………………………….. 139 Search ………………………………………………………………………………………………….. 140 MyMiele ……………………………………………………………………………………………….. 141 Favorites………………………………………………………………………………………………. 142 Baking………………………………………………………………………………………………….. 146 Baking tips…………………………………………………………………………………………….. 146 Tips for baking……………………………………………………………………………………….. 147
5
Contents
Notes on the operating modes…………………………………………………………………. 147 Roasting ………………………………………………………………………………………………. 149 Roasting tips …………………………………………………………………………………………. 149 Notes on the operating modes…………………………………………………………………. 149 Food Probe……………………………………………………………………………………………. 151 Broiling ………………………………………………………………………………………………… 154 Broiling tips……………………………………………………………………………………………. 154 Tips for broiling………………………………………………………………………………………. 154 Notes on the operating modes…………………………………………………………………. 155 Cleaning and care for the steam oven …………………………………………………… 156 Important information on cleaning and care ………………………………………………. 156 Unsuitable cleaning agents ……………………………………………………………………… 157 Cleaning the steam oven front …………………………………………………………………. 157 PerfectClean ………………………………………………………………………………………….. 158 Oven compartment ………………………………………………………………………………… 159 Cleaning the water container and condensate container……………………………… 160 Accessories …………………………………………………………………………………………… 161 Cleaning the side racks …………………………………………………………………………… 162 Lowering the browning/broiling element ……………………………………………………. 163 Maintenance………………………………………………………………………………………….. 164
Soaking ……………………………………………………………………………………………. 164 Drying ………………………………………………………………………………………………. 164 Rinsing……………………………………………………………………………………………… 164 Descaling the steam oven …………………………………………………………………… 164 Removing the door…………………………………………………………………………………. 166 Installing the door…………………………………………………………………………………… 167 Frequently Asked Questions …………………………………………………………………. 168 Optional accessories ……………………………………………………………………………. 174 Containers …………………………………………………………………………………………….. 174 Other…………………………………………………………………………………………………….. 174 Cleaning and care products …………………………………………………………………….. 174 Customer Service…………………………………………………………………………………. 175 Contact in the event of a fault ………………………………………………………………….. 175 Appliance warranty and product registration ……………………………………………… 175 Caring for the environment …………………………………………………………………… 176 Installation……………………………………………………………………………………………. 177 IMPORTANT SAFETY INSTRUCTIONS – INSTALLATION …………………………….. 177
6
Contents
Installation dimensions DGC 7860 ……………………………………………………………. 178 Installation in a tall cabinet ………………………………………………………………….. 178 Side view ………………………………………………………………………………………….. 179 Swivel range for control panel……………………………………………………………… 180 Connections and ventilation………………………………………………………………… 181
Installation dimensions DGC 7780, DGC 7880 …………………………………………… 182 Installation in a tall cabinet ………………………………………………………………….. 182 Side view ………………………………………………………………………………………….. 183 Swivel range for control panel……………………………………………………………… 184 Connections and ventilation………………………………………………………………… 185
Installing and removing the steam oven…………………………………………………….. 186 Electrical connection ………………………………………………………………………………. 189 Declaration of conformity ……………………………………………………………………… 190 Copyrights and licenses ……………………………………………………………………….. 191
7
IMPORTANT SAFETY INSTRUCTIONS
When using the appliance, please comply with the basic safety requirements, including the following instructions: Read all instructions before installation and use of the steam oven to prevent accidents and damage to the appliance. The Combi-Steam Oven is referred to in the following instructions as a steam oven.
This appliance complies with all current local and national safety requirements. Inappropriate use can, however, lead to personal injury and material damage. Please read these operating and installation instructions carefully before using the steam oven for the first time. They contain important information on safety, installation, use, and maintenance. This prevents both personal injury and damage to the steam oven. Miele cannot be held liable for injury or damage caused by noncompliance with these instructions. Keep these operating and installation instructions in a safe place and pass them on to any future owner.
8
IMPORTANT SAFETY INSTRUCTIONS Appropriate use This appliance is intended for residential use only. The steam oven is not suitable for outdoor use. The steam oven is intended only to steam, bake, roast, broil, de-
frost, and reheat food. All other types of use are not permitted. Risk of fire. Never use the steam oven to store or dry items which could ignite easily. Persons who lack physical, sensory or mental abilities, or experience with the appliance should not use it without supervision or instruction by a responsible person. This steam oven is supplied with a special bulb to cope with particular conditions (e.g. temperature, moisture, chemical resistance, abrasion resistance and vibration). This special bulb must only be used for the purpose for which it is intended. It is not suitable for room lighting. Replacement of bulbs may only be carried out by a Miele authorized technician.
9
IMPORTANT SAFETY INSTRUCTIONS Safety with children Activate the system lock to ensure that children cannot switch on
the steam oven inadvertently. Please supervise children in the vicinity of the steam oven and do not let them play with it. Risk of burns due to improper use. Do not allow children to operate the steam oven. Risk of suffocation from packaging material. While playing, children may become entangled in packaging material (such as plastic wrapping) or pull it over their head, presenting the risk of suffocation. Keep packaging material away from children. Danger of injury caused by hot surfaces. Children’s skin is far more sensitive to high temperatures than that of adults. External parts of the steam oven such as the door glass, control panel, and the vent become quite hot. Do not let children touch the steam oven when it is in operation. Keep children well away from the steam oven until it has cooled down and there is no danger of injury. Risk of injury from the open door. The oven door can support a maximum weight of 22 lbs (10 kg). Children could injure themselves on an open door. Do not let children sit on the door, lean against it, or swing on it.
10
IMPORTANT SAFETY INSTRUCTIONS
Technical safety This steam oven must be installed and connected in compliance with the installation instructions. Unauthorized installation, maintenance, and repairs can cause considerable danger for the user. Installation, maintenance, and repairs must only be carried out by a Miele authorized technician. Changes or modifications not expressly approved by Miele may void the user’s authority to operate the steam oven. Maintenance by the user: Never repair or replace any part of the appliance unless the instructions specifically recommend doing so. Service work should only be performed by a qualified technician. A damaged appliance is dangerous. Check the appliance for any visible damage. Never install or attempt to use a damaged appliance. Reliable and safe operation of this steam oven can only be assured if it has been connected to the power supply. Be certain your appliance is properly installed and grounded by a qualified technician. To guarantee the electrical safety of this appliance, continuity must exist between the appliance and an effective grounding system. It is imperative that this basic safety requirement be met. If there is any doubt, have the electrical system of the house checked by a qualified electrician. Proper installation: Make sure that your appliance has been installed correctly and that it has been grounded by a qualified technician. Before connecting the appliance to the power supply, ensure that the connection data on the data plate (voltage and frequency) match the power supply. This data must correspond in order to avoid the risk of damage to the appliance. Consult a qualified electrician if in any doubt.
11
IMPORTANT SAFETY INSTRUCTIONS Do not use an extension cord to connect this appliance to the
power supply. Extension cords do not guarantee the required safety of the appliance. Maintain the required minimum installation height of 36″ (914 mm). For safety reasons, this appliance may only be used after it has been built in. This steam oven must not be used in a non-stationary location (e.g. on a ship). Risk of injury due to electric shock. Any contact with live connections or tampering with the electrical or mechanical components of the oven will endanger your safety and may lead to the steam oven malfunctioning. Do not open the steam oven housing under any circumstances. While the appliance is under warranty, repairs should only be performed by a Miele-authorized service technicians. Work by unqualified persons could be dangerous and may void the warranty. Defective components should be replaced by Miele original parts only. Only with these parts can safety of the appliance be assured as intended by the manufacturer. If the electrical plug is removed from the power cord or if the power cord is supplied without an electrical plug, the steam oven must be connected to the electricity supply by a qualified service technician. If the power cord is damaged, it must be replaced with a special power cord (see “Electrical connection” under “Installation”).
12
IMPORTANT SAFETY INSTRUCTIONS During installation, maintenance and repair work, the appliance
must be disconnected from the main electricity supply. It is only completely isolated from the electricity supply when: – The circuit breakers have been switched off, or – The fuses of the electrical installation have been completely re-
moved, or – Unplug (if plug present) the machine from the outlet. Pull the plug
not the cord. If the steam oven is installed behind a cabinet front (e.g., a door), do not close the cabinet front while the steam oven is in use. Heat and moisture can build up behind the cabinet front when closed. This can result in damage to the steam oven, the housing unit, and the floor. Leave the door panel open until the steam oven has cooled down completely.
13
IMPORTANT SAFETY INSTRUCTIONS
Correct use Danger of burning. The heater elements may still be hot even if they are not glowing red. The surfaces of the oven compartment can cause burns if they are touched. External parts of the steam oven such as the door glass, control panel, and the vent become quite hot. During operation and after turning the steam oven off, make sure that you do not touch any hot parts and surfaces and do not let any items of clothing or flammable objects come into contact with these. Wait until the steam oven has cooled down. Do not let food sit in the oven for an extended period of time before or after cooking. Doing so can result in food poisoning or sickness. Loose fitting or hanging garments present a fire hazard. Wear proper apparel while operating the appliance. Use only dry, heat-resistant potholders. Moist or damp potholders used on hot surfaces may result in steam burns. Do not let potholders come in contact with oil or grease. Do not substitute dish towels or other bulky items for potholders. Do not let potholders touch hot heating elements. Open the door carefully to allow hot air or steam to escape before placing or removing food. Danger of burning. Push the baking trays and wire racks onto the corresponding level before heating up the steam oven. If you want to remove the baking tray or wire rack while the oven compartment is hot, do not touch the heater elements with the pot holders. To prevent burns, allow the heating elements to cool before cleaning by hand. Smother the fire or flames, or use a dry chemical extinguishing agent or foam fire extinguisher. Do not store any flammable liquids and objects near to the steam oven or cooktop.
14
IMPORTANT SAFETY INSTRUCTIONS
WARNING Never use the steam oven to heat or warm up a room. This may result in carbon monoxide poisoning and overheating of the steam oven.
WARNING Never use the steam oven for storage purposes. This may result in carbon monoxide poisoning and overheating of the steam oven.
WARNING Never cover slots, holes, or openings in the base of the steam oven or cover the entire wire rack with materials such as aluminum foil. This blocks the air flow in the steam oven and can cause carbon monoxide poisoning. Covers made of aluminum foil can also cause heat to build up, which could lead to a fire. Do not obstruct the flow of combustion and ventilation air. Only use the steam oven to prepare food. Corrosive chemicals and vapors such as those caused by heated adhesives, plastic, or flammable liquids and objects can be harmful to the health. Do not use the steam oven for drying, toasting, or dehumidifying. Do not let metal objects (aluminum foil, pans) come in contact with the heating element. Make certain that the power cords of small appliances do not come in contact with or get caught in the oven door. Risk of injury caused by hot surfaces and steam. The steam oven gets hot during operation. You could burn yourself on the heater elements, oven compartment, side racks, accessories, food, or steam. Use pot holders when placing food in the appliance or removing it and when working in the hot oven compartment.
15
IMPORTANT SAFETY INSTRUCTIONS Risk of injury caused by hot food.
Food may spill or splash around when placing it into the oven or removing it. The food can cause burns. When placing cooking containers in the oven or removing them, make sure that the hot food does not spill. Do not heat up food in closed containers e.g. tins or sealed jars in the steam oven, as pressure will build up in the container, causing it to explode. Plastic containers which are not suitable for use in an oven can melt at high temperatures and can even damage the steam oven or catch fire. Only use plastic containers which are declared by the manufacturer as being suitable for use in a steam oven. Follow the manufacturer’s instructions on use. If you want to use plastic containers for steaming food make sure that they are temperature resistant to 212°F (100°C) and steam resistant. Any other plastic containers could melt, become brittle or break when subjected to heat. Risk of injury caused by steam. Pouring a cold liquid onto a hot surface creates steam, which can cause severe scalding. The sudden temperature change can also cause damage to hot surfaces. Never pour cold liquids directly onto hot enameled surfaces. It is important that the temperature in the food being cooked is evenly distributed and sufficiently high. You can ensure this by stirring or turning the food. Food which is left in the oven compartment can dry out and the moisture released can lead to corrosion damage in the steam oven. Do not leave food in the oven compartment and do not use any cooking containers which are susceptible to corrosion. Risk of injury from the open door. You could bang into the open door or trip over it. Do not leave the door open unnecessarily.
16
IMPORTANT SAFETY INSTRUCTIONS The door can support a maximum weight of 22 lbs (10 kg). Do not
sit, lean or place heavy items on the open oven door. Also be sure nothing can get trapped between the door and the oven cavity. The steam oven could get damaged. Oil and fat can ignite if overheated. Never leave the steam oven unattended when cooking with oil and fat. If it does ignite do not put the flames out with water. Switch the steam oven off immediately and then suffocate the flames by keeping the oven door closed. Due to the high temperatures radiated, objects left near the steam oven when it is in use could catch fire. Do not use the steam oven to heat up the room. Broiling food for excessively long cooking durations can cause it to dry out with the risk of catching fire. Do not exceed the recommended cooking durations. Certain foods dry out quickly and may catch fire due to high broiling temperatures. Never use broiling modes to finish baking par-cooked rolls or bread, or to dry flowers or herbs. Instead, use the Convection Bake or Surround operating mode. To avoid fueling any flames, do not open the steam oven door if there is smoke inside the oven compartment. Interrupt operation by turning the steam oven off and disconnecting it from the electricity supply. Do not open the door until the smoke has dispersed. Use caution when using alcohol in your recipes. Alcohol evaporates at high temperatures but may, in rare circumstances, combust on the hot heating elements.
17
IMPORTANT SAFETY INSTRUCTIONS Never line the floor of the oven with aluminum foil or oven liners.
Do not place any dishware or any pans, pots, or baking trays directly on the floor of the oven compartment. If you want to use the floor of the oven compartment as an extra surface, place the wire rack on the floor of the oven compartment with the rack surface facing up and the dishware on top. In doing so, ensure that the filter in the floor of the oven is not moved. The oven compartment floor can become damaged by the wire rack being pushed around on it. Do not push the wire rack around on the oven compartment floor. Larger deposits of food can block the drain and pump. Always make sure that the filter in the floor of the oven is inserted. When using a small electrical appliance, e.g., a hand-held blender, near the steam oven, care should be taken that the power cord of the appliance cannot get trapped by the steam oven door. This could damage the insulation on the cord. Do not operate the appliance without the bulb cover. Steam could attack the electrical components and cause a short circuit. Steam could also damage the electrical components.
18
IMPORTANT SAFETY INSTRUCTIONS Cleaning and maintenance Only clean parts listed in these operating and installation instruc-
tions. Risk of injury due to electric shock. The steam from a steam cleaning appliance could reach live electrical components and cause a short circuit. Never use a steam cleaner for cleaning. Scratches on the door glass can cause the glass to break. Do not use abrasive cleaners, hard sponges, brushes or sharp metal tools to clean the door glass. The side racks can be removed (see “Cleaning the side racks” under “Cleaning and care for the steam oven”). Reinstall the side racks correctly. To avoid corrosion on the stainless steel surfaces, remove any splashes on the interior walls of the oven from food or liquids containing salt. In warm, moist environments, there is a higher probability of pest infestations. Ensure the steam oven and the area surrounding it are always kept clean. Damage caused by pests is not covered by the warranty.
19
IMPORTANT SAFETY INSTRUCTIONS Accessories Use only genuine original Miele parts. If parts or accessories from
other manufacturers are used, the warranty may become void. Only use the Miele food probe supplied with this oven. If it is faulty, it must only be replaced with a Miele genuine probe. The plastic on the probe can melt at very high temperatures. Do not use the probe when using the broil functions (exception: Convection Broil ). Do not store the probe in the oven if it is not in use. The perforated and solid cooking pans will be damaged by high temperatures! Use them only in modes and programs that work exclusively with steam. This device complies with Industry Canada licence-exempt RSS standard(s) and part 15 of the FCC Rules. Operation is subject to the following two conditions: (1) This device may not cause harmful interference, and (2) this device must accept any interference received, including interference that may cause undesired operation. The construction of the device assures that the FCC exposure limits are verifiably met using the integrated WiFi module EK037. Contains: FCC ID: 2ACUWEK037 IC ID: 5669C-EK037
KEEP THE OPERATING AND INSTALLATION INSTRUCTIONS IN A SAFE PLACE AND REVIEW THEM PERIODICALLY.
20
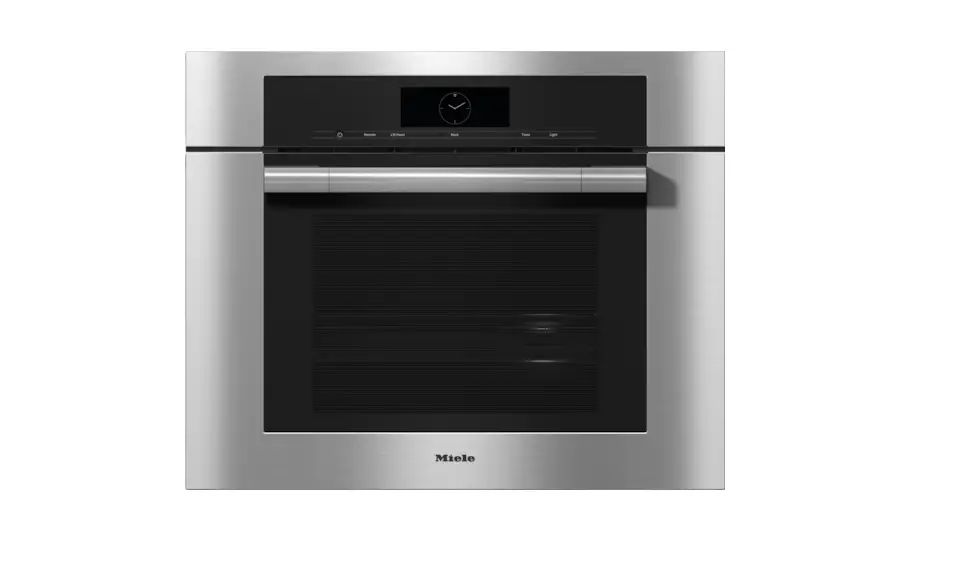
Steam oven
DGC 7860
Overview
a Controls b Vent c Browning/Broiling element d Oven interior lighting e Convection fan with heating element f Oven floor with bottom heater element and floor filter underneath it g Drip channel h Temperature sensor i Moisture sensor j Door seal k Connection socket for the probe l Side runners with 4 shelf levels m Steam inlet n Door
21
Overview
DGC 7780, DGC 7880
a Controls b Vent c Browning/Broiling element d Oven interior lighting e Convection fan with heating element f Oven floor with bottom heater element and floor filter underneath it g Drip channel h Temperature sensor i Moisture sensor j Door seal k Connection socket for the probe l Side runners with 4 shelf levels m Steam inlet n Door
22
Overview
a Condensate container b Condensate container compartment c Data plate d Compartment for water container e Water container
23
Overview
A list of the models described in these operating and installation instructions can be found on the back page.
DGGL 20
Data plate
The data plate can be found at the top on the opened control panel. Here you can find the model and serial number. Have this information available if you need to contact Miele so that any issues can be rectified as quickly as possible.
1 perforated cooking pan Gross capacity 0.64 gal (2.4 l) Useable capacity 0.48 gal (1.8 l) 17 11/16″ x 7 1/2″ x 1 9/16″ (WxDxH) 450 x 190 x 40 mm (WxDxH) DGGL 12
Included accessories
The accessories supplied with your appliance, as well as a range of optional ones, are available to order from Miele (see “Optional accessories”).
The perforated and solid cooking pans will be damaged by high temperatures! Use them only in modes and programs that work exclusively with steam.
DGG 20
1 perforated cooking pan Gross capacity 1.43 gal (5.4 l) Useable capacity 0.87 gal (3.3 l) 17 11/16″ x 15 3/8″ x 1 9/16″ (WxDxH) 450 x 390 x 40 mm (WxDxH) Universal tray
1 universal tray for baking, roasting and broiling
Wire rack
1 solid cooking pan Gross capacity 0.64 gal (2.4 l) Useable capacity 0.48 gal (1.8 l) 17 11/16″ x 7 1/2″ x 1 9/16″ (WxDxH) 450 x 190 x 40 mm (WxDxH)
1 wire rack for baking, roasting and broiling
24
Food probe
Overview
FlexiClip telescopic runners HFC 71
Food probe to allow you to monitor the exact temperature of cooking processes (see “Food probe” under “Roasting”). When using the food probe, do not
insert the FlexiClip telescopic runners on shelf level 4, otherwise the socket will be blocked.
Descaling tablets For descaling the steam oven
The FlexiClip telescopic runners can be attached to any shelf level. Push the FlexiClip telescopic runners all the way into the oven before placing accessories on them. The accessories will then automatically sit securely in between the stoppers at either end of each runner and be prevented from sliding off.
The FlexiClip telescopic runners can support a maximum load of 33 lb (15 kg).
25
Overview
Installing and removing the FlexiClip telescopic runners
Danger of injury caused by hot
surfaces. The steam oven gets hot during operation. You could burn yourself on the heater elements, oven compartment, side racks, or accessories. Allow the heater elements, oven compartment, the side racks, and the accessories to cool down before fitting or removing the FlexiClip telescopic runners.
The FlexiClip telescopic runners are installed in between the two rails that make up a shelf level. The FlexiClip telescopic runner with the Miele logo is installed on the right.
When installing or removing the FlexiClip telescopic runners, do not extend them.
Then secure the FlexiClip telescopic runner to the lower rail of the shelf level (3.).
If the FlexiClip telescopic runners are difficult to pull out after installing, you may need to pull firmly on them once to release them. To remove a FlexiClip telescopic runner, proceed as follows: Push the FlexiClip telescopic runner
in all the way.
Hook the FlexiClip telescopic runner onto the lower rail of a shelf level at the front (1.) and push it along the rail into the oven compartment (2.).
Remove the FlexiClip telescopic runner by raising it at the front (1.) and then pulling it forward along the rail of the shelf level and out (2.).
26
Control panel
a Recessed On/Off button For turning the steam oven on and off
b Optical interface (for Miele Service only)
c Remote sensor button For controlling the steam oven via your mobile device
d Lift Panel sensor button For opening and closing the control panel
e Touch display For displaying information and for operation
f Proximity sensor (MotionReact) For turning on the oven interior lighting and the display when approached, and to dismiss the audible signal when movement is detected
g Back sensor button To go back a step
h Timer sensor button To activate or deactivate timers or alarms
i Light sensor button For switching the oven interior lighting on and off
27
Control panel
On/Off button
The On/Off button is recessed and reacts to touch. Use this button to turn the steam oven on and off.
Motion sensor
The motion sensor is located under the touch display next to the Back sensor button. The motion sensor detects when you approach the touch display, e.g., with your hand or body. If you have activated the corresponding settings, you can turn on the oven interior lighting, turn on the steam oven, or dismiss the audible signals (see “Proximity sensor” under “Settings”).
28
Control panel
Sensor buttons
The sensor buttons react to touch. Every tap of a sensor button is confirmed with an audible keypad tone. You can turn this keypad tone off by selecting the Volume | Keypad Tone | Off setting.
If you want the sensor buttons to respond even when the steam oven is turned off, select the Display | QuickTouch | On setting.
Sensor button Function
Remote
If you want to control the steam oven from your mobile device, you must have the Miele@home system, turn on the Remote Control setting, and tap this sensor button. The sensor button then lights up and the MobileStart function is available.
As long as this sensor button is illuminated, you can control the steam oven via your mobile device (see “Settings Miele@home”).
Lift Panel
Use this sensor button to open and close the control panel (see “Description of functions Control panel”).
Back
Depending on which menu you are in, this will take you back a level or back to the main menu.
Timer
If a menu appears on the display or if a cooking process is in progress, you can use this sensor button to set a timer (e.g., when boiling eggs) or an alarm (a specific time) at any point (see “Alarm + timer”).
Light
Select this sensor button to turn the oven interior lighting on and off.
Depending on the setting selected, the oven interior lighting turns off after 15 seconds or remains constantly turned on or off.
29
Control panel
Touch display
The sensitive surface of the touch display can be scratched by pointed or sharp objects, e.g., pens. Only touch the display with your fingers. Make sure that water cannot get behind the touch display. The touch display is split into multiple areas.
12:00
Operating Modes
Automatic Programs
Special Modes
MyMiele
The menu path appears on the left of the header. The individual menu options are separated by a vertical line. … indicates that there are more menu options available if the menu path can no longer be displayed because there is not enough space on the display. If you tap a menu name in the header, the display will switch to that menu. To switch to the start screen, tap . The time of day is shown on the right of the header. You can set the time of day by tapping the display. Additional symbols may also appear, e.g., SuperVision . At the top of the header, there is an orange line where you can drag down the pulldown menu. This allows you to turn settings on or off during a cooking process. The current menu and menu options are shown in the center of the display. You can scroll to the right or left by swiping your finger across the display to the right or left. Tap a menu option to select it (see “Using the appliance”). The operation fields that appear in the footer vary according to the menu that is selected; e.g., Timer, Save or OK.
30
Control panel
Symbols
The following symbols may appear on the display:
Symbol
…
/ /
Meaning This symbol indicates that there is additional information and advice about using the appliance. Select OK to confirm the information. This indicates that there are more menu options available, which are not visible because there is not enough space on the display. Water level indicator Alarm Timer Some settings, e.g., display brightness and signal tone volume, are selected using a segment bar. The system lock or sensor lock is on (see “Settings Safety”). The controls are locked. Core temperature when using the probe Remote control (only appears if you are in the Miele@home system and have selected the Remote Control | On setting) SuperVision (only appears if you are in the Miele@home system and have selected the SuperVision | SuperVision display | On setting)
31
Using the appliance
You operate the steam oven via the touch display by touching the desired menu option. Each time you tap a possible option, the relevant characters (word and/or symbol) will light up orange. Fields for confirming an operating step are highlighted in green (e.g., OK).
Selecting a menu option
Tap the field or value you want on the display.
Scrolling
You can scroll left or right. Swipe across the screen. To do this,
place your finger on the touch display and swipe it in the desired direction. The bar at the bottom shows you where you are in the current menu.
Exiting a menu
Tap the Back sensor button or tap the … symbol in the menu path.
Tap the symbol to switch to the start screen.
Entries made before this which have not been confirmed with OK will not be saved.
Changing a value or setting
Changing a setting in a list The current setting is highlighted in orange. Tap the desired setting. The setting is now saved. This will take you back to the previous menu.
Entering numbers with the roller Swipe the roller up or down until the
desired value is displayed in the center. Confirm with OK. The changed number is now saved.
Entering numbers using the numerical keypad Tap on the value that is in the middle
of the numerical keypad. The numerical keypad appears. Tap the required numbers. As soon as you enter a valid value, OK will turn green. Use the arrow to delete the last entered number. Confirm with OK. The changed number is now saved.
32
Using the appliance
Changing the setting with a segment bar Some settings are represented by a bar made up of segments. If all of the segments are illuminated, the maximum value is selected. If none of the segments are illuminated or if only one is, the minimum value is selected or the setting is turned off altogether (e.g., audible signals). Tap the corresponding segment on
the segment bar to change the setting. Select On or Off to turn the setting on or off. Confirm your selection with OK. The setting is now saved. This will take you back to the previous menu.
Entering letters
Letters are entered using a display keyboard. It is best to select short names. Tap the letters or characters you
want. Tip: You can add a line break for longer program names using the symbol. Tap Save. The name is now saved.
Displaying the context menu
In some menus you can display a context menu, e.g., to rename Favorites or to move entries under MyMiele. For example, tap a Favorite and keep
your finger on it until the context menu opens. To close the context menu, tap an area of the display located outside of the menu window.
Moving entries
You can change the order of Favorites or entries under MyMiele. For example, tap a Favorite and keep
your finger on it until the context menu opens. Select Move. Keep your finger on the highlighted field and drag it to the location you want.
33
Using the appliance
Displaying the pull-down menu
During a cooking program, you can turn settings such as Booster or Preheat and the WiFi function on or off. Use the orange line under the header
to drag the pull-down menu down. Select the setting you want to
change. Active settings are highlighted in orange. Depending on the selected color scheme, inactive settings are highlighted either in black or white (see “Settings Display”). To close the pull-down menu, drag it back up to the top or tap an area of the display located outside of the menu window.
Displaying Help
Context-sensitive help is available for certain functions. In this case, Help appears in the bottom line. Tap Help to display information in text
and pictures. Tap Close to return to the previous
menu.
Activating MobileStart
Select the Remote sensor button to activate MobileStart.
The Remote sensor button lights up. You can operate your steam oven remotely with the Miele app.
Directly operating on the steam oven takes priority over operating it via the remote control function on the app. You can use MobileStart as long as the Remote sensor button is lit up.
34
Description of functions
Control panel
The water container and the condensate container are located behind the control panel. The panel is opened and closed by touching the Lift Panel sensor button. Before the control panel closes automatically, a note appears in the display, which you must confirm with OK. The control panel is fitted with anti-trapping protection. If the control panel senses resistance when opening/closing, the process is canceled. Do not touch the upper edge of the door when the panel is opening and closing.
Water container
The maximum filling volume is 6 cups (1.4 l) and the minimum is 4 1/4 cups (1.0 l). There are markings on the water container. The upper marking must never be exceeded. Water consumption depends on the type of food and the cooking duration. The water may need to be topped up during cooking. Water consumption is increased if the door is opened during cooking. Fill the water container to the maximum level before each cooking program involving steam.
Condensate container
Condensate that collects in the appliance from cooking is pumped into the condensate container. The container has a maximum capacity of 6 cups (1.4 l).
Food probe
The probe measures the core temperature in the food, enabling the temperature during the cooking process to be monitored simply and accurately.
Temperature/core temperature
Some functions have a preset recommended temperature. The recommended temperature can be altered within the given range for an individual cooking program, a program stage, or for every time that program is used (see “Recommended temperatures” under “Settings”). The core temperature can also be altered within the given range for an individual program or a specific program stage.
35
Description of functions
Moisture
The Combi Steam operating mode and Reheat Special Mode use a combination of oven heat and moisture. The moisture level can be selected within the given range for an individual program or a specific program stage. Depending on the moisture setting, moisture or fresh air is supplied to the oven compartment. With the moisture setting = 0%, the maximum fresh air supply is implemented and no moisture is supplied. With the moisture setting = 100%, there is no fresh air supply and the moisture content is at its maximum. Some food gives off moisture during the cooking process. This moisture from the food affects the amount of additional moisture needed. If the required amount of moisture is low, the steam generator may not be activated at all.
Cooking duration
Depending on the operating mode, you can set a cooking duration of between 1 minute and 6, 10, or 12 hours. The cooking durations of the Automatic, Maintenance, and Menu Cooking programs are set at the factory and cannot be altered. When cooking with steam, as well as for programs and applications with pure steam operation, the cooking duration does not begin until the set temperature is reached. It starts immediately for all other operating modes, programs, and applications.
Noises
A humming sound can be heard during operation and after turning off the steam oven. This noise does not indicate incorrect operation or an appliance fault. The noise is made by water being pumped through the system. When the steam oven is in use, you will hear a blower noise.
36
Description of functions
Heating-up phase
The display shows the temperature in the oven compartment as it rises during the heating-up phase in all operating modes (exceptions: Maxi Broil , Broil ). The duration of the heating-up phase with steam cooking will depend on the quantity and temperature of the food. In general, the heating-up phase will last for approx. 7 minutes. It will be longer if you are cooking refrigerated or frozen food. The heating-up phase may also take longer when cooking at lower temperatures and when cooking with the Sous-vide operating mode.
Cooking phase
The elapsing time left is shown in the display during the cooking phase. When cooking with steam, the cooking phase begins once the set temperature is reached. It starts immediately for all other operating modes, programs, and applications.
Oven interior lighting
For energy-saving reasons, the oven interior lighting has been set at the factory to go out after the program has begun. If you want it to stay on all the time the oven is on, you will need to alter the default setting (see “Lighting” under “Settings”). If the door is left open at the end of a cooking program, the oven interior lighting will turn off automatically after 5 minutes. If the Light sensor button on the control panel is touched, the oven compartment lighting will come on for 15 seconds.
Steam reduction
With steam cooking and Combi-Steam, the steam-reduction function will turn on automatically at the end of a cooking program which uses a temperature within a certain temperature range. This is to prevent a large amount of steam escaping when the door is opened. Steam reduction will appear in the display.
Steam reduction can be turned off (see “Steam reduction” under “Settings”). When steam reduction is turned off, a large amount of steam will escape when the door is opened.
37
Before first use
Miele@home
Your steam oven is equipped with an integrated WiFi module. To use this feature, you will need: – a WiFi network – the Miele app – a Miele user account You can create
a user account via the Miele app. The Miele@mobile app will guide you as you connect your steam oven to your home WiFi network. Once your steam oven is connected to your WiFi network, you can use the app for a number of actions, including the following: – Call up information on the operating
status of your steam oven – Retrieve information on cooking pro-
cesses that are in progress – Stop cooking programs that are in
progress Connecting your steam oven to your WiFi network will increase energy consumption, even when the steam oven is turned off.
Availability of the WiFi connection The WiFi connection shares a frequency range with other appliances (including microwave ovens and remote control toys). This can cause sporadic or even complete connection failures. Therefore, the availability of featured functions cannot be guaranteed.
Miele@home availability The ability to use the Miele app depends on the availability of the Miele@home service in your country. The Miele@home service is not available in every country. For information about availability, please visit www.miele.com.
Miele App The Miele App is available to download free of charge from the Apple App Store® or from the Google Play StoreTM.
Make sure that the signal of your WiFi network is sufficiently strong in the place where your steam oven is installed.
38
Before first use
Basic settings
You must make the following settings before starting up for the first time. You can change these settings again at a later time (see “Settings”).
Danger of injury caused by hot
surfaces. The steam oven gets hot during operation. For safety reasons, the steam oven may only be used when it has been fully installed.
The steam oven will turn on automatically when it is connected to the electricity supply.
Setting the language Select the desired language. If you have accidentally selected a language that you don’t understand, proceed as described in “Settings Language “.
Setting the location Select the required location.
Setting up Miele@home Set up Miele@home? will appear on the display. To set up Miele@home immediately,
select Continue. To set it up at a later date, select Skip.
See “Settings Miele@home” for information on setting up at a later date. To set up Miele@home immediately, select the connection method you want to use. You will then be guided by the display and the Miele app.
Setting the date Set the day, then the month, and fi-
nally the year. Confirm with OK.
Setting the time Set the time of day in hours and min-
utes. Confirm with OK.
39
Before first use
Setting the water hardness Your local water authority will be able to tell you the hardness of the water in your area. More information can be found under in “Water hardness” under “Settings”. Set the water hardness level for your
area. Confirm with OK. Completing the commissioning process Follow any further instructions on the
display. The appliance is now ready for use.
Cleaning for the first time
Remove any protective wrapping and stickers from the steam oven and accessories.
The appliance has undergone a function test in the factory. Residual water from this testing may have dripped from the lines into the oven cavity during transportation.
Cleaning the water container and condensate container
Risk of injury caused by the con-
trol panel. You could get caught in the panel as it opens or closes. Do not touch the upper edge of the door when the panel is opening and closing.
Turn the steam oven on using the On/Off sensor button.
Select the Lift Panel sensor button to open the control panel.
Remove the water container and condensate container. Remove the water container and condensate container by pushing them upward slightly.
Rinse the water container and condensate container by hand or in the dishwasher.
Push the water container and condensate container back in again.
Select the Lift Panel sensor button to close the control panel.
The message Press the OK button to close the lift-up control panel will appear. Confirm with OK.
40
Before first use
Cleaning the accessories/oven compartment Take all accessories out of the oven
compartment. Wash the cooking containers by hand
or in the dishwasher. The universal tray and wire rack surfaces are treated with PerfectClean and must only be washed by hand. See “PerfectClean” under “Cleaning and care for the steam oven”.
Clean the universal tray and the wire rack with a clean sponge and a solution of hot water and liquid dish soap.
The interior of the steam oven has been treated at the factory with a conditioning agent. To remove this, clean the oven com-
partment with a clean sponge and a mild solution of liquid dish soap and hot water.
Setting the correct boiling point for water
Before cooking food for the first time, you must adjust the steam oven to the boiling temperature of the water, which varies depending on the altitude of where the steam oven is located. This process also flushes out the components of the appliance that carry water.
This procedure must be carried out to ensure efficient functioning of your appliance.
Distilled or carbonated water or other liquids could damage the steam oven. Only use cold, fresh drinking water (below 70°F (20°C)).
Remove the water container and fill it up to the maximum marker.
Push the water container into the appliance.
Then run the steam oven for 15 minutes using the Steam Cooking operating mode (212°F (100°C)). Proceed as described in “Operation”.
Setting the correct boiling point for water following a house move If you move house, the boiling point for the water in the steam oven will need to be reset for the new altitude if this differs from the old one by 984 ft (300 m) or more. To do this, descale the appliance (see “Maintenance” under “Cleaning and care for the steam oven”).
41
Before first use
Heating up the steam oven
Take all accessories out of the oven compartment if applicable.
To remove the grease from the ring heater element, heat the steam oven up to 395°F (200°C) using the Convection Bake operating mode for 30 minutes. Proceed as described in “Operation”.
Danger of injury caused by hot
surfaces. The steam oven gets hot during operation. You could burn yourself on the heater elements, oven compartment, or side racks. Use pot holders when working in the hot oven compartment. The heater element will give off a slight smell when it is heated for the first time. The smell and any vapors given off will dissipate after a while and do not indicate a faulty connection or appliance. It is important to ensure that the kitchen is well ventilated during this operation.
42
Settings overview
Menu option
Language Time
Date Lighting Start screen
Display
Volume
Units of Measurement
Available settings … | deutsch | english | …
Location
Display
On* | Off | Night dimming
Clock type
Analog* | Digital
Clock format
24 h* | 12 h (am/pm)
Set
On
“On” for 15 seconds*
Off
Main menu*
Operating modes
Automatic Programs
Special Modes
Favorites
MyMiele
Brightness
Color scheme
Bright | Dark*
QuickTouch
On | Off*
Buzzer Tones
Keypad Tone
Welcome Melody
On* | Off
Weight
g* | lb | lb/oz
Temperature
°C* | °F
* Factory default
Settings
43
Settings
Menu option
Available settings
Keep warm Steam reduction
On
Off* On*
Off
Recommended temperatures Booster
Automatic Rinse
Water hardness
On*
Off
On*
Off
1°dH | … | 15°dH* | … | 70°dH
Proximity sensor
Switch the light on
during cooking program* | always on | Off
Switch the appliance on
On | Off*
Acknowledge buzzer
On* | Off
Safety
System Lock
On | Off*
Sensor Lock
On | Off*
Furniture front recognition On
Off*
Miele@home Remote Control
Activate Deactivate Connection status Set up again Reset Set up
On*
Off
SuperVision
SuperVision display
On | Off*
Display in standby
On* | Only if there is a fault
Appliance list
Display this Appliance | Buzzer Tones
* Factory default
44
Menu option
RemoteUpdate Software version Legal information Showroom Program Factory default
* Factory default
Available settings On*
Off
Open Source Licenses Demo Mode
On | Off*
Appliance settings Favorites MyMiele Recommended temperatures
Settings
45
Settings
Opening the Settings menu
In the Settings menu, you can personalize your steam oven by adjusting the factory default settings to suit your requirements. From the main menu: Select Settings. Select the setting you want. You can check settings or change them.
You cannot change settings while a cooking program is in progress.
Language
You can set your language and location. After selecting and confirming your choice, the language you have selected will appear on the display. Tip: If you have accidentally selected a language that you don’t understand, select in the main menu. Follow the symbol to get back to the Language submenu.
Time
Display Select how you want the time of day to appear in the display when the steam oven is turned off: – On
The time is always visible in the display. If you also select the Display | QuickTouch | On setting, all sensor buttons will react to touch straight away and the motion sensor will automatically detect when you approach the display. If you also select the Display | QuickTouch | Off setting, the steam oven has to be turned on before it can be used. – Off The display appears dark to save energy. The steam oven has to be turned on before you can use it. – Night dimming To save energy, the time only shows on the display between 5:00 a.m. and 11:00 p.m. The display remains dark at all other times.
46
Settings
Clock type The time of day can be displayed as Analog (with a clock face) or Digital (h:min) format. With the digital display, the date is also shown.
Clock format The time of day can be displayed in the 24 or 12-hour format (24 h or 12 h (am/ pm)).
Set Set the hours and the minutes. Tip: If no cooking program is in progress, tap the time in the header to change it. If there is a power failure, the current time of day will reappear once the power has been restored. The time of day is saved for approx. 150 hours.
If the steam oven has been connected to a WiFi network and signed into the Miele@mobile app, the time will be synchronized based on the location setting in the Miele@mobile app.
Date
Set the date.
When the steam oven is turned off, the date will only appear in the display if Time | Clock type | Digital is selected.
Lighting
– On The oven interior lighting is turned on during the entire cooking process.
– “On” for 15 seconds The oven interior lighting turns off 15 seconds after a cooking process has begun. Press the Light sensor button to turn the oven interior lighting on again for 15 seconds.
– Off The oven interior lighting is turned off. Press the Light sensor button to turn the oven interior lighting on for 15 seconds.
47
Settings
Start screen
The steam oven is set at the factory for the main menu to appear when the steam oven is turned on. You can change this default setting so that, for instance, the operating modes or MyMiele settings appear on the start screen (see “MyMiele”). This new start screen will then appear when the steam oven is next turned on.
Select the Back sensor button or follow the path in the header to get to the main menu.
Display
Brightness The display brightness is represented by a segment bar. –
Maximum brightness –
Minimum brightness
Color scheme Choose between a light or dark color scheme for the display. – Bright
The display has a light background with dark characters. – Dark The display has a dark background with light characters.
QuickTouch Select how the sensor buttons and the motion sensor should respond when the steam oven is turned off: – On
If you have also selected the Time | Display | On or Night dimming setting, the sensor buttons and the motion sensor will also respond when the steam oven is turned off. – Off Regardless of whether Time | Display is set, the sensor buttons and the motion sensor only respond when the steam oven is turned on, as well as for a certain amount of time after turning it off.
48
Volume
Buzzer Tones If audible signals are turned on, an audible signal will sound when the set temperature is reached and at the end of a set time. The volume of the audible signals is represented by a segment bar. –
Maximum volume –
Audible signals are switched off
Keypad Tone The volume of the tone that sounds each time you tap a sensor button is represented by a segment bar. –
Maximum volume –
Keypad tone is turned off
Welcome Melody The melody that sounds when you tap the On/Off button can be turned on or off.
Settings
Units of Measurement
Weight For automatic programs, you can set the weight of food in grams (g), pounds (lb), or pounds/ounces (lb/oz). Temperature You can set the temperature in Celsius (°C) or Fahrenheit (°F).
49
Settings
Keeping warm
Using the Keep warm function, you can keep food warm at the end of a steam cooking program. Food is kept warm at a preset temperature for a maximum of 15 minutes. You can cancel the keeping warm process by opening the door.
Please note that delicate food, especially fish, can continue cooking while being kept warm. – On
The Keep warm function is turned on. When cooking at a temperature of approx. 175°F (80°C) or above, this function becomes active after approx. 5 minutes. The food is kept warm at a temperature of 160°F (70°C). – Off The Keep warm function is turned off.
Steam reduction
The Steam reduction function stops excessive steam escaping when the door is opened. – On
The steam-reduction function will turn on automatically at the end of a cooking program which uses a temperature of over approx. 175°F (80°C) (steam cooking) or 175212°F (80 100°C) and 100% moisture (CombiSteam). Steam reduction will appear in the display. – Off If steam reduction is turned off, the Keep warm function is also automatically turned off. When steam reduction is turned off, a large amount of steam will escape when the door is opened.
Recommended temperatures
If you often cook with temperatures that differ from the default, the recommended temperatures can be changed. After you select this option, a list of oven modes will appear on the display. Select the operating mode you want
to use. The recommended temperature will appear together with the range within which it can be changed. Change the recommended tempera-
ture. Confirm with OK.
50
Settings
Booster
The Booster function is used to quickly preheat the oven. – On
The Booster function is automatically turned on during the preheating phase of a cooking program. The browning/broiling element, ring heating element, and fan all preheat the oven compartment to the required temperature at the same time. – Off The Booster function is turned off during the preheating phase of a cooking program. Only the heating elements for the selected operating mode are used to preheat the oven compartment.
Automatic rinsing
Following a cooking program with steam, Appliance rinsing will appear in the display after the steam oven has been turned off. This process flushes any remaining food deposits out of the system. You can activate or deactivate the automatic rinsing process.
You can also use the pull-down menu to turn the Booster function on or off for a cooking program.
51
Settings
Water hardness
The steam oven must be adjusted to the local water hardness level to ensure that it works correctly and to ensure that descaling is carried out at the correct interval. The harder the water is, the more frequently the steam oven needs to be descaled. Your local water authority will be able to tell you the hardness of the water in your area. If you use bottled water, such as mineral water, make sure it is not carbonated. Adjust this setting depending on the calcium content. The calcium content is given on the label of the bottle in mg/l Ca2+ or ppm (mg Ca2+/l). You can set the hardness level between 1 gpg (1°dH) and 73 gpg (70°dH). The hardness level is set to 16 gpg (15°dH) by default. Set the water hardness level for your
area. Confirm with OK.
Water hardness
°dH
gpg
Calcium content mg/l Ca2+ or ppm (mg Ca2+/l)
Setting
1
1
7
1
2
2
14
2
3
3
21
3
4
4
29
4
5
5
36
5
6
6
43
6
7
7
50
7
8
8
57
8
9
9
64
9
52
Water hardness
°dH
gpg
Calcium content mg/l Ca2+ or ppm (mg Ca2+/l)
Setting
10
10
71
10
11
11
79
11
12
12
86
12
13
14
93
13
14
15
100
14
15
16
107
15
16
17
114
16
17
18
121
17
18
19
129
18
19
20
136
19
20
21
143
20
21
22
150
21
22
23
157
22
23
24
164
23
24
25
171
24
25
26
179
25
26
27
186
26
27
28
193
27
28
29
200
28
29
30
207
29
30
31
214
30
31
32
221
31
32
33
229
32
33
34
236
33
34
35
243
34
35
36
250
35
36
38
257
36
3745 3947
258321
3745
4660 4863
322429
4660
6170 6473
430500
6170
Settings
Proximity sensor
The motion sensor detects when you approach the touch display, e.g., with your hand or body.
If you want the motion sensor to respond even when the steam oven is turned off, select the Display | QuickTouch | On setting.
Switch the light on – during cooking program
As soon as you approach the touch display during a cooking process, the oven interior lighting turns on. The oven interior lighting automatically turns off again after 15 seconds. – always on As soon as you approach the touch display, the oven interior lighting turns on. The oven interior lighting automatically turns off again after 15 seconds. – Off The proximity sensor does not respond when you approach the touch display. Press the Light sensor button to turn the oven interior lighting on for 15 seconds.
Switch the appliance on – On
If the time is displayed, the steam oven turns on and the main menu appears as you approach the touch display. – Off The motion sensor does not respond when you approach the touch display. Turn the steam oven on using the On/Off sensor button.
Acknowledge buzzer – On
As soon as you approach the touch display, the audible signals turn off. – Off The proximity sensor does not respond when you approach the touch display. Turn the audible signals off manually.
53
Settings
Safety
System Lock The system lock prevents the steam oven being turned on by mistake. You can still set an alarm and a timer, as well as use the MobileStart function when the system lock is active.
The system lock will remain activated even after a power outage. – On
The system lock is now active. Before you can use the steam oven, turn it on and touch the symbol for at least 6 seconds. – Off The system lock is now deactivated. You can use the steam oven as normal.
Sensor Lock The sensor lock prevents the cooking program from being turned off by mistake or settings from being changed. Once activated, the sensor lock prevents the sensor buttons and fields on the display from working for a few seconds after a program has been started, with the exception of the On/Off button. – On
The sensor lock is active. Touch OK for at least 6 seconds to deactivate the sensor lock for a short period of time. – Off The sensor lock is not active. All sensor buttons react to touch as normal.
54
Settings
Furniture front recognition
– On Cabinet door front recognition is activated. Using the motion sensor, the steam oven automatically detects whether the door panel is closed. If the door panel is closed, the steam oven turns off automatically after a certain period.
– Off Cabinet door front recognition is deactivated. The steam oven does not detect whether the door panel is closed.
If the steam oven is installed behind a cabinet front (e.g., a door), the steam oven, housing unit, and the floor can be damaged by the buildup of heat and moisture behind the closed cabinet front. Always leave the door panel open when you are using the steam oven. Leave the door panel open until the steam oven has cooled down completely.
Tip: Turn off furniture front recognition if you want to use the Sabbath Program.
Miele@home
The steam oven is a Miele@homecompatible appliance with SuperVision functionality. Your steam oven is fitted with a WiFi communication module and is suitable for wireless communication. There are a number of ways of connecting your steam oven to your WiFi network. We recommend connecting your steam oven to your WiFi network using the Miele@mobile app or via WPS. – Activate
This setting is only visible if Miele@home is deactivated. The WiFi function is reactivated. – Deactivate This setting is only visible if Miele@home is activated. Miele@home remains set up; the WiFi function is turned off. – Connection status This setting is only visible if Miele@home is activated. The display shows information such as the WiFi reception quality, network name, and IP address. – Set up again This setting is only visible if a WiFi network has already been set up. Reset the network settings and set up a new network connection straight away.
55
Settings
– Reset This setting is only visible if a WiFi network has already been set up. The WiFi function is deactivated and the WiFi connection will be reset to the factory default. You must set up a new WiFi connection to be able to use Miele@home. The network settings should be reset whenever a steam oven is being disposed of or sold, or if a used steam oven is being put into operation. This is the only way to ensure that all personal data has been removed and the previous owner will no longer be able to access the steam oven.
– Set up This setting is only visible if no WiFi connection has been set up yet. You must set up a new WiFi connection to be able to use Miele@home.
Remote Control
If you have installed the Miele app on your mobile device, have access to the Miele@home system, and have activated the remote control function (On), you can use the MobileStart function and, for example, retrieve information about steam oven cooking processes that are in progress or to end a process that is in progress. The steam oven requires max. 2 W in networked standby.
Activating MobileStart Select the Remote sensor button to
activate MobileStart. The Remote sensor button lights up. You can operate your steam oven remotely with the Miele app.
Directly operating on the steam oven takes priority over operating it via the remote control function on the app. You can use MobileStart as long as the Remote sensor button is lit up.
56
Settings
SuperVision
The steam oven is a Miele@homecompatible appliance with SuperVision functionality for monitoring other household appliances in the Miele@home system. The SuperVision function cannot be activated until the Miele@home system has been set up. SuperVision display – On
The SuperVision function is turned on. The symbol will appear in the top right-hand corner of the display. – Off The SuperVision function is turned off. Display in standby The SuperVision function is also available when the oven is in standby. However, the time-of-day display must be turned on (Settings | Time | Display | On). – On Active domestic appliances that are signed on to the Miele@home system are always displayed. – Only if there is a fault Only faults on active domestic appliances are displayed.
Appliance list All domestic appliances signed on to the Miele@home System are displayed. Once you have selected an appliance, you can access further settings: – Display this Appliance
On The SuperVision function for this appliance is turned on.
Off The SuperVision function for this appliance is turned off. The appliance is still signed on to the Miele@home system. Faults are displayed, even if the SuperVision function for the appliance has been turned off.
– Buzzer Tones You can select whether the audible signals are turned on (On) or turned off (Off) for this appliance.
57
Settings
RemoteUpdate
The RemoteUpdate menu option is only displayed and can only be selected if the requirements for using Miele@home have been met (see “Before using for the first time Miele@home”). The RemoteUpdate function is used for updating the software in your steam oven. If an update is available for your steam oven, it will automatically download it. Updates will not be installed automatically. They must be initiated manually. If you do not install an update, you can continue to use your steam oven as usual. However, Miele recommends installing updates.
Activating/deactivating The RemoteUpdate function is activated as standard. Available updates will be downloaded automatically but will only be installed if you initiate installation manually. Deactivate RemoteUpdate if you do not want any updates to be downloaded automatically.
Running a RemoteUpdate Information about the content and scope of an update is provided in the Miele app. A message will appear in your steam oven display if a software update is available. You can install the update immediately or postpone this until later. When the steam oven is turned on again, you will be reminded about the update. Deactivate RemoteUpdate if you do not want to install the update.
The update may take several minutes. Please note the following information about the RemoteUpdate function: – You will only receive a message when
an update is available. – Once an update has been installed, it
cannot be undone. – Do not turn the steam oven off during
the update. Otherwise, the update will be aborted and will not be installed. – Some software updates can only be carried out by Miele Customer Service.
58
Settings
Software version
The software version menu option is for use by Miele Technical Service. You do not need this information for domestic use. Confirm with OK.
Legal information
You can find an overview of the integrated open-source components under Open Source Licenses. Confirm with OK.
Showroom Program
This function enables the steam oven to be demonstrated in showrooms without heating up. Do not activate this setting for domestic use.
Demo Mode
If you have demo mode activated,
Demo mode is active. The appliance will
not heat up will appear when you turn the steam oven on.
– On Touch OK for at least 4 seconds to activate demo mode.
– Off Touch OK for at least 4 seconds to deactivate demo mode. You can use the steam oven as normal.
Factory default
– Appliance settings Any settings that have been altered will be reset to the factory default settings.
– Favorites All Favorites will be deleted.
– MyMiele All MyMiele entries will be deleted.
– Recommended temperatures Any recommended temperatures that have been changed will be reset to the factory default settings.
59
Alarm + Timer
Using the Timer sensor button, you can set a timer (e.g., for boiling eggs) or an alarm for a specific time.
Two alarms, two timers, or an alarm and a timer can be set simultaneously.
Using the Alarm function
The alarm can be used to specify a particular time for an audible signal to sound.
Setting the alarm If the Display | QuickTouch | Off setting is selected, you will need to turn the steam oven on before setting the alarm. The alarm time will then appear on the display when the steam oven is turned off. Select the Timer sensor button. Select Alarm. Set the time for the alarm. Tap Close to confirm. When the steam oven is turned off, the alarm time and will appear instead of the time of day. If you are cooking at the same time or if you are in a different menu, the alarm time and will appear in the top righthand corner of the display. At the specified time for the alarm, will flash on the display next to the time and an audible signal will sound. Select the Timer sensor button or the
set alarm time on the display. The audible signal will stop and the symbols on the display will go out.
Changing an alarm Select the alarm on the display or se-
lect the Timer sensor button and the alarm you want. The set alarm time will appear on the display. Set the new time for the alarm. Tap Close to confirm. The adjusted alarm time is now saved and will appear on the display.
Deleting an alarm Select the alarm on the display or se-
lect the Timer sensor button and the alarm you want. The set alarm time will appear on the display. Select Delete. Tap Close to confirm. The alarm is deleted.
60
Alarm + Timer
Using the Timer function
The timer can be used to time other activities in the kitchen, e.g., boiling eggs. The timer can also be used at the same time as a cooking program for which the start and finish times have been set (e.g., as a reminder to stir the food or add seasoning, etc.). The maximum timer duration that can
be set is 59 minutes and 59 seconds.
Setting the timer If you have selected the Display | QuickTouch | Off setting, you will need to turn the steam oven on before setting the timer. The timer can then be seen counting down on the display when the steam oven is turned off. Example: you want to boil some eggs and set a timer of 6 minutes and 20 seconds. Select the Timer sensor button. Select Timer. Set the required timer duration. Tap Close to confirm. When the steam oven is turned off, the timer time counts down in the display and appears instead of the time of day. If you are cooking at the same time or if you are in a different menu, the timer duration and will appear in the top right-hand corner of the display.
At the end of the timer duration, will flash, the time will start counting up, and an audible signal will sound. Select the Timer sensor button or the
required timer on the display. The audible signal will stop and the symbols on the display will go out.
Changing the timer Select the timer on the display or se-
lect the Timer sensor button and then the timer duration you want. The set timer duration will appear. Set a new timer duration. Tap Close to confirm. The changed timer duration is now saved and will count down in minutes. Timer durations of less than 10 minutes will count down in seconds.
Deleting the timer Select the timer on the display or se-
lect the Timer sensor button and then the timer duration you want. The set timer duration will appear. Select Delete. Tap Close to confirm. The timer is deleted.
61
Main and submenus
As different countries have different preferences when it comes to preparing food, the temperatures in °F and °C may not match. The temperatures are defined as they are specified in the table.
Menu
Recommended value
Range
Operating Modes Convection Bake
Convection Roast
Surround
Combi Steam Combi Conv Bake
Combi Surround
Combi Broil Steam Cooking
Sous-vide
Intensive
Bake
Browning
Maxi Broil Broil Convection Broil
320°F (160°C) 375°F (190°C) 355°F (180°C)
85435°F (30225°C)
85435°F (30225°C)
85435°F (30225°C)
340°F (170°C) 355°F (180°C)
Level 3 212°F (100°C) 150°F (65°C) 355°F (180°C) 375°F (190°C) 375°F (190°C)
Level 3 Level 3 395°F (200°C)
85435°F (30225°C)
85435°F (30225°C)
Level 13
105212°F (40100°C)
115195°F (4590°C)
120435°F (50225°C)
210395°F (100200°C)
210435°F (100225°C)
Level 13
Level 13
120435°F (50225°C)
62
Menu
Operating Modes Humidity Plus
Automatic Programs Special Modes
Reheat
Defrost
Miele Mix & Match Crisp Cooking Gentle Cooking Crisp Reheating Gentle Reheating
Blanch Canning Dehydrate
Proof Menu Cooking Sanitize Cookware Sabbath Program Warm-up Cookware
Keep warm
Main and submenus
Recommended value
Range
320°F (160°C)
85435°F (30225°C)
265°F (130°C) 140°F (60°C)
250285°F (120140°C)
120140°F (5060°C)
195°F (90°C)
120°F (50°C)
355°F (180°C) 120°F (50°C)
150°F (65°C)
175212°F (80100°C)
85160°F (3070°C)
355°F (180°C)
120175°F (5060°C)
105212°F (40100°C)
63
Main and submenus
Menu
MyMiele Favorites Settings Maintenance
Descale Soak Drying Rinse
Recommended value
Range
64
Energy-saving tips
Cooking programs
– Remove all accessories from the oven that are not required for a cooking program.
– If a temperature range is given, it is best to select the lower temperature and check the food after the shortest cooking time given.
– Preheat the oven only if instructed to do so in the recipe or the cooking chart.
– Try not to open the door when cooking.
– Dark, matte tins are best for baking. They absorb the heat more effectively and transmit it to the mixture more quickly. Shiny materials such as stainless steel or aluminum reflect the heat and therefore can give a more uneven result. Do not cover the oven floor or the wire rack with heat-reflecting aluminum foil.
– Monitor cooking durations to avoid wasting energy when cooking. Set the cooking duration, or use a food probe if you have one.
– Most food can be cooked using Convection Bake or Convection Roast . Because the fan distributes the heat in the oven compartment straight away, it allows you to use a lower temperature than you would with Surround . It also enables you to cook on multiple shelf levels at the same time.
– Convection Broil is the best operating mode for broiled dishes. Lower temperatures can be used than with other broil modes that use the maximum temperature setting.
– Whenever possible you should cook several dishes at the same time. Place them next to each other in the oven or on different shelf levels.
– Dishes which you are unable to prepare at the same time should, if possible, be cooked one after the other in order to make use of existing heat in the oven.
Settings
– Select the Display | QuickTouch | Off setting for the control elements in order to reduce energy consumption.
– Select the Lighting | Off or “On” for 15 seconds setting for the oven interior lighting. You can turn the oven interior lighting on again at any time by tapping the Light sensor button.
Energy-saving mode
The steam oven will turn itself off automatically to save energy if a program is not being run and controls have not been operated. The time of day will appear on the display or the display will remain dark (see “Settings”).
65
Operation
Malfunction due to missing floor filter. If the floor filter is missing, food deposits can get into the drain. The water cannot be pumped away. Before each cooking program, check that the filter in the floor of the oven compartment is correctly fitted.
Turn the steam oven on. The main menu will appear. If you want to cook using a steam op-
erating mode or with bursts of steam, fill the water container and fit it back in place.
Distilled or carbonated water or other liquids could damage the steam oven. Only use cold, fresh drinking water (below 70°F (20°C)).
Place the food in the oven. Select Operating Modes . Select the operating mode you want
to use. The operating mode and recommended values for temperature and moisture (if applicable) appear. Change the recommended values if
necessary.
The recommended values will be automatically accepted within a few seconds. You can change the temperature and moisture level later by selecting the temperature or moisture indicator. Confirm with OK. The required and the actual temperature will appear and the preheating phase will begin. You will see the temperature rising on the display. An audible signal will sound when the set temperature is reached for the first time. After the cooking program, select Fin-
ish.
The steam-reduction function will turn on automatically at the end of a cooking program which uses a temperature of over approx. 175°F (80°C) (steam cooking) or 175212°F (80100°C) and 100% moisture (Combi-Steam). Wait until Steam reduction goes out in the display before opening the door.
Take the food out of the oven.
66
Operation
Cleaning the steam oven Remove the water container and con-
densate container and empty them as required. Turn the steam oven off. Appliance rinsing appears after a cooking program involving steam. Follow the instructions on the display.
The rinsing process should be carried out every time to flush any remaining food deposits out of the system.
Clean and dry the whole steam oven as described in “Cleaning and care for the steam oven”.
Leave the appliance door open until the oven compartment is completely dry.
Refilling the water If water needs replenishing during the cooking program, a tone will sound and the display will prompt you to refill the container with fresh water. Remove the water container and fill it
with fresh water. Push the water container into the ap-
pliance. The cooking program will continue.
Changing values and settings for a cooking program
Depending on the operating mode, as soon as a cooking program is in progress, you can change the values or settings for this program. Depending on the operating mode, you can change the following settings: – Temperature – Moisture – Duration – Booster – Preheat – Crisp function
Changing the temperature and core temperature Via Settings | Recommended temperatures, you can permanently adjust the recommended temperature to suit your cooking preferences. The core temperature only appears if you are using the probe (see “Roasting Probe”). Tap the temperature display. Change the temperature and the
core temperature as required. Confirm with OK. The cooking program will resume with the new target temperatures.
67
Operation
Changing Moisture Touch the moisture indicator. Change the moisture level. Confirm with OK. The program will continue to run at the new moisture level.
Setting additional durations
Cooking results can be adversely affected if there is a long delay between the food being placed in the oven and the start of cooking. Fresh food can change color and even spoil. When baking, the cake mixture or dough can dry out, and the raising agents can lose their effectiveness. Select as short a time as possible until the start of the cooking process.
You have placed the food in the oven, selected an operating mode and the required settings such as the temperature. By entering Duration, Ready at or Start at, you can automatically turn the cooking program off or on and off. – Duration
Enter the required cooking duration for the food. The oven heating will turn off automatically once the cooking duration has elapsed. The maximum cooking duration that can be set depends on the operating mode that you have selected. – Ready at Specify when you want the cooking program to finish. The oven will turn off automatically at the time you have set.
– Start at This function will only appear in the menu if you have set a Duration or Ready at time. With Start at, you have to specify when you want the cooking program to start. The oven will turn on automatically at the time you have set.
Select or Timer. Set the required times. Confirm with OK.
Changing set durations Select , the duration, or Timer. Select the time you want and change
it. Confirm with OK.
These settings will be deleted in the event of a power failure.
Deleting the set cooking durations Select , the duration, or Timer. Select the time you want. Select Delete. Confirm with OK.
If you delete Duration, the set durations for Ready at and Start at are also deleted. If you delete Ready at or Start at, the cooking program will start using the cooking duration set.
68
Operation
Canceling a cooking program
If you cancel a cooking program, the oven heating and lighting will turn off. Any cooking durations set will be deleted.
During a cooking program with steam, Steam reduction will appear if you have set a temperature above approx. 175°F (80°C) (steam cooking) or 175 212°F (80100°C) and 100% moisture (Combi-Steam). Select Close to return to the main menu.
Canceling a cooking program without a set cooking duration Select Finish. The main menu will appear.
Canceling a cooking program with a set cooking duration Select Cancel. Cancel program? will appear. Select Yes. The main menu will appear.
Interrupting a cooking program
A cooking program is interrupted as soon as the door is opened. The oven heating turns off. The set cooking duration is saved when cooking with steam as well as for programs and applications with pure steam operation.
Risk of injury due to hot steam.
When using a cooking program involving steam, a lot of hot steam can escape if the door is opened. The steam can cause burns. Step back and wait until the hot steam has dissipated.
Risk of injury caused by hot sur-
faces and food. The steam oven gets hot during operation. You could burn yourself on the heater elements, oven compartment, side racks, accessories, or food. Use pot holders when placing food in the appliance or removing it and when working in the hot oven compartment. When placing cooking containers in the oven or removing them, make sure that the hot food does not spill.
The cooking program will resume when the door is closed. The steam oven will heat up again and the display will show the temperature in the oven compartment as it rises. When cooking with steam as well as for programs and applications with pure steam operation, the time left only continues to count down once the set temperature has been reached.
In programs using 100% moisture and temperatures up to 212°F (100°C): the cooking program will finish early if the door is opened in the last minute of cooking (55 seconds remaining).
69
Operation
Preheating the oven
The Booster function is used to quickly preheat the oven compartment in some operating modes. The Preheat function can be used with any oven operating mode and has to be turned on separately for each cooking program. The oven compartment only needs to be preheated in a few cases. Preheat the oven compartment when
cooking the following food: – cakes, cookies, and pastries with a
short cooking duration (approx. 30 minutes or less) as well as delicate items (e.g., sponge) with the Surround operating mode (without the Booster function)
Booster The Booster function is activated as the factory default setting for the following operating modes (Settings | Booster | On): – Convection Bake – Convection Roast – Surround If you set a temperature above 210°F (100°C) and the Booster function is turned on, a rapid preheating phase heats the oven compartment to the set temperature. The browning/broiling element and the ring heating element come on together with the hot air blower.
Delicate items (e.g., sponge cake or cookies) will brown too quickly on the top if the Booster function is used. Turn off the Booster function for these items.
Turning Booster on or off for a cooking program If you have selected the Booster | On setting, you can turn the function off separately for a cooking program. On the other hand, you can also turn on the function separately for a cooking program if you have selected the Booster | Off setting. Example: You have selected an operating mode and the required settings such as the temperature. You want to turn off the Booster function for this cooking program. Drag down the pull-down menu. Booster is highlighted in orange. Select Booster. Depending on the color scheme, Booster is highlighted in either black or white. Close the pull-down menu. The Booster function is turned off during the preheating phase. Only the heating elements for the selected operating mode are used to preheat the oven compartment.
70
Operation
Preheat You can place most dishes in the cold oven compartment to make use of the heat produced during the preheating phase.
If you have set a cooking duration, it will only start to count down when the target temperature is reached and you have placed the food in the oven. Start the cooking program immediately without delaying the start time.
Turning on Preheat The Preheat function has to be turned on separately for each cooking program. Example: You have selected an operating mode and the required settings such as the temperature. You want to turn on the Preheat function for this cooking program. Drag down the pull-down menu. Depending on the color scheme, Preheat is highlighted in either black or white. Select Preheat. Preheat is highlighted in orange. Close the pull-down menu. The following message will be displayed with a time: Place food in oven at . The oven compartment is heated to the set temperature. As soon as you are prompted to do
so, place the food in the oven. Confirm with OK.
Crisp function
The Crisp function function (moisture reduction) allows moisture to be removed from the oven as required during the entire cooking process or at times during the process. It is a good idea to use this function when cooking items which have a moist topping, e.g., quiche, pizza, tray bakes with fresh fruit toppings, or muffins. Poultry in particular gets a nice crisp skin with this function. The Crisp function function can be used in the following operating modes: – Convection Bake – Convection Roast – Surround – Intensive – Bake – Browning – Convection Broil – Humidity Plus
71
Operation
Turning on Crisp function The Crisp function function has to be turned on separately for each cooking program. You have selected an operating mode and the required settings such as the temperature. You want to turn on the Crisp function function for this cooking program. Drag down the pull-down menu. Depending on the color scheme, Crisp function is highlighted in either black or white. Select Crisp function. Crisp function is highlighted in orange. Close the pull-down menu. The Crisp function function is turned on. The Crisp function function can be turned off again at any time via the pull-down menu.
Injecting bursts of steam
You can release bursts of steam during the cooking process in all oven operating modes. The number of bursts of steam is unlimited. You can release a burst of steam as soon as Burst of steam appears and Start is shown in green.
Please wait until the heating-up phase is completed to allow the steam to be distributed evenly in the warm air in the oven. Select Start. The burst of steam will be released. This will take approximately 1 minute. Proceed as described to release fur-
ther bursts of steam once Start is shown in green again.
72
Changing the operating mode
You can change to another operating mode during a cooking program. Tap the symbol for the selected oper-
ating mode. If you have set a cooking duration,
confirm the Cancel program? message with Yes. Select the new operating mode. The new operating mode will appear on the display with its corresponding recommended values. Set the values for the cooking program and confirm with OK.
Operation
73
General notes
The “General Notes” section contains general information. You will find more detailed information about particular foods and how to cook them in the other sections.
The advantages of cooking with steam
Almost all vitamins and minerals are retained as the food is not immersed in water. Cooking with steam also retains the true taste of the food better than conventional cooking. We therefore recommend seasoning the food after it has been cooked. Food also retains its fresh, original color.
Suitable containers
Cooking containers Stainless-steel cooking containers are provided with the steam oven. Other containers, in a variety of sizes, both perforated and solid, are available as optional extras (see “Optional accessories”). This enables you to choose the most suitable container for the meal you are preparing. Use perforated cooking containers for steam cooking if possible. The steam can reach the food from all sides and the food is cooked evenly.
Your own dishware You can also use your own dishware. However, please note the following: – Dishware must be suitable for use in
an oven and able to withstand steam. With plastic dishware, please check with the manufacturer that it is suitable for use in a steam oven. – Thick-sided dishware made from porcelain, ceramic, or stoneware is not very suitable for using with steam. Due to its thick sides, it does not conduct heat well, meaning cooking durations will be considerably longer than those given in the charts. – Place the dishware on the wire rack or in a cooking container. Depending on the size of the dishware, you can also place the wire rack on the floor of the oven compartment with the rack surface facing up and the dishware on top. You can also take the side racks out to make more room (see “Cleaning the side racks” under “Cleaning and care for the steam oven”). – Ensure that there is a gap between the upper rim of the dishware and the top of the oven compartment to allow sufficient steam into the dishware.
74
General notes
Shelf level
You can select any shelf level. You can also cook on several levels at the same time. This will not alter the cooking duration. When using more than one deep cooking container at the same time, it is best to offset them on their runners and to leave at least one level free in between them. Always insert cooking containers and the rack between the rails of the shelf level supports so that they cannot tip.
Frozen food
The heating up phase for frozen food is longer than for fresh food. The greater the quantity of frozen food, the longer the preheating phase.
Temperature
During steam cooking, the temperature does not exceed 212°F (100°C). Almost all foods can be cooked at this temperature. Some types of food, such as berries, need to be cooked at lower temperatures to prevent them from bursting. See the relevant sections in these operating instructions for more details.
Cooking duration
During steam cooking, the cooking duration does not begin until the set temperature is reached. In general, the cooking durations for cooking with steam are the same as for cooking food in a saucepan. More information about any factors which may affect the cooking duration is given in the relevant sections. The quantity of food does not affect the cooking duration. 2 lb (1 kg) of potatoes will take the same time to cook as 1 lb (500 g) of potatoes.
Cooking with liquid
When cooking with liquid only fill the cooking pan ²/ full to prevent the liquid spilling when the cooking pan is removed from the oven.
Your own recipes – Steam cooking
Food and recipes which are prepared in pot or a pan can also be cooked in the steam oven. The cooking times in the steam oven will be the same. Please note that food will not be brown or crisp when cooking with steam.
75
General notes
Universal tray and wire rack
Use the universal tray with the wire rack placed on top of it, e.g., for roasting and broiling. During roasting, you can use the meat juices collected in the tray to make a gravy or sauce. If you are using the universal tray with the wire rack on top, insert the universal tray between the rails of a shelf level and the wire rack will automatically slide in above them. When removing them from the oven, pull both out together. Non-tip safety notches The wire rack and universal tray have non-tip safety notches in the middle which prevent them being pulled right out when they only need to be partially pulled out. The tray and rack can then only be taken out of the oven by raising them upwards and then pulling them out.
76
Notes on the cooking charts
Follow the instructions on cooking durations, temperatures, and cooking notes.
Selecting the cooking duration The cooking durations given are guidelines only. We recommend selecting the shorter
duration initially. You can cook for longer if necessary.
Steam cooking
77
Steam cooking
Vegetables
Fresh food Prepare fresh vegetables in the usual way, i.e. wash, clean and cut them up.
Frozen food Frozen vegetables do not need to be defrosted beforehand unless they have been frozen together in a block. Frozen and fresh vegetables which take the same length of time to cook can be cooked together. If vegetables have frozen together in clumps, break these up before cooking with steam. Follow the manufacturer’s instructions on the packaging regarding cooking duration.
Cooking pan Food such as peas or asparagus spears, which have little or no space between them, will take longer to cook because the steam has less space to work in. For an even result, it is best to use a shallow container for these types of food, and only fill it about 1-2″ (3-5 cm) deep. When cooking large quantities divide the food between 2 or 3 shallow containers rather than using one deep one. Different types of vegetables which take the same length of time to cook can be cooked together in one cooking pan. Use solid containers for vegetables which are cooked in liquid, e.g. cabbage.
Shelf level When cooking vegetables with a distinctive color (e.g. beets) in a perforated container at the same time as cooking other foods in other containers, place the drip tray directly underneath the perforated container to catch any drips and therefore avoid any color transfer.
Cooking duration The cooking duration depends on the size of the food and how well cooked you want it, just as it does with conventional cooking methods. Example: White potatoes, cut into quarters: approx. 17 minutes White potatoes, cut in half: approx. 20 minutes
Settings Automatic Programs | Vegetables | … | or Operating Modes | Steam Cooking Temperature: 212°F (100°C) Duration: see chart
78
Vegetables Artichokes Cauliflower, whole Cauliflower, florets Beans, green Broccoli, florets Chantenay carrots, whole Chantenay carrots, halved Chantenay carrots, chopped Endive, halved Chinese cabbage, chopped Peas Fennel, halved Fennel, cut into strips Kale, chopped White potatoes, peeled whole halved quartered Yukon Gold potatoes, peeled whole halved quartered Idaho/Russet potatoes, peeled whole halved quartered Kohlrabi, cut into batons Pumpkin, diced Corn on the cob Chard, chopped
Steam cooking
[min] 3238 2728 38 310 14 78 67 4 45 3 3 1012 45 2326
2729 2122 1618
2527 1921 1718
2628 1920 1516
67 410 1114 23
79
Steam cooking
Vegetables Bell pepper, diced or cut into strips New potatoes, firm Mushrooms Leeks, sliced Leeks, halved lengthways Romanesco, whole Romanesco, florets Brussels sprouts Beets, whole Red cabbage, chopped Black salsify, whole Celery root, cut into batons Green asparagus White asparagus, whole Carrots, chopped Fresh Spinach Napa cabbage, chopped Celery, chopped Rutabaga, chopped White cabbage, chopped Savoy cabbage, chopped Zucchini, sliced Snap peas Cooking duration
80
[min] 1
3032 1
23 6
2225 57
1012 5357 2326 910
67 37 49 36 12 510 35 67 12 510
1 35
Steam cooking
Fish
Fresh food Prepare fresh fish in the usual way, i.e. clean, gut and filet.
Frozen food Frozen fish should be slightly defrosted before cooking.
Preparing for use Add some lemon or lime juice to fish before cooking. The citric acid helps the flesh stay firm. It is not necessary to season fish when cooking with steam as this method retains the minerals which give the fish its unique flavor.
Cooking pans If using a perforated pan, grease it first.
Shelf level When cooking fish in a perforated container at the same time as cooking other types of food in other containers, place the container with the fish directly above the universal tray to catch any liquid and so avoid any transfer of tastes to other food.
Temperature 185195°F (8590°C) For gently cooking delicate types of fish, such as sole. 212°F (100°C) For cooking firmer types of fish, e.g. cod and salmon. Also for cooking fish in sauce or stock.
Cooking duration The cooking duration depends on the thickness and the consistency of the food, and not on the weight. The thicker the piece of food is, the longer cooking will take. A piece of fish weighing 1 lb (500 g) that is 1″ (3 cm) thick will take longer to cook than a piece weighing 1 lb (500 g) and only 1/2″ (2 cm) thick. The longer fish cooks, the firmer its flesh will become. Use the cooking durations given in the chart. If you find that the fish is not cooked sufficiently only cook it for a few minutes more. When cooking fish in sauce or stock, we recommend that you increase the cooking duration quoted by a few minutes.
81
Steam cooking
Tips – Adding herbs and spices, such as
dill, will help bring out the full flavor of the fish. – Cook large fish in the swimming position. To help maintain the structure of the fish, place a small cup or similar upside down in the cooking container. Arrange the fish belly-side down over the cup. – You can use any fish scraps, e.g., fish heads, bones, tails, etc., to make a fish stock. Place the fish scraps together with some mixed vegetables in a solid cooking container and add cold water. Cook at 212°F (100°C) for 60 to 90 minutes. The longer the cooking duration, the stronger the stock. – Preparing fish au bleu is a method involving cooking the fish in water with vinegar, at different proportions depending on the recipe. It is important not to damage the skin of the fish. This method is suitable for cooking carp, trout, tench, eel, and salmon. Settings Automatic Programs | Fish | … | Steam
Cooking
or Operating Modes | Steam Cooking Temperature: see chart Duration: see chart
82
Fish Eel Perch filet Mahi mahi filet Trout, 1/2 lb (250 g) Halibut filet Cod filet Carp, 3 lbs (1.5 kg) Salmon filet Salmon steak Rainbow trout Basa filet Tilapia filet Haddock filet Plaice filet Monkfish filet Sole filet Turbot filet Tuna filet Pike perch filet
temperature, duration
Steam cooking
[°F (°C)] 212 (100) 212 (100) 185 (85) 195 (90) 185 (85) 212 (100) 212 (100) 212 (100) 212 (100) 195 (90) 185 (85) 212 (100) 212 (100) 185 (85) 185 (85) 185 (85) 185 (85) 185 (85) 185 (85)
[min] 57 810 3
1013 46 6
1825 68 810
1417 3
68 46 45 810
3 58 510
4
83
Steam cooking
Meat
Fresh food Prepare the meat as usual.
Frozen food Meat should be thoroughly defrosted before cooking in the steam oven (see “Defrost” under “Special Modes”).
Preparation For meat which needs to be seared before being cooked, e.g. for a stew, sear the meat in a pan on the cooktop first.
Cooking duration The cooking time depends on the thickness and consistency of the food. The thicker the meat, the longer the cooking time. The thicker the piece of food is, the longer cooking will take. A piece of fish weighing 1 lb (500 g) that is 4″ (10 cm) thick will take longer to cook than a piece weighing 1 lb (500 g) and only 2″ (5 cm) thick.
Tips – To retain the flavor, use a perforated
cooking container. Place a solid cooking container or the universal tray underneath in order to collect the concentrate. You can use the concentrate to enhance your sauces or freeze it for later use. – Boiling meat from chicken and beef as well as meat bones can be used to make a strong stock. Place the meat together with the bones and some mixed vegetables in a cooking container and add cold water. The longer the cooking duration, the stronger the stock.
Settings Automatic Programs | Meat | … |
Steam Cooking
or Operating Modes | Steam Cooking Temperature: 212°F (100°C) Duration: see chart
84
Meat Beef flank, covered with water Pork knuckle Chicken breast filet Ham hock Prime rib, covered with water Veal strips Smoked pork slices Lamb casserole Poularde Roulade of turkey Turkey cutlet Short rib, covered with water Beef casserole Whole chicken, covered with water Top round
duration
Steam cooking
[min] 110120 135140
810 105115 110120
34 68 1216 6070 1215 46 130140 105115 8090 110120
85
Steam cooking
Rice
Rice swells when cooked and needs to be cooked in liquid. The proportion of rice to liquid will vary depending on the type of rice. The rice absorbs all the liquid during the cooking process so that none of the nutrients are lost.
Settings Automatic Programs | Rice | … | or Operating Modes | Steam Cooking Temperature: 212°F (100°C) Duration: see chart
Basmati rice Parboiled rice Round grain rice Pudding rice Risotto rice Brown rice Wild rice
Ratio Rice to liquid
1 : 1.5 1 : 1.5
1 : 2.5 1 : 2.5 1 : 1.5 1 : 1.5
[min]
15 2325
30 1819 2629 2629
Cooking duration
86
Steam cooking
Grains
Grain swells when cooked and needs to be cooked in liquid. The proportion of grain to liquid will vary depending on the type of grain. Grain can be cooked whole or cracked.
Settings Automatic Programs | Grains | … | or Operating Modes | Steam Cooking Temperature: 212°F (100°C) Duration: see chart
Amaranth Bulgur Green spelt, whole Green spelt, cracked Oats, whole Oats, cracked Millet Polenta Quinoa Rye, whole Rye, cracked Wheat, whole Wheat, cracked
Ratio Grain to liquid
1 : 1.5 1 : 1.5 1 : 1 1 : 1 1 : 1 1 : 1 1 : 1.5 1 : 3 1 : 1.5 1 : 1 1 : 1 1 : 1 1 : 1
[min]
1517 9
1820 7 18 7 10 10 15 35 10 30 8
Cooking duration
87
Steam cooking
Pasta/noodles
Dry pasta Dry pasta swell when cooked and needs to be cooked in liquid. The liquid must cover the pasta by at least 1″. Cook pasta according to package directions.
Fresh food Fresh pasta and noodles, such as those you can buy from the supermarket chilled counter, do not need to absorb water. Cook in a greased, perforated container. Separate any pieces of pasta or noodles which have stuck together and spread them out in the cooking container.
Settings Automatic Programs | Pasta | … | or Operating Modes | Steam Cooking Temperature: 212°F (100°C) Duration: see chart
Fresh food Gnocchi Round Knoepfli Ravioli Spaetzle Tortellini
[min] 2 1 2 1 2
Cooking duration
88
Steam cooking
Dumplings
Ready-made dumplings in wrappers need to be covered completely with water. Otherwise they will not absorb enough water and will fall apart, even if steeped in water prior to cooking. Cook fresh dumplings in a greased, perforated container.
Settings Automatic Programs | Pasta | … | or Operating Modes | Steam Cooking Temperature: 212°F (100°C) Duration: see chart
Steamed dumplings Yeast dumplings Boil-in-the-bag potato dumplings Boil-in-the-bag bread dumplings
[min] 30 20 20
1820
Cooking duration
89
Steam cooking
Legumes
Soak legumes for at least 10 hours in cold water before cooking. Soaking makes the legumes more digestible and shortens the cooking duration required. Soaked legumes must be covered with liquid during cooking. Lentils do not need to be soaked before cooking. With unsoaked legumes, a certain ratio of pulses to liquid is required depending on type.
Settings Automatic Programs | Legumes | … | or Operating Modes | Steam Cooking Temperature: 212°F (100°C) Duration: see chart
Beans Kidney beans Azuki beans Black beans Pinto beans White beans Peas Yellow peas Green peas, shelled
Soaked
[min]
5565 2025 5560 5565 3436
4050 27
Cooking duration
90
Beans Kidney beans Azuki beans Black beans Pinto beans White beans Lentils Brown lentils Red lentils Peas Yellow peas Green peas, shelled
Cooking duration
Steam cooking
Unsoaked Ratio
Legumes to liquid
[min]
1 : 3
130140
1 : 3
95105
1 : 3
100120
1 : 3
115135
1 : 3
8090
1 : 2
1314
1 : 2
7
1 : 3
110130
1 : 3
6070
91
Steam cooking
Eggs
Use a perforated container to prepare boiled eggs in the steam oven. The eggs do not need to be pierced before cooking as they are gradually warmed during the preheating phase and so do not burst when they are cooked with steam. When using a solid container for making egg dishes such as scrambled eggs, remember to grease it first.
Settings Automatic Programs | Eggs | … | or Operating Modes | Steam Cooking Temperature: 212°F (100°C) Duration: see chart
Small soft medium hard Medium soft medium hard Large soft medium hard Extra large soft medium hard
[min] 3 5 9 4 6 10 5
67 12 6 8 13
duration
92
Steam cooking
Fruit
Cook fruit in a solid container so that none of the juice is lost. If you wish to cook fruit in a perforated container, place a solid container directly underneath it to collect the juice. Tip: You can use the collected juice to prepare a glaze.
Settings Automatic Programs | Fruit | … | or Operating Modes | Steam Cooking Temperature: 212°F (100°C) Duration: see chart
Apple chunks Pear chunks Cherries Mirabelle plums Nectarine/peach chunks Plums Quince, diced Rhubarb pieces Gooseberries
[min] 13 13 24 12 12 13 68 12 23
duration
Sausage
Settings Automatic Programs | Sausage | … | or Operating Modes | Steam Cooking Temperature: 195°F (90°C) Duration: see chart
Sausage Boiled sausage Pork sausage Veal sausage
[min] 68 68 68
Cooking duration
93
Steam cooking
Shellfish
Preparation Defrost frozen shellfish before cooking with steam. Peel, clean and wash the shellfish.
Cooking pan If using a perforated pan, grease it first.
Cooking duration The longer shellfish are cooked, the tougher they become. Use the cooking durations given in the chart. When cooking shellfish in sauce or stock, we recommend that you increase the cooking duration quoted by a few minutes.
Settings Automatic Programs | Shellfish | … | or Operating Modes | Steam Cooking Temperature: see chart Duration: see chart
Prawn Shrimp Jumbo shrimp Small shrimp Lobster Large shrimp
[°F (°C)] 195 (90) 195 (90) 195 (90) 195 (90) 205 (95) 195 (90)
[min] 3 3 4 3
1015 3
temperature, duration
94
Steam cooking
Mussels
Fresh food
Danger of food poisoning from spoiled mussels.
Spoiled mussels can cause food poisoning. Only cook mussels which are closed. Do not eat mussels which have not opened after being cooked.
Steep fresh mussels in water for a few hours before cooking to rinse out any sand. Then scrub the mussels thoroughly to clean them.
Frozen food Defrost frozen mussels before cooking.
Cooking duration The longer mussels are cooked, the tougher they become. Use the cooking durations given in the chart.
Settings Automatic Programs | Mussels | … | or Operating Modes | Steam Cooking Temperature: see chart Duration: see chart
Barnacles Cockles Bearded mussels Scallops Razor clams Clams
[°F (°C)] 212 (100) 212 (100) 195 (90) 195 (90) 212 (100) 195 (90)
[min] 2 2 12 5
24 4
temperature, duration
95
Steam cooking
Menu Cooking – Manual
Before cooking meals with the manual menu cooking function, turn off steam reduction (see “Steam reduction” under “Settings”).
When cooking a menu, you can combine different foods with different cooking durations, e.g., fish filet with rice and broccoli. The food is placed in the steam oven compartment at different times so that each item is ready at the same time. Shelf level Place foods that produce a lot of liquid (e.g., fish) or have a distinctive color (e.g., beetroot) directly above the universal tray. This avoids any transfer of flavor or color to other food and prevents liquid dripping onto food below it. Temperature Whole meals should be cooked at a temperature of 212°F (100°C) as this is the temperature required to cook the majority of foods. Do not cook a whole meal at the lowest temperature when different temperatures are required for different types of food, e.g. 185°F (85°C) for seabream and 212°F (100°C) for potatoes. If the recommended cooking temperature for the food is 185°F (85°C), for example, try cooking it at 212°F (100°C) and testing the result. Some delicate types of fish with a soft structure, e.g. sole and plaice will become very firm when cooked at 212°F (100°C).
Cooking duration If you are increasing the recommended temperature, shorten the cooking duration by approx. ¹/.
Example Food cooking durations (see cooking charts in “Steam cooking”)
Parboiled rice Tilapia filet Broccoli
24 minutes 6 minutes 4 minutes
Calculation of set cooking durations: 24 minutes minus 6 minutes = 18 minutes (1st cooking duration: rice) 6 minutes minus 4 minutes = 2 minutes (2nd cooking duration: tilapia filet) Remaining time = 4 minutes (3rd cooking duration: broccoli)
Cooking duration
24 min. rice 6 min. tilapia filet
4 min. broccoli
Setting 18 min. 2 min. 4 min.
96
Cooking a whole menu Place the rice in the oven first. Set the first cooking duration: 18 min-
utes. After the 18 minutes, place the fish in
the oven. Set the second cooking duration:
2 minutes. After the 2 minutes, place the broc-
coli in the oven. Set the third cooking duration: 4 min-
utes.
Steam cooking
97
Sous-vide (vacuum) cooking
Always observe USDA/CFIA food safety guidelines. This gentle cooking method allows food to be cooked slowly at a low, constant temperature in vacuum packaging. With vacuum cooking, moisture does not evaporate and all nutrients and flavors are retained. The result is flavorful and cooked evenly.
Only use food that is fresh and in good condition. Ensure hygienic conditions and that food has not been out of the refrigerator too long, e.g. during transportation.
Use only heat-stable, boiling-resistant vacuum bags. Do not cook food in the manufacturers packaging, such as vacuumpacked frozen food. It is possible that an unsuitable vacuum bag was used. Use the vacuum bag only once.
Vacuum-seal the food in a chamber system vacuum sealer only.
98
Sous-vide (vacuum) cooking
Important usage notes
For the best cooking results: – Use herbs and spices more sparingly
than with conventional methods because the impact on the taste of the food will be stronger. You can also cook the food unseasoned and add seasoning after cooking. – The cooking duration is reduced when salt, sugar, and liquids are added. – The food becomes firmer if acidic ingredients such as lemon or vinegar are added. – Do not use alcohol or garlic as this can cause an unpleasant taste. – Only use vacuum bags that match the size of the food. If the vacuum bag is too big, too much air can remain inside. – If you want to cook several pieces of food in one vacuum bag, put them side by side in the bag. – If you want to cook food in several vacuum bags at once, put the bags side by side on the wire rack. – The cooking durations depend on the thickness of the food. – With high temperatures and/or long cooking durations, the appliance may run low on water. Check the display from time to time.
– Keep the door closed during the cooking program. Opening the door extends the cooking process and can change the cooking result.
– Temperatures and cooking durations from sous-vide recipes cannot always be emulated exactly. Alter the settings to achieve the degree of cooking you want.
99
Sous-vide (vacuum) cooking
Tips
– In order to reduce cooking times, you can vacuum-seal food items 12 days before the cooking program. Store the vacuum-sealed food in the refrigerator at no more than 40°F (5°C). In order to preserve quality and flavor, the food should be cooked no later than 2 days afterward.
– Freeze liquids such as marinades before vacuum-sealing to prevent them from escaping from the bag.
– Fold the edges of the vacuum bag outward for filling. This will give you clean, perfect seams.
– If you do not want to eat the food straight after cooking, put it in iced water immediately and allow it to cool down completely. After this, store the food at temperatures no greater than 40°F (5°C). This way, you can retain the food’s quality and flavor while keeping it fresh for longer. Exception: poultry must be eaten straight after the cooking program.
– After cooking, cut the vacuum bag on all


