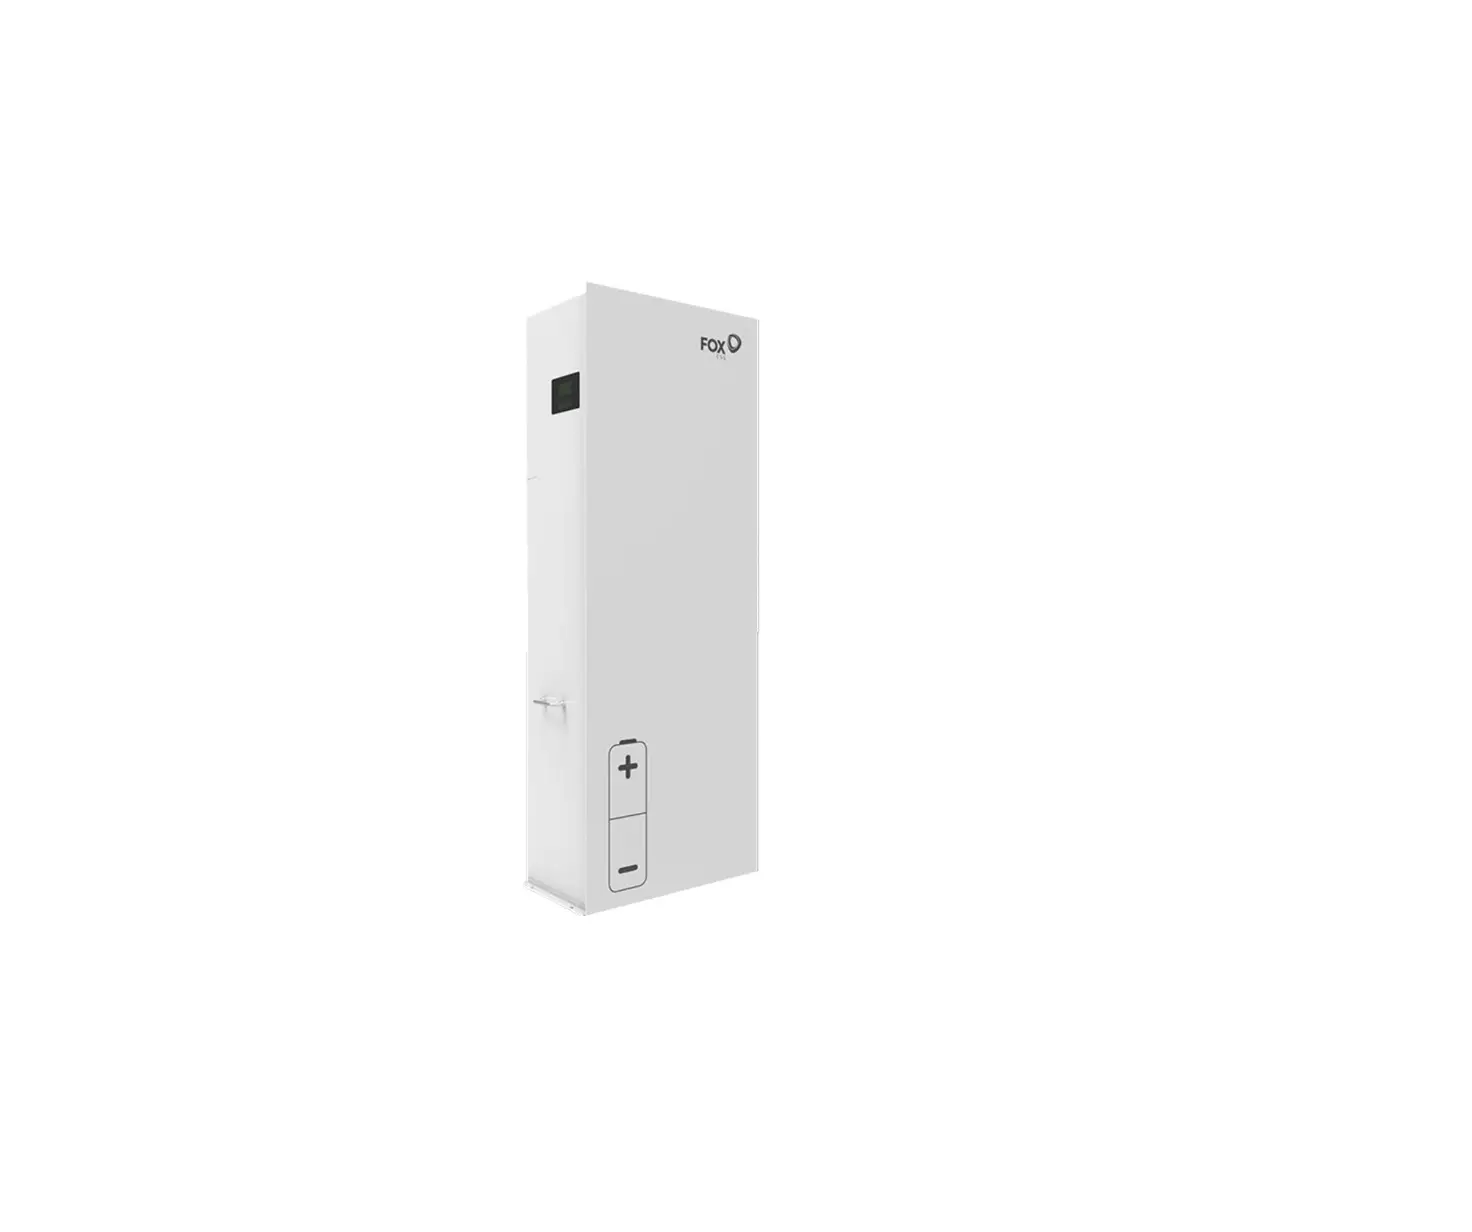
FOX-ESS AIO 3-6kW All-In-One Single Phase
Energy Station Installation Guide

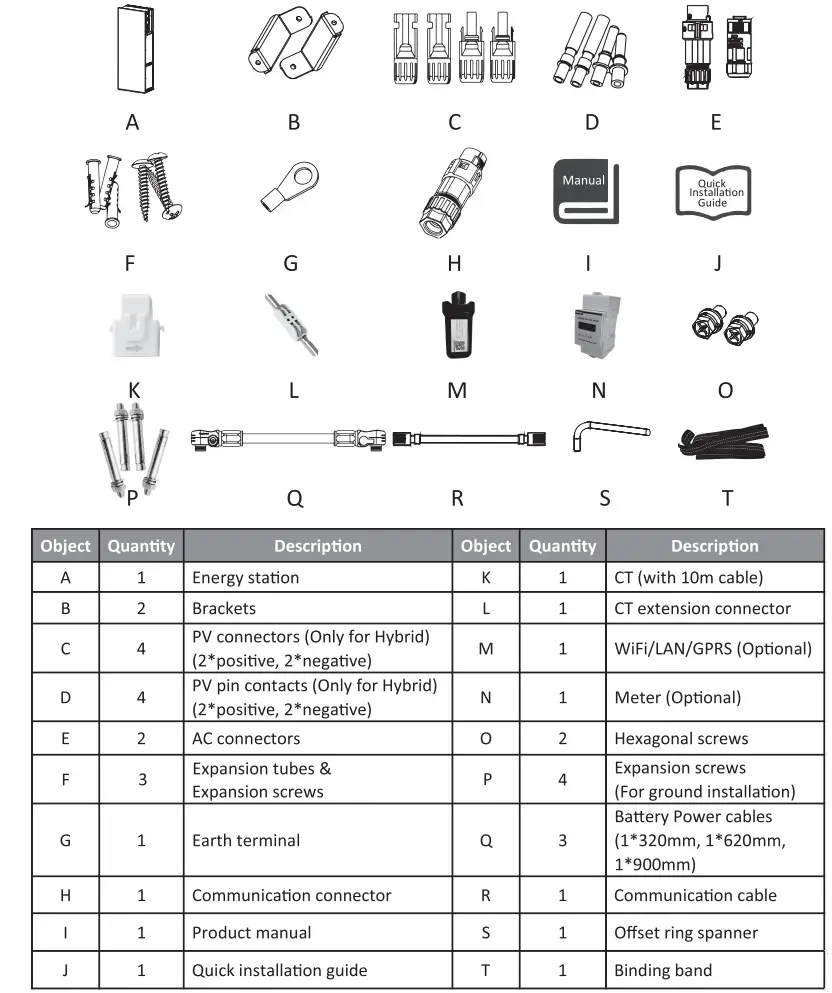
Packing List
Installation Steps
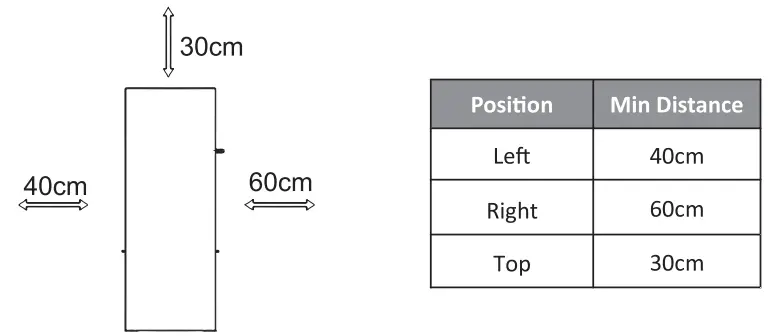
Please make sure the energy station will be installed with a proper distance as shown below.
A. Energy station installation
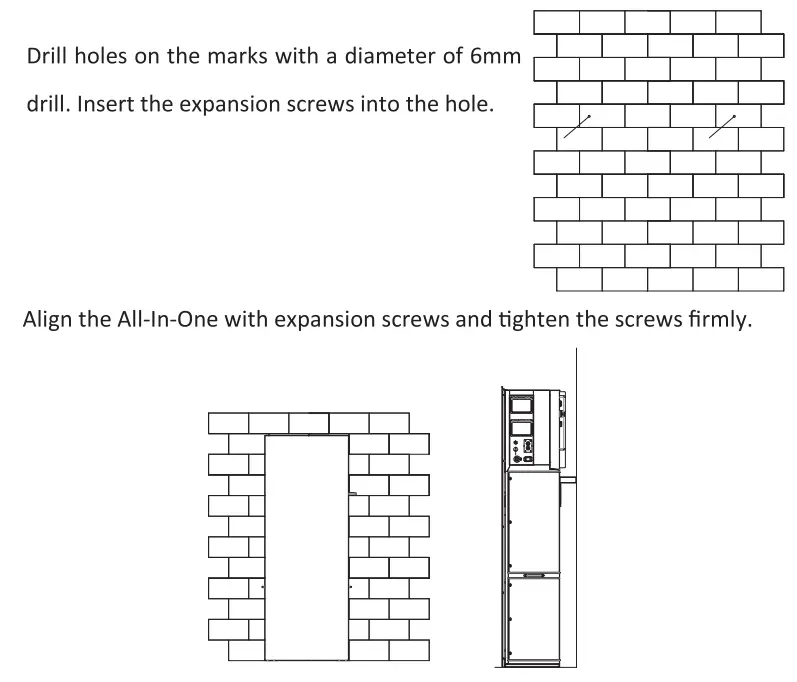
- Wall mounting
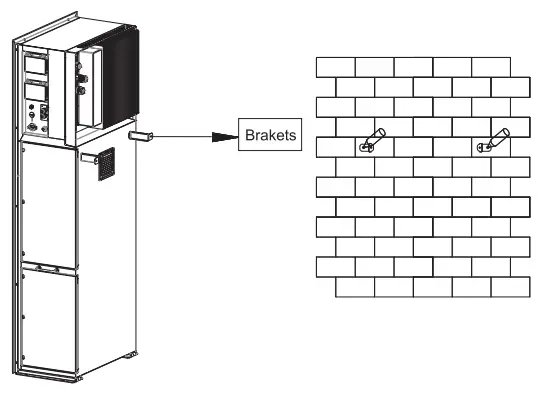
Choose a clean and stable wall surface for Installation. Use hexagonal screws to fix the brackets on the back of the AU-In-One. Aim the All-In-One towards the wall and mark position of two holes from brackets.
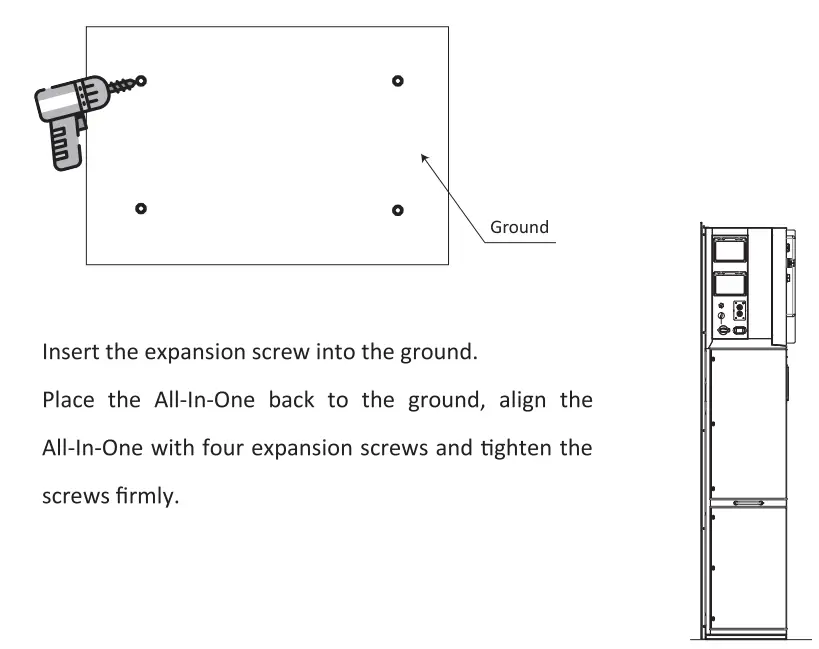
- 2. Ground installation
Choose a flat and stable ground for Installation and place the All-In-One on that ground.
Mark position of the four corners on the bottom of the All-In-One then remove the All-In-One.
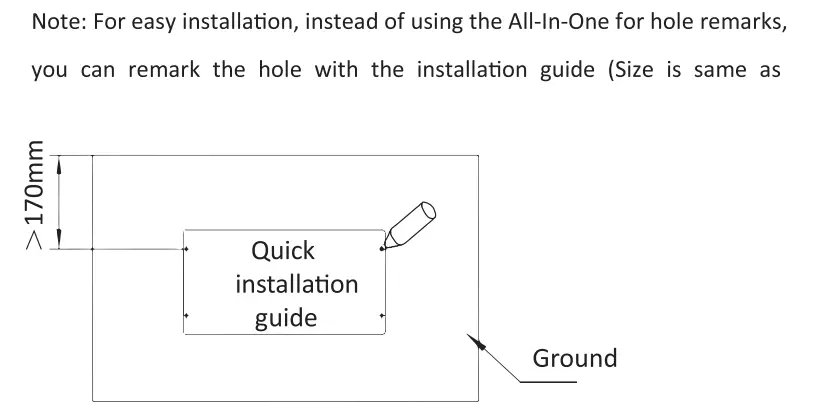
Drill holes on the marks, make sure the depth is at least 60mm, the diameter of the holes is about 13-14 mm. The hole which closest to the wall should keep a minimum distance of 170mm from the wall.
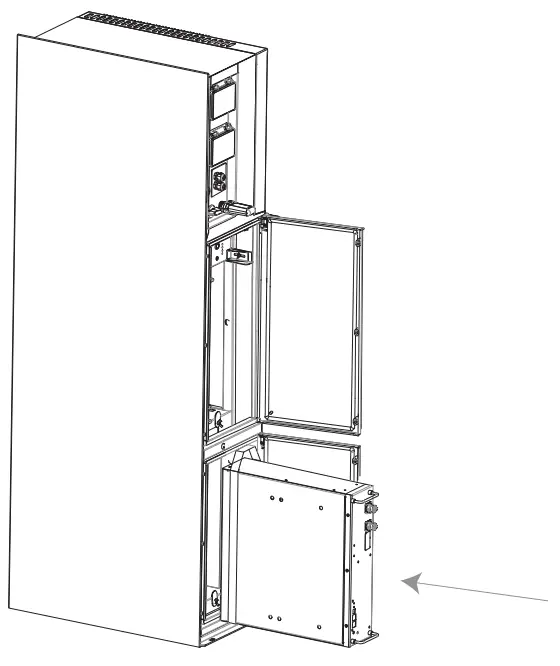
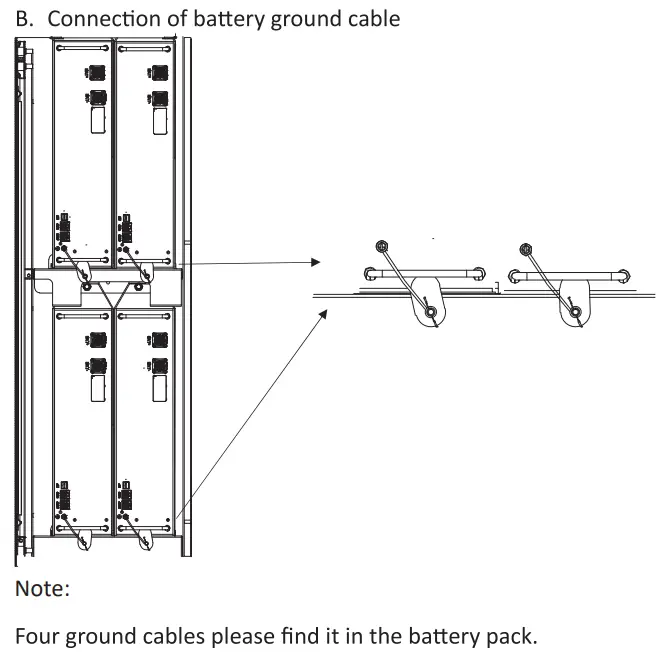
B. Battery installation
Remove the brackets on both sides of the battery. There are eight screws on the left and right sides (4*Left, 4*right).
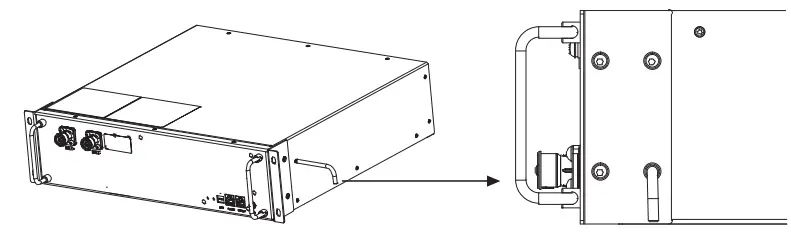
Push the battery into the All-In-One as shown in the figure below.
Serial Port Connections
Communication interface between the inverter and Meter/Battery/DRM/485 are as follows with Rj45 connectors which should be inserted corresponding port in the inverter.
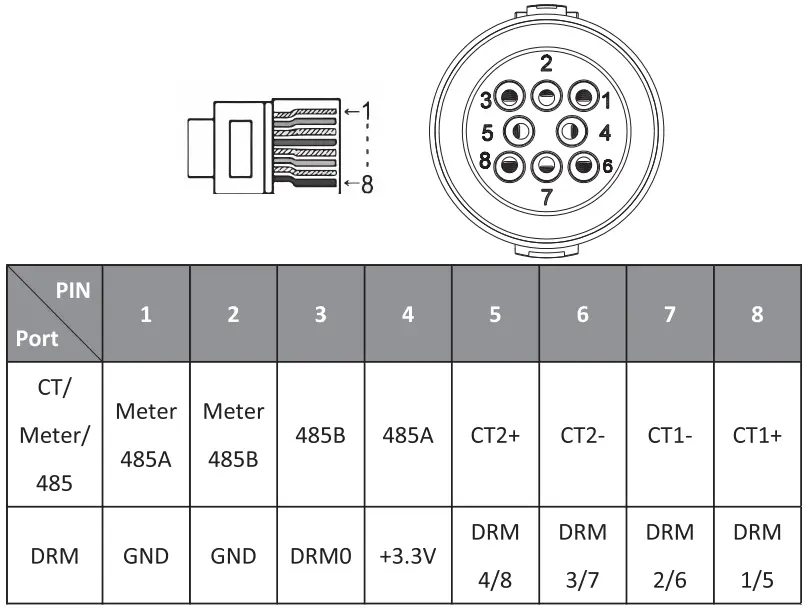
Note:
CT1: For All-In-One, CT2: Grid tied inverter (if have).
Compatible Meter type: DDSU666 (CHINT), SDM230 (EASTRON).
Wiring Steps
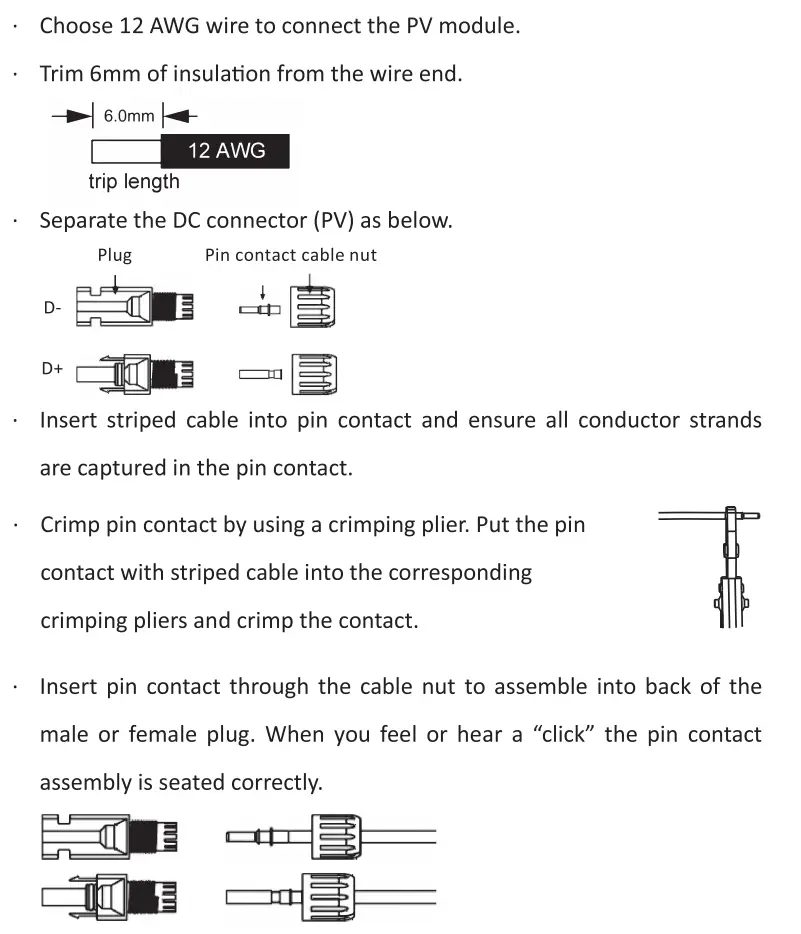
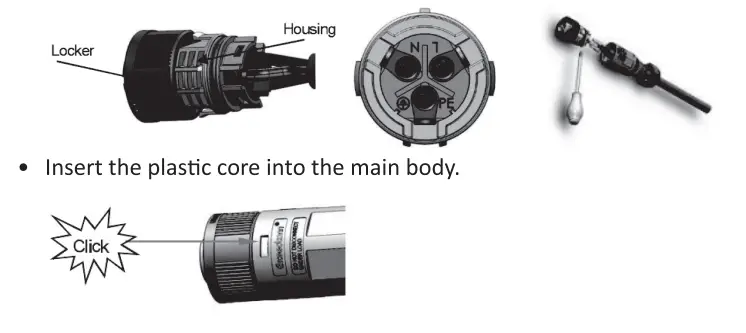
- Unlock the DC connector:
– Use the specified wrench tool.
– When separating the DC+ connector, push the tool down from the top.
-When separating the DC- connector, push the tool down from the bottom.
-Separate the connectors by hand.
Battery Wring
A. connection of battery power line and communication line
- For two batteries
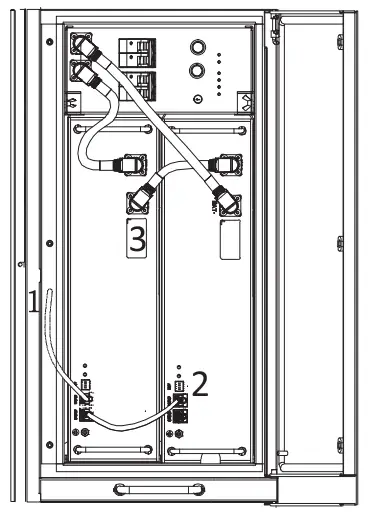
Note:
No.1 is reserved line.
No.2 & No.3 please find it in the battery pack .
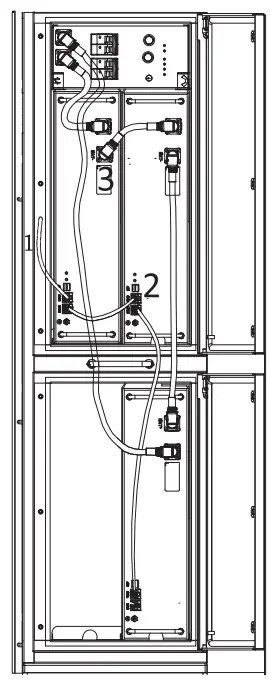
- For three batteries
Note:
No. 1 is reserved line.
No.2 & No.3 please find it in the battery pack.
- For four batteries
Note:
No.1 is reserved line.
No.2 & No.3 & No.4 & No.5 please find it in the battery pack.

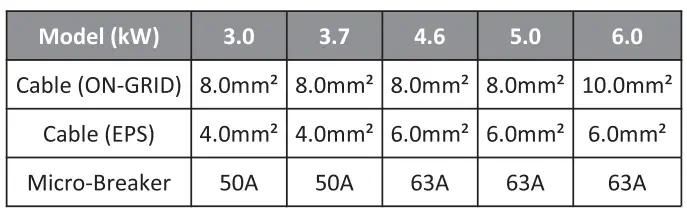
Grid Wiring
Cable dimensions
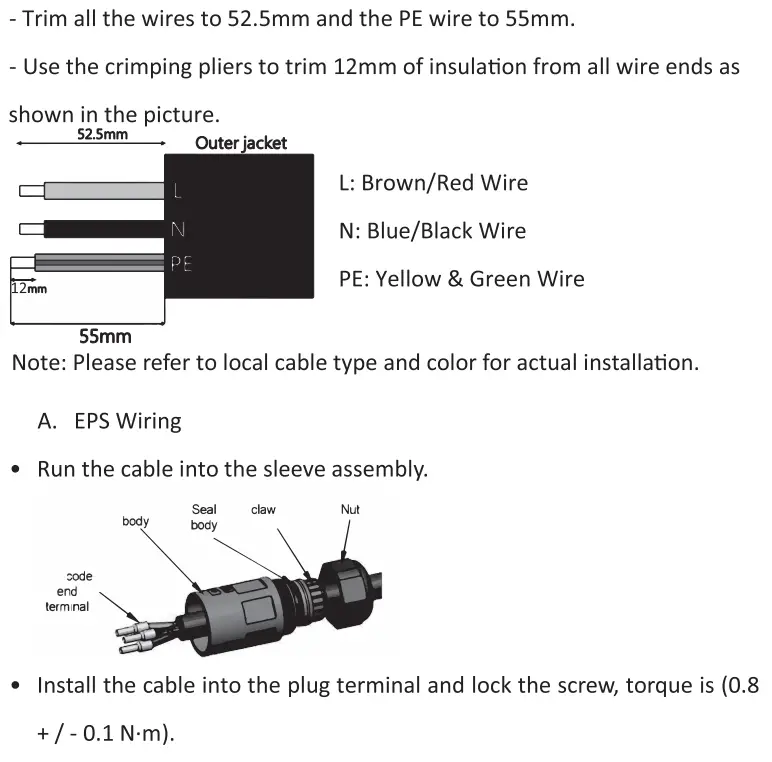
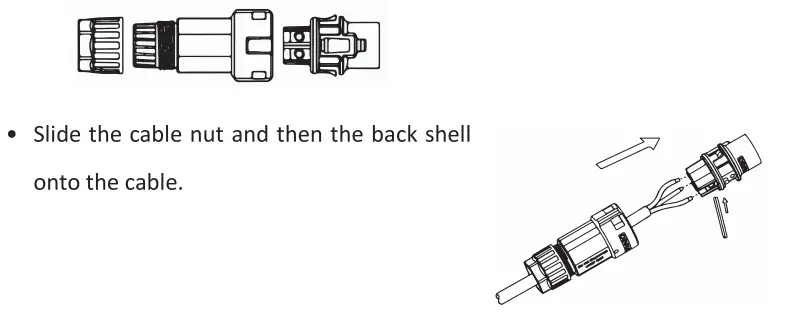
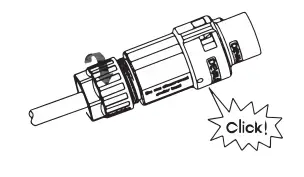
- Put t he sealing body and yarn trapper into the main body, screw the lock nut into the main body, and the torque is (2.5 + / – 0.5N·m).
- Insert t he male end into the female end. For the rotation direction of the lock, please refer to the LOCK mark on the assembly.
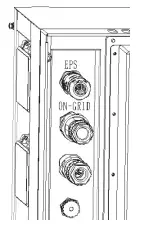
B. ON-GRIO Wiring
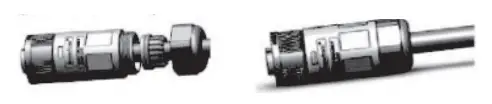
- Separate the ON-GRID plug into three parts as below.
- Hold the middle part of the female insert, rotate the back shell to loosen it, and detach it from female inset.
- Remove the cable nut (with rubber insert from the back shell.
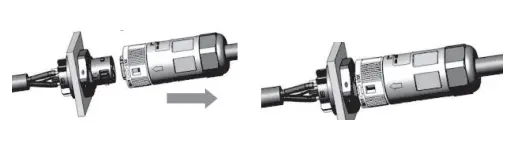
- Push the threaded sleeve into the socket, tighten up t he cap on the terminal.
- Push the threaded sleeve to connection terminal until both are locked tightly on the energy station.
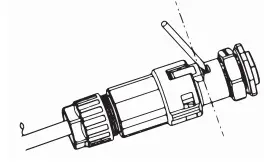
- Remove the ON-GRID connector: Press the bayonet out of the slot with a small screwdriver or the unlock tool and pull it out, or unscrew the threaded sleeve, then pull it out.
Grounding Wiring
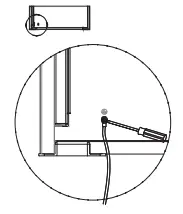
Use the crimping pliers to press the ground cable into the ground terminal, screw the ground screw with screwdriver as shown below.
Energy Station Start-Up
Please refer to the following steps to start up the energy station.
- Ensure the energy station fixed well.
- Make sure all wirings are completed.
- Make sure t he meter is connected well.
- Make sure t he battery is connected well.
- Make sure t he external EPS contactor is connected well {if needed).
- Turn on the PV/ OC switch (for Hybrid version only), AC breaker, EPS breaker and battery breaker.
- Enter the settings page, select START/ STOP and set it to start.
Note:
- When starting energy station for the first time, the country code will be set by default to the local settings. Check if the country code is correct.
- Set the time on the inverter using the button or by using the APP.
Energy Station Switch Off
Please refer to the following steps to switch off the energy station.
- Enter the settings page, select START/ STOP and set it to stop.
- Turn off the PV/DC switch (for Hybrid version only), AC breaker, EPS breaker and battery breaker.
- Wait 5 min before you open the upper lid (if in need of repair).


 Three-phase High Performance Inverter User Manual")


 Three Phase Solar Inverter User Manual")