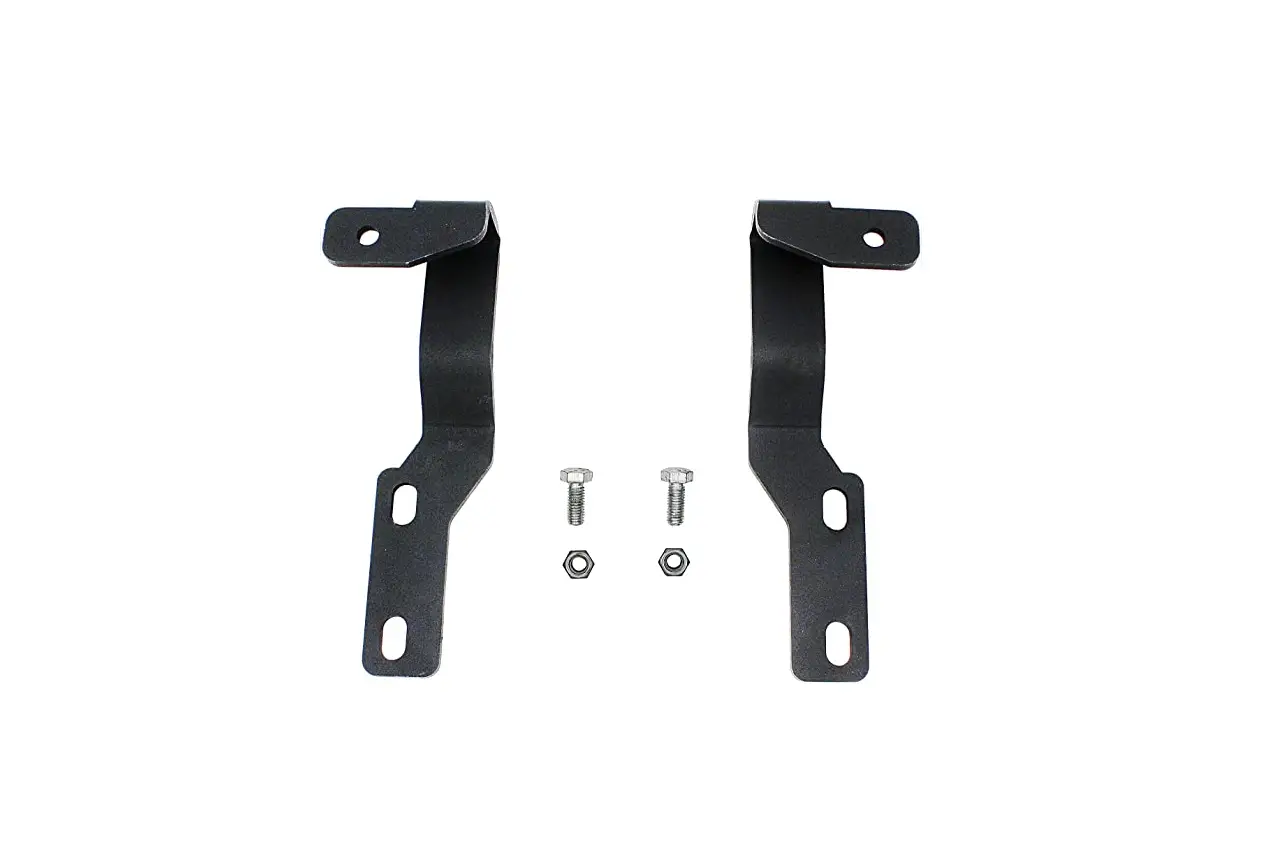
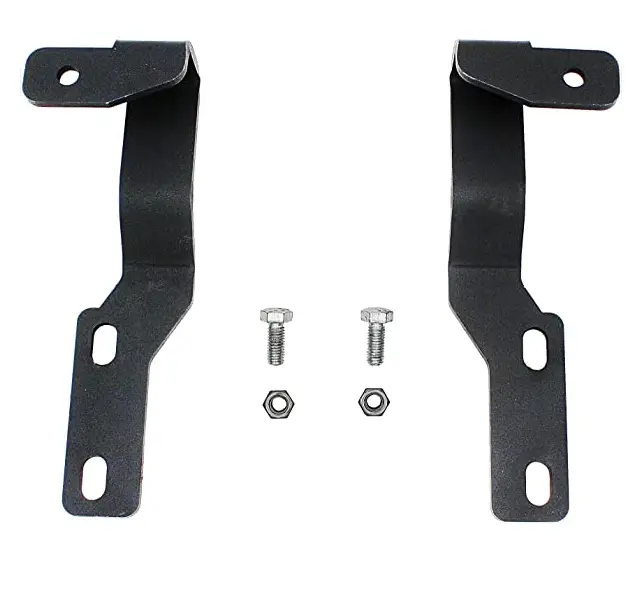
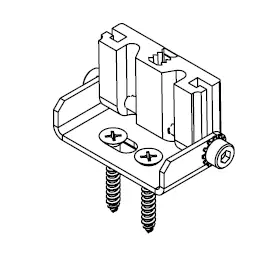
Q-TRAN HINGE Adjustable Light Fixture Bracket
NOTES
- Not recomended for use with flexible encapsulated fixtures
- Compatible with MICRO 5 rigid fixtures
- Compatible with extrusions with lens
- Compatible with rigid encapsulated fixtures
- Mount to drywall with drywall anchors or mount to wood surface
INCLUDED PARTS
- Assembled bracket
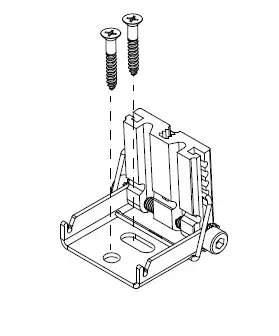
- 3/4″ long mounting screw(s)
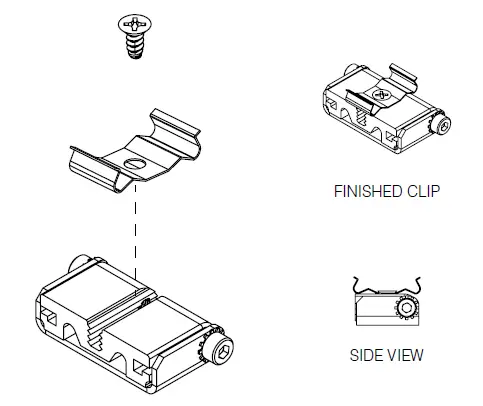
- 6-32 x 1/4” undercut flat head mounting clip screw
- Allen key 5/64″ (for HMB-S & HMB-M) or 3/32″ (for HMB-L & HMB-XL)
TOOLS & HARDWARE NEEDED
- Drywall anchors (if mounting to drywall)
- Screw driver
- Measuring tape
INSTALLATION
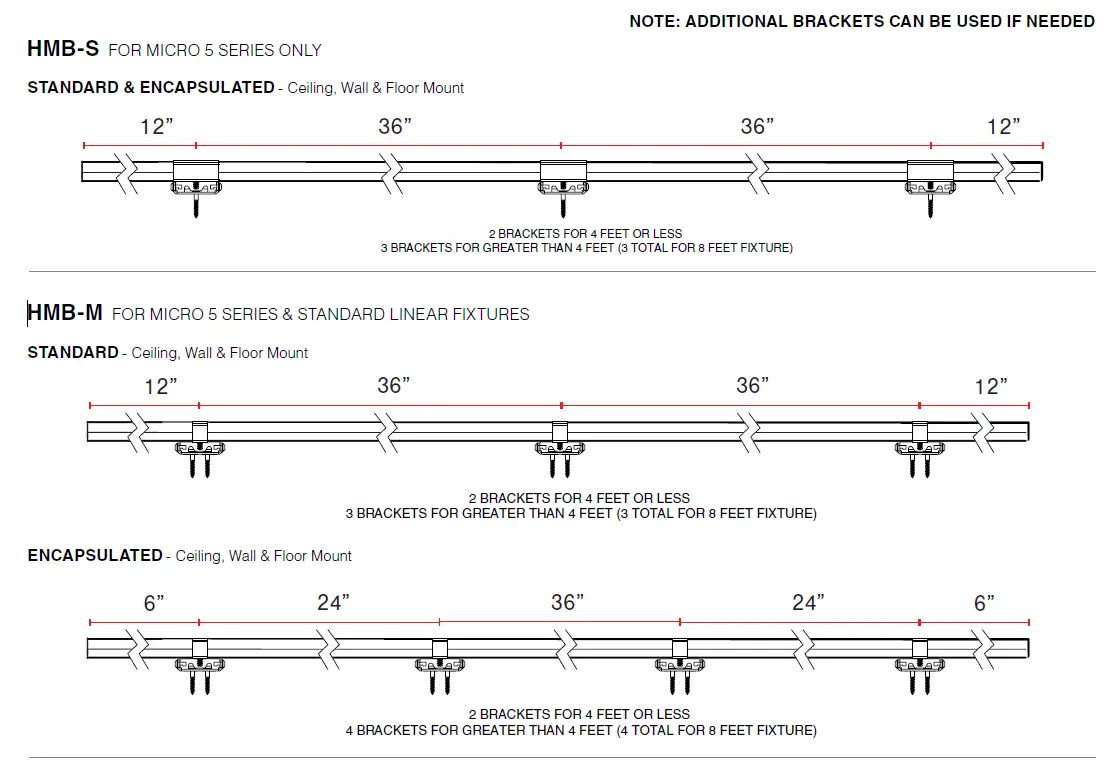
HMB-S
FOR MICRO 5 SERIES OR SMALL FIXTURES
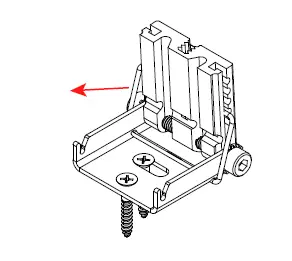
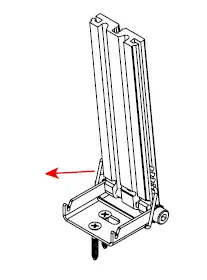
- Remove HMB-S from bag. Loosen side screws with 5/64 fallen wrench and rotate inner bracket to reveal mounting hole.

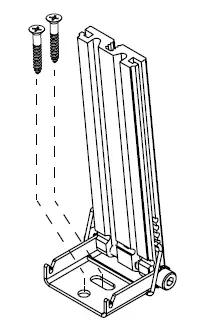
- Screw down base bracket with provided screw or equivalent.

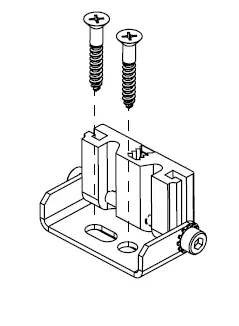
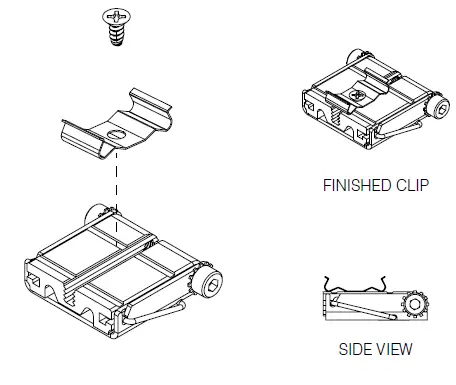
- Install fixture mount clip with provided SS #6 flat head screw from bag.

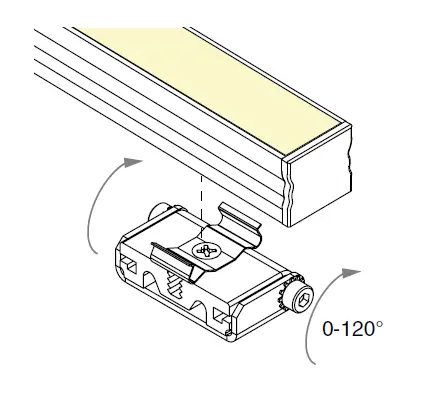
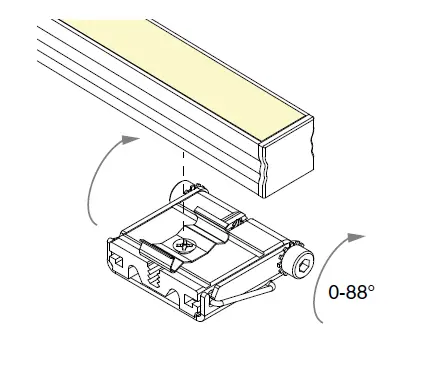
- Snap fixture onto bracket. Rotate inner bracket to desired angle then tighten side screws to lock angle.


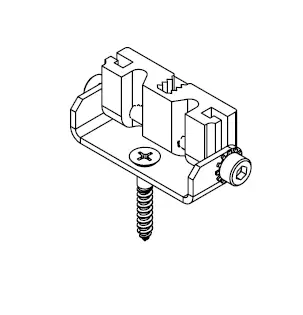
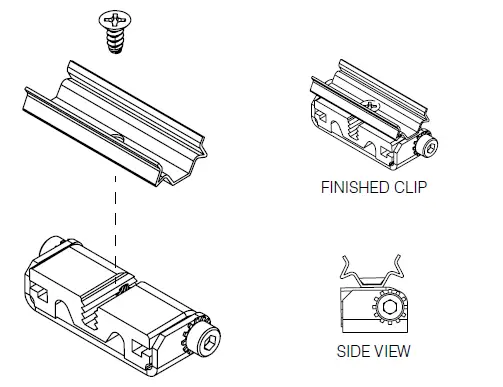
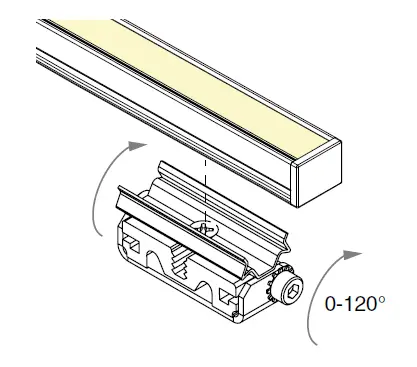
NOTE: Screw can only be installed once so make sure correct position is configured. Do not over torque. Hand tighten until firm.
HMB-M
FOR LIGHT-WEIGHT LINEAR FIXTURES
- Remove HMB-M from bag. Loosen side screws with 5/64 fallen wrench and rotate inner bracket to reveal mounting hole.

- Screw down base bracket with provided screw or equivalent.

- Install fixture mount clip with provided SS #6 flat head screw from bag.

- Snap fixture onto bracket. Rotate inner bracket to desired angle then tighten side screws to lock angle.

NOTE: Screw can only be installed once so make sure correct position is configured. Do not over torque. Hand tighten until firm.
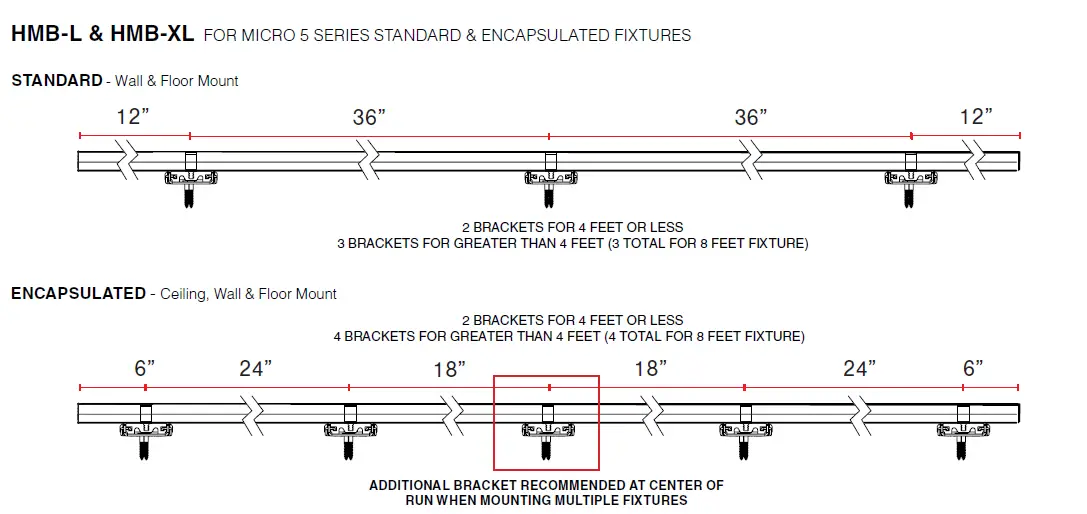
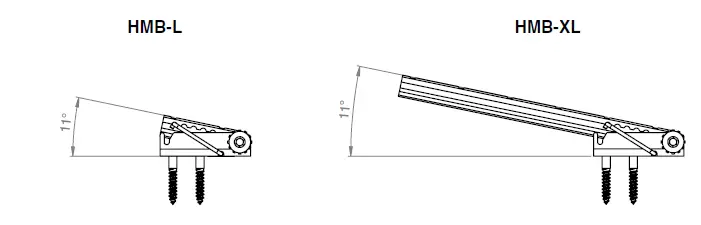
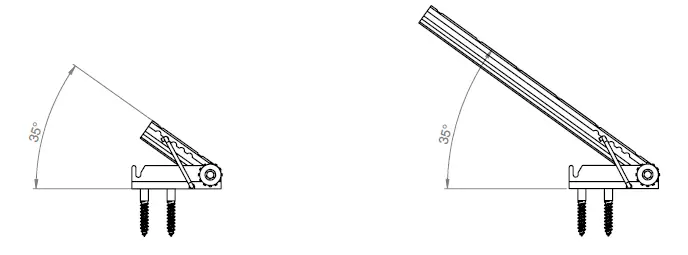
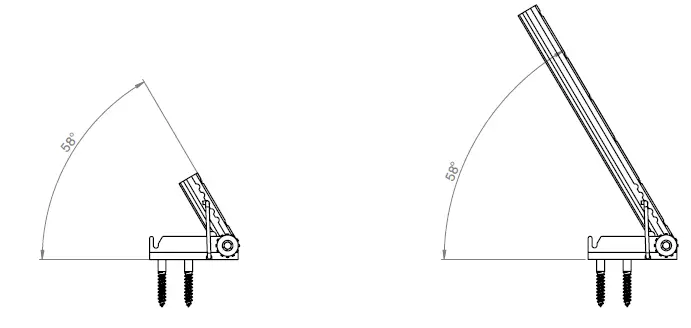
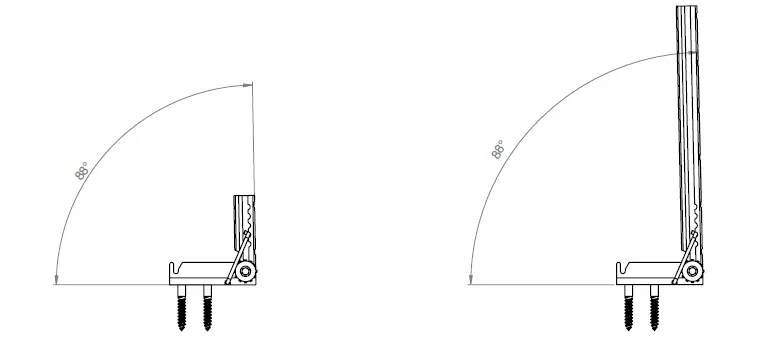
HMB-L
FOR HEAVY LINEAR FIXTURES
- Remove HMB-L from bag. Loosen side screws with 3/32 allen 2 wrench and rotate inner bracket to reveal mounting hole.

- Screw down base bracket with provided screw or equivalent.
- Lower down by pushing anchor in arrows direction. Lock by pushing in opposite direction.

- Install fixture mount clip with provided SS #6 flat head screw from bag.

- Snap fixture onto bracket. Rotate inner bracket to desired angle then tighten side screws to lock angle.

NOTE: Screw can only be installed once so make sure correct position is configured. Do not over torque. Hand tighten until firm.
HMB-XL
FOR HEAVY LINEAR FIXTURES & ANGLE HEIGHT CONTROL
- Remove HMB-XL from bag. Loosen side screws with 3/32 allen 2 wrench and rotate inner bracket to reveal mounting hole.

- Screw down base bracket with provided screw or equivalent.
- Lower down by pushing anchor in arrows direction. Lock by pushing in opposite direction.

- Install fixture mount clip with provided SS #6 flat head screw from bag.

- Snap fixture onto bracket. Rotate inner bracket to desired angle then tighten side screws to lock angle.

NOTE: Screw can only be installed once so make sure correct position is configured. Do not over torque. Hand tighten until firm.
HMB-XL
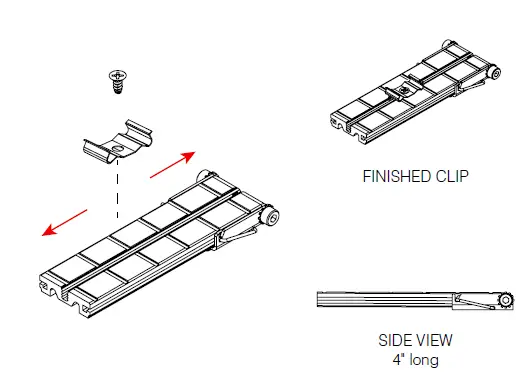
FIELD MOUNT AND CUSTOM INSTALL FEATURES
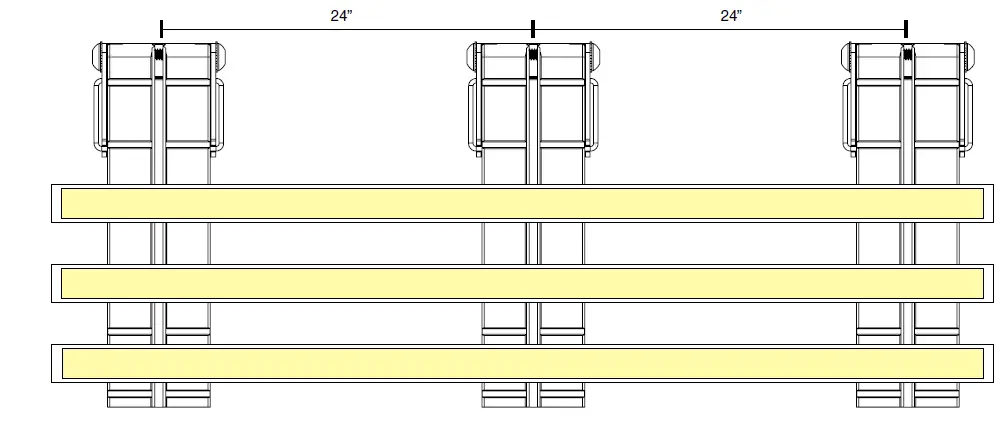
CUSTOM CUTS – Field cuttable to smaller lengths

CUSTOM FIXTURE MOUNT
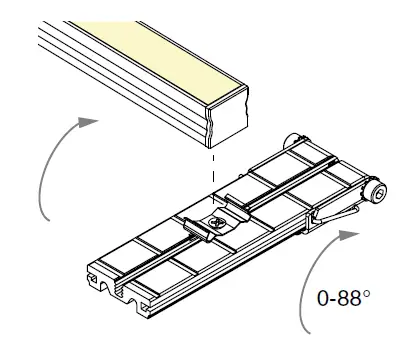
PRE-SET ANGLES FOR HMB-L & HMB-XL
1ST NOTCH
2ND NOTCH
3RD NOTCH
4TH NOTCH
© 2022 Q-Tran Inc. All rights reserved | 155 Hill St. Milford, CT 06460 | 203-367-8777 | [email protected] | www.q-tran.com


