
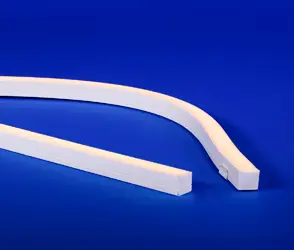
Q-TRAN Q-CAP Flexible Fixtures
INSTALLATION
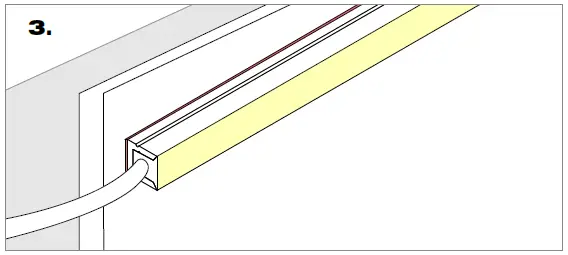
VHB MOUNTING
- Remove the backing from the adhesive and apply firm pressure to the bonding surface.
- Peel off secondary backing.

- Adhere to mounting surface.


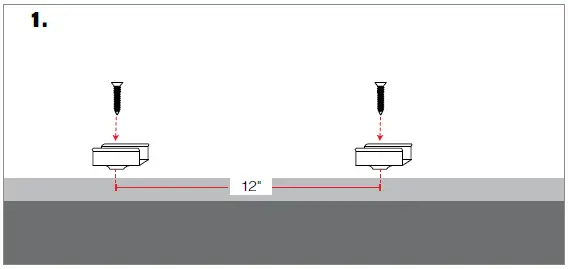
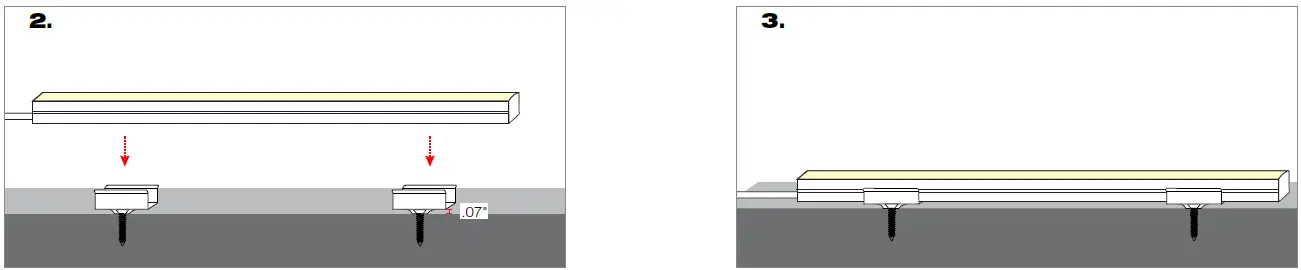
WHITE SNUG CLIP
NOTE: White snug clip should be placed every 12″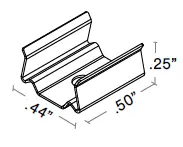
INCLUDED HARDWARE
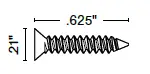
- #4×5/8″ Flat head screw
- Mount white snug clip with provided flat head screw.

- Align fixture to white snug clips matching distances.
- Press fixture into white snug clips.

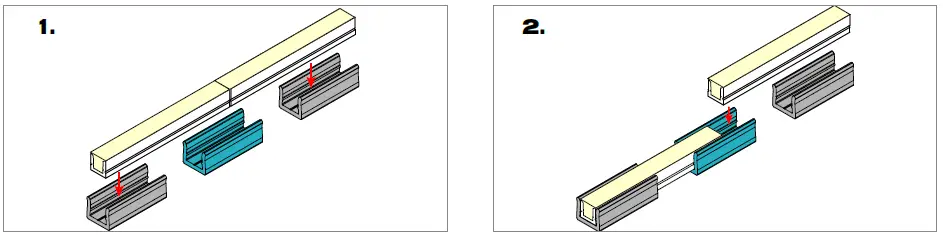
PVC MOUNT CLIP: Connects two seamless fixtures, with or without wire exit
MICRO5-PPS-2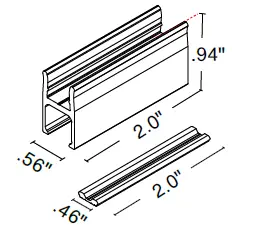
Mounting Feed
- Press both fixtures into PPS clip.

- Snap fixture into mounted PPS channel When wire will exit into conduit do not install bracket.
- Finished Assembly for seamless bottom feed mounting (S5/P5).


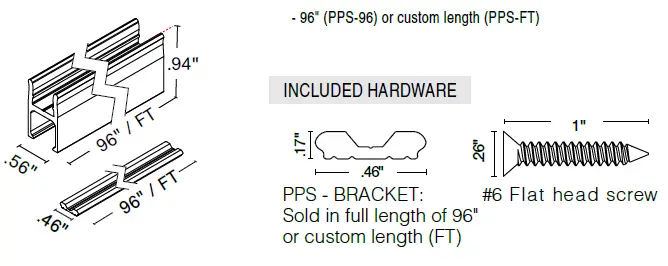
LOW PROFILE PVC MOUNT CLIP: Connects two seamless fixtures, with or without wire exit.
MICRO5-PPS-LP-2
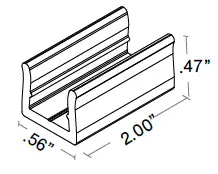
Mounting Feed
- Snap in 2″ channel
- Press in fixtures

- Finished assembly for end feed mounting (S1/P1).


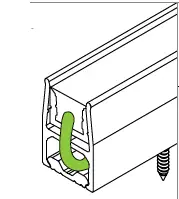
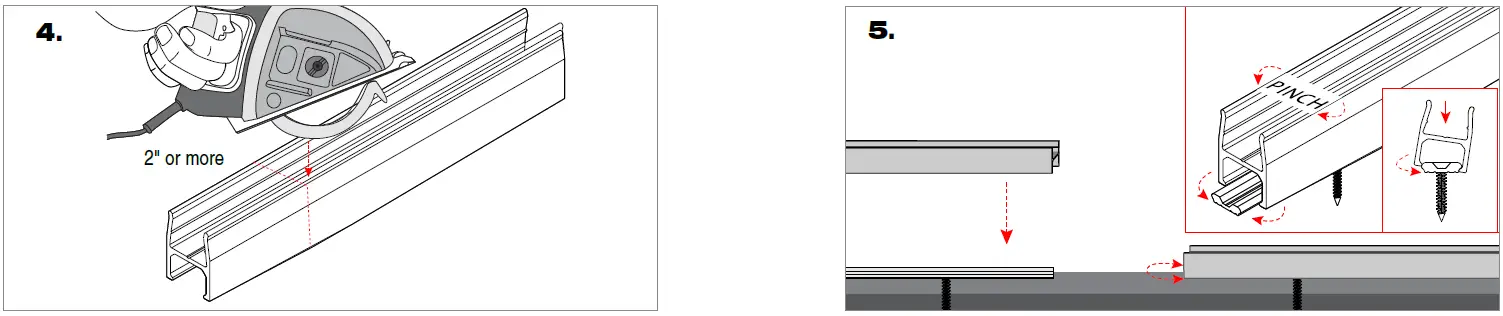
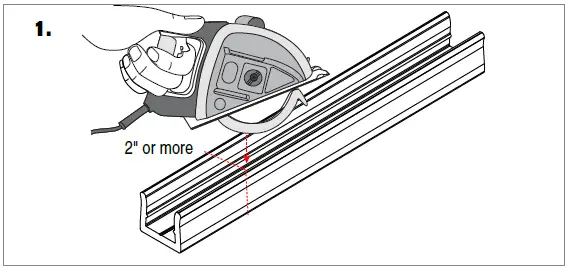
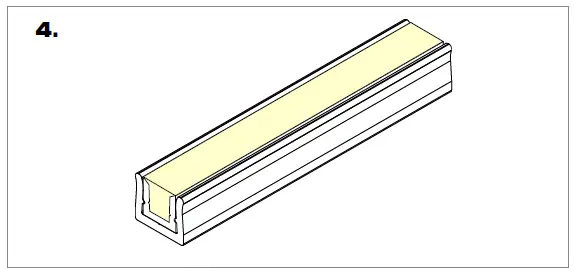
PVC MOUNT CHANNEL: Support for the fixture
MICRO5-PPS-96 & MICRO5-PPS-FT
- 96″ (PPS-96) or custom length (PPS-FT)

Built in wire way
- The PPS-BRACKET allows you to create a wire way under the PPS channel without any screws interfering

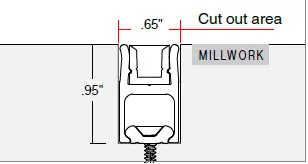
Millwork install
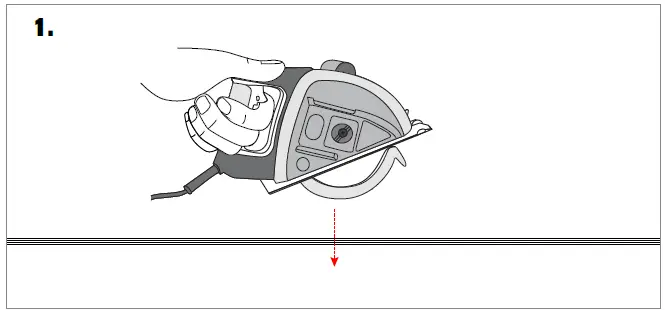
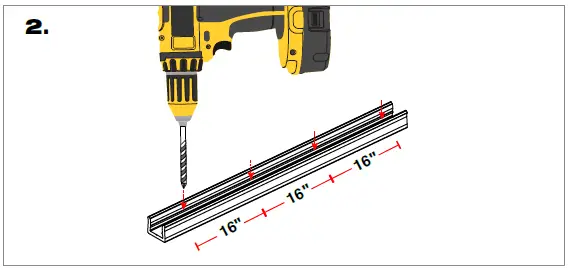
- The PPS-BRACKET can be field cuttable and cut to whatever length your application requires. The PPS-BRACKET can be installed as a full length of 96″, multiple smaller pieces, or end to end for longer seamless runs.

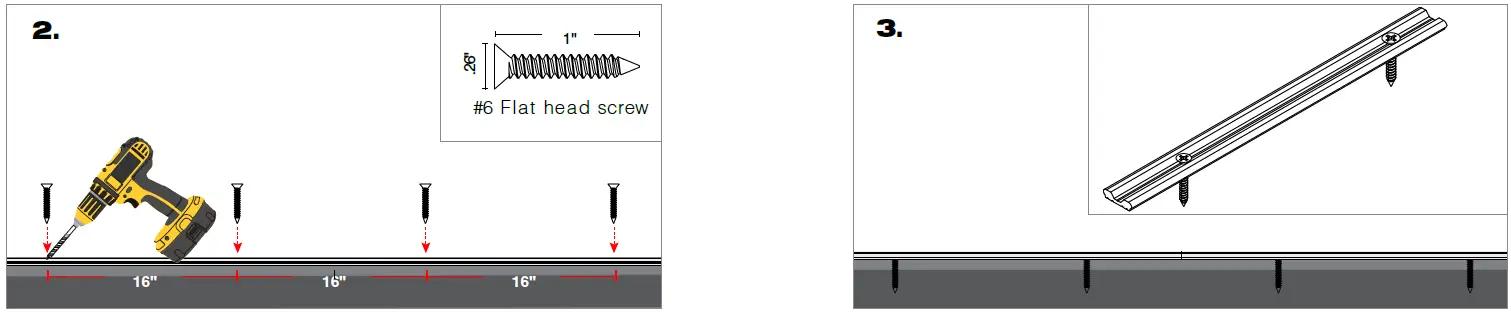
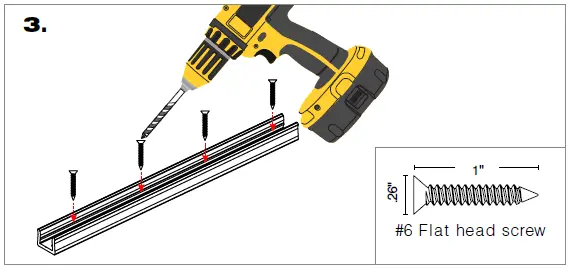
- Using pre-drilled pilot holes screw the #6 flat head screws to mount the PPS-BRACKET (1 screw every 16″).
- NOTE : For drywall applications mount directly into a stud.
- Using pre-drilled pilot holes, use the #6 flat head screws to mount the PPS-BRACKET.

- The PPS-96 or PPS-FT can be field cuttable and cut to whatever length your application requires. The PPS-96 or PPS-FT can be installed as a full length of 96″, multiple smaller pieces, or end to end for longer seamless runs.
- To mount, pinch the upper half of the PPS-96 or PPS-FT while you pivot it around one side of the PPS-BRACKET and push-in until you hear it snap into place. The PPS-96 or PPS-FT flexes around the PPS-BRACKET to create a solid, and secure snap on connection.

LOW PROFILE PVC MOUNT CHANNEL: Support for the fixture
MICRO5-PPS-LP-96 & MICRO5-PPS-LP-FT
96″ (PPS-96) or custom length (PPS-FT)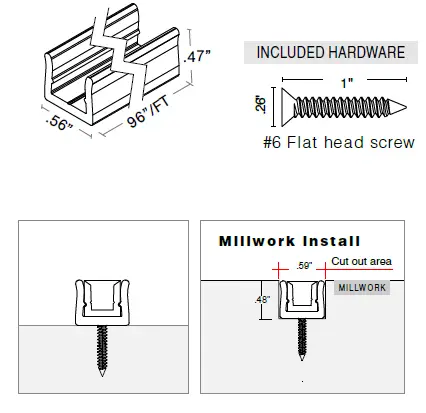
- The PPS-LP-96 or PPS-LP-FT can be field cuttable and cut to whatever length your application requires. The PPS-96 or PPS-FT can be installed as a full length of 96″, multiple smaller pieces, or end to end for longer seamless runs.

- Drill holes (1 hole/screw every 16″) into the PPS-LP.
- Using pre-drilled holes, use the #6 flat head screws to mount the PPS-LP.

NOTE : For drywall applications mount directly into a stud. - Snap fixture into PPS-LP.

- 2021 Q-Tran Inc. All rights reserved
- 155 Hill St. Milford, CT 06460
- 203-367-8777
- [email protected]
- www.q-tran.com


