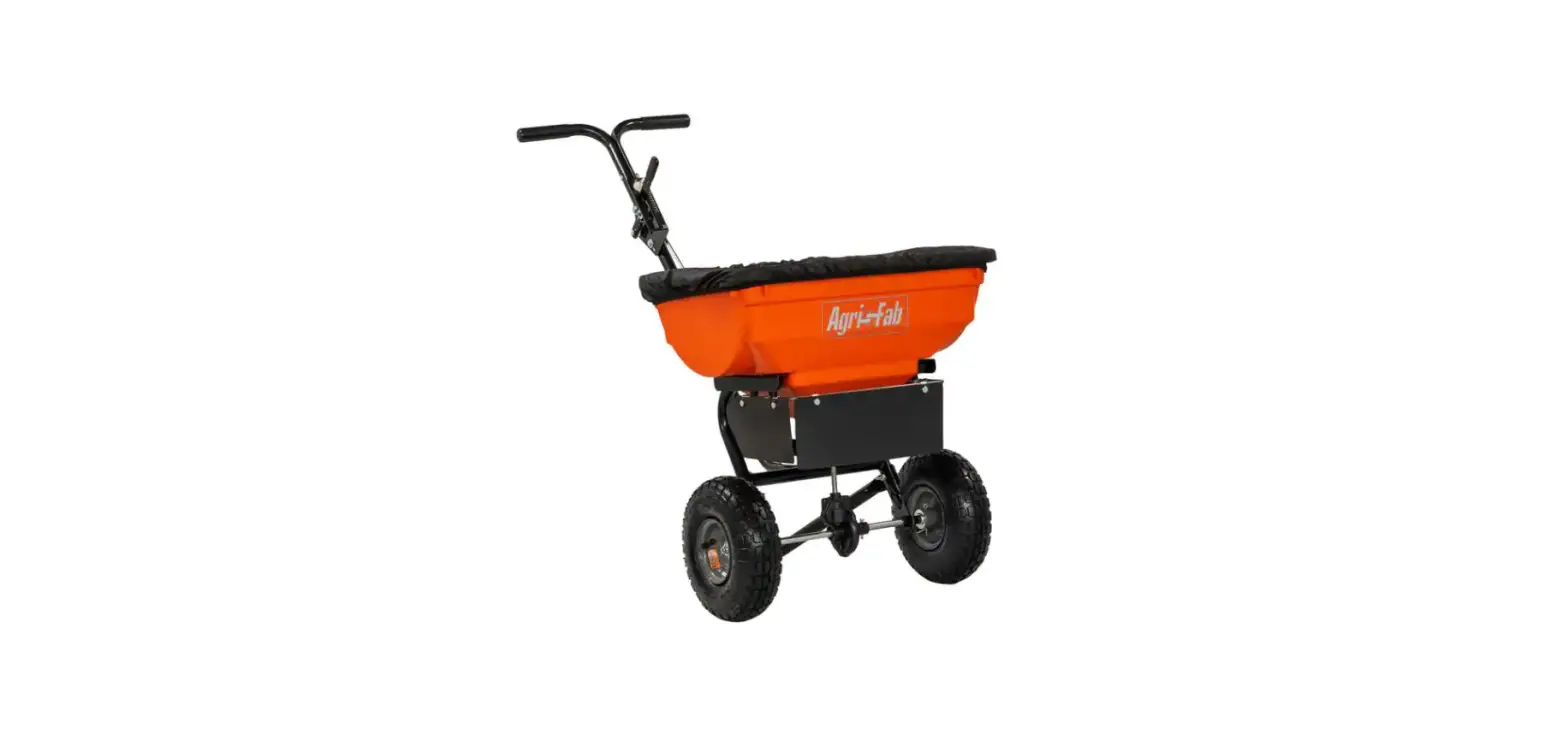
Agri-Fab 45-0575 85 lbs. Capacity Push Broadcast Spreader Instruction Manual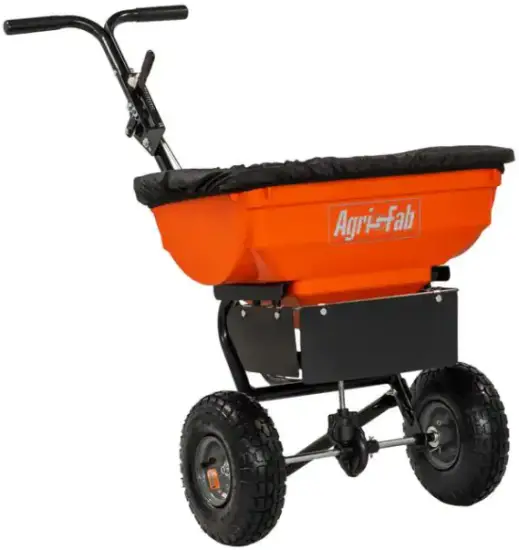
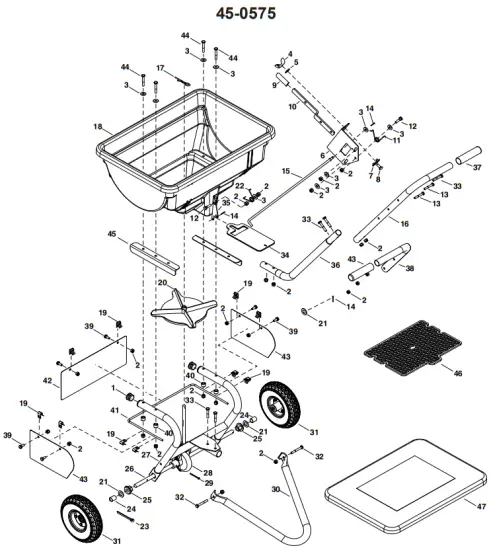
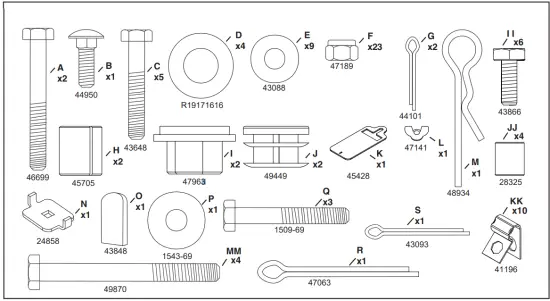
Parts Description
| REF | QTY | PART NO | DESCRIPTION | REF | QTY | PART NO | DESCRIPTION |
| 1 | 2 | 49449 | 1” Plug | 25 | 2 | 47963 | Flange Bearing |
| 2 | 26 | 47189 | 1/4” Nylock Hex Nut | 26 | 1 | 28611 | 1/2” Axle |
| 3 | 10 | 43088 | Small Washer | 27 | 1 | 68491BL3 | Frame Assembly |
| 4 | 1 | 47141 | 1/4” Nylon Wing Nut | 28 | 1 | 69209 | Gearbox Assembly |
| 5 | 2 | 1543-69 | Nylon Washer | 29 | 1 | 43093 | Cotter Pin |
| 6 | 1 | 27322BL1 | Flow Control Mounting Bracket | 30 | 1 | 28463BL3 | Stand Tube |
| 7 | 1 | 24858 | Adjustable Stop | 31 | 2 | 45702G | Wheel |
| 8 | 1 | 44950 | 1/4-20 X 3/4” Carriage Bolt | 32 | 2 | 46699 | 1/4 X 2” Hex Bolt |
| 9 | 1 | 43848 | Control Arm Grip | 33 | 5 | 43648 | 1/4 X 1-1/2” Hex Bolt |
| 10 | 1 | 24856BL1 | Control Arm | 34 | 1 | 45428 | Flow Plate |
| 11 | 1 | 42347 | Torsion Spring | 35 | 1 | 2-118 | Slide Gate Bracket |
| 12 | 2 | 43661 | 1/4-20 X 1” Hex Bolt | 36 | 1 | 28464BL3 | Lower Handle Tube |
| 13 | 3 | 1509-69 | 1/4-20 X 1-3/4” Hex Bolt | 37 | 2 | 44482 | Handle Grip |
| 14 | 2 | 44101 | 3/32” Cotter Pin | 38 | 1 | 44589BL3 | Short Handle Tube |
| 15 | 1 | 45431 | Control Rod | 39 | 6 | 43866 | Bolt, Hex 1/4-20 X 5/8 GR5 |
| 16 | 1 | 28662BL3 | Handle Tube | 40 | 4 | 28325 | Spacer, .31ID X 5/8 GR5 |
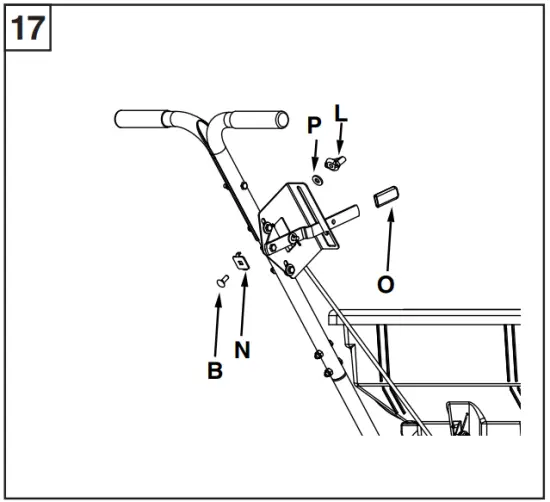
| 17 | 1 | 48934 | Hairpin Agitator | 41 | 1 | 2-205 | Tube, Deflector Frame 85 lb. |
| 18 | 1 | 45433ORG | Hopper | 42 | 1 | 2-207 | Deflector, Front |
| 19 | 10 | 41196 | Clamp, 7/32 Bare X 0.28 | 43 | 2 | 2-206 | Deflector, Side |
| 20 | 1 | 45504 | Impeller | 44 | 4 | 49870 | Bolt, Hex 1/4-20 X 2-1/2″ |
| 21 | 4 | R19171616 | Large Washer | 45 | 2 | 28486BL1 | Support Angle |
| 22 | 1 | 44566 | Torsion Spring | 46 | 1 | 45470 | Grate |
| 23 | 1 | 47063 | 5/32” Cotter Pin | 47 | 1 | 40883 | Hopper Cover |
| 24 | 2 | 45705 | Spacer | 1 | 3-106 | Owner’s Manual |
Assembly Instructions
NOTE: Remove tape from Slide Gate Bracket

SCAN QR CODE FOR SPREADER CALIBRATION VIDEO INSTRUCTION
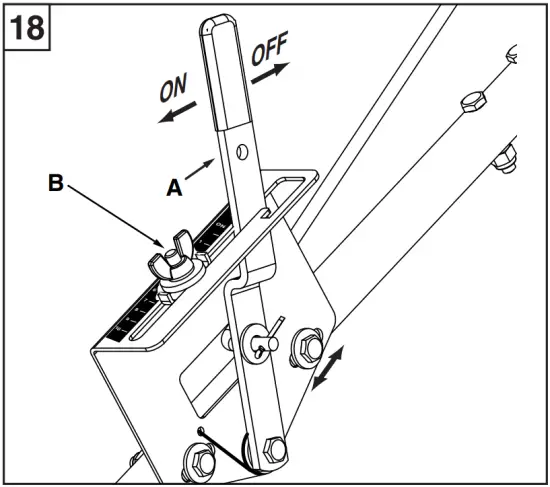
Calibrate the flow control setting. (See figure 18)
- Move the control lever (A) to the “OFF” position.
- Slide the control bracket along the control tube until the shut-off plate in the bottom of the hopper is closed.
- Lightly tighten the hex nuts that fasten the flow control bracket to the control tube.
- Set the adjustable stop (B) at “5”. Pull the control lever (A) against the stop (B) and verify that the shut-off plate has opened about half way.
- If the shut-off plate does not open half way, adjust the position of the control bracket until the shut-off plate opens about half way and closes completely. Tighten the hex nuts.
SAFETY INFORMATION
- Read the information on the chemical package for instructions and cautions on handling and applying.
- Wear eye and hand protection when handling and when applying lawn or garden chemicals.
- Never allow children to operate the spreader.
OPERATION
Do not use powdered lawn chemicals. They do not give a
satisfactory or consistent broadcast pattern.
- Estimate the size of the area to be covered and calculate the amount of material required.
- Set the adjustable stop according to the flow setting recommended in the application chart on this page.
Also refer to the instructions on the packaging for the material to be spread. - The application chart is calculated for light to heavy coverage at a vehicle speed of 3 mph, or 100 ft. in 23 seconds. Do not exceed 6 mph.
- Make sure the control lever is in the “OFF” position.
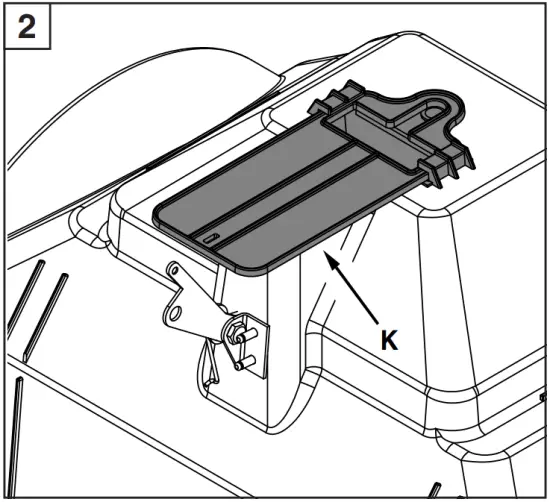
- Fill the hopper, breaking up any lumpy fertilizer.
- Start the spreader in motion and then pull the control lever forward against the adjustable stop to the “ON” position.
- Always move the control lever to the “OFF” position before turning or stopping.
- To ensure uniform coverage, make each pass so that the broadcast pattern slightly overlaps the pattern from the previous pass. The approximate broadcast widths for different materials are shown in the application chart on this page.
- For rectangular areas, make two passes across the short ends to create turning areas. For nonrectangular areas, make two passes around the entire border.
- When broadcasting weed control fertilizers, make sure the broadcast pattern does not hit evergreen trees, flowers or shrubs.
APPLICATION CHART
IMPORTANT: Minor setting adjustments may be necessary to compensate for humidity and moisture content of the material.
MAINTENANCE
- Oil the free spinning wheel once a year or more often as needed.
- Oil the nylon bushings in the frame tube once a year or more often as needed.
- Apply a light coating of grease to the gears as needed.
- Before each use make a thorough visual check of the spreader for any bolts and nuts which may have loosened. Retighten any loose bolts and nuts.
- Make sure the tires are adequately inflated. Do not inflate beyond the maximum pressure printed on the tire.
![]() WARNING: Over-inflated tires can explode, causing serious injury. To avoid injury, NEVER inflate tires beyond the maximum pressure printed on the sidewall of the tire. ALWAYS use a hand pump to safely inflate tires.
WARNING: Over-inflated tires can explode, causing serious injury. To avoid injury, NEVER inflate tires beyond the maximum pressure printed on the sidewall of the tire. ALWAYS use a hand pump to safely inflate tires.
STORING
- Empty the spreader after each use, storing left over material in its original bag.
- Rinse the inside of the hopper and the exterior of the spreader and dry off before storing.
- Store in a clean, dry area.
Customer Support
THANK YOU FOR YOUR PURCHASE!
Without your product review, we don’t exist.
If you are happy with our quality products & service, please take just a moment to leave positive feedback and a short review of our product on our website or your retailer’s website.
Not totally satisfied?
If you have any issues, don’t hesitate to contact us. We make mistakes sometimes, but please give us the chance to make it right before leaving negative feedback against our product.
Customer Care
M-F 7:00 a.m. – 5:00 p.m. CST
800-448-9282
www.agri-fab.com


