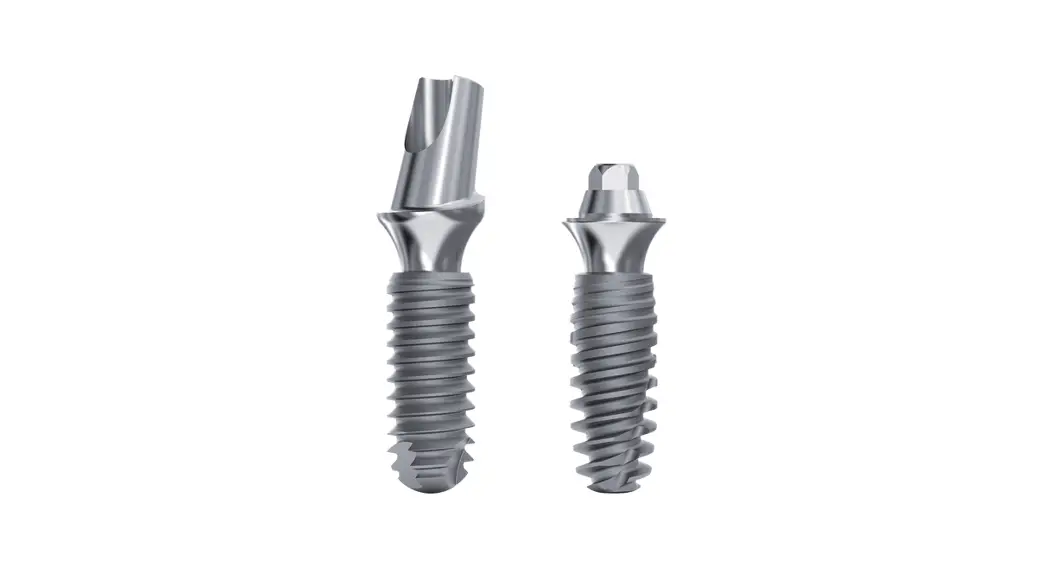
![]() Axiom BL REG Dental Implant
Axiom BL REG Dental Implant
Instructions
Axiom BL REG Dental Implant
Anthogyr instruments
Instructions for use for standard or guided surgery instruments used with the Axiom® BL, Axiom® TL, Axiom® 2.8, Anthofit®, and Mini implant ranges
Product description
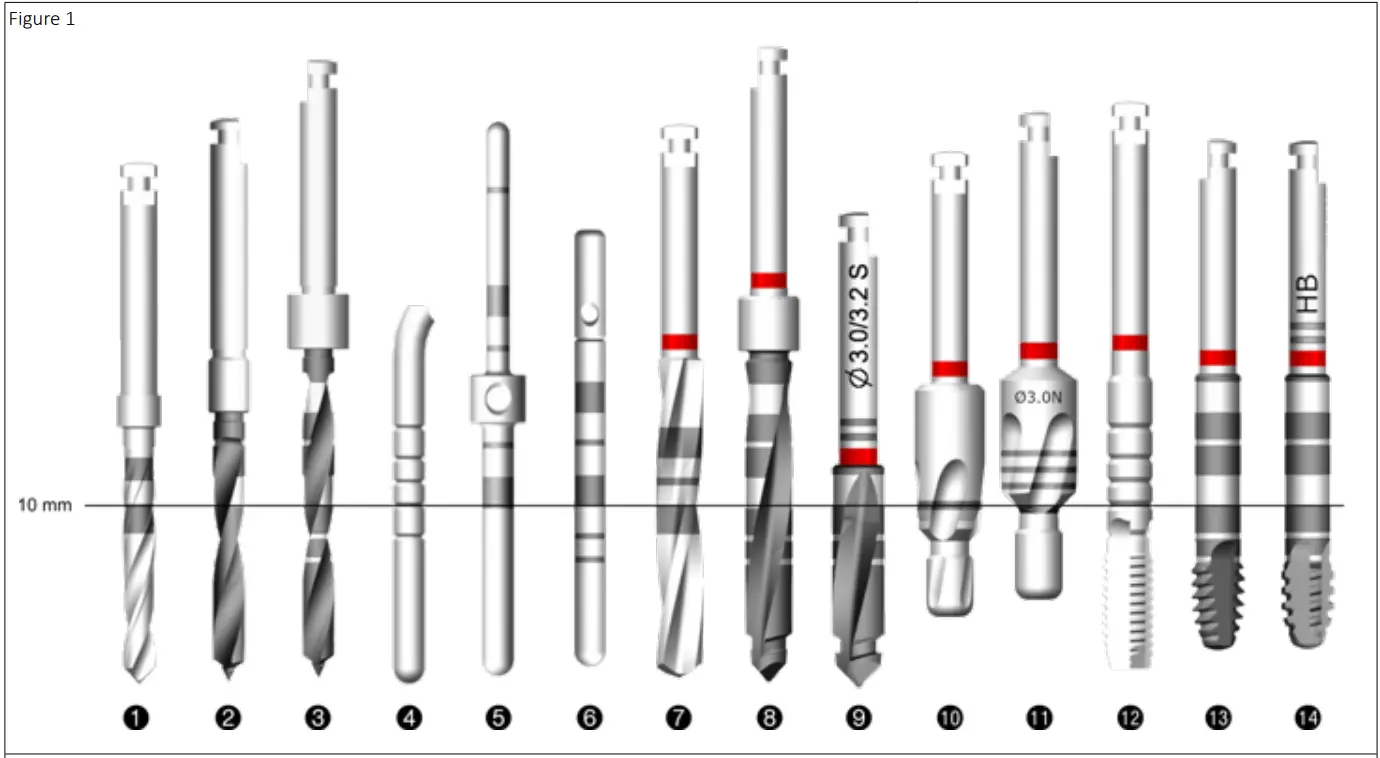
| 1. Anthofit® Initial drill 2. Mini implant initial drill 3. Axiom® initial drill 4. Anthofit® graduated depth gauge 5. Mini implant gauge Ø 1.5/Ø 2.0 6. Axiom® gauge 7. Anthofit® twist drill | 8. Axiom® step drill 9. Cortical drill 10. Anthofit® countersink 11. Axiom® TL countersink 12. Anthofit® tap 13. Axiom® REG tap 14. Axiom® PX tap |
Anthogyr instruments are part of the Anthogyr Axiom®, Anthofit® and Mini implant systems and are divided into types according to use:
- Planning: X-ray templates.
- Implant bed preparation:
Guided cutting instruments: initial drills, step drills, pointer drills, taps, gingival cutters, bone mill, cortical bur. Non-guided cutting instruments: initial drills, step drills, pointer drills, taps, gingival cutters, burs. - Auxiliaries instruments: gauges, drill guides, drill stops, sliders/spoons, implant fixation screws, pins, sleeves.
- Torque transmission instruments: mandrel, wrench, implant holder, mandrel extension.
- Gripper components: gripper, gripping wrench, handling analog.
- Kits: guided surgical kits, Axiom® Multi Level® surgical kits, Axiom® 2.8 surgical kit, Mini implant surgical kit, Anthofit® surgical kit, Axiom® Multi Level® prosthesis kits, Anthofit® prosthesis kit, stop kits, empty kits.
For a detailed product description, item reference number and dimensions, please consult the product label and the Anthogyr product catalogue.
For detailed information on the instruments, their specific indications for use, their use in specific procedures and their compatibility, please refer to the user manuals and brochures listed in the “Further Information” section. Specific product description:
Kits:
Anthogyr kits are reusable containers consisting of two main components: a base with a cover and one or more inserts. The inserts are composed of other components made of silicone rubber, namely silicone strips and holders used to maintain the Anthogyr instruments in place during the surgical or prosthetic procedure and during sterilisation.
The base and inserts have markings and/or colours code to indicate either the surgical workflow, or the position of the instruments in the kit. The cover holds all the instruments securely in place during treatment.
Stop kits are reusable containers consisting of a drilled base to accommodate the stops and a cover to hold the stops in place during the treatment phases.
Materials:
Instruments are made of Titanium (Ti6Al4V ELI), Stainless steel, Polyetheretherketone (PEEK), Silicone, Polypropylene (PP), PolyPhenylSulphone (PPSU) or PVC.
Intended use
Anthogyr instruments are intended for the planning and the implant bed preparation, or for the placement of implants or prostheses from the Anthogyr implants systems for oral implantation.
Specific intended use:
Planning
X-ray templates are intended to facilitate the planning prior to the placement of Anthogyr implants.
Implant bed preparation
Implant site preparation instruments are intended to prepare the implant bed prior to implant placement.
Auxiliaries instruments
Auxiliaries instruments are intended for visual control or physical guidance during the implant bed preparation or implant placement.
Torque transmission
Tightening instruments are intended to apply or transmit torque to instruments, implants or prostheses.
Gripper components
Gripping instruments are intended for the manipulation of screws, prosthetic components or analogs.
Kits
Anthogyr kits are intended to organise instruments, and secure instruments during the sterilisation phase.
Indications
Anthogyr instruments are indicated for use in procedures to place implants or prostheses, from the Anthogyr implant systems, in fully or partially edentulous patients.
Specific indications
Planning
The X-ray templates represent the dimensions of the implants and provide guidance in the choice of the device to be placed, in accordance with the bone volume available.
Implant bed preparation
Cutting instruments are indicated for use in implant surgery to drill or cut into the upper or lower jaw and can be used to prepare bone and soft tissue.
Guided cutting instruments are used with the corresponding guided surgical auxiliaries to ensure better control of the direction and depth of cut.
Auxiliaries instruments
Depth gauges, drill stops, position and drill guides, guided surgery drilling template, guided surgery sleeves are used during implant bed preparation or implant placement and
are indicated for visual control or physical guidance of the position, depth and direction of the implant channel or implant. Torque transmission instruments Screwing instruments are used to transport in the mouth instruments, implants or prosthetic devices and allow to transmit torque. They can be used with a ratchet or handpiece. Gripper components
Gripping instruments are used to manually transport prosthetic components or analogs.
Kits
Anthogyr kits are used to store and secure instruments and auxiliaries between and during surgical and/or prosthetic manipulations, transportation and sterilisation. They
are indicated for use in health facilities by health professionals. These kits are indicated for use with a validated, legally marketed, double sterilisation bag to maintain the sterility of sealed devices.
Patient type and intended user
Anthogyr instruments are intended for use with partially or totally edentulous adult patients who do not present any of the conditions listed among the contraindications.
Anthogyr instruments are reserved for use by dental surgeons trained in implantology.
Contraindications
Allergy or hypersensitivity to chemical components in the materials used and mentioned in the “Product description” section.
Warning
- Products must be protected against inhalation or swallowing when handled in the mouth. Aspiration of products can lead to infection or incidental physical injury.
- Do not use damaged, corroded or dull instruments. Always inspect instruments before use.
- Do not exceed the maximum number of uses for the device as detailed in the “Lifespan of products” section.
- Avoid the area of the mandibular nerve canal during the implant bed preparation and the insertion of the implant. Nerve damage can lead to anaesthesia, paraesthesia and dysaesthesia.
- Do not exceed the recommended insertion torques as this may cause bone necrosis and fracture.
Specific warnings
X-ray templates
- The precision of the X-ray template is +/- 2%.
- To avoid scaling errors, X-ray templates must not be copied.
- Use the implant-specific X-ray template.
- Do not use a damaged X-ray template (altered print, tear etc.).
Implant bed preparation
- Due to the design and function of the drills, the tip is a maximum of 0.5 mm longer than the insertion depth of the implant. This additional length should be taken into account in the planning phase and is represented by triangles on the X-ray template.
- Ensure that the drilling depth is correct by using the recommended surgical plans (including X-ray evaluation), depth marks on the drills, drill stops, depth gauges. Anthogyr instruments have depth markings that correspond to the available implant lengths (Figure 1).
- When measuring the depth of the implant channel, ensure that the depth gauge is inserted to the full depth of the drilling.
- Use the drills in order of increasing diameter with a clockwise rotation.
- Drill intermittently using external irrigation.
Bone quality must be taken into account when preparing the implant bed.
Do not exceed the following cutting speeds:
| Surgical stage | Cutting instrument | Speed (rpm) |
| Preparation of the gum, guided and non-guided | Gingival cutter | 50 |
| Preparation of the alveolar crest, non- guided | Pointer drill | 1500 |
| Round bur | 1500 | |
| Lindemann bur | 1500 | |
| Preparation of the alveolar crest, guided | Cortical bur | 500 |
| Bone mill | 500 | |
| INTEGRAL pointer drill | 1000 | |
| INITIAL pointer drill | 1500 | |
| Drill, guided and non- guided | Axiom® initial drills | 1500 |
| INITIAL initial drills | 1500 | |
| INTEGRAL initial drills | 1000 | |
| Anthofit® initial drills | 1250 | |
| AGS step drills | 1000 | |
| Axiom® step drills | 1000 | |
| Axiom® 2.8 step drills | 1200 | |
| Anthofit® twist drills | 1000 | |
| Mini implant twist drills | 1500 | |
| Axiom® cortical drills | 1000 | |
| Preparation of the bone crest post- drilling, non-guided | Axiom® BL countersink | 50 |
| Anthofit® countersink | 500 | |
| Axiom® TL countersink | 50 | |
| Tapping, guided and non-guided | Anthofit® tap | 50 |
| Axiom® tap | 25 |
Drill for pin:
- Please note that 0.5 mm of apical over- drilling must be accounted for.
Guided surgical instruments:
- When inserting or removing a drill bit from a sleeve, the drill bit must not be in a rotated position. This could result in damage to the drill bit and/or guiding sleeve, and potentially lead to a blockage.
- The guided drills may only be used in combination with the corresponding sleeves and/or spoons inserted into the guides. Inspect the drill sleeves for operational safety before each surgical procedure. Inspect the adjustment, orientation and stability of the guide sleeves in their housing, as well as the placement of the guide before each surgical procedure.
- Ensure that the spoon is correctly positioned inside the sleeve inserted in the drilling guide.
- To insert a fixation pin, place the guide (on teeth or mucous membranes), create the pin housing by drilling with the corresponding drill bit in the corresponding sleeve up to the stop, insert and screw the pin into the sleeve.
- Avoid applying a radial load to the sleeves to ensure that they are properly retained in the drilling guide.
The INITIAL guided surgery protocol is not applicable to the preparation of implant sites for Anthofit®, Mini implant and Axiom® implants with a diameter greater than 4.6 mm and a length greater than 14 mm. The INTEGRAL guided surgery protocol is not applicable to the preparation of implant sites for Anthofit®, Axiom® 2.8, Mini implant and Axiom® implants with a diameter greater than 4.6 mm and a length greater than 14 mm.
Axiom® BL countersinks:
Ensure that the primary stability of the Axiom® BLimplants is sufficient before using the countersinks.Throughout the entire rotation, maintain the alignment axis of the bur and the pin: do not exert anybending force on the tool.
Auxiliaries instruments
The pointer drill Ø 1.5 mm (Ref. OPPO15) is not recommended for use without a ring or drilling guide.
Torque transmission Do not exceed the following tightening speeds:
| Surgical stage | Associated implant | Speed (rpm) |
| Tightening of the implant, guided and non-guided | Axiom® REG implant | 25 |
| Axiom® PX implant | 15 | |
| Axiom® X3 implant | 15 | |
| Anthofit® implant | 50 | |
| Axiom®2.8 implant | 25 | |
| Mini implant | 15 |
Axiom® implant screwing instruments:
- The Axiom® BL and Axiom® TL implant screwing wrenches and mandrels have a graduated marker for the vertical positioning of the implant against anatomical structures or to the bone in the case of flapless placement.
- The Axiom® BL and Axiom® TL implant screwing wrenches and mandrels have 3 sides, each with a visual marker corresponding to a side of the trilobate connection of the implant. At the end of screwing process, orient one of the markers as closely as possible in the appropriate direction, depending on the desired prosthetic restoration and the situation in the mouth.
Prosthesis screwing instruments:
- Do not use motorised rotating tools to screw/ unscrew prosthetic parts.
- Excessive pre-drilling with AATOOL instrument may result in breakage of the instrument.
- Do not apply bending forces to spherical instruments.
Caution/Precaution
Clinical use:
- The components must be handled in accordance with the instructions detailed in the manual of the implant range, listed in the “Further information” section.
- Ensure that all handling is sterile.
Inspect the instruments before use. Never use poten- tially contaminated components. Only use properly reprocessed instruments if they are suitable for multiple uses. - Handle cutting instruments with care to avoid injury.
- Every time an instrument is changed, check its proper hold in the contra-angle or wrench by pulling on it slightly.
- Guided surgical sleeves, the analog positioning tool and Angulated Access screw gripper are for single use only: do not reuse or re-sterilise. Risk of contamination and risk of altering the functional surfaces.
Specific caution/precautions
Planning
During the surgical planning phase, ensure the proper use of an X-ray transparency in good condition.
Implant bed preparation
- Inspect the instruments before use. Always follow the recommended drilling speeds.
- To ensure proper drilling and alignment, use drill stops, drill guides and depth gauges.
- Taps should only be used in D1 bone.
Torque transmission
- Inspect the instruments before use.
- Use tools that are compatible with the system, for more information see the “Compatibility information” section.
Component rework: The component must not be retouched in any way.
Residuals risks and side effects
The clinical outcome of dental treatment is influenced by multiple factors. The following residual risks and possible side effects are related to the use of the instruments and
may lead to additional dental treatment at the dental practice:
Residual risks:
- additional treatment at dentist’s office
- bite/mastication/phonetic problems
- bleeding
- bone compression
- bone damage
- damage to adjacent/opposing tooth
- discomfort
- hyperplasia
- hypersensitivity/allergic reaction
- injuries of gingiva
- irritation/inflammation
- local or systemic infection (including peri-implantitis, periodontitis, gingivitis, fistula)
- local pain
- longer recovery/healing time than expected
- loss of implant
- loss of prosthetic component
- nerve damage possibly resulting in chronic pain
- paraesthesia, dysaesthesia
- poor aesthetic outcome
- possibility of prolongation of surgery
- possibility of surgical implant explantation
- possibility to swallow/inhale small parts during the procedure
- recall to the dentist’s office
- sinus perforation
- swelling
Side effects:
- swelling
- local inflammation
- bruising
- resorption of maxillary/mandibular ridge bone
- local infection
- minor bleeding
Compatibility information
Anthogyr implants and prosthetic components are available in a wide variety of configurations. Only Anthogyr parts that are compatible with the implant connection are suitable for use. For more information, please refer to the manuals listed in the “Further information” section.
Compatibility of instruments for implant bed preparation:
Anthogyr implant bed preparation instruments are equipped with a coloured ring indicating the drilling diameter. They are in line with the diameters of the implants. The drilling diameter is also marked on the instrument.
| Ring colour | Range | Drilling diameter | Tap diameter |
| Green | Axiom® | Ø 2.4 | / |
| Orange | Axiom® | Ø 2.6 | Ø 2.8 |
| Red | Axiom® | Ø 3.0 | Ø 3.4 |
| Anthofit® | Ø 3.0 | Ø 3.5 | |
| Black | Anthofit® | Ø 3.25 | Ø 3.75 |
| Mini implant | Ø 1.5 | / | |
| Yellow | Axiom® | Ø 3.6 | Ø 4.0 |
| Anthofit® | Ø 3.5 | Ø 4.0 | |
| White | Axiom® | Ø 4.2 | Ø 4.6 |
| Anthofit® | Ø 4.0 | / | |
| Blue | Axiom® | Ø 4.8 | Ø 5.2 |
| Anthofit® | Ø 4.5 | Ø 5.0 | |
| Purple | Axiom® | Ø 5.4 | / |
| Brown | Axiom® | Ø 6.0 | / |
The coloured ring on the Axiom® TL countersinks corresponds to the colour of the ring of the last drill used (guiding diameter).
The hard bone instruments and the kit containing them are differentiated from other instruments and kits by two black lines laser marked.
Compatibility of the Axiom® implant screwing instruments:
| Marker | Compatible implant types |
| Grey instruments | Axiom® BL implant |
| Gold instruments | Axiom® TL implant |
Warning: The use of instruments that are not suitable for the implant can damage the implant connection.
Compatibility of the prosthetic tightening instruments:
| Marker | Compatible component types |
| “HEXA” marking | Screw with hexagonal recess |
| Novaloc® abutment | |
| “BALL” marking | Screw or lock with ball recess |
Compatibility of the INTEGRAL range guided surgical instruments:
Each guided instrument is guided in only one sleeve diameter. A coloured dot on the instrument indicates the compatible sleeve. The colour of the dot is identical to the colour of the sleeve.
| Marker | Compatible instrument types |
| Instruments with a blue dot | Sleeve Ø 3.6 |
| Instruments with a purple dot | Sleeve Ø 4.2 |
| Instruments with a brown dot | Sleeve Ø 5.0 |
Compatibility of drill and bur stops:
| Components | Compatible instrument types |
| Pink Axiom® stops | Lindemann bur |
| Axiom® initial drills | |
| Axiom® Ø 2.0/2.4 and Ø 2.4/3.0 step drills | |
| Yellow Axiom® stops | Axiom® Ø 3.0/3.6 step drills |
| Grey Axiom® stops | Axiom® Ø 3.6/4.2 step drills |
| Blue Axiom® stops | Axiom® Ø 4.2/4.8 step drills |
| Purple Axiom® stops | Axiom® Ø 4.8/5.4 step drills |
| Brown Axiom® stops | Axiom® Ø 5.4/6.0 step drills |
| Stop pin (Ref. OPFFP) | Axiom® BL Ø 4.5, Ø 5.3 and Ø 6.6 countersinks |
| Mini implant stops | Mini implant twist drill and initial drill |
Compatibility of the INGPPA drilling guide:
The drilling guide (Ref. INGPPA) is only compatible with Axiom® BL implants. Using the guide for Axiom® TL implants could damage the internal connection of the implant.
The drilling guide is only compatible with the Ø 1.5 mm pointer drill (Ref. OPPO15).
Cleaning and disinfection
Anthogyr instruments are delivered non-sterile. They must be cleaned and decontaminated before use and after each use for reusable components. Do not use the components if the packaging is opened or damaged. Before treatment, remove the components from their packaging. Anthogyr recommends following the protocol described in the cleaning and sterilisation manual available at ifu.anthogyr.com or on request from Anthogyr at the above address.
For sterilisation, see the “Sterilisation” section.
Sterilisation
Anthogyr instruments delivered non-sterile must be sterilised before use. Anthogyr recommends following the protocol described in the cleaning and sterilisation manual available at ifu.anthogyr.com or on request from Anthogyr at the above address. After the sterilisation was done, asepsis rules must be followed. Anthogyr declines all responsibility for re-sterilised components, regardless of who carried out the reste rilisation or the method used. Under no circumstances should a previously used or non-sterile prosthetic component be placed in the patient’s mouth. If the original packaging is damaged, Anthogyr will not accept the return of the content.
Protocol for use
Refer to the brochures listed in the “Further information” section for detailed step-by-step instructions. Anthogyr instruments are devices intended for temporary use in the
oral cavity and intended for continuous use for less than 60 minutes.
Lifespan of products
Planning
X-ray templates can be used for up to 5 years unless the information is illegible.
Implant bed preparation
The instruments can be reused in accordance with the maximum number of uses defined in the table below, except in cases where there are signs of deterioration (illegibility of markings or markers, deterioration of the coating, signs of corrosion, etc.).
Range | Type of device | Product lifespan |
| INITIAL | Ø 2.0 pin drill | 10 uses |
| Pointer drills | 10 uses | |
| Initial drills | 10 uses | |
| INTEGRAL | Ø 2.0 pin drill | 10 uses |
| Gingival cutters | 10 uses | |
| Bone mill | 10 uses | |
| Cortical bur | 10 uses | |
| Pointer drills | 10 uses | |
| Initial drills | 10 uses | |
| Step drills | 10 uses | |
| Taps | 10 uses | |
| Anthogyr Guiding System | Gingival cutters | 10 uses |
| Step drills | 10 uses | |
| Taps | 10 uses | |
| Axiom® Multi Level® | Countersinks | 20 uses |
| Pointer drills | 20 uses | |
| Round bur | 20 uses | |
| Lindemann bur | 20 uses | |
| Initial drills | 20 uses | |
| Step drills | 20 uses | |
| Cortical drills | 20 uses | |
| Taps | 20 uses | |
| Axiom® 2.8 | Drills | 20 uses |
| Tap | 20 uses | |
| Mini implant | Gingival cutter | 20 uses |
| Twist drills | 20 uses | |
| Anthofit® | Countersinks | 15 uses |
| Initial drills | 15 uses | |
| Twist drills | 15 uses | |
| Taps | 15 uses |
One use is equivalent to one implant channel.
Auxiliaries instruments
The instruments can be reused in accordance with the maximum number of uses defined in the table below, except in cases where there are signs of deterioration (illegibility of markings or markers, deterioration of the coating, signs of corrosion, etc.).
| Range | Type of device | Product lifespan |
| INITIAL and INTEGRAL guided surgery | Ø 2.0 fixation pin | 250 uses, except in the case of breakage or significant deterioration causing the tool to malfunction |
| Sleeves | Single use | |
| Anthogyr Guiding System | Spoons | 250 uses |
| Sliders | 250 uses | |
| Implant fixation screw | 250 uses, unless thread damage occurs | |
| Axiom® Multi Level® | Drill stops | 250 uses |
| Guiding pin | 250 uses | |
| Gauges | 250 uses | |
| Drilling guides | 250 uses | |
| Axiom® 2.8 | Gauges | 250 uses |
| Mini implant | Gauge | 250 uses |
| Drill stops | 250 uses | |
| Anthofit® | Gauges | 250 uses |
One use is equivalent to one reprocessing cycle.
Torque transmission
The instruments can be reused in accordance with the maximum number of uses defined in the table below, except in cases where there are signs of de terioration (illegibility of markings or markers, de terioration of the coating, signs of corrosion, etc.).
| Range | Type of device | Product lifespan |
| INTEGRAL | Implant screwing wrenches | 50 uses |
| Implant screwing mandrels | 50 uses | |
| Anthogyr Guiding System | Implant screwing mandrels | 250 uses |
| Axiom® Multi Level® | Implant screwing wrenches | 250 uses |
| Implant holder | 250 uses | |
| Implant screwing mandrels | 250 uses | |
| Universal instrument mandrels | 100 uses | |
| Prosthetic screwing wrenches | 250 uses | |
| Prosthetic screwing mandrels | 250 uses | |
| Mandrel extension | 250 uses |
One use is equivalent to one reprocessing cycle.
Gripper components
The instruments can be reused in accordance with the maximum number of uses defined in the table below, except in cases where there are signs of deterioration (illegibility of markings or markers, deterioration of the coating, signs of corrosion, etc.).
| Range | Type of device | Product lifespan |
| Anthogyr Guiding System | Analog positioning tool | Single use |
| Axiom® Multi Level® | AA screw gripper | Single use |
| Axiom® 2.8 | Gripper tools | 250 uses |
One use is equivalent to one reprocessing cycle.
Kits
The instruments can be reused in accordance with the maximum number of uses defined in the table below, except in cases where there are signs of deterioration (illegibility of markings or markers, deterioration of the coating, signs of corrosion, etc.).
| Range | Type of device | Product lifespan |
| INITIAL | Guided surgical kit | 250 uses |
| INTEGRAL | Guided surgical kits | 50 uses |
| Anthogyr Guiding System | Guided surgical kit | 250 uses |
| Axiom® Multi Level® | Surgical kits | 250 uses |
| Prosthesis kits | 250 uses | |
| Stop kits | 250 uses | |
| Axiom® 2.8 | Surgical kit | 250 uses |
| Mini implant | Surgical kit | 250 uses |
| Anthofit® | Surgical kit | 250 uses |
| Prosthesis kit | 250 uses |
One use is equivalent to one reprocessing cycle.
Further information
For more information on the use of Anthogyr prducts, please contact your local Anthogyr sales reprsentative or contact Anthogyr customer service or visifu.anthogyr.com and www.anthogyr.com.
For more specific information on Anthogyr instruments, please refer to:
INITIAL guided surgery:
- Anthogyr INITIAL Guided Surgery user guide (AXIOM-GID_NOT)
INTEGRAL guided surgery:
- Anthogyr INTEGRAL Guided Surgery user guide (AXIOM-INT_NOT)
Anthogyr Guiding System:
- Anthogyr Guiding System Axiom® BL user guide (AGS-R-PX_NOT)
Axiom® Multi Level®:
- Axiom® Multi Level® surgical user guide (AXIOM-MLC_NOT)
- Axiom® Multi Level® Prosthetic user guide (AXIOM-MLP_NOT)
- Axiom® BL X3 surgical user guide (AXIOM- X3C_NOT)
- Axiom® TL X3 surgical user guide (AXIOM-TLX3_NOT)
Axiom® 2.8:
- Axiom® BL 2.8 user guide (AXIOM2-8_NOT)
Mini implant:
- Mini implant user guide (MIO_NOT)
Anthofit®:
- Anthofit® HE surgical user guide (ANTHOFIT- HEC_NOT)
- Anthofit® HE prosthetic user guide (ANTH- HEP_NOT)
Others:
- Cleaning and sterilisation user guide (NETT-STE_NOT)
- Axiom® REG and PX User guide (AXIOMR- PX_NOT)
Storage
Store these products in a clean, dry area, at room temperature. Improper storage may compromise the essential characteristics of the materials and design, which may lead to device failure.
Waste treatment
Waste resulting from the intervention (packaging, part extracted, etc.) must be handled as medical waste under the responsibility of the user.
Patient information
Patients must accept regular medical follow-ups and should consult their doctor in the event of any unexpected change in the performance of he prosthetic reconstitution. Patients must be informed of the need to ensure regular oral hygiene. Patient must be advised to remain cautious for the first few weeks after surgery.
Notes
The practitioner must have the necessary knowledge to practice dental implantology and must be familiar with the handling instructions for Anthogyr products as described in this document in order to use
Anthogyr products safely and in accordance with their instructions for use. Anthogyr products must be used in accordance with the manufacturer’s instructions for use. The dental surgeon is solely responsible for the proper use of Anthogyr products in accordance with their instructions for use and to determine whether the product is suitable for the individual patient’s situation. Anthogyr products are part of a complete range and must be used in combination with the corresponding original components and instruments distributed by Anthogyr, its parent company and any affiliates or subsidiaries of the parent company (“Straumann”).
The use of third-party products not distributed by Anthogyr voids any warranty or other obligation, express or implied, of Anthogyr. Any product-related issues must be reported to the local Anthogyr organisation together with the product in question. In the event of a serious incident, the user must file a report with the local Anthogyr organisation and the appropriate competent authority in accordance with local regulations. Anthogyr also offers an online complaint service in the countries concerned.
Validity
The publication of this document supersedes and replaces all previous versions.
Anthogyr all rights reserved.
Anthogyr® and/or other trademarks and logos of Anthogyr® mentioned herein are trademarks or registered trademarks of Anthogyr.
Availability
Some components of the Anthogyr implant system are unavailable in certain countries.
Symbols
The following table describes the symbols that may be printed on the packaging label. Please refer to the label on the packaging for the applicable product symbols.
| Symbol | Description of symbol | Source of symbol |
 | Manufacturer | NF EN ISO 15223-1 |
| Date of manufacture | NF EN ISO 15223-1 | |
| Catalogue number | NF EN ISO 15223-1 | |
| Batch code | NF EN ISO 15223-1 | |
| Serial number | NF EN ISO 15223-1 | |
| Consult instructions for use or consult electronic instructions for use | NF EN ISO 15223-1 | |
| Medical Device | NF EN ISO 15223-1 |
| CE markingcompliance with current regulations | Directive 93/42/CEE MDR (EU) 2017/745 |
| FDA certification logo | 21 CFR 801.109(b)(1) | |
| Use-by date | NF EN ISO 15223-1 | |
| Single sterile barriersystem | NF EN ISO 15223-1 | |
| Single sterile barrier system with protective packaging inside | NF EN ISO 15223-1 |
| Sterilised using irradiation | NF EN ISO 15223-1 | |
| Do not resterilise | NF EN ISO 15223-1 | |
| Non-sterile | NF EN ISO 15223-1 | |
| Sterilisable in a steam steriliser (autoclave) at temperature specified | ISO 7000- 2868 | |
| Non sterilisable in a steam steriliser (autoclave) at temperature specified | Anthogyr | |
| Do not use if packaging is damaged and consult instructions for use | NF EN ISO 15223-1 | |
| Keep away from sunlight | NF EN ISO 15223-1 | |
| Do not re-use | NF EN ISO 15223-1 | |
| Caution | NF EN ISO 15223-1 | |
| Contains hazardous substances | NF EN ISO 15223-1 | |
| Screwing torque | Anthogyr | |
| Axiom® BL countersink + pin | Anthogyr |
![]()
![]() Anthogyr
Anthogyr
2237 Av. André Lasquin
74700 Sallanches – France
www.anthogyr.com
E-mail: [email protected]
Phone: +33(0)4 50 58 02 37
Validity Date: 2022-11![]() REF: 063INSTRU_NOT
REF: 063INSTRU_NOT
SAP code: 063INSTRU_NOT Index: E


