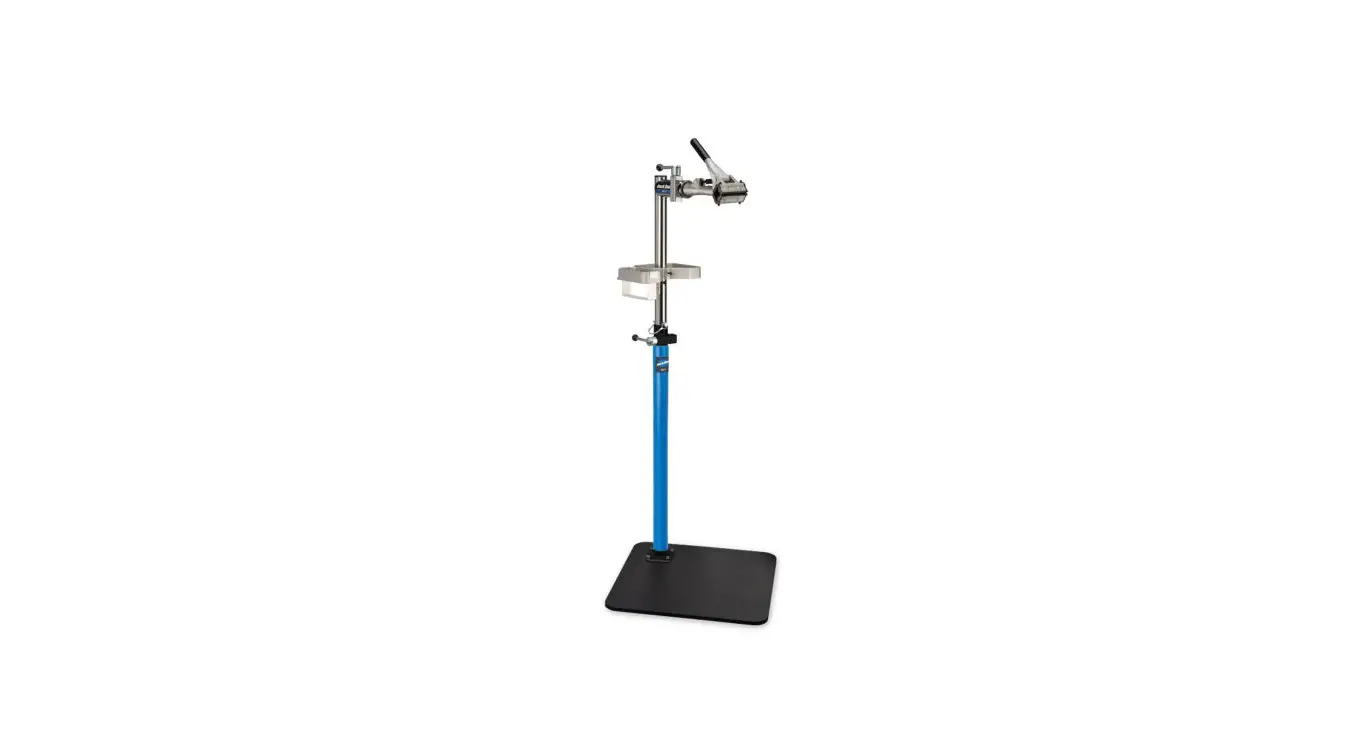
parktool PRS-3.3 Deluxe Single Arm Repair Stand Instructions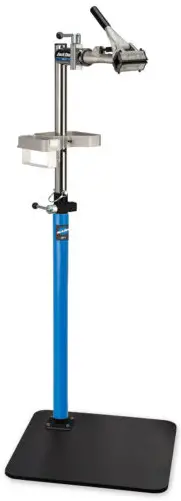
Assembly
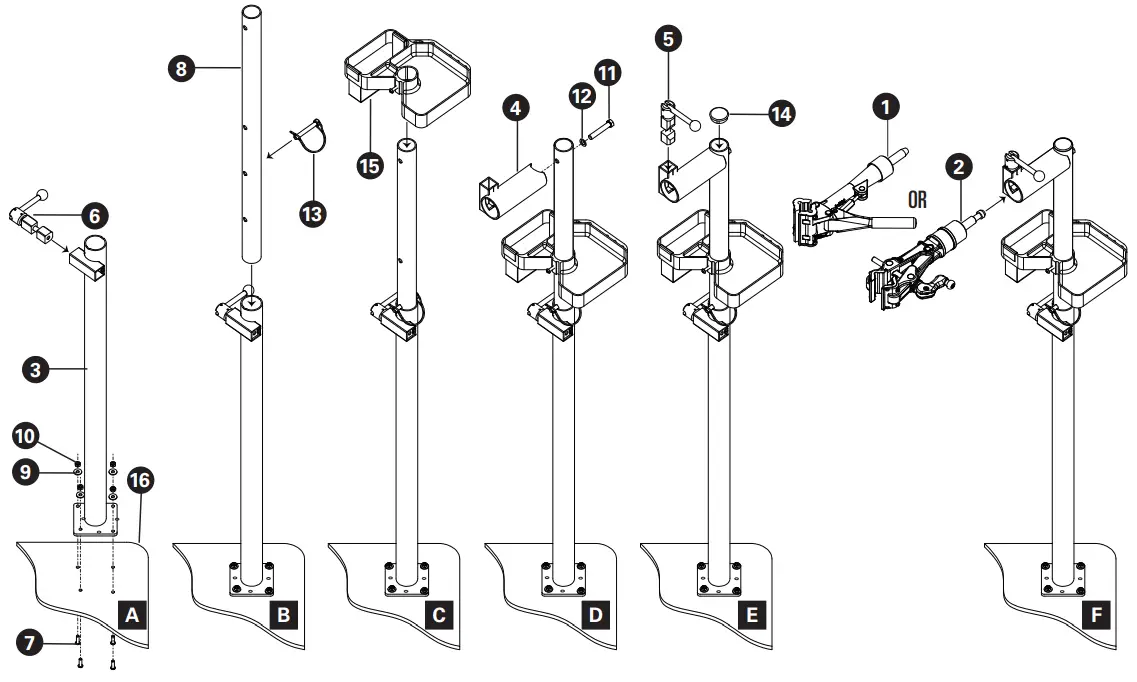
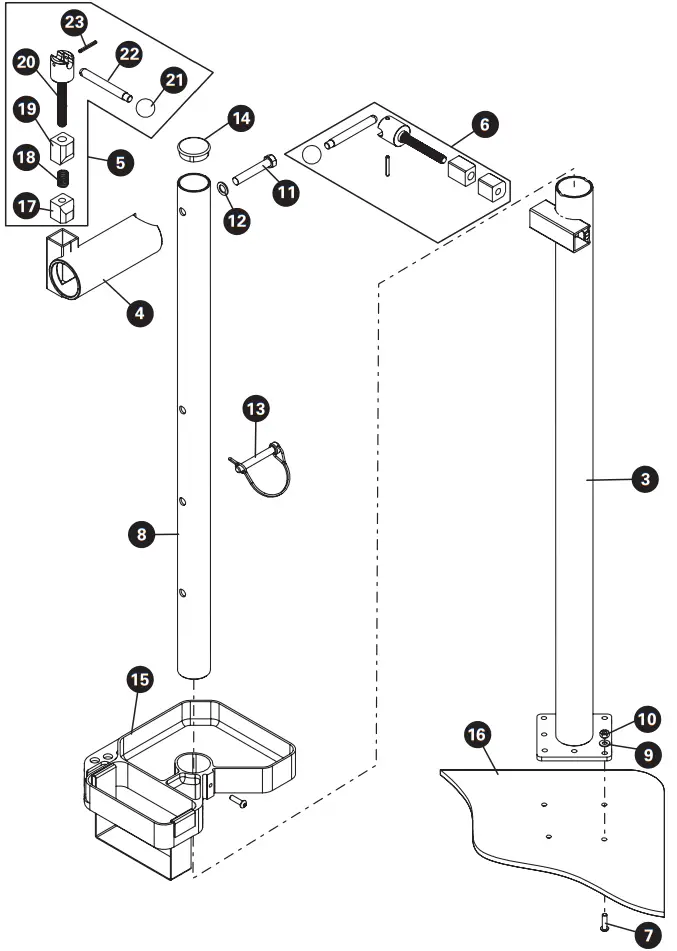
- A. Rotate base support upright (#3) until the holes marked with 3 align correctly with holes in base (#16). Note: the stamped arrow will point towards the center of the base (#16). Attach base support upright (#3) to steel base (#16) using four button head cap screws (#7), 3/16” washers (#9) and ¼-20 hex nuts (#10). Place lock block assembly without spring (#6) into square tube on base support upright.
- B. Install locking pin (#13) in one of three positioning holes on upright tube (#8) and slide into base support upright (#3). Tighten handle of lock block assembly (#6) to secure upright tube.
- C. Slide aluminum tool tray (#15) ontoupright tube (#8), leaving at least a 2” gap between tray and locking pin (#13). Tighten set screw in tray to secure.
- D. Attach horizontal tube (#4) to upright tube (#8) using 7/16” hex head bolt (#11) and 7/16” washer (#12).
- E. Place lock block assembly with spring (#5) into square tube on horizontal tube (#4). Press end cap (#14) into top of upright tube (#8).
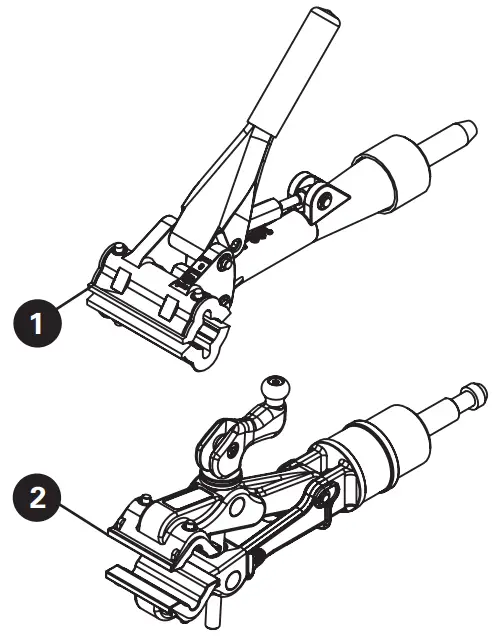
- F. Place clamp (#1 or #2) into horizontal tube (#4) and tighten handle of lock block assembly (#5) to secure.
For safety and stability, the clamp (#1 or #2) and horizontal tube (#4) should always extend directly over the middle of the base (#16).
Height Adjustment

The PRS-3.3-1 and PRS-3.3-2 have three height adjustment positions. To adjust the height:
- G. Remove bike from repair stand. Hold upright tube (#8) firmly and loosen handle of lock block assembly (#6) in base support upright (#3).
- H. Continue to hold upright tube (to prevent it from dropping) and pull locking pin (#13) from upright tube (#8).
- I. Raise or lower upright tube (#8)
- J. Reinstall locking pin (#13) into desired height adjustment hole.
- K. Retighten handle of lock block assembly (#6).
Clamp Rotational Adjustment
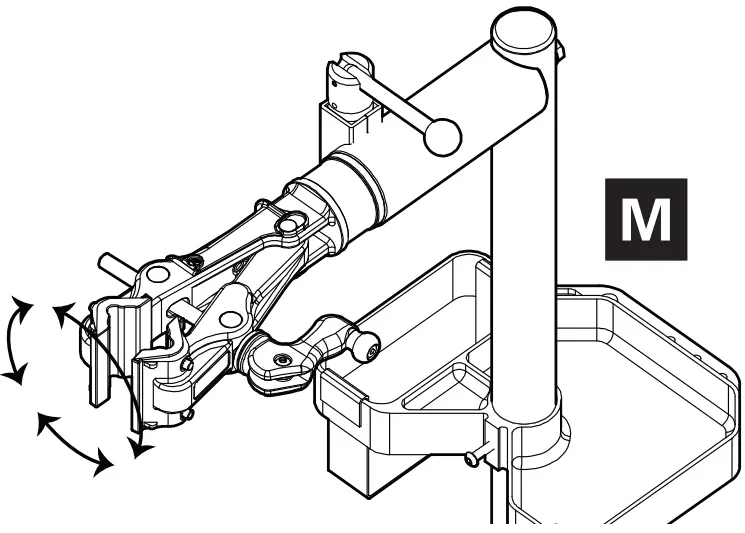

The clamp on the PRS-3.3-1 and PRS-3.3-2 can be rotated 360 degrees, allowing easy access to any component of the bike. To adjust the angle of the clamp:
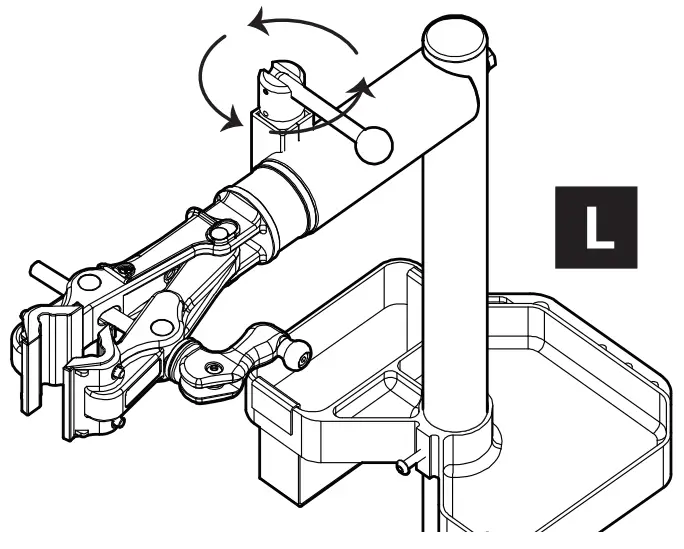
- L. Loosen handle on lock block assembly (#5) in horizontal tube (#4).
- M. Rotate clamp (#1 or #2) to desired position.
- N. Retighten handle of lock block assembly (#5) to secure clamp.
Notes
- Some bike manufacturers recommend not clamping thin-walled or carbon fiber frames. Consult the manufacturer for suggested clamping locations.
- To avoid damage to the finish, clean the bike tube and jaw covers before clamping.
- The two clamping jaws each have a recess to provide clearance for cables. Make sure any brake or shift cables are in one of the recesses before clamping.
- Keeping the front of the bike slightly lower than the back will help prevent the front wheel and handlebars from flopping and hitting the frame’s top tube. A Park Tool HBH-2 Handlebar Holder can be used to prevent handlebar flopping if the bike is being rotated in the repair stand.
- For bolting the repair stand directly to the floor, use the Park Tool FP-2 Floor Plate (sold separately).
PARK TOOL
PRS-3.3 PART NUMBERS
| Ref. # | Part # | Description | Qty. |
| 1 | 100-3C | Adjustable Linkage Clamp (PRS-3.3-1) | 1 |
| 2 | 100-3D | Micro Adjust Clamp (PRS-3.3-2) | 1 |
| 3 | 125 | Base Support Upright | 1 |
| 4 | 124A | Horizontal Tube | 1 |
| 5 | 180 | Lock Block Assembly (with spring) | 1 |
| 6 | 180-2 | Lock Block Assembly (without spring) | 1 |
| 7 | 133S | Button Head Cap Screw 1/4”-20 x 7/8” | 4 |
| 8 | 125A | Upright Tube | 1 |
| 9 | 132S | Washer, 3/16” | 4 |
| 10 | 131S | Hex Nut, 1/4”-20 | 4 |
| 11 | 128B | Hex Head Bolt, 7/16”-14 x 2-1/2” | 1 |
| 12 | 128-3 | Flat Washer, 7/16” | 1 |
| 13 | 123 | Locking Pin | 1 |
| 14 | 179A | End Cap | 1 |
| 15 | 105 | Aluminum Tool Tray | 1 |
| 16 | 130 | Steel Base (sold separately) | — |
| 17 | 113S | Threaded Lock Block | — |
| 18 | 115S | Spring | — |
| 19 | 114S | Unthreaded Lock Block | — |
| 20 | 112S | Lock Block Bolt Assembly | — |
| 21 | 110S | Ball Knob | — |
| 22 | 111S | Locking Lever | — |
| 23 | 109S | Spring Pin 5/32” x 1-1/4” | — |
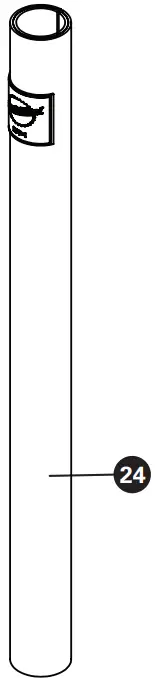
| 24 | RPP-1 | Post Protector | 1 |
![]()


