![]()
TS-2.3 Instructions
PARK TOOL CO.
5115 Hadley Ave. N., St. Paul, MN 55128 (USA) www.parktool.com
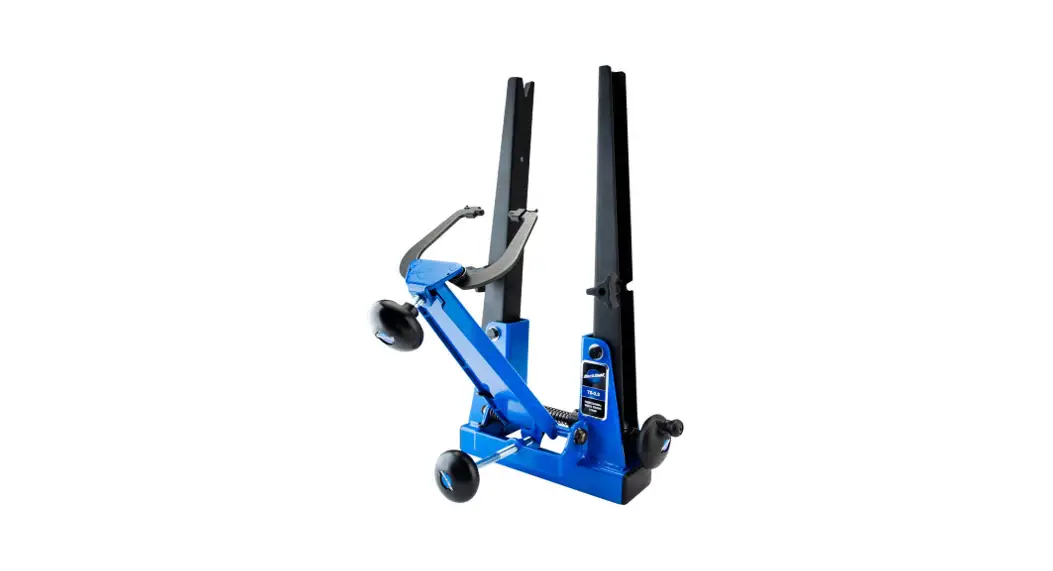
TS-2.3 Professional Truing Stand
Assembly Apply grease to threads of caliper arm knob (Ref. #8) and install into threaded hole in base (Ref. #1).
Bolt TS-2.3 to workbench (bolts not included) or clamp in bench vise. The TS-2.3 can also be mounted in an optional Park Tool TSB-2.2 Tilting Base, which allows the stand to be tilted forward or backward for comfortable use.
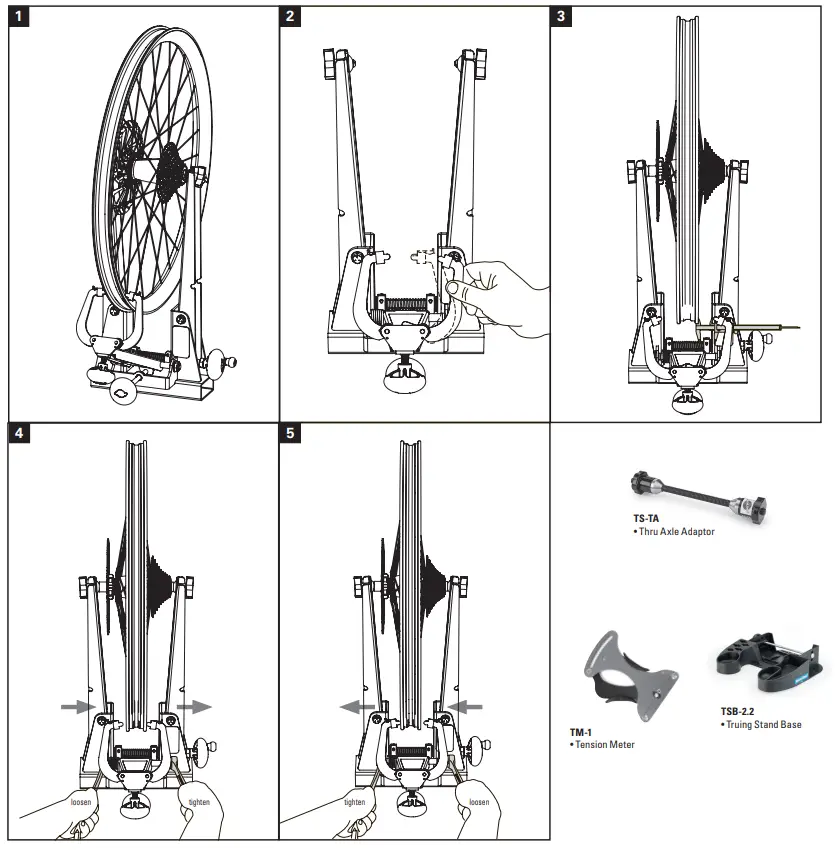
Setup Adjust caliper arm knob (Ref. #8), caliper knob (Ref. #17) and upright knob (Ref. #28), as needed to permit wheel to be placed in TS-2.3 and to allow calipers (Ref. #14 and #15) to clear rim as wheel is rotated (Figure 1). When wheel is properly installed in TS-2.3, the uprights (Ref. #34) should just touch locknuts of wheel’s hub. Excessive tightening of upright knob will cause uprights to flex, resulting in inaccurate centering or “dish”.
When truing a thru axle wheel, install the included thru axle adapters (Ref. #35) into the dropouts of the uprights. Tighten knobs fully to secure adapters. When not in use, adapters can be stored in the notches found on the sides of the uprights.
The calipers of the TS-2.3 are equipped with special nylon caps (ref. #16) to protect rims with a carbon fiber, painted, or other finely finished surface. When a metal caliper tip is desired, the nylon caps can easily be removed by lifting the tab and pulling the cap from the caliper. The caps are installed by simply pushing onto the caliper tip.
Truing Wheels The process of adjusting spokes to true a wheel is a topic that can’t be adequately covered in this format. Instructions for lateral truing, radial truing, dishing, pre-stressing, and spoke tensioning can be found at parktool.com. Additional information can be found in bicycle repair manuals, such as the Park Tool BBB-4 Big Blue Book of Bicycle Repair, or in books specifically dedicated to wheel building and truing.
Wheel Dish For a wheel to perform properly, it is important for the rim to be centered between the locknuts of the hub, or “dished”. The design of the TS-2.3 allows the uprights to move simultaneously. However, slight imperfections in the shape or condition of the axle and/or locknuts can significantly affect the dish reading. As a result, for precision work, a dishing gauge such as the Park Tool WAG-4 or WAG-5 should be used to verify and make final adjustments.
Maintenance Occasional cleaning and lubrication will keep the TS-2.3 operating smoothly for years. Apply grease to threads on main shaft (Ref. #5), caliper arm knob (Ref. #8), and caliper knob (Ref. #17). Lubricate pivot points of TS-2.3 with light spray or drip lubricant.
Adjustment The TS-2.3 is adjusted at the factory. Over time, worn parts, damaged parts, or rough handling may result in inaccurate centering (“dish”), requiring the stand to be readjusted.
NOTE: A properly dished wheel or a Park Tool #1554-1 Centering Gauge is necessary for the adjustment process. If using a wheel, a dishing gauge such as a Park Tool WAG-4 or WAG-5 should be used to confirm the wheel is properly dished.
Inspect stand for parts that are worn, bent or damaged.
Repair or replace as necessary.
Pull outward on the two calipers (Ref. #14 and #15) to make sure they move freely, without binding or excessive play (Figure 2). Adjust as necessary using nut (Ref. #25) behind each caliper.
Place wheel or centering gauge in stand and adjust upright knob (Ref. #28) until uprights (Ref. #34) just touch locknuts on hub of wheel.
Measure distance between outer edge of rim (or gauge) and base’s right upright. Then measure distance between outer edge of rim and base’s left upright (Figure 3). Compare the two measurements:
- If measurements are the same on both sides, move to next step.
- If measurements on the two sides are different, loosen socket head cap screws in the two shaft adjusting collars (Ref. #6). Then gently tap or pull uprights (Ref. #34) sideways until measurements are the same on both sides. Retighten socket head cap screws.
Using caliper arm knob (Ref. #8) and caliper knob (Ref. #17) adjust calipers (Ref. #14 and #15) so they are close to the rim and note result:
- If rim is centered between calipers, the adjustment process is complete.
- If rim is closer to right caliper than to left caliper, caliper arm needs to move right. Loosen lock nut (Ref. #26) on left side of base 1/4 turn and then tighten lock nut on right side of base an equal amount (Figure 4). Repeat as needed until rim is centered.
- If rim is closer to left caliper than to right caliper, caliper arm needs to move left. Loosen lock nut on right side of base 1/4 turn and then tighten lock nut on left side of base an equal amount (Figure 5). Repeat as needed until rim is centered.

TS-2.3 Parts
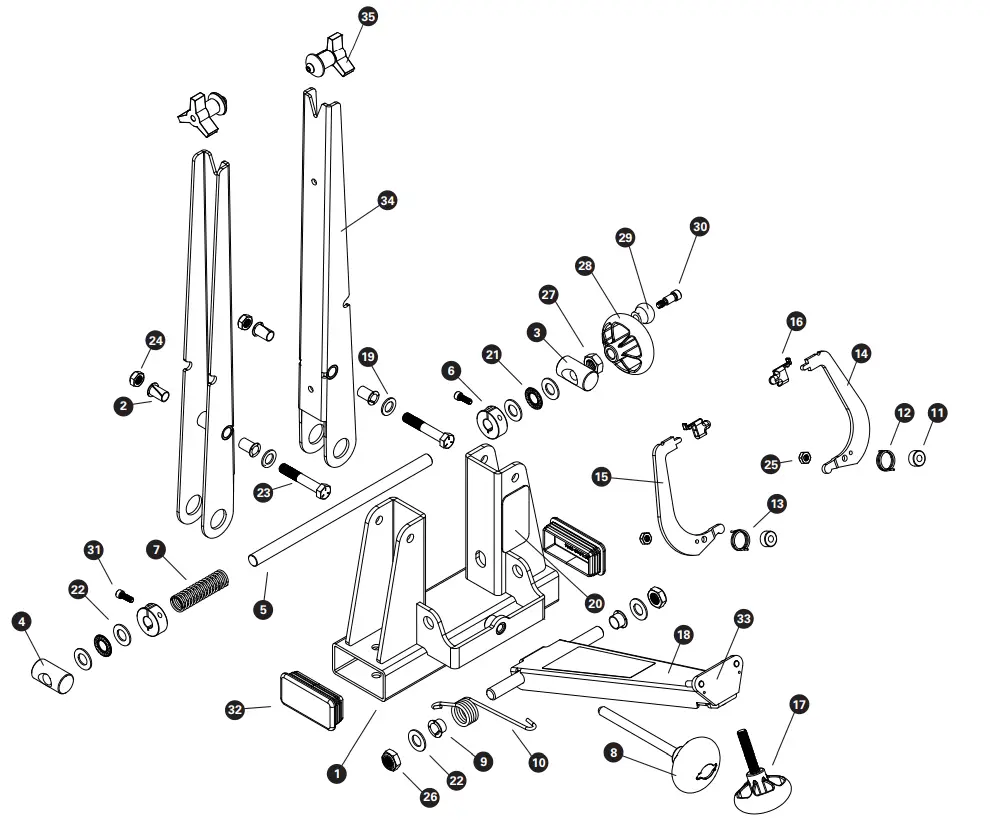
TS-2.3 PART NUMBERS
| Ref. # | Part # | Description | Qty. |
| 1 | 214-2.2P | Base Weldment | 1 |
| 2 | 232-2 | Upright Bushing | 4 |
| 3 | 204RS | Pivot Bushing, Right | 1 |
| 4 | 204LS | Pivot Bushing, Left | 1 |
| 5 | 211S | Main Adjustment Shaft | 1 |
| 6 | 209-2 | Split Shaft Collar | 2 |
| 7 | 229 | Main Shaft Spring | 1 |
| 8 | 216S | Caliper Arm Adjustment Knob | 1 |
| 9 | 235-2 | Caliper Arm Bushing | 2 |
| 10 | 210 | Caliper Arm Spring | 1 |
| 11 | 228-2R | Caliper Spring Spacer | 2 |
| 12 | 222SR | Caliper Finger Spring, Right | 1 |
| 13 | 222SL | Caliper Finger Spring, Left | 1 |
| 14 | 236R | Caliper Finger, Right | 1 |
| 15 | 237L | Caliper Finger, Left | 1 |
| 16 | 238-2 | Finger Tip | 2 |
| 17 | 223S | Caliper Finger Adjustment Knob | 1 |
| 18 | Sticker | 1 | |
| 19 | 128-3 | Flat Washer | 2 |
| 20 | 208-2.3 | Name Badge | 1 |
| 21 | 748-1 | Needle Bearing | 2 |
| 22 | 1458-3 | Bearing Washer | 6 |
| 23 | 225-2 | Bolt, 3/8-24 x 2 1/4” | 2 |
| 24 | 230-2 | Thin Nylon Lock Nut, 3/8-24 | 2 |
| 25 | 480-6 | Thin Nylon Lock Nut, 1/4-20 | 2 |
| 26 | 233-2 | Thin Nylon Lock Nut, 1/2-20 | 2 |
| 27 | 212S | Locknut, 1/2-13 | 1 |
| 28 | 2397S | Upright Knob | 1 |
| 29 | 1967 | Knob | 1 |
| 30 | 1968 | Socket Head Cap Screw, 5/16 x 1/2 | 1 |
| 31 | 209 | Socket Head Cap Screw, M5 | 2 |
| 32 | 227-2 | Base End Cap | 2 |
| 33 | 207-2.3P | Caliper Arm Assembly | 1 |
| 34 | 200-2.3 | Long Upright | 2 |
| 35 | 2729A | Thru Axle Adaptor | 2 |
![]()
© 2022 Park Tool Co.
PARK TOOL® and the color BLUE are registered trademarks of Park Tool Co.


