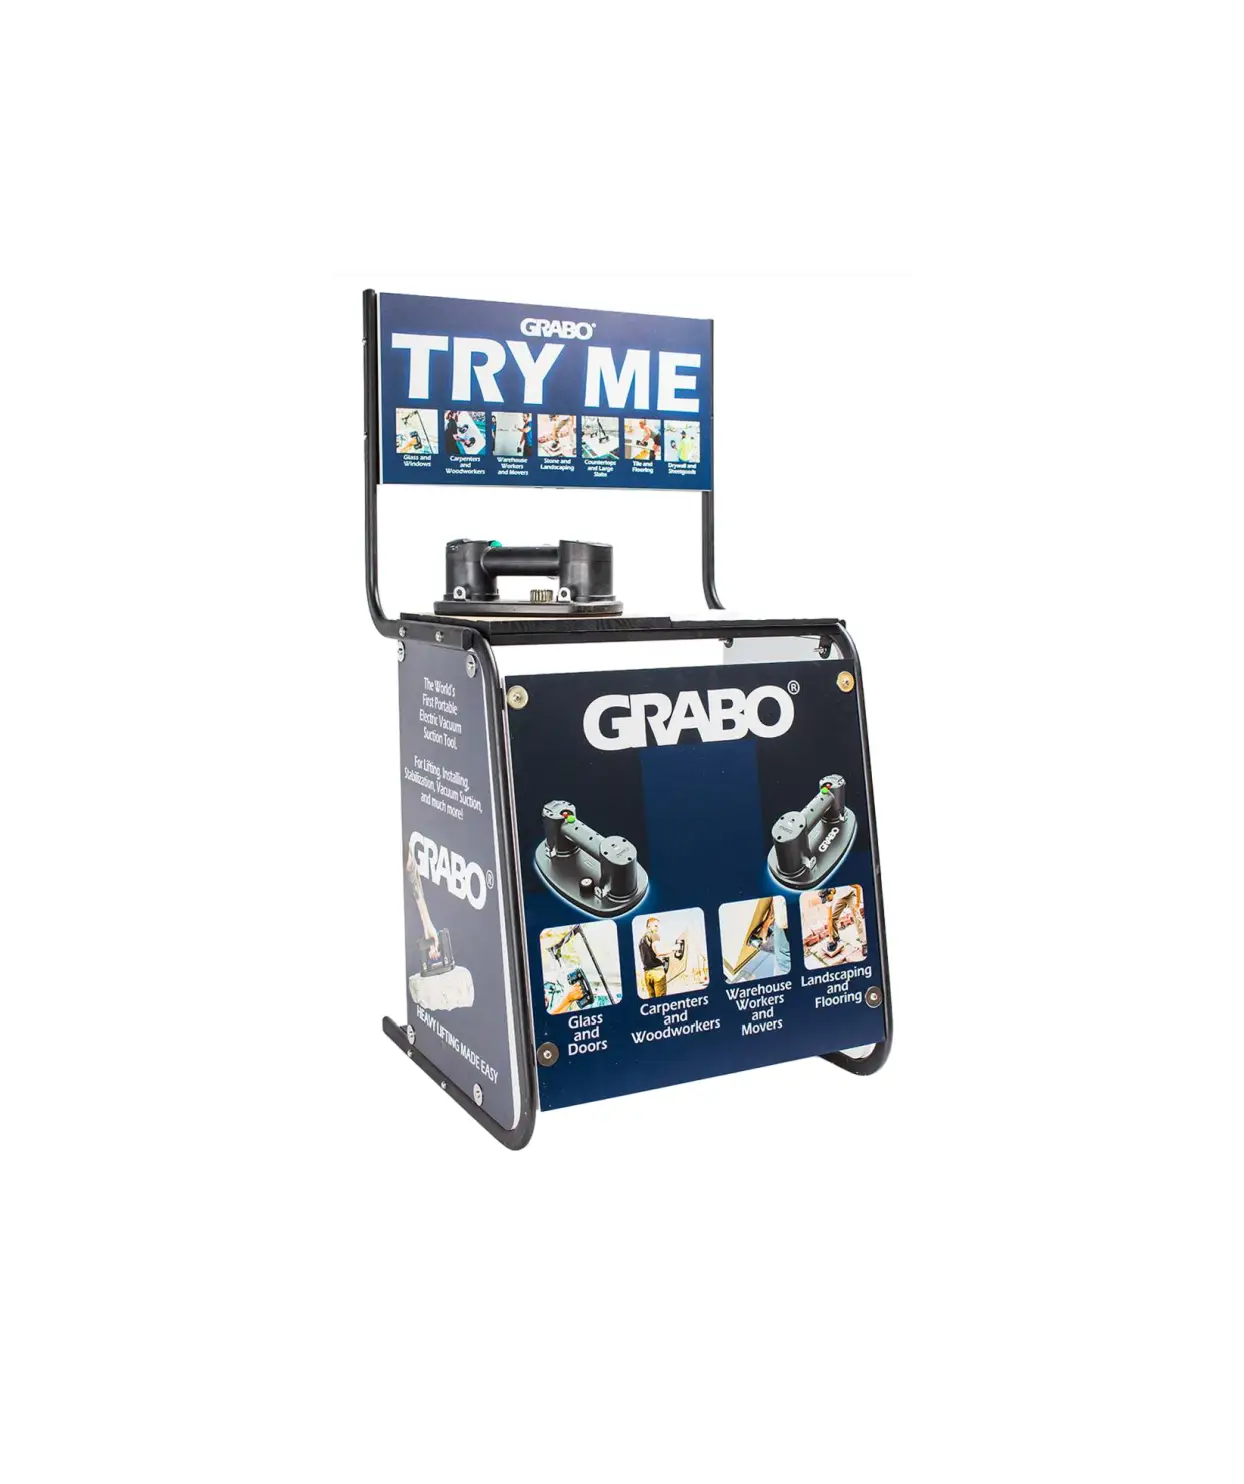
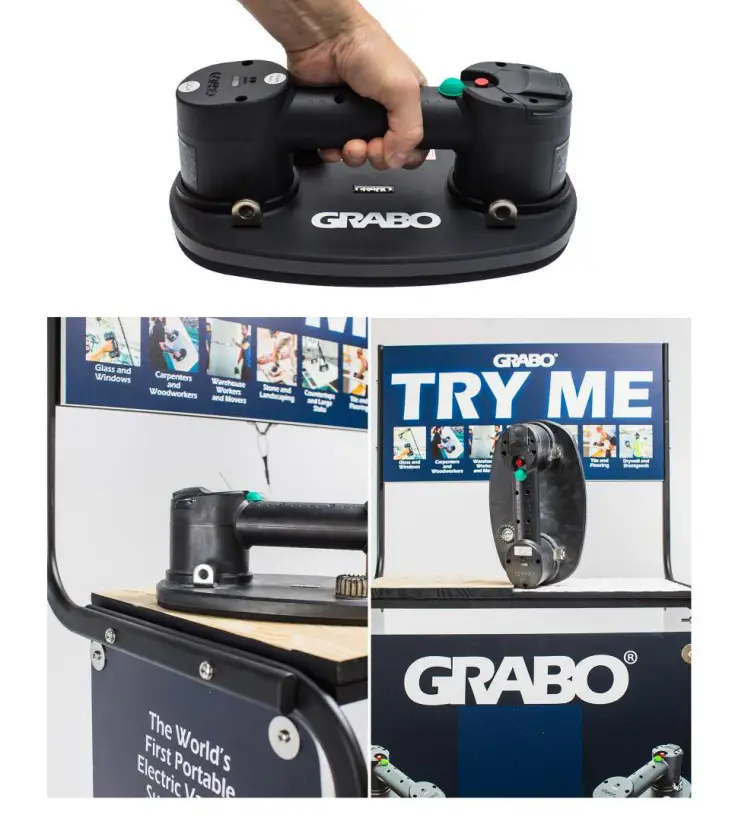
GRABO TRY ME Display Stand
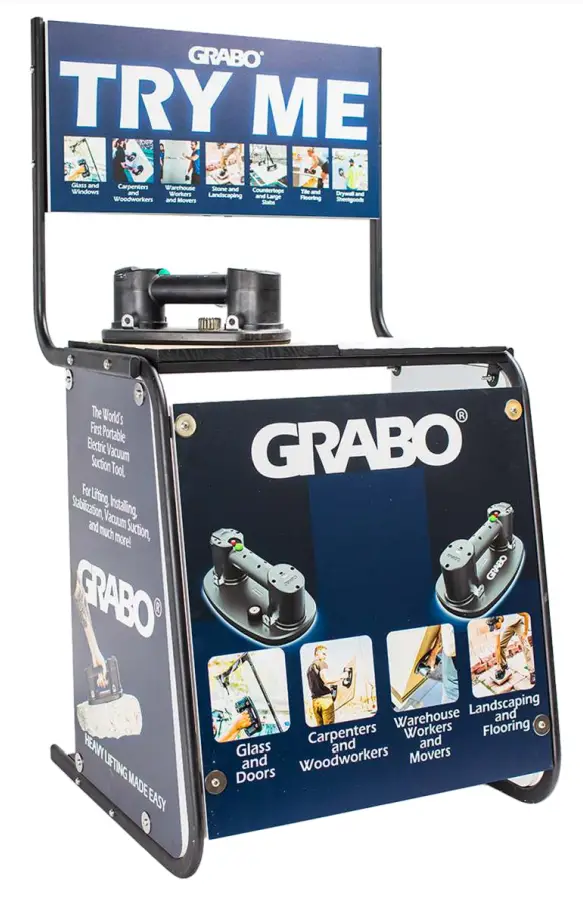
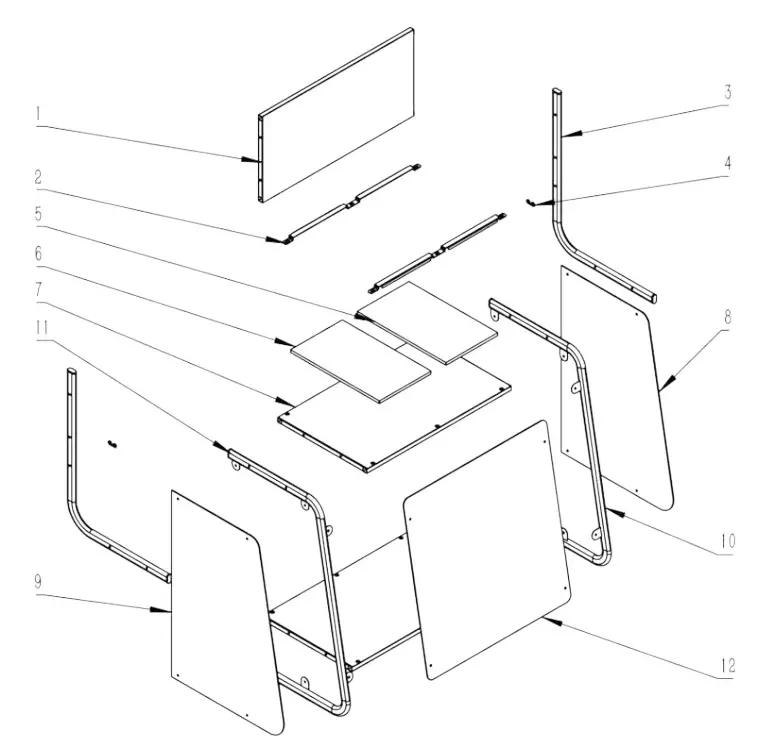
GRABO DISPLAY STAND CONTENTS
| NO | NAME | NUMBER |
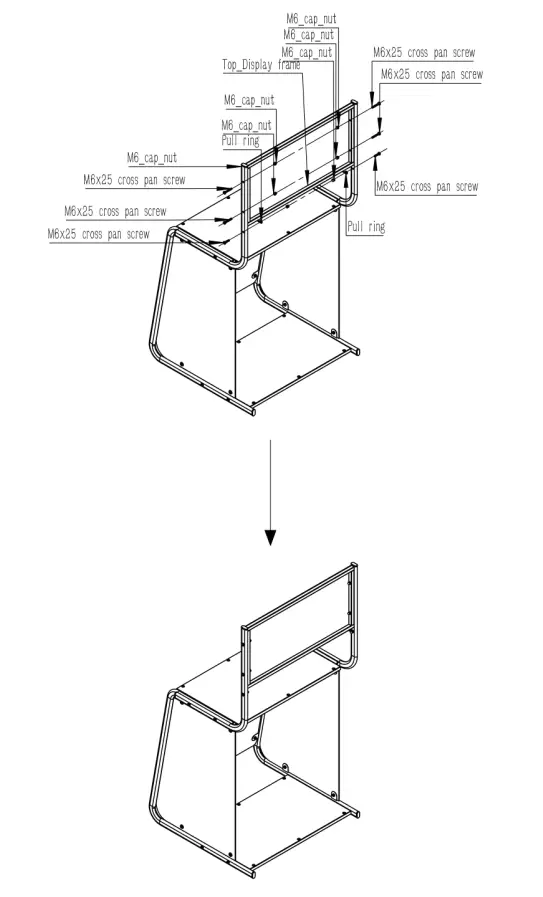
| 1 | Top-Display frame | 1 |
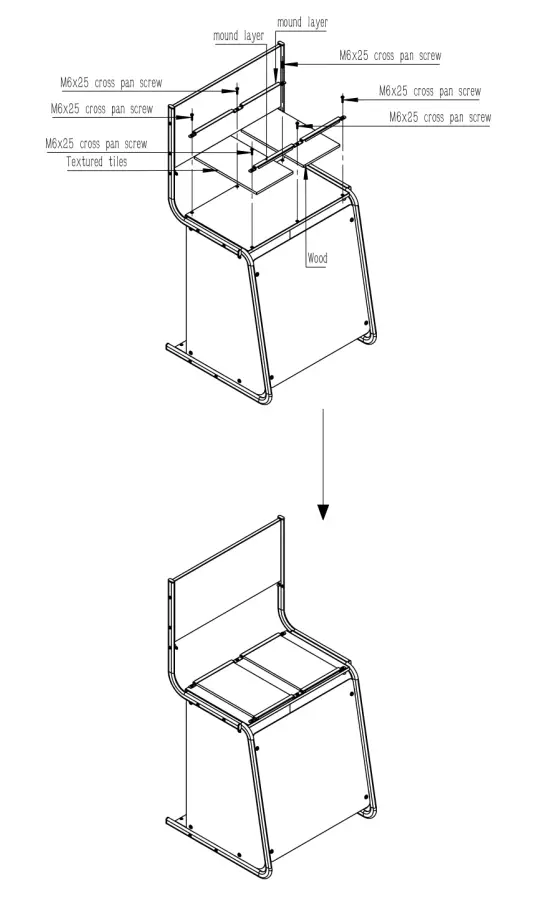
| 2 | Mound layrer | 2 |
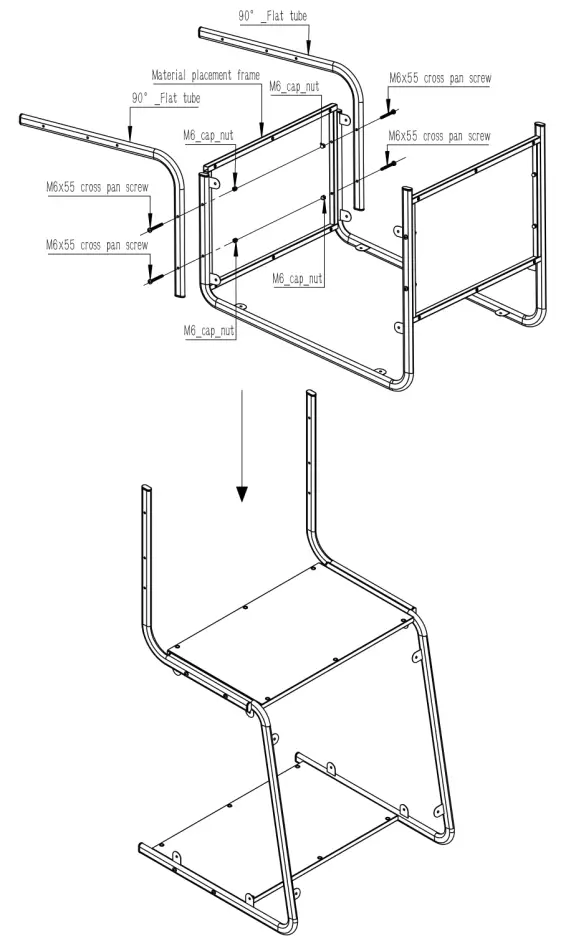
| 3 | 90° -Flat tube | 2 |
| 4 | Pull ring | 2 |
| 5 | Textured tiles | 1 |
| 6 | Wood | 1 |
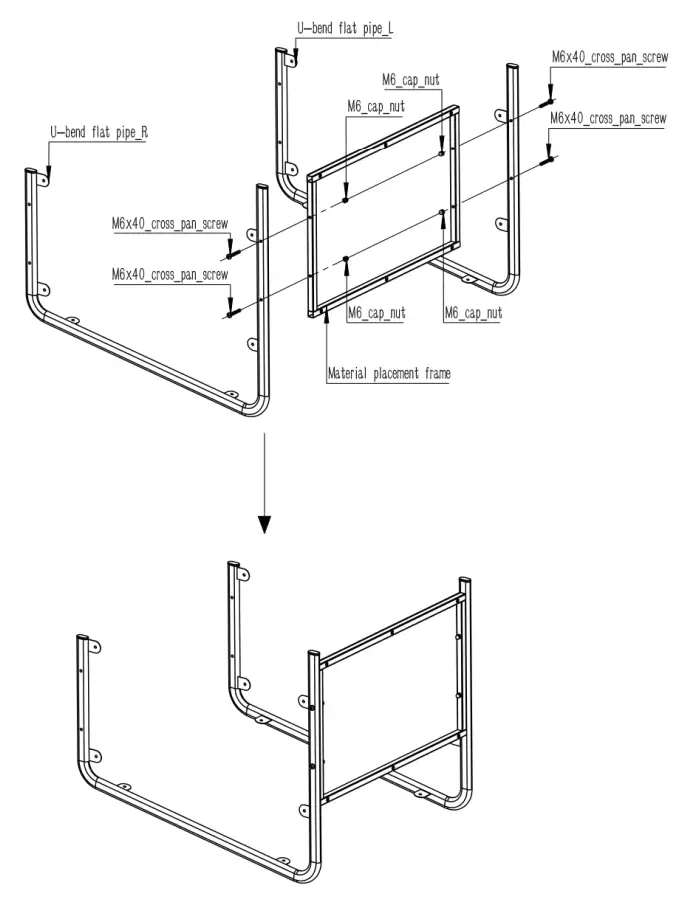
| 7 | Material placement frame | 2 |
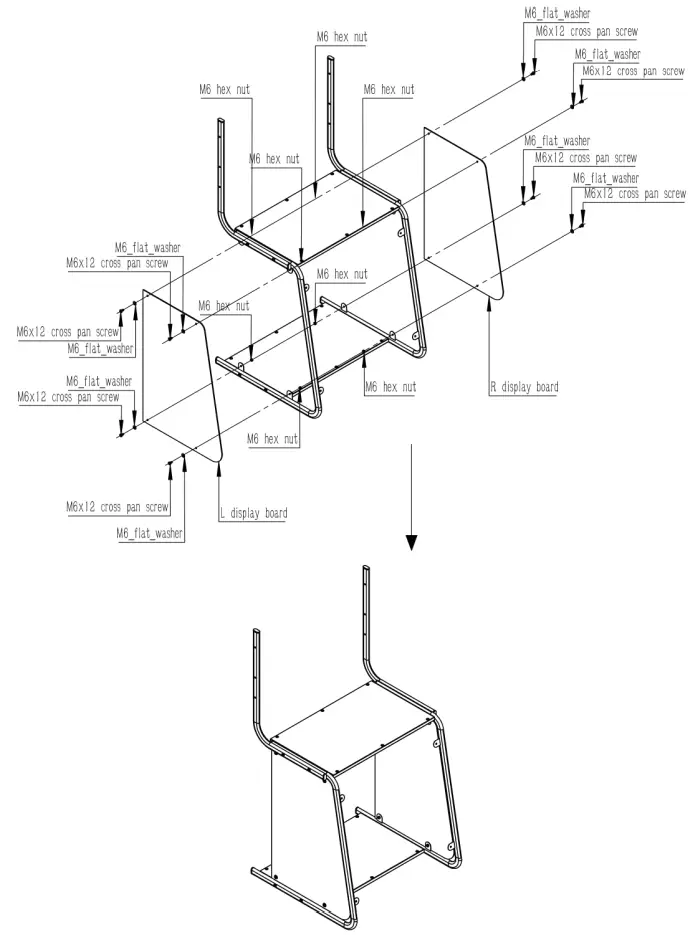
| 8 | Grabo Side-R | 1 |
| 9 | Grabo Side-L | 1 |
| 10 | U-bend flat pipe-R | 1 |
| 11 | U-bend flat pipe-L | 1 |
| 12 | front panel | 1 |
| A | M6x12 cross pan screw | 12 |
| B | M6x25 cross pan screw | 8 |
| C | M6x40 cross pan screw | 8 |
| D | M6x55 cross pan screw | 4 |
| E | M6 hex nut | 12 |
| F | M6 hex nut with cap | 14 |
| G | M6_flat_washer | 12 |
| H | Wire_rope | 2 |
| I | Wire-lockset | 4 |

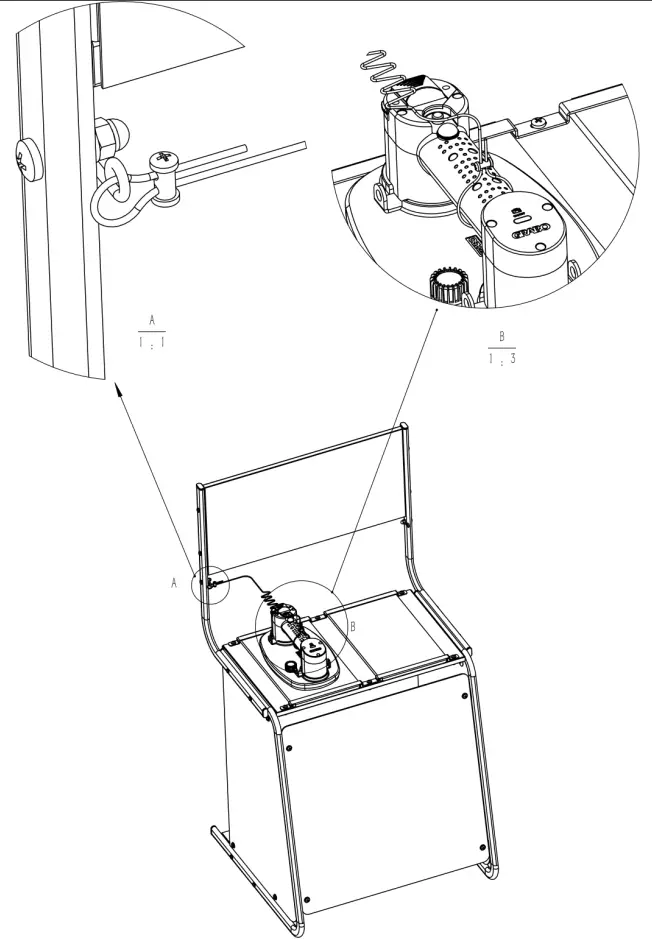
Note: As a safety precaution, included is an optional metal arm (cross pan) to secure the testing materials down to the display unit table top, to prevent the materials being dropped or possible injury.
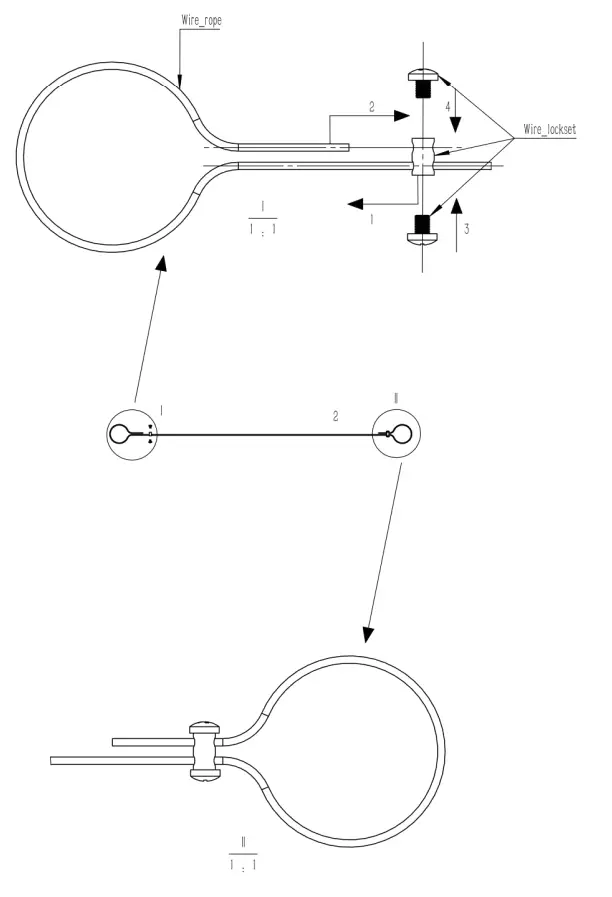
Note: Included is tether cable to ensure the Grabo Tool cannot be separated from the display unit.
Wire cable can also be inserted through one of the four lifting Lugs.
For any questions, comments, or concerns, please reach out to us at:
USA Headquarters
Grabo
600 S. Eastern Ave.
Suite 8B
Las Vegas, NV. 89119