![]()
Monitor Stand
Instruction Manual
V1.0

Model: HNCM5

Website: www.huanuoav.com
Thank you for choosing this Huanuo product! At Huanuo we strive to provide you with the best quality products and services in the industry. Please share your experience of our product with others at www.huanuoav.com/reviews if you are satisfied. Should you have any issues, please don’t hesitate to contact us.
Technical Support:
1-800-556-0533 Mon-Fri 10am – 5pm (PST) (USA) (CAN)
Other Info: [email protected] (US/CA/DE/UK/FR/IT/ES/AU)
IMPORTANT SAFTY INSTRUCTIONS
Please carefully read all instructions before attempting installation. If you do not understand the instructions or have any concerns or questions, please contact our customer service at [email protected]
CAUTION: Avoid potential personal injuries and property damage! Do not use this product for any purpose that is not explicitly specified in this manual. Do not exceed weight capacity. We are not liable for damage or injury caused by improper mounting, incorrect assembly or inappropriate use.
Check the VESA Pattern of Monitor Before the Installation
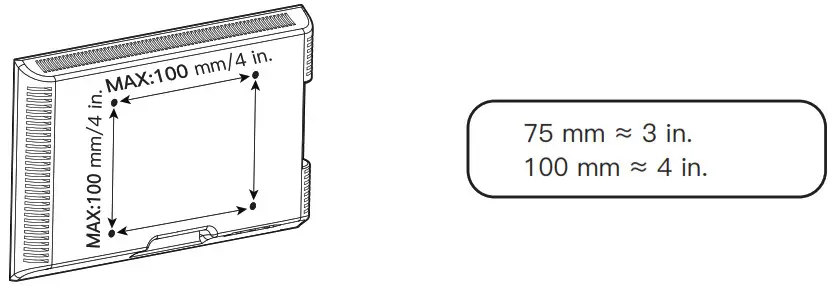
Minimum VESA pattern:75mm/3 in.(W)x75mm/3 in.(H)
If your TV VESA is greater than 100×100 mm/4×4 in. or less than VESA 75x75mm/3x3in., this mount is NOT compatible.
If this mount is NOT compatible, please contact customer service at [email protected] to find a compatible mount.
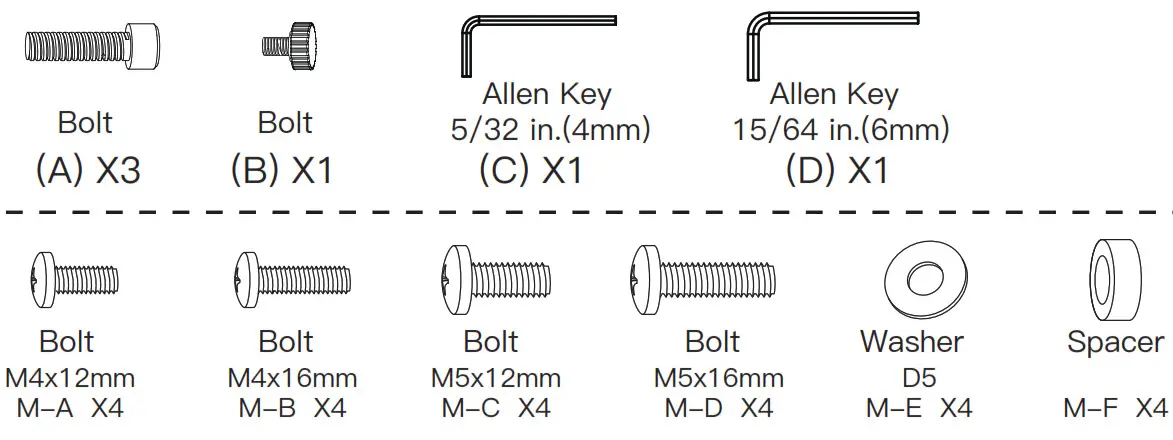
Tools Required [Not Included]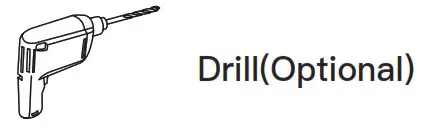 Supplied Parts and Hardware
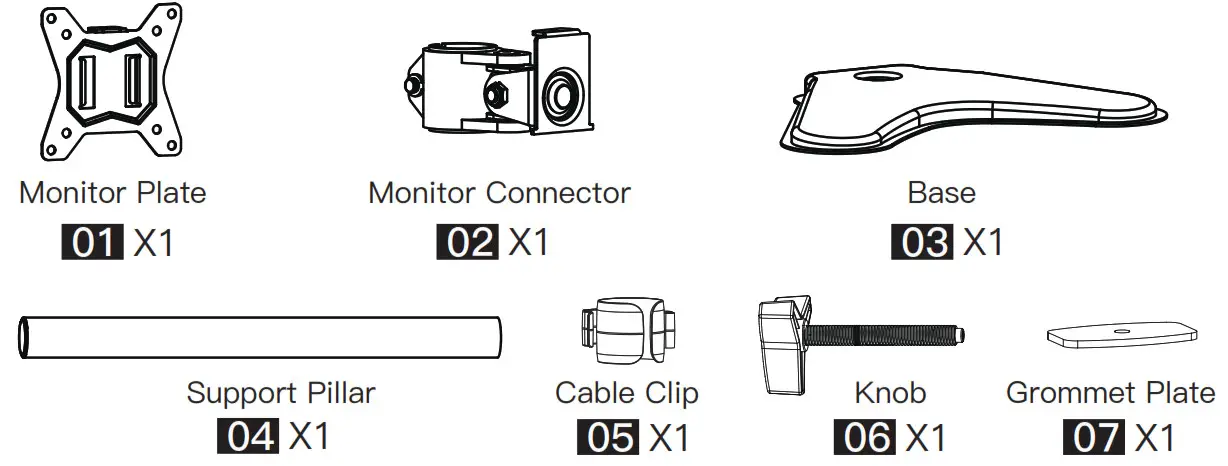
Step 1 Secure the Support Pillar [04] to the Base [03]
Option A
Secure the support pillar [04] to the base [03] using bolts [A] and Allen key [C]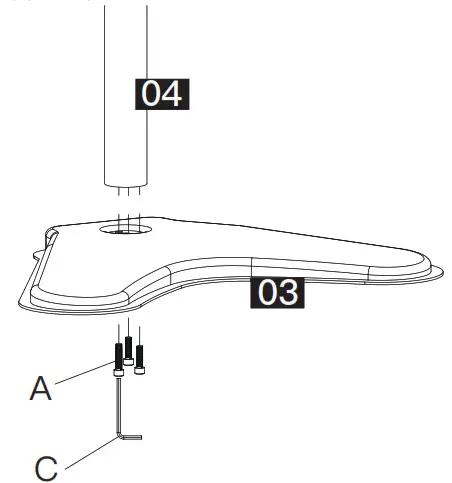 Option B
Secure the support pillar [04] with base [03] to desktop using grommet plate [07] and knob [06]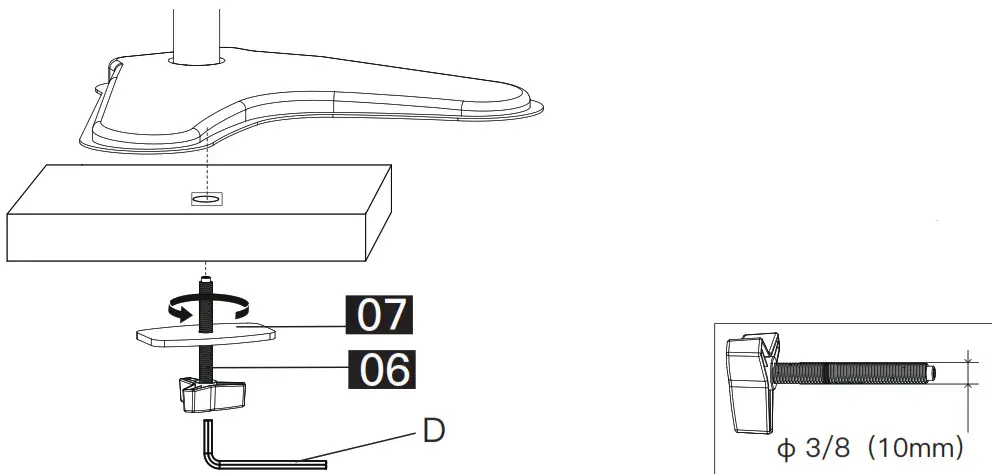 Note: If there isn’t a hole on your desk, you can use a 0.47 in.-1.18 in.(12 mm-30mm) drill to drill a hole. The drill is NOT included.
Step 2 Secure Cable Clip [05] and Monitor Connector [02] in Sequence to the Support Pillar [04]
Step 2-1 Slide the cable clip [05] and monitor connector [02] in sequence to the support pillar [04].
Step 2-2 Tighten monitor connector [02] to the support pillar [04] using Allen key [D]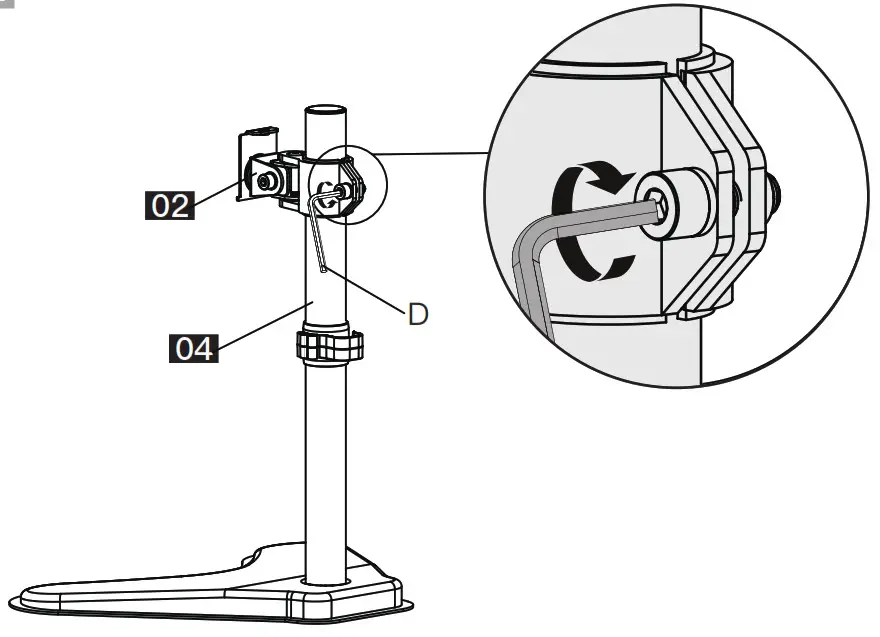
Step 3 Select Monitor Bolts
Only one bolt size fits your monitor.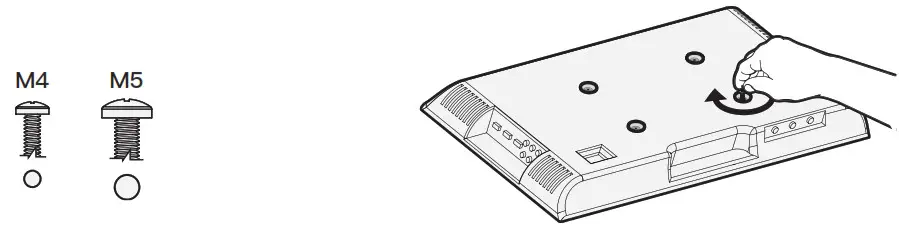 Bolt length:Verify adequate thread engagement with bolts or bolts/spacers combination.We recommend thread engagement by at least 5 turns.
-Too short will not hold the monitor.
-Too long will damage the monitor.
Step 4 Attach the Monitor Plate to the Monitor
FLAT BACK MONITOR (UNIVERSAL MONITOR PLATE)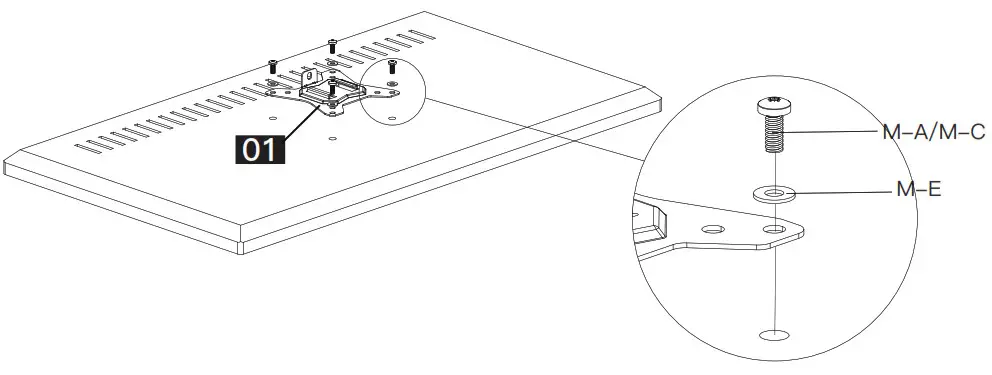 ROUND BACK MONITOR (UNIVERSAL MONITOR PLATE)
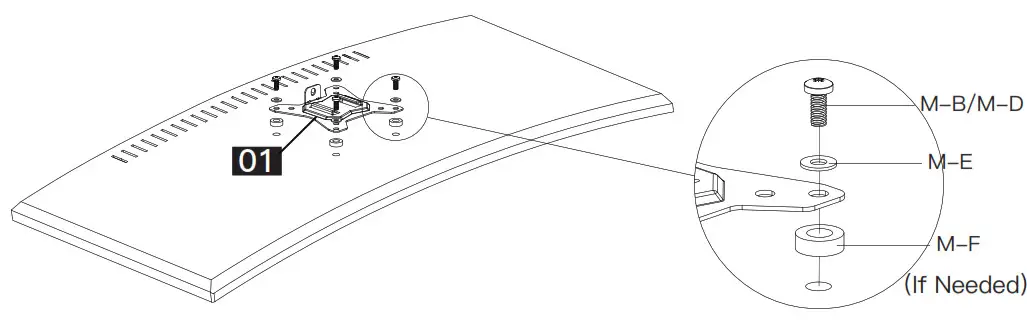
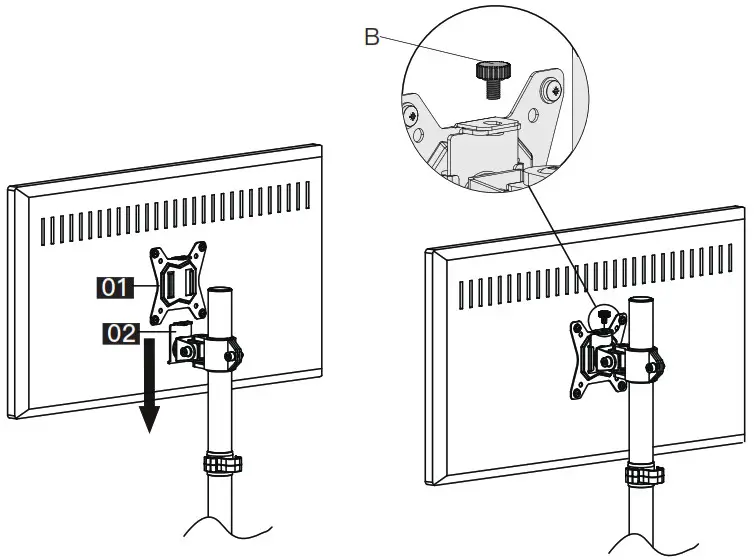
Step 5 Hang Monitor to the Stand and Secure with Bolt [B]. B
 Step 6 Fix Tilt Angle of the Monitor
 Step 7 Manage Cables
 Step 8 Store Allen Keys into the Cable Clip
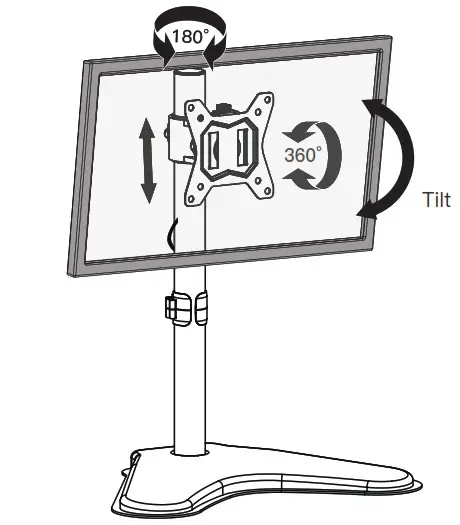
 Features
 Step 6 Fix Tilt Angle of the Monitor
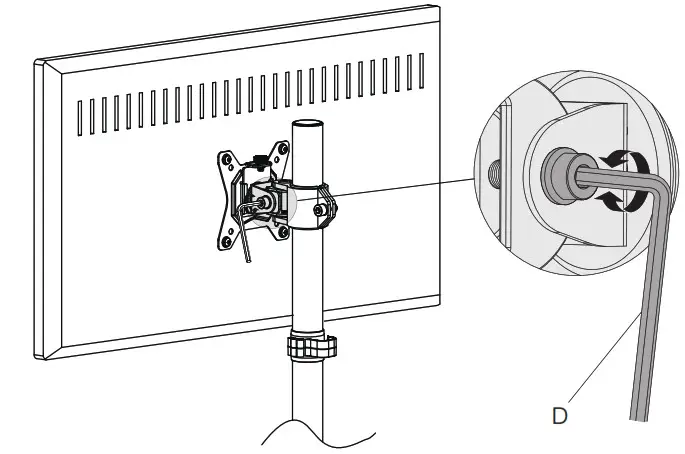 Step 7 Manage Cables
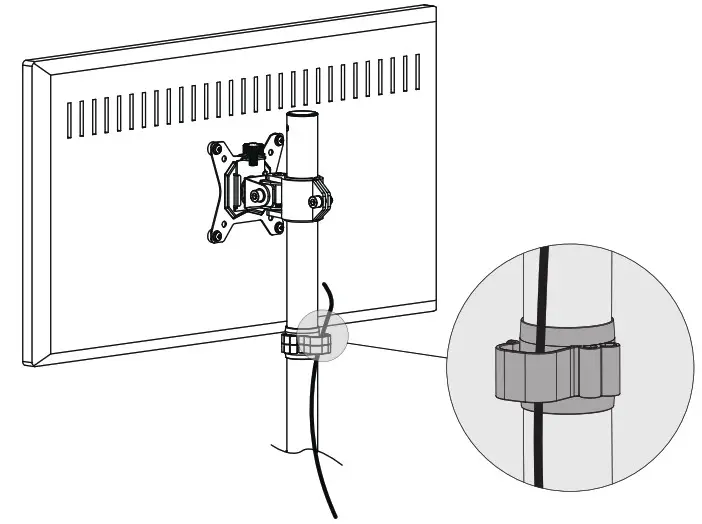 Step 8 Store Allen Keys into the Cable Clip
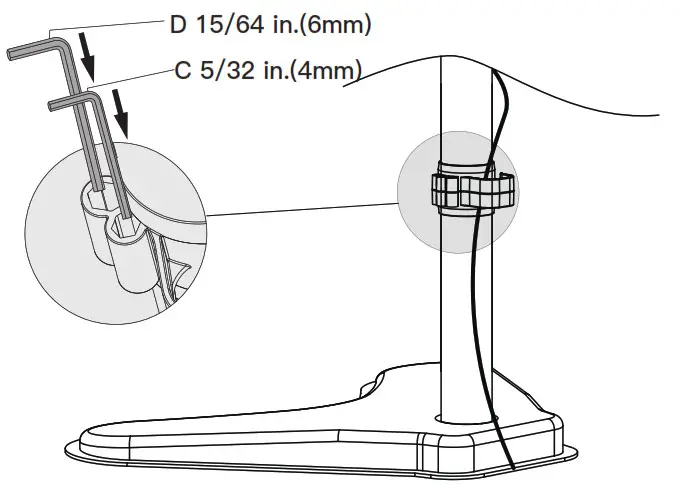 Features