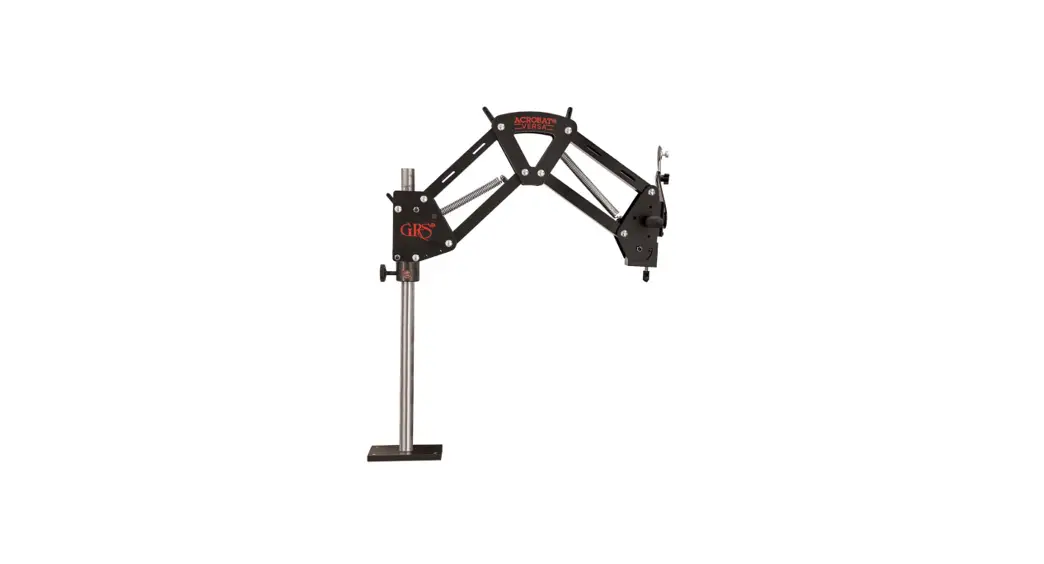
![]() 003-635 Acrobat Versa Stand
003-635 Acrobat Versa Stand
Instruction Manual
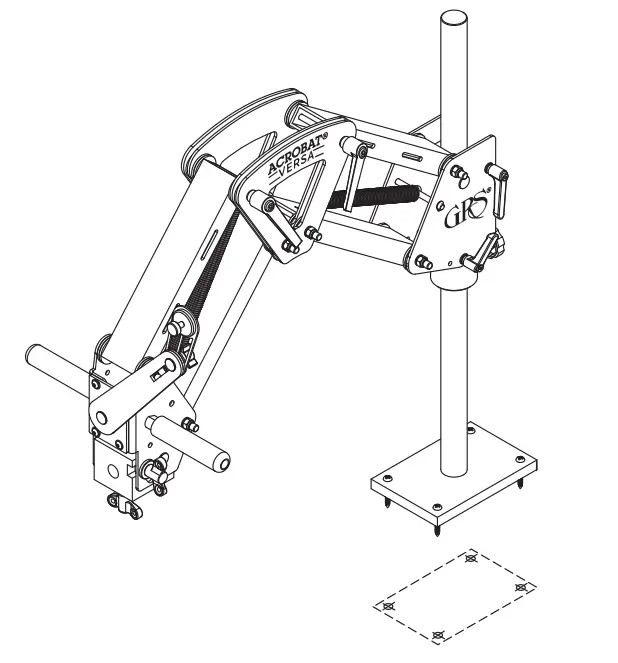
BENCH INSTALLATION
Locate the microscope stand base on the bench top so the microscope will be over your work. Cut out the template (back cover, page 8) and tape it exactly where the base will be located. Using a center punch or awl, mark the centers of the screw holes through the paper and into the bench top. Remove the template and proceed according to bench material.
WOODEN BENCH
Use a 1/8″ drill bit and drill all four holes a little more than 1″ deep. Attach the stand to the bench with the 1-1/2″ wood screws (included).
METAL BENCH
Drill 1/4″ holes through the bench top. Use 10-32 flat head bolts (not included) with a length of about 1/2″ more than the thickness of your bench top to attach the stand to the bench. Bolt the stand down using washers and nuts (not included) on the underside.
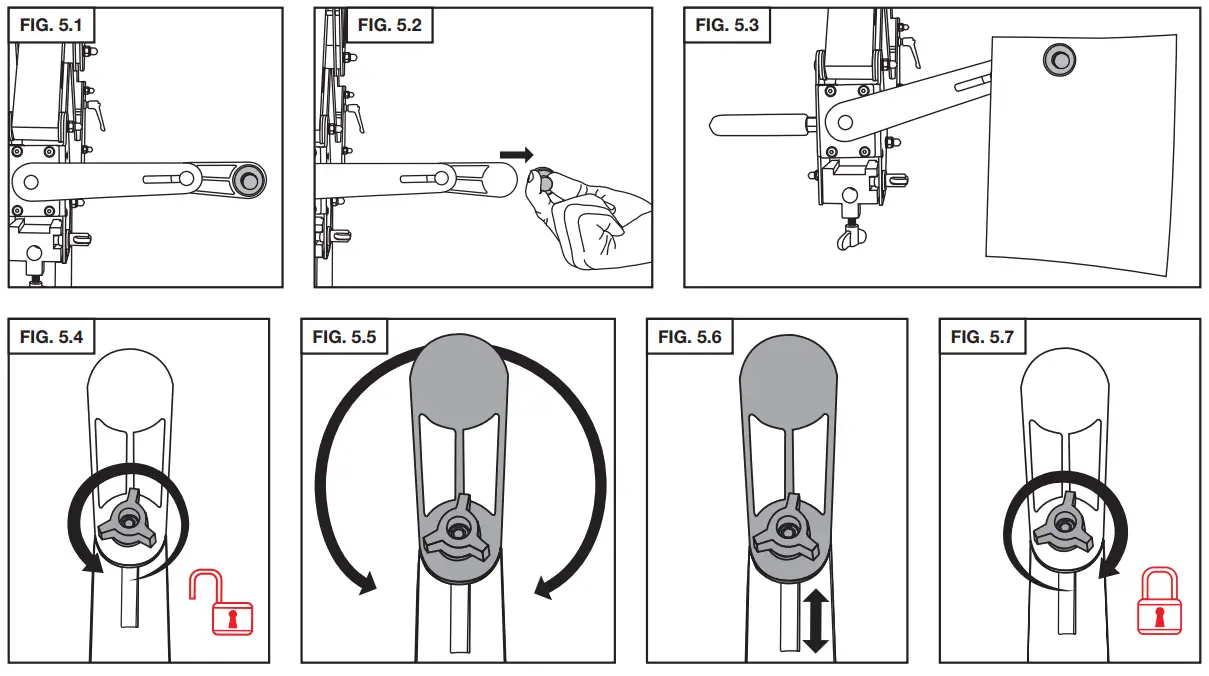
HANDLE INSTALLATION
PARTS AND TOOLS NEEDED
2 handles
2 Carriage Bolts
Wrench (not included)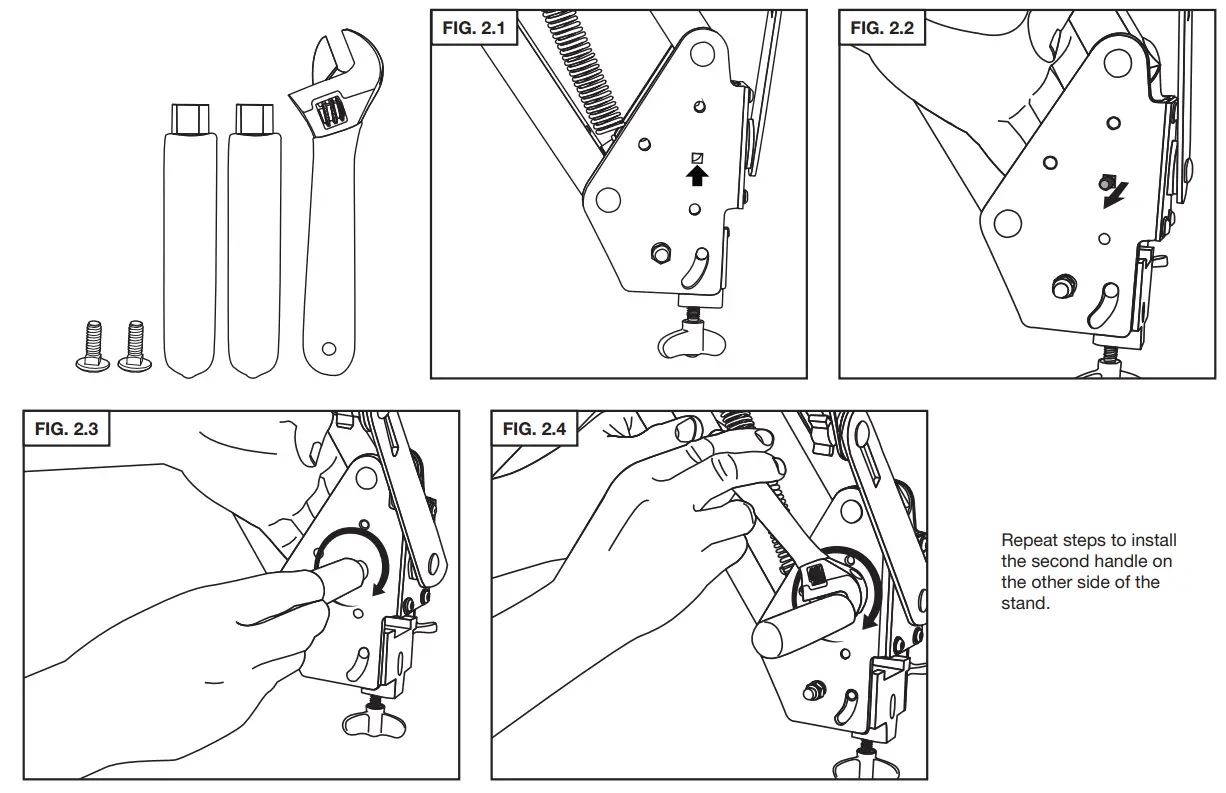
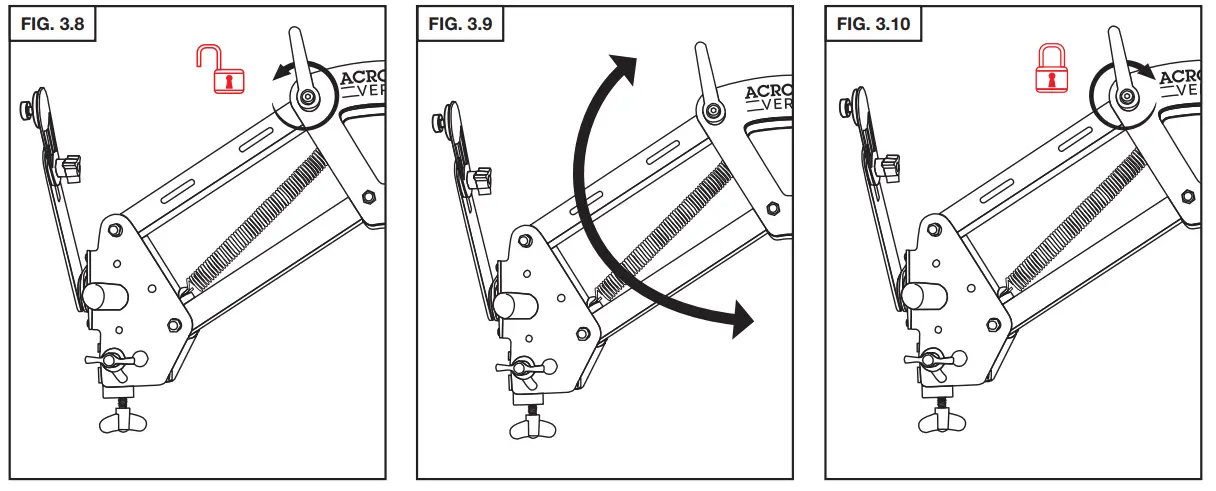
STAND ADJUSTMENTS AND FEATURES
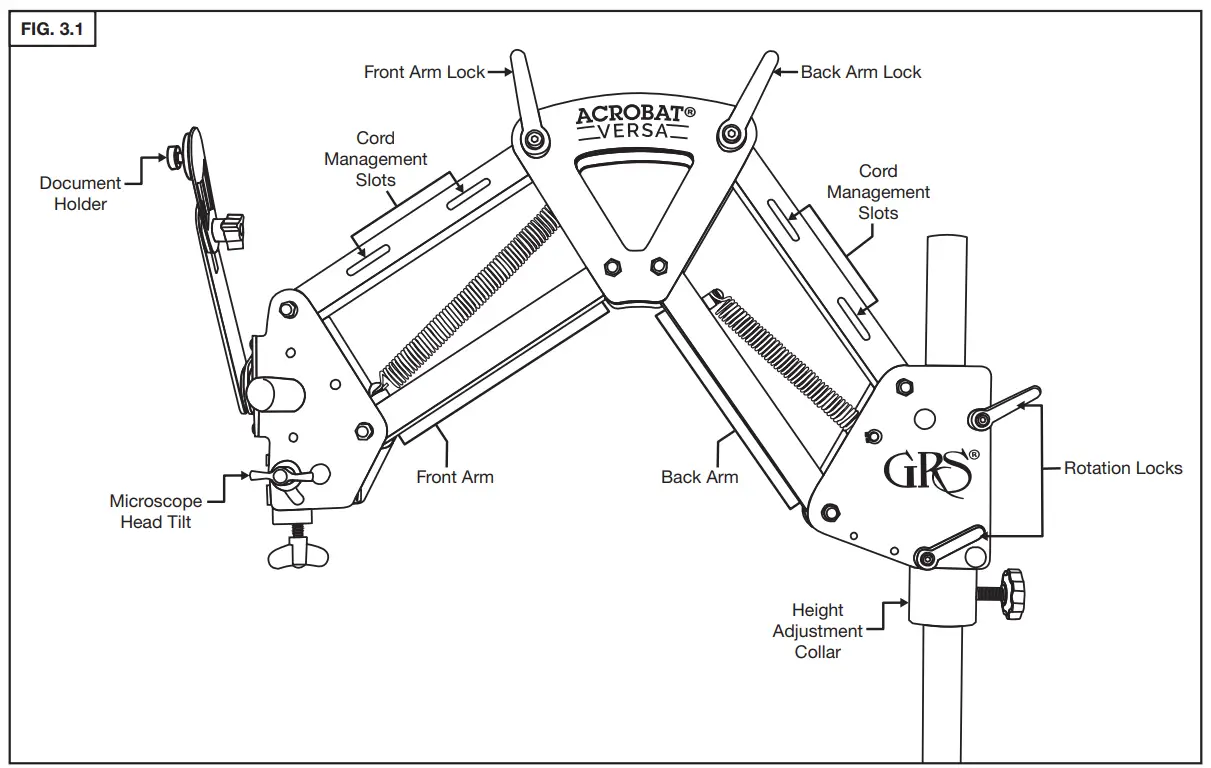
LEVER ORIENTATION
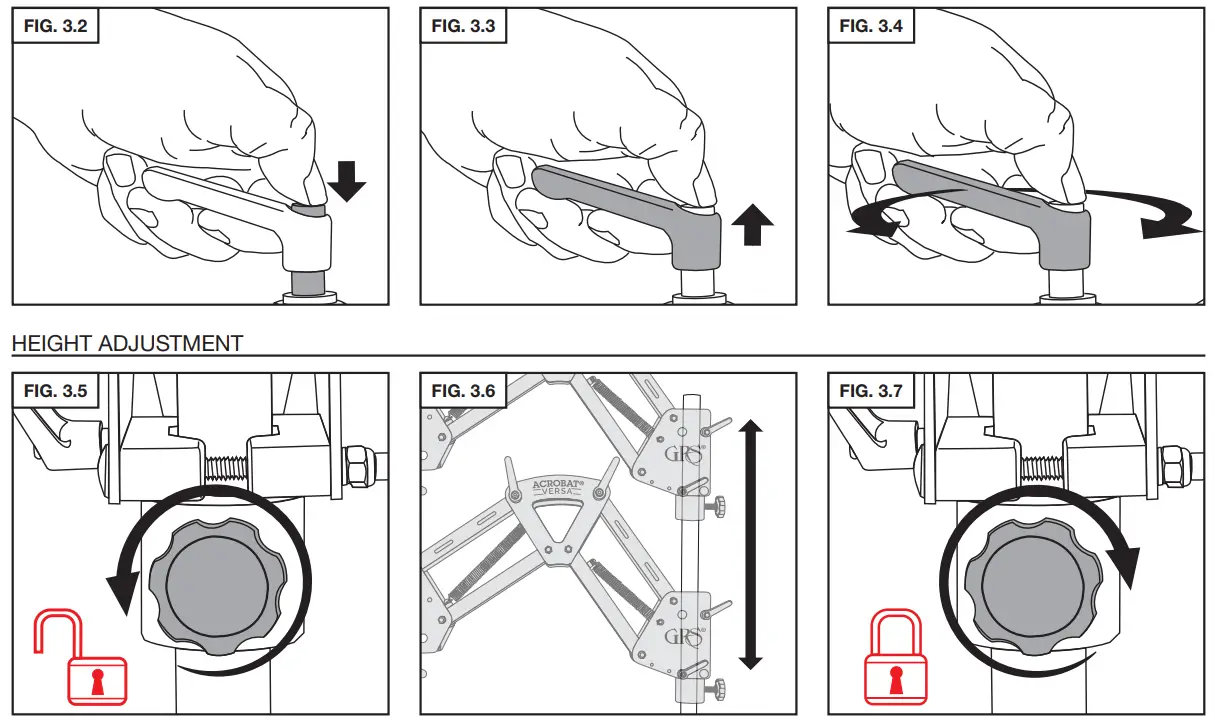
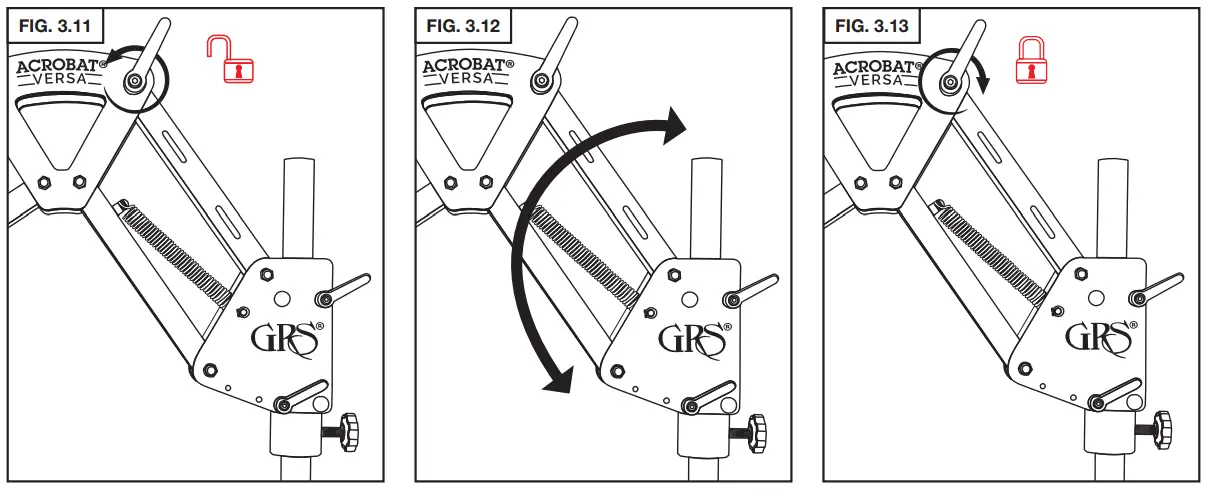
FRONT ARM ADJUSTMENT
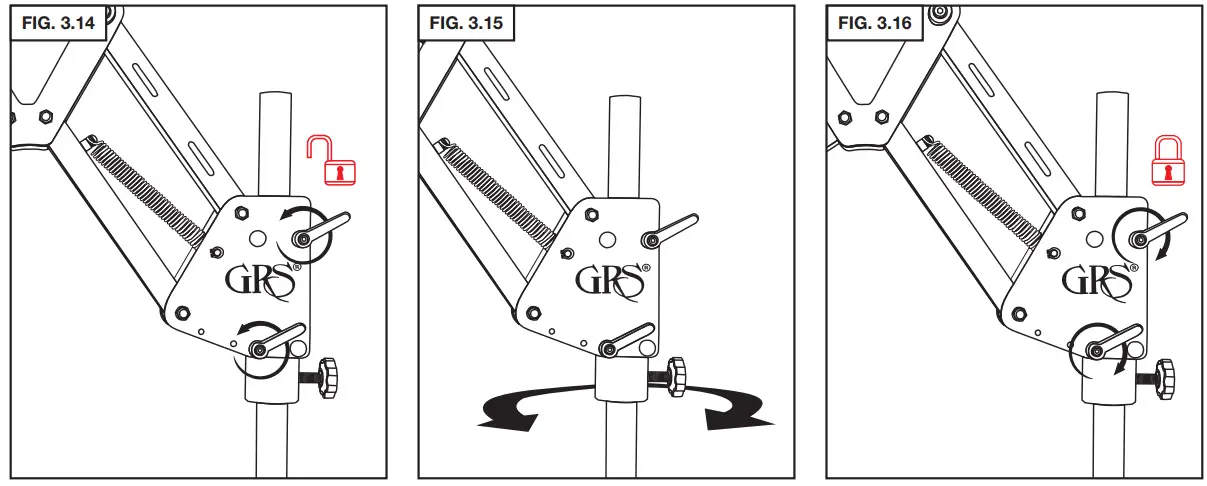
BACK ARM ADJUSTMENT
ARM ROTATION
See GRS LIT-415 for instructions on how to mount the Leica A60 microscope with the Acrobat® Versa stand.
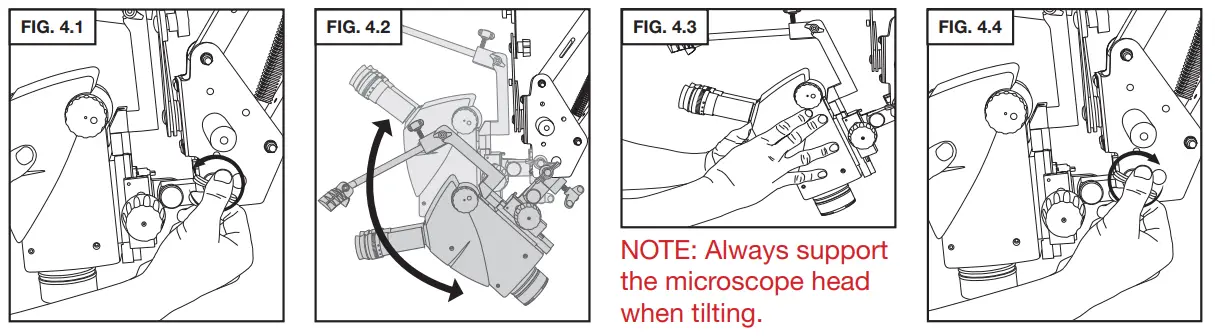
MICROSCOPE HEAD TILT
DOCUMENT HOLDER
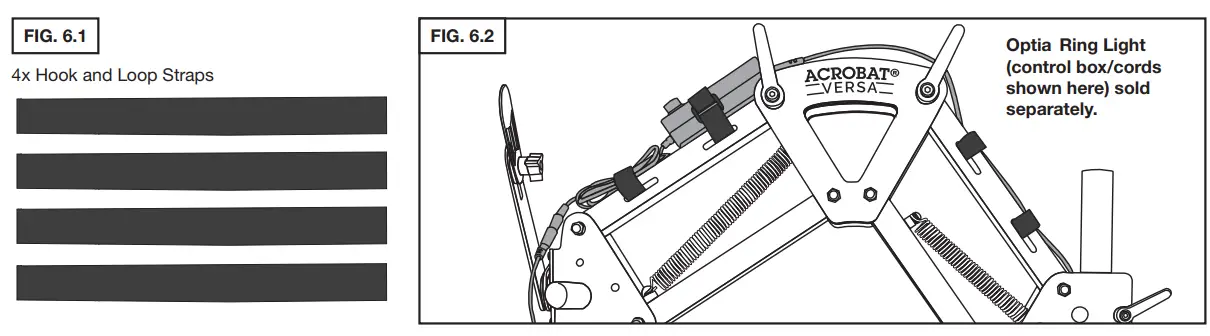
CORD MANAGEMENT
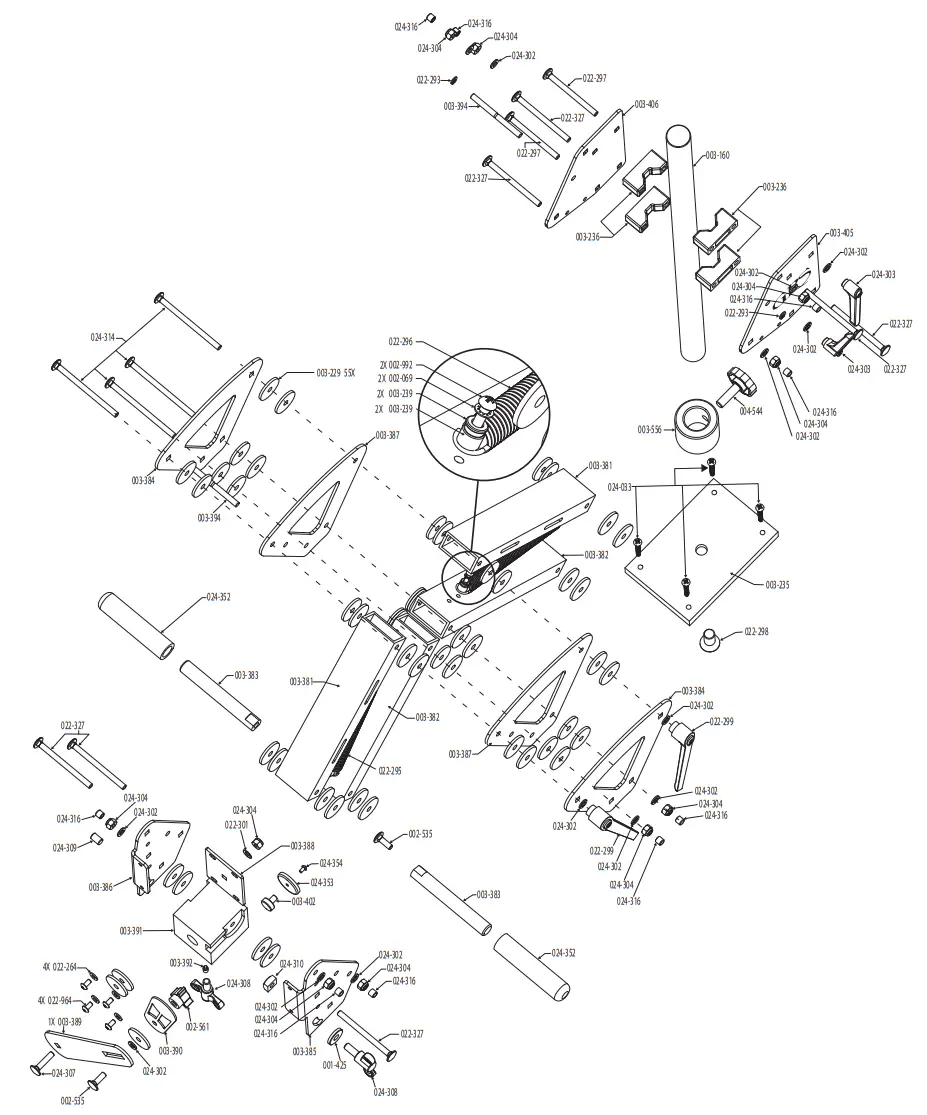
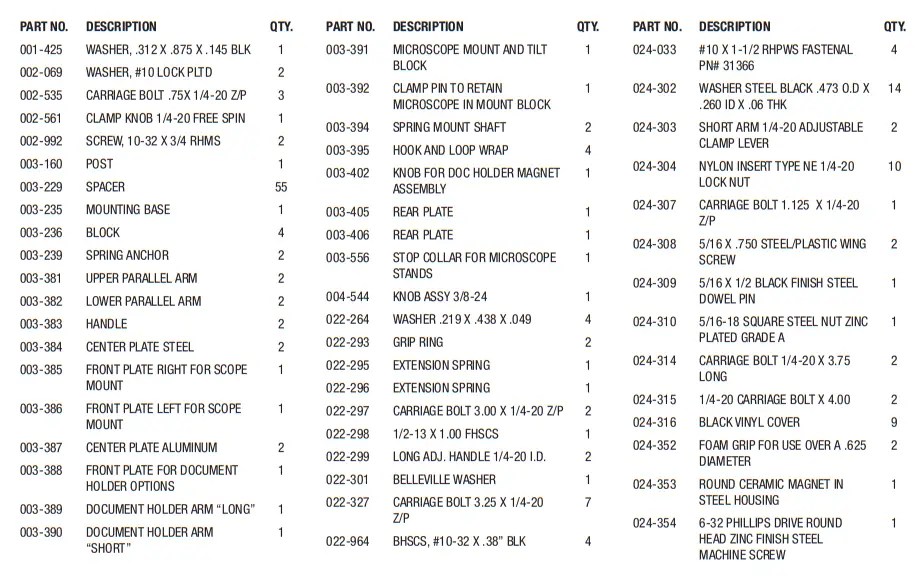
Acrobat® Versa Stand
PARTS LIST • #003-635
Microscope Stand Base Template
900 Overlander Road Emporia, KS 66801 USA
800-835-3519 620-343-1084
Fax: 620-343-9640
[email protected]
www.grstools.com
Last Update: 2016-02-03


