![]() Blackbird Scepter LED Street
Blackbird Scepter LED Street
Luminaire Instructions
Blackbird Scepter LED Street Luminaire
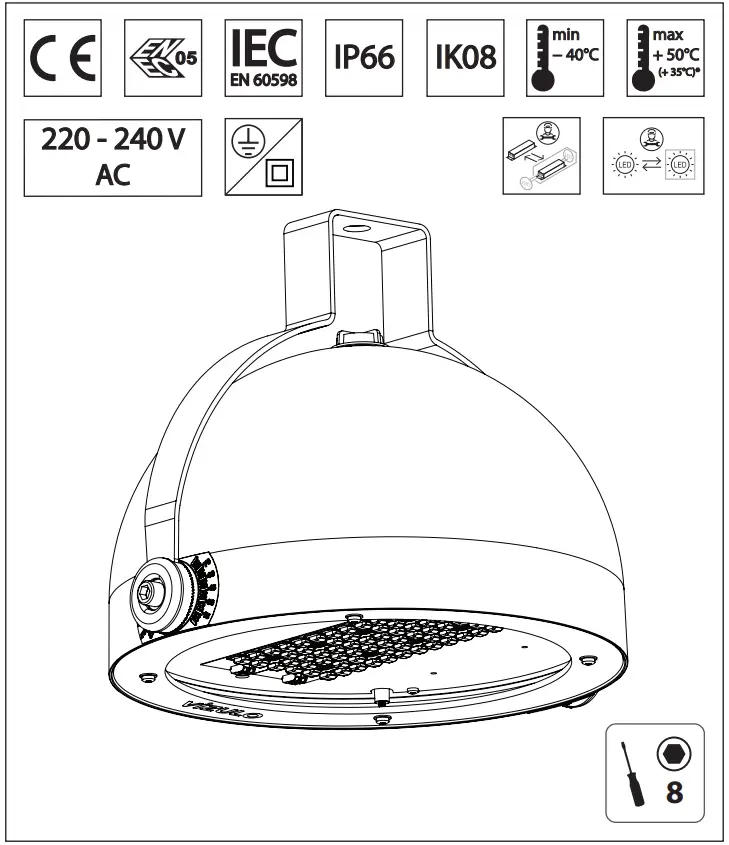
* Depends on configuration. Check label or technical specification.
PCB module replacement
![]() Danger!
Danger!
Before disassembling the luminaire, check if it is disconnected from the power grid.
| 1 | Unscrew the glass from the body and lift it |  |
| 2 | Disconnect the PCB module from the driver | 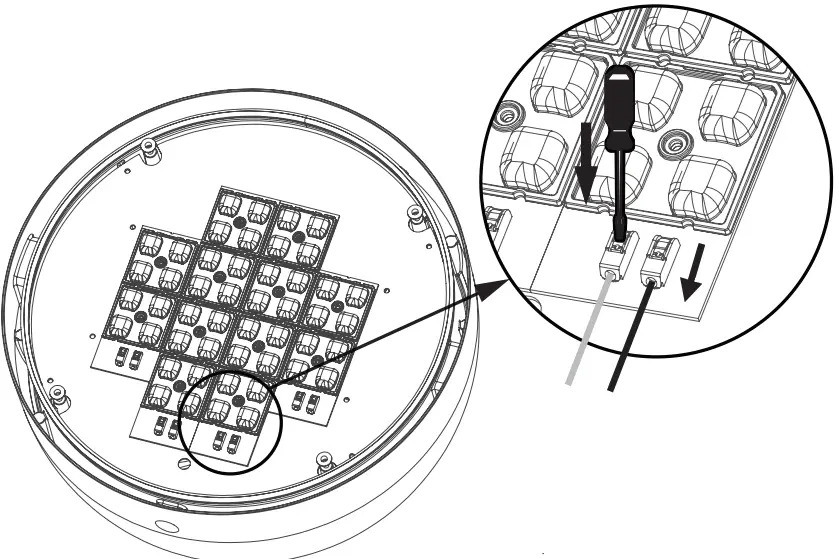 |
| 3 | *Pay attention to the lense direction! **PCB module count depends on configuration Unscrew the PCB module, replace it and screw it back into place | 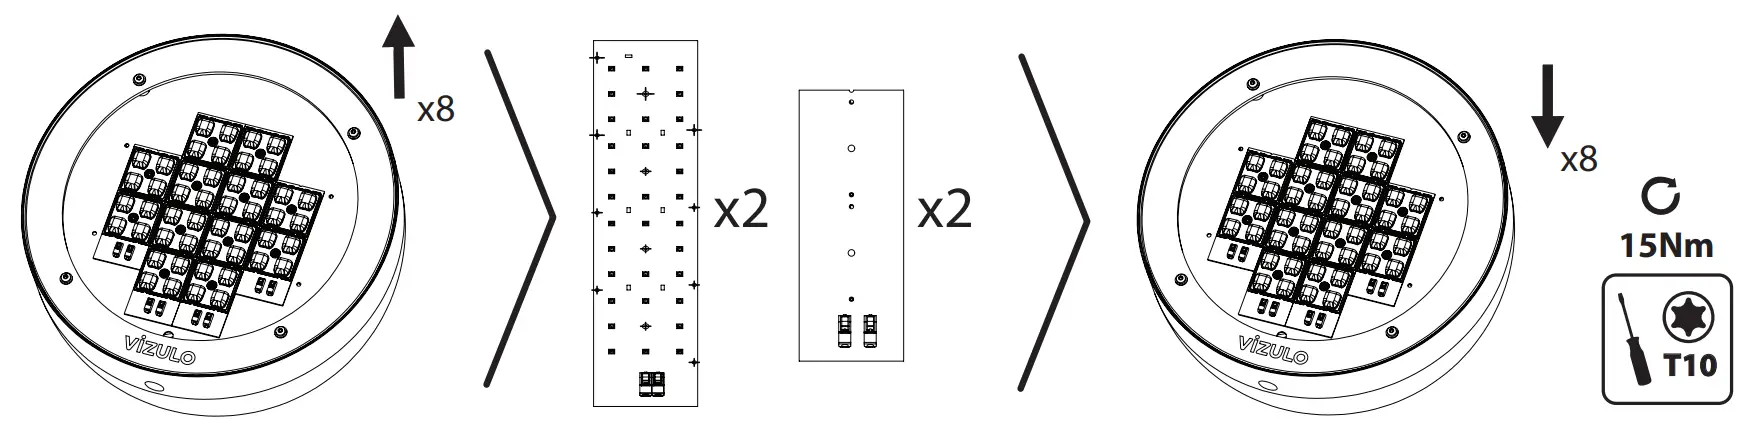 |
| 4 | Connect the PCB module to the driver | 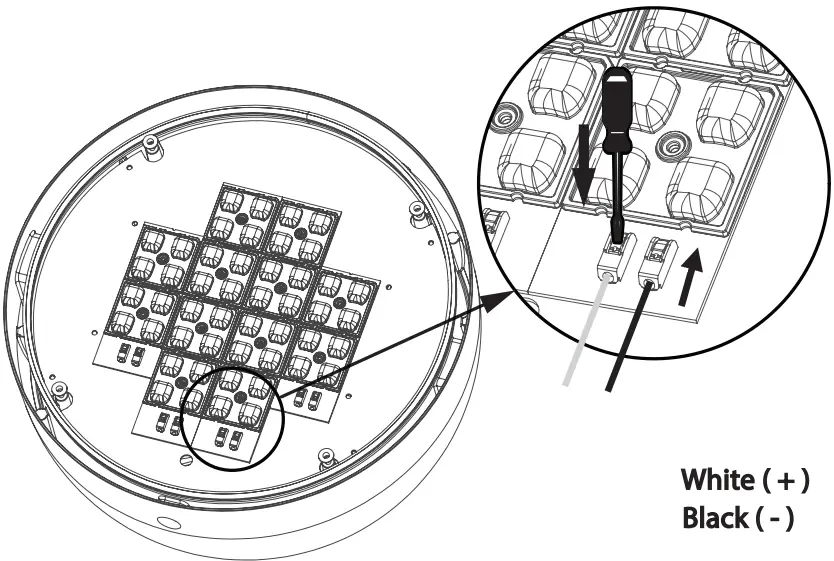 |
| 5 | Lower the glass and and screw it | 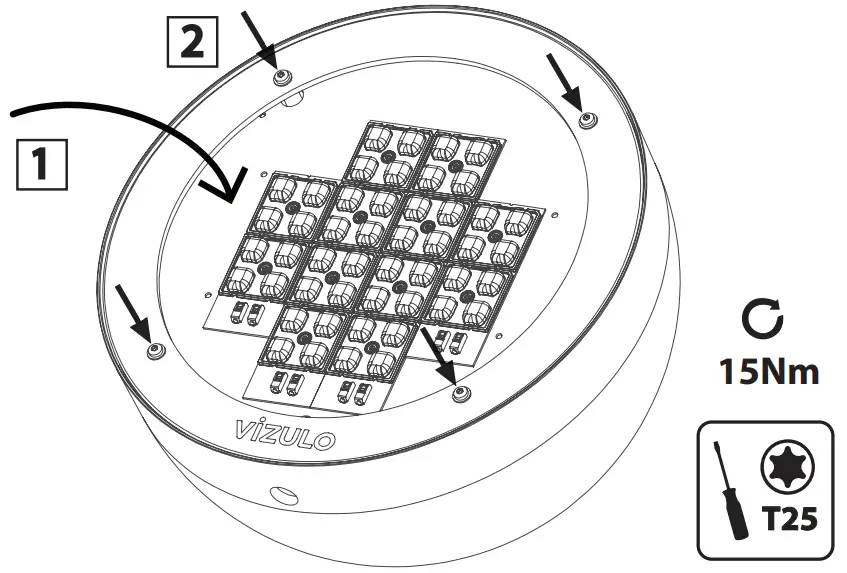 |
LED driver replacement
![]() Danger!
Danger!
Before disassembling the luminaire, check if it is disconnected from the power grid.
| 1 | Unscrew the glass from the body and lift it | |
| 2 | Disconnect the PCB module from the driver | |
| 3 | Unscrew the PCB plate from the body | 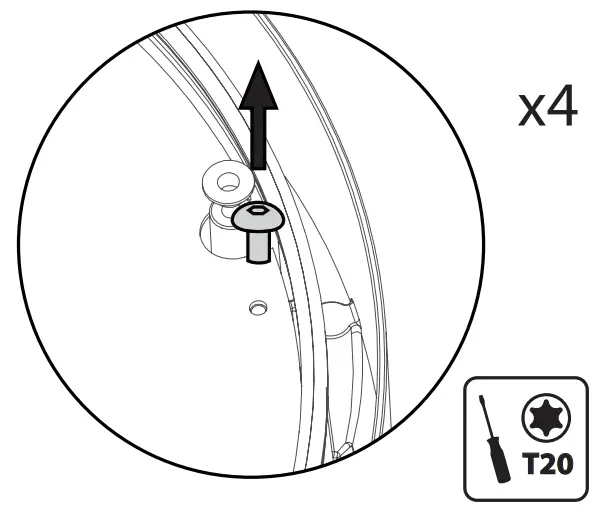 |
| 4 | Lift the PCB plate | 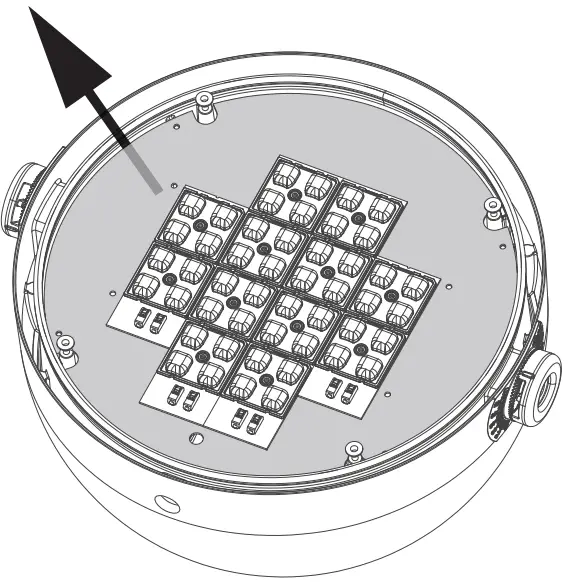 |
| 5 | Take a reference photo and disconnect the wires from the driver | 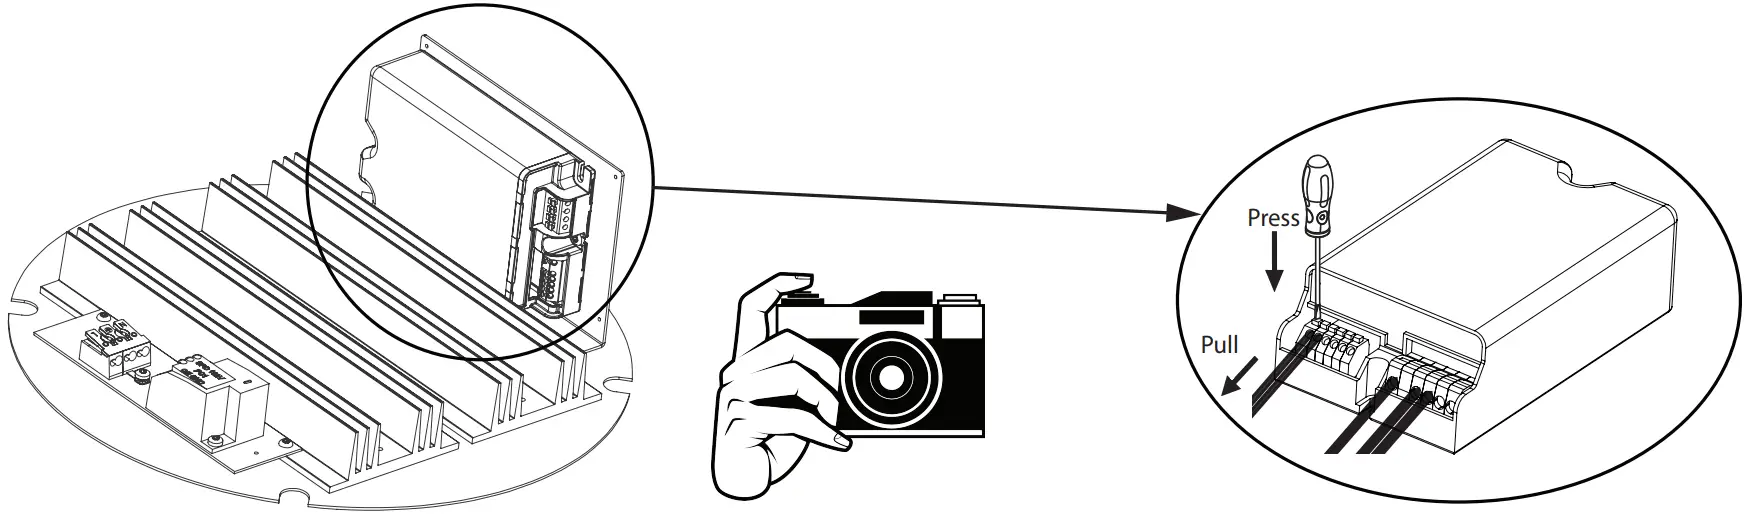 |
| 6 | Unscrew the EQUI wire | 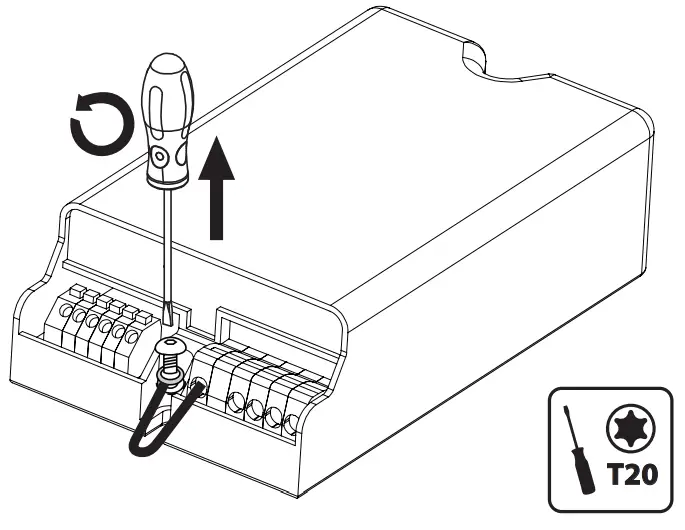 |
| 7 | Unscrew the LED driver | 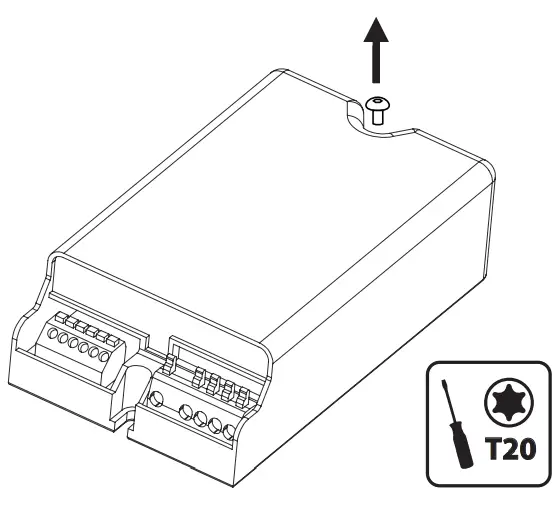 |
| 8 | Replace the LED drivers | 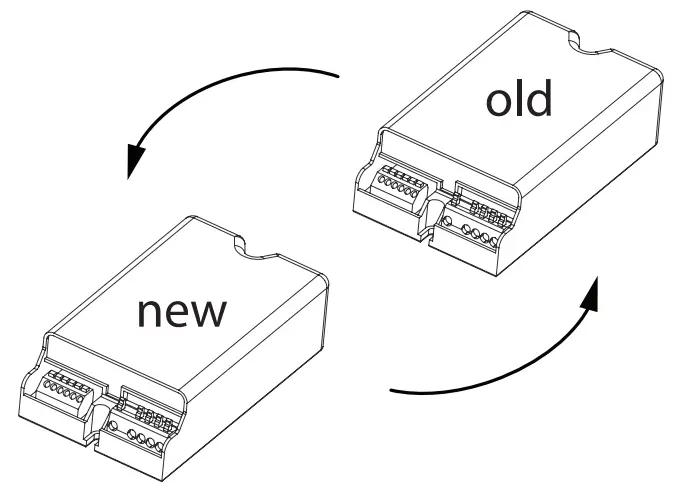 |
| 9 | Put the new LED driver into place | 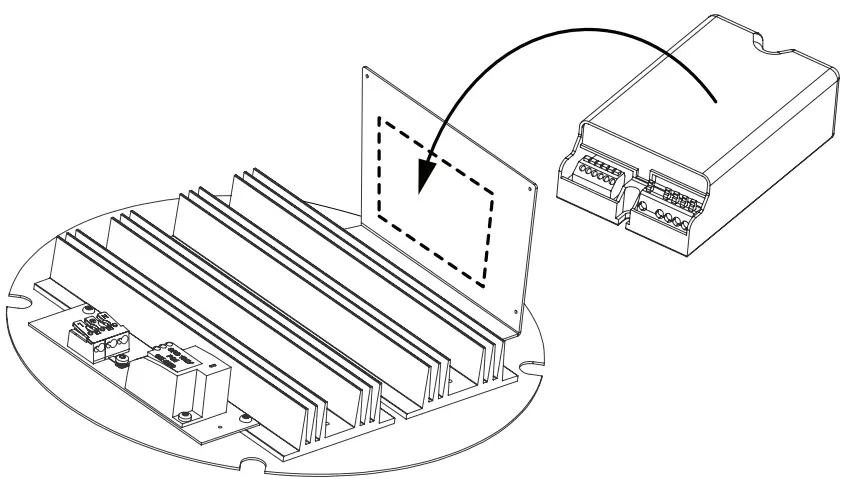 |
| 10 | Screw the LED driver |  |
| 11 | Screw the EQUI wire | 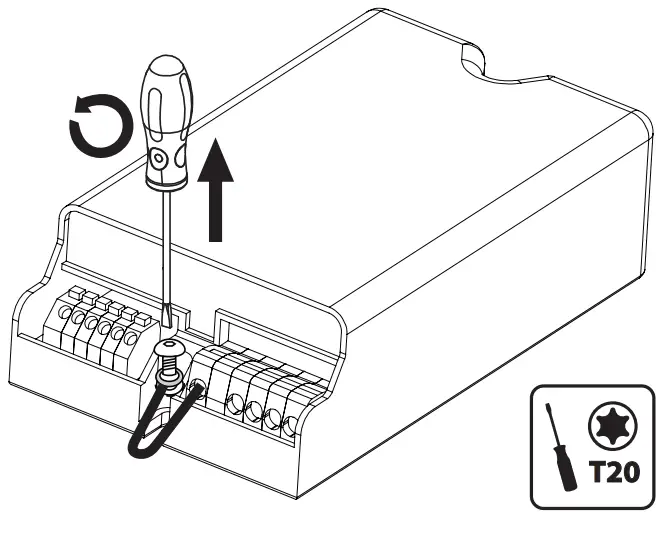 |
| 12 | Consult the reference picture | 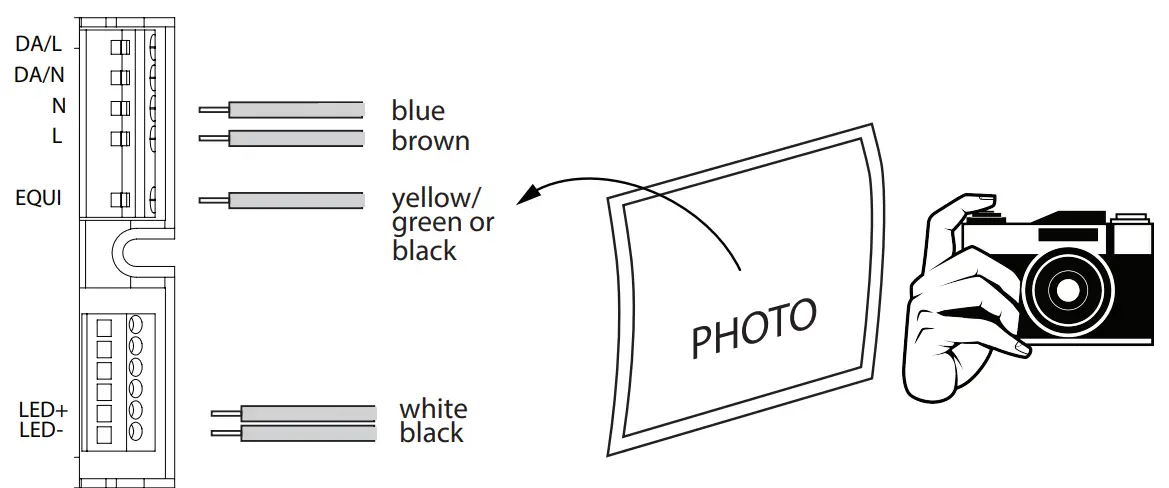 |
| 13 | Connect the wires to the driver | 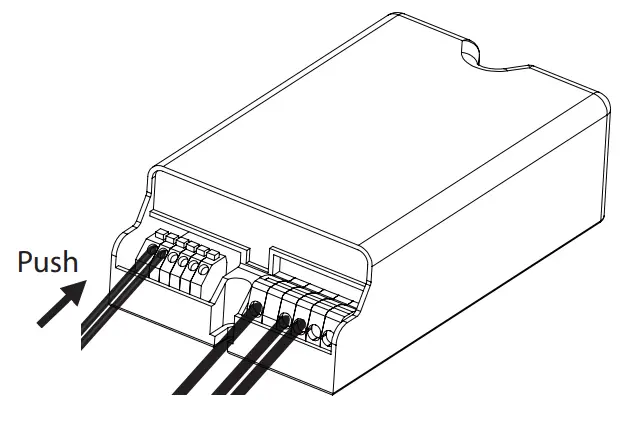 |
| 14 | Lift the PCB plate | 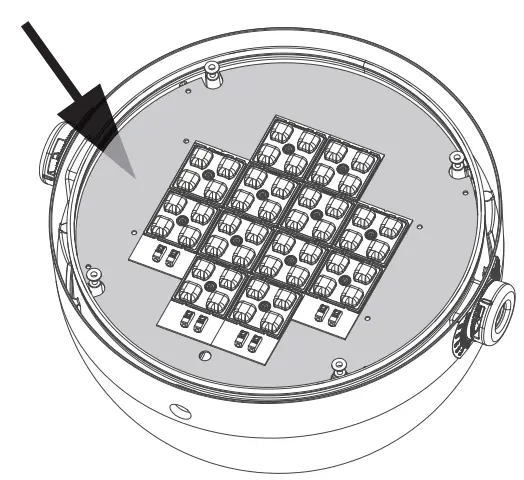 |
| 15 | Screw the PCB plate from the body and lift it | 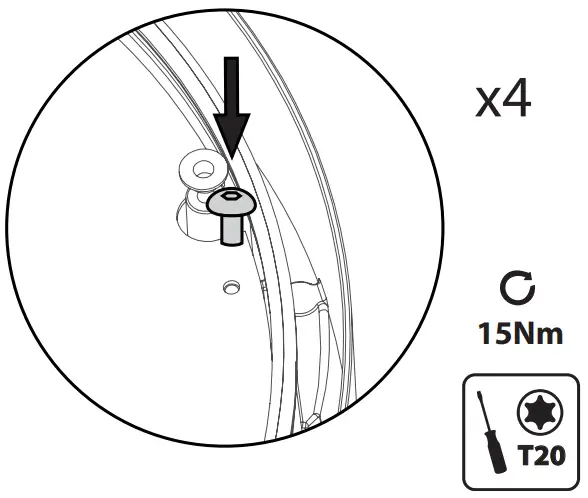 |
| 16 | Lower the glass and and screw it | 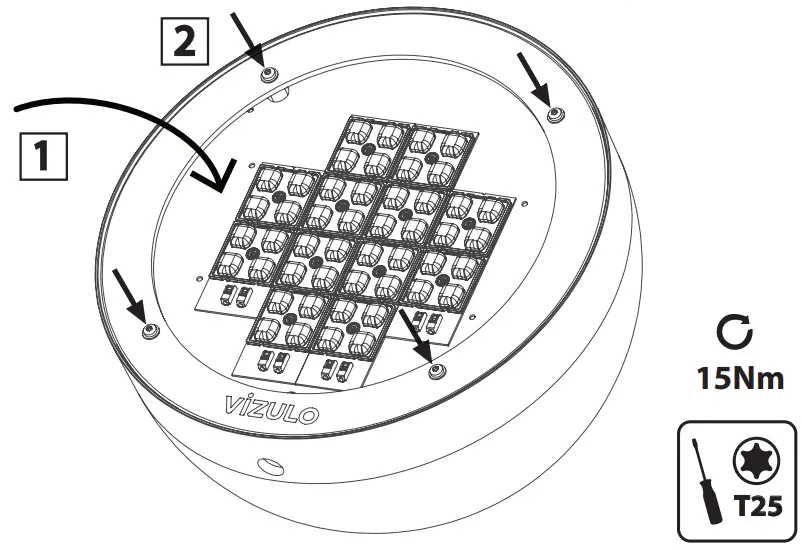 |
Terms of use and maintenance
Before luminaire is turned on, it should be mounted according with this mounting instruction or any other applicable regulations.
Mounting instructions
Mounting of luminaire must be performed by a qualified person according with following instructions:
- The warranty of luminaire does not apply, if the mounting of luminaire has been performed in precipitation (rain, snow, hail).
- The warranty of luminaire does not apply, if a control system unauthorized by VIZULO or an inapplicable LED driver has been used to drive the luminaire.
- The warranty of luminaire does not apply, if it has been used in an unsuitable ambient temperature or has been supplied by voltage outside of the specified range.
- The warranty of luminaire does not apply, if the LED driver program has been changed in any way.
- The warranty of the luminaire does not apply, if the logged history data of the LED driver has been deleted without the permission of VIZULO.
- The warranty of luminaire does not apply, if it has been mounted in unspecified angles or upside down (luminaire glass directed up), or it has been completely submerged under water.
Safety instructions
Any actions with the luminaire must be performed by a qualified person, who is certified according with national regulations and requirements. To prevent any accidents person installing the luminaire must follow national safety requirements and following instructions:
- The label containing technical parameters of the luminaire has to be studied before the work on it has begun.
- Any luminaire build or design changes are prohibited.
- The luminaire must be used in good technical condition and according with this instruction.
- Only VIZULO authorized spare parts and accessories can be used to repair the luminaire.
- The repair of luminaire has to be performed by a qualified and certified person.
Maintenance and repair
Luminaire has to be disconnected from electrical grid before it is opened and/or repaired!
- The person working with the luminaire must follow national regulations and legislations that apply to maintenance and testing of electrical or electronic appliances.
- The luminaire may need to be cleaned depending on its environment. Only a damp cloth or a sponge may be used to clean the luminaire. Use only household detergents diluted by water.
- Only VIZULO authorized spare parts may be used for the luminaire.
- Instruction for changing spare parts must be requested from VIZULO and studied before the repair is attempted.
- LED modules, lens and LED drivers can be changed on an installed luminaire, but it is advised to perform this task indoor to avoid water entering the luminaire.
- Spare parts (lens, LED modules and drivers) should be ordered from the information available on the luminaire label.
![]() 02-08-2021
02-08-2021
SIA VIZULO
Laucu Lejas, Iecava, Latvia, LV-3913
www.vizulo.com


