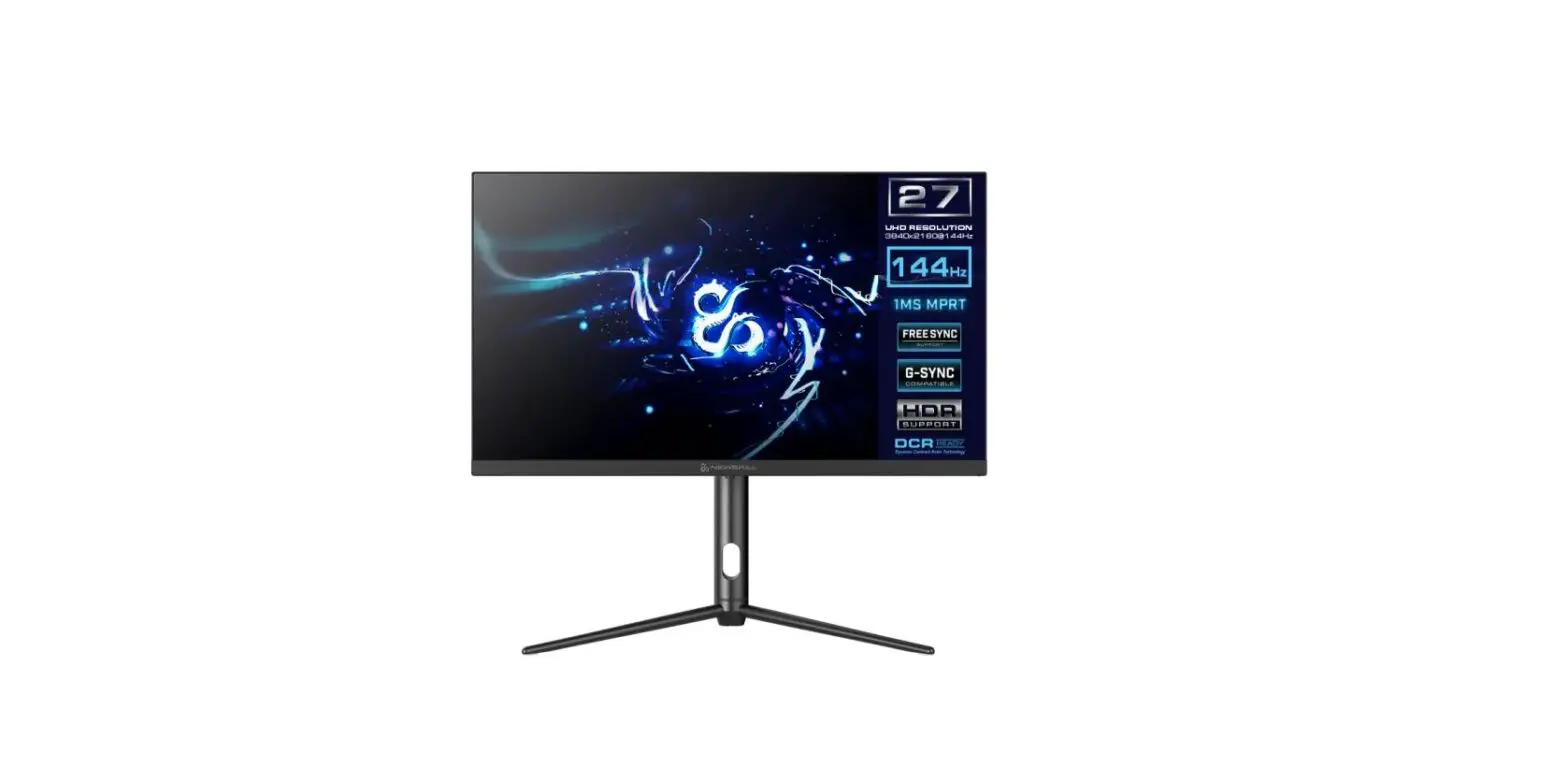
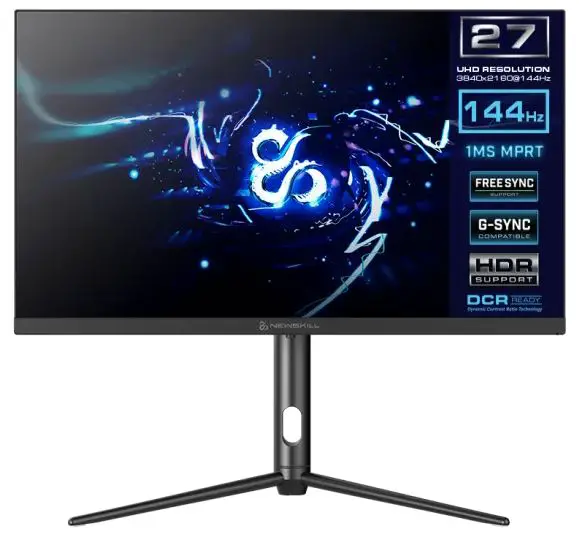
NEWSKILL ICARUS RGB 24.5 Inch FHD Resolution Gaming Monitor
The terms HDMI and HDMI High-Definition Multimedia Interface, and the HDMI Logo are trademarks or registered trademarks of HDMI Licensing Administrator, Inc. in the United States and other countries.
Important Safety Precautions
- Please read all the instructions carefully before usingthis product.
- BE SURE TO unplug the power cord when cleaning LCD. Never clean it with liquid detergent or spraying detergent, but wipe it with wet soft cloth. If it is still not clean, please use special detergent for LCD.
- DO NOT use accessories not authorized by the manufacturer, other wise they may incur danger.
- When disconnecting the power cord of display or power adapter, always remember to hold the plug instead of puling the wire to unplug the power cord.
- Keep the display away from water sources such as bath tub, washbasin, sink or washing machine.DO NOT place the display on wet floor or near a swimming pool, or press LCD surface with fingers or hard objects.
- The grooves and openings on the back and bottom of the shell are for ventilation purpose and also for guaranteeing the reliability of the elements and preventing them from overheating; in order to prevent the vents from blocking; DO NOT place the display on bed, sofa, carpet or other similar surfaces; DO NOT place the display near to or on heat radiator or heater; DO NOT put the display into embedded device, unless it is provided with adequate ventilating equipment.
- Only the type of power source indicated on the nameplate applies to this display. If you have any questions on the type of power source you use, please consult the dealer of the display or local administration of power supply.
- For safety, the display or the power adapter is equipped with a three-pin plug power cord. The third pin of this plug is for grounding, and only applicable to socket that is correctly grounded. In case that your socket is not available for the plug, please contact electrician to replace the socket.
- Since there is high voltage or other risks when the shell is opened or moved, please DO NOT repair the display by yourself, but request qualified maintenance staff to carry out.
- In one of the following cases, please unplug the display or the power adapter and ask qualified maintenance staff for help:
- The power cord or the plug is impaired or worn.
- The display falls off or the shell is damaged.
- The display is obviously abnormal.
- Please place the display in a cool, dry and well ventilated place.
- Store the display in temperature range of -10°C~60°C, beyond which the display may be damaged permanently.
Power & Electrical Warnings
The monitor should be operated only from the type of power source indicated on the label. If you are not sure of the type of power supplied to your home, consult your dealer or local power company.
The monitor is equipped with a three-pronged grounded plug, a plug with a third (grounding) pin. This plug will fit only into a grounded power outlet as a safety feature. If your outlet does not accommodate the three-wire plug, have an electrician install the correct outlet, or use an adapter to ground the appliance safely. Do not defeat the safety purpose of the grounded plug. Unplug the unit during a lightning storm or when it will not be used for long periods of time. This will protect the monitor from damage due to power surges. Do not overload power strips and extension cords. Overloading can result in fire or electric shock. To ensure satisfactory operation, use the monitor only with UL listed computers which have appropriate configured receptacles marked between 100-240V AC, Min. 5A. The wall socket shall be installed near the equipment and shall be easily accessible.
- Read the safety instructions carefully and thoroughly.
- All cautions and warnings on the device or user’s manual should be noted.
- Refer servicing to qualified personnel only.
- Keep the User’s Guide that comes with the package for future reference.
- To prevent fire or shock hazard, keep this device away from humidity and high temperature.
- Lay this device on a reliable flat surface before setting it up.
- Make sure that the power voltage is within its safety range and has been adjusted properly to the value of 100~240V before connecting the device to the power outlet. Do not disable the protective earth pin from the plug. The device must be connected to an earthed mains socket-outlet. Always disconnect the power cord or switch the wall socket off if the devicewould be left unused for a certain time to achieve zero energy consumption.
- Place the power cord in a way that people are unlikely to step on it. Do not place anything on the power cord.
- The ventilator on the device is used for air convection and to prevent the device from overheating. Do not cover the ventilator.
- Do not leave the device in an unconditioned environment with a storage temperature above 60OC or below -20OC, which may damage the device.
- NOTE: The maximum operating temperature is around 40OC.
- When cleaning the device, be sure to remove the power plug. Use a piece of soft cloth rather than industrial chemical to clean the device. Never pour any liquid into the opening; that could damage the device or cause electric shock.
- Always keep strong magnetic or electrical objects away from the device.
If any of the following situations arises, get the device checked by service personnel:
- The power cord or plug is damaged.
- Liquid has penetrated into the device.
- The device has been exposed to moisture.
- The device does not work well or you can not get it work according to user’s manual.
- The device has dropped and damaged.
- The device has obvious sign of breakage.
Warning: Overuse of screens is likely to affect eyesight.
Recommendations
- Take a 10-minute break for every 30 minutes of screen time.
- Children under 2 years of age should have no screen time. For children aged 2 years and over, screen time should be limited to less than one hour per day.
Do not place the monitor in rain, humid environment or open the monitor case to avoid any shock, electrical hazards, and/or mechanical hazards.
Operation
- Keep the monitor out of direct sunlight and away from stoves or any other heat source.
- Keep the monitor out of water source
- Remove any object that could fall into ventilation holes or prevent proper cooling of the monitor’s electronics.
- Do not block the ventilation holes.
- Do not knock or drop the monitor during operation or transportation.
Maintenance Guidelines
- Do not place the monitor in rain, humid environment or open the monitor case to avoid any shock, electrical hazards, and/or mechanical hazards.
- Before cleaning the monitor, unplug the monitor power cable from the electrical outlet.
- To clean your screen, slightly dampen a soft, clean cloth with water.
- If possible, use a special screen-cleaning tissue or solution. Do not use benzene, thinner, ammonia, abrasive cleaners, or compressed air.
- Use a slightly dampened, warm cloth to clean the frame. Avoid using detergent of any kind as some detergents might leave a milky film on the plastics.
- Unplug the monitor if you are not going to use it for an extendedperiod of time.
- To avoid the risk of shock or permanent damage to the set, do not expose the monitor to dust, rain, water, or excessive moisture environment. If your monitor gets wet, wipe it with dry cloth as soon as possible.
Product Description
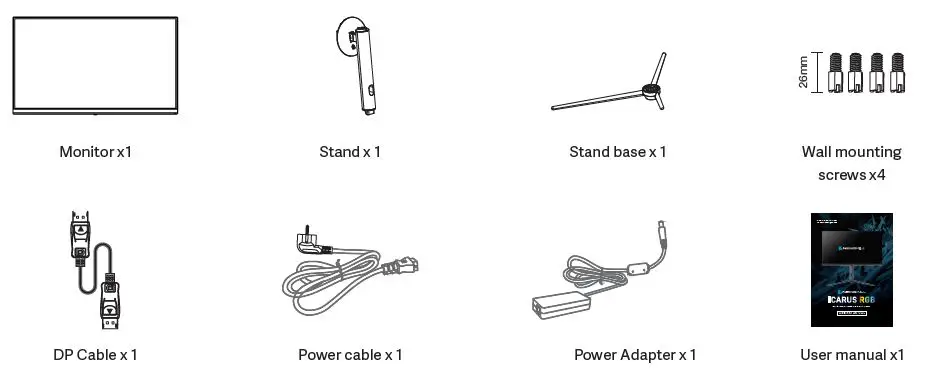
Packing list
Please check the following items in the packing case before installation:
- If any of above items is missing, please contact with the dealer.
Product Overview
Monitor Buttons
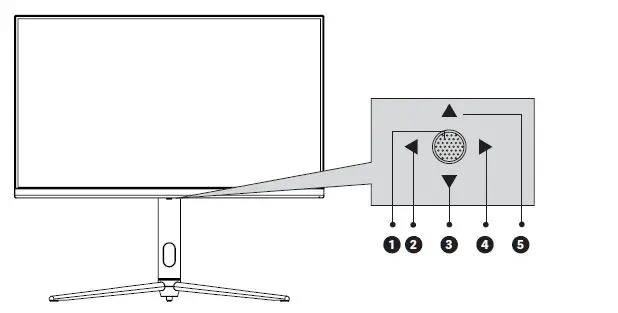
| Press to turn on/of the monitor | |
| Exit / Hot key | Press to return to the previous menu/quickly switch the color format |
| Press to move down in the menu/quickly enter the light console | |
| M Menu Button | Press to enter sub-menus/ quickly enter the main menu |
| Press to move up in the menu/quickly enter the game crosshair mode |
Explanation of indicators

Steady blue light indicates the power is on and the monitor runs normally. Red light indicates no horizontal or vertical synchronous signal detected or no video input signal, and that the monitor is in standby status. Please make sure your computer is turned on and operates normally and check that all video cables are fully plugged in and/or connected to the monitor.
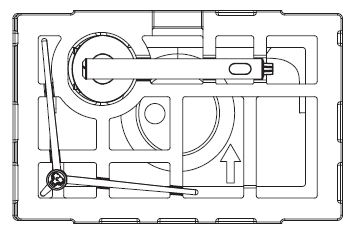
Installation of base
Keep the foam underneath the monitor before attaching the stand.
- Open the package to take out foams and put them on a flat tabletop.
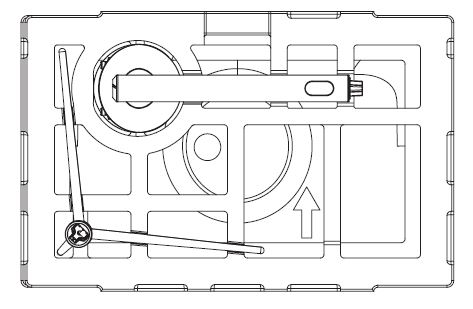
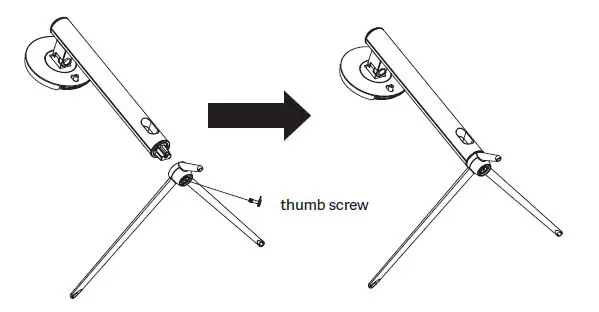
- Take out the base and stand, and use the thumb screw of the base to lock the stand.
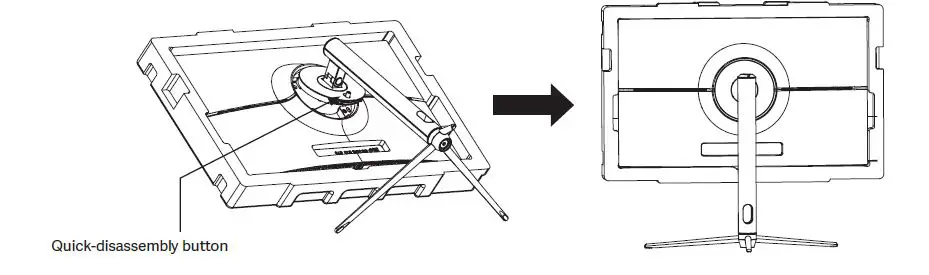
- Align the base and stand components assembled in Step 2 to the slot of the machine and clip them. (Note: Slide the quick disassembly button up with fingers to take out the base and stand components)
Installation of mount
- Open the package to take out foams and put them on a flat tabletop.
- Take out all accessories from foams and take out the upper foam. First, remove four screws locking the rear casing with a Phillips screwdriver (optional). (During disassembly of screws, do not take the screen out from the foam to avoid damage to the screen)
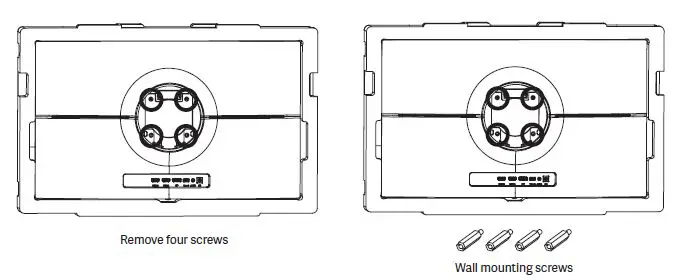
- Take out four studs for hexagon irons from the accessory bag to and lock them on the rear casing. (Do not take the screen out from the foam to avoid damage to the screen)
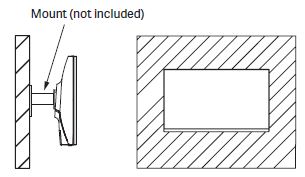
- During hanging of the product, do not pinch the screen with hand to avoid damage to the screen.
- Tips: The mounting hole distance of the mount for the product is 75x75mm.
- Tips: The mounting hole distance of the mount for the product is 75x75mm.
Connectivity Options
Connecting the power cable

Please connect the power adapter to the power cable, connect the power adapter plug to the corresponding power port of the monitor, and then connect the power cable to a properly grounded power outlet.
Connecting your earphones
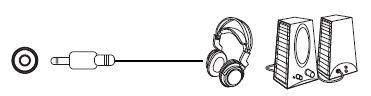
- Connect audio outputting devices such as earphones to the AUDIO OUT interface.
HDMI connectivity

- Use the HDMI cable to connect the HDMI IN interface of the product to the HDMI OUT interface of a PC.
DP connectivity
- Use the DP cable to connect the DP IN interface of the product to the DP OUT interface of a PC.
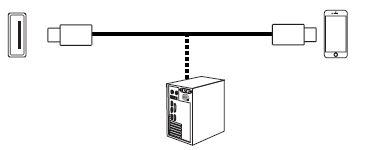
Type-C interface

- A Type-C line can be used to connect to data ports of machines and external terminals.
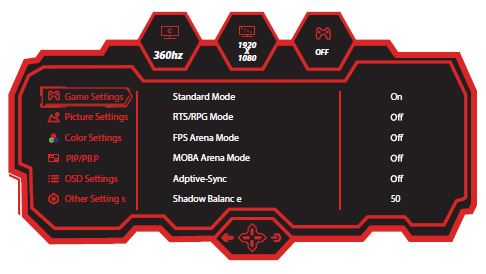
The On-Screen Display (OSD) is used to adjust preferences and settings for the monitor itself. It will appear in the lower right corner once we activate it.
WARNING: When using the monitor for the first time, settings will automatically adjust to optimal settings according to your computer’s configuration and parts etc.
- Press one of the buttons (M,
 ,
,  , E, ) to activate the browser window.
 - Press M
 to enter the OSD screen.
 - Press or to navigate between functions.
- The current selection will be highlighted, press M to access the sub-menu or select.
- Navigate between the options with or and advance in the submenus with M button.
| Main Menu | Sub-Menu | Options |
|
Game Settings | Standard Mode | Off/On |
| RTS/RPG Mode | Off/On | |
| FPS Arena Mode | Off/On | |
| MOBA Arena Mode | Off/On | |
| Adapitve-Sync | Off/On | |
| Shadow Balance | Range of progress bar: 0-100 | |
| Response Time | Off/Normal/Fast/Ultrafast | |
| Refresh Rate | Off/On | |
| Position: TopRight/TopLeft/BottomRight/BottomLeft | ||
| Game Crosshair | Off | |
| On: Crosshair 1/Crosshair 2/Crosshair 3/Crosshair 4/Crosshair 5/Crosshair 6 | ||
| Game Time | Off | |
| On: 15:00/30:00/45:00/60:00 | ||
| Dynamic Brightness | Off/Normal/Exper/Elaboration | |
| HDR | Off/HDR Standard/HDR Movie/HDR RTS/RPG/HDR FPS | |
| MPRT | Off/On | |
|
Ambient Lighting | Off | |
| Logo Led: Color/ Strenght/Mode | ||
| Led Bar: Color/Strenght/Mode/Front Color/Rear Color | ||
| Physical Super View | Off/On | |
| Position: TopRight/TopLeft/BottomRight/BottomLeft/Center | ||
| Localdimming | Off/On | |
| Overclock | Off/On | |
|
Picture Settings | Brightness | Range of progress bar: 0-100 |
| Contrast | Range of progress bar: 0-100 | |
| DCR | Off/On | |
| Contextual Model | Off | |
| On: Movie Mode/Reading Mode/Night Mode/Care Eyes Mode | ||
| Low Blue Light | Range of progress bar: 0-100 | |
| Sharpness | Range of progress bar: 0-5 | |
| Gamma | 1.8/2.0/2.2/2.4/2.6/ S.curve | |
| Aspect Ratio | Wide Screen/4:3/1:1/Auto |
| Main Menu | Sub-Menu | Options |
|
Color Settings | Warm | Off/On |
| Natural | Off/On | |
| Cool | Off/On | |
| User1 | Off/On: Red, Green, Blue | |
| User2 | Off/On: Red, Green, Blue | |
| User3 | Off/On: Red, Green, Blue | |
| Hue | Red/Green/Blue/Cyan/Magenta/Yellow: Range of progress bar: 0-100 | |
| Saturation | ||
|
PIP/PBP | PIP/PBP Mode | Off/PIP Mode/PBP 2Win 1:1/PBP 2Win 2:1 /PBP 2Win 1:2 |
| Sub-Signal Source | Type-C/DP/HDMI1/HDMI2/Smart For Screen | |
| Audio Source | Auto/Type-C/DP/HDMI1/HDMI2 | |
| PIP Position | TopRight/TopLeft/BottomRight/BottomLeft | |
| PIP Size | Small/Medium/Large | |
| Window Swap | Off/On | |
|
OSD SETTING | Language | 简体中文 /English/ 한국어 /عربى/Portugues do Brasilazil/Deutsch/Nederland/Suomi/ Français/ Ελληνικά /Indonesia/Italiano/ 日本語 /Malaysia/Polskie/Português/P усский / Españo/ไทย/ Укра ї нська /Tiếng Việt/ 繁體中文 /Türkçe |
| OSD Time Out | Range of progress bar: 5-60 | |
| OSD H-Position | Range of progress bar: 0-100 | |
| OSD V-Position | Range of progress bar: 0-100 | |
| OSD Transparency | Range of progress bar: 0-5 | |
| Hotkey1 Setting | Brightness/Contrast/Volume/Mute/Shadow Balance/Game Crosshair/Refresh Rate/ Game Time/Contextual Model/ PIP/PBP Mode/Input Signal/Dynamic Brightness/ Physical Super View/HDR/Light Sensor/Gravity Sensor/Ambient Lighting | |
| Hotkey2 Setting | ||
| Hotkey3 Setting | ||
| OSD Rotation | Normal/90/180/270 | |
| OSD Lock | Off/On | |
|
Other Settings | Input Signal | Auto/Type-C/DP/HDMI1/HDMI2 |
| Volume | Range of progress bar: 0-100 | |
| Mute | Off/On | |
| HDMI Version | HDMI 2.1/ HDMI 2.0 | |
| Auto Power | Off/On | |
| Eyeshield Remind | Off/On | |
| Gravity Sensor | Off/On | |
| Reset | No/Yes | |
| Informatioin | Input Source:/Resolution:/Mode:/HDR Ver.:/SN: |
Technical Specifications of Product
| Model | Newskill Icarus 24″ FHD 360Hz IC24FI360 |
| Screen diagonal | 24.5 inches |
| Aspect ratio | 16:9 |
| Backlighting | Edge-LED |
| Brightness | 350(typ), 300Min |
| Panel | IPS |
| Resolution | 1920 x 1080 |
| Refresh rate | 360Hz |
| Response time | 1ms MPRT |
| Vision angle | 178°(H) / 178°(V) |
| Contrast ratio | 1000:1 |
| VESA installation | 75 x 75mm |
| Colors | 16.7 millions |
| Adaptive-Sync | Yes |
| Input signal | 2x HDMI2.1, 1x DP1.4, 1x AUDIO Jack 3,5mm, 1x Type-C 65W |
| Power | DC19V,4.74A, 90W |
| Audio | |
| Speakers | No |
| Audio output | Yes |
| Accessories | |
| Power cable | Yes |
| Power adapter | Yes |
| HDMI Cable | No |
| DP Cable | Yes |
| Additional functions | |
| Low Blue Light | Yes |
| Physical Dimensions | |
| Dimensions (with Stand) | 556.38 x 513.99 x 226.56mm |
| Dimensions (without Stand) | 556.38 x 328.44 x 72.63mm |
| Net Weight | 5,1Kg |
| Gross Weight | 7,2Kg |
MORE INFORMATION AT: www.NEWSKILLGAMING.COM


