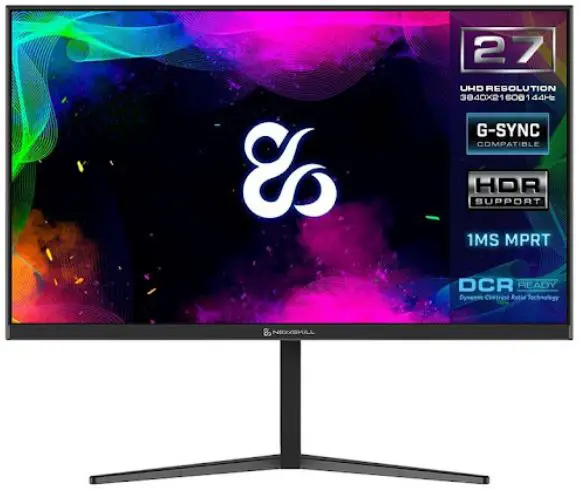
NEWSKILL Icarus 27-Inch FHD Resolution
Important Safety Precautions
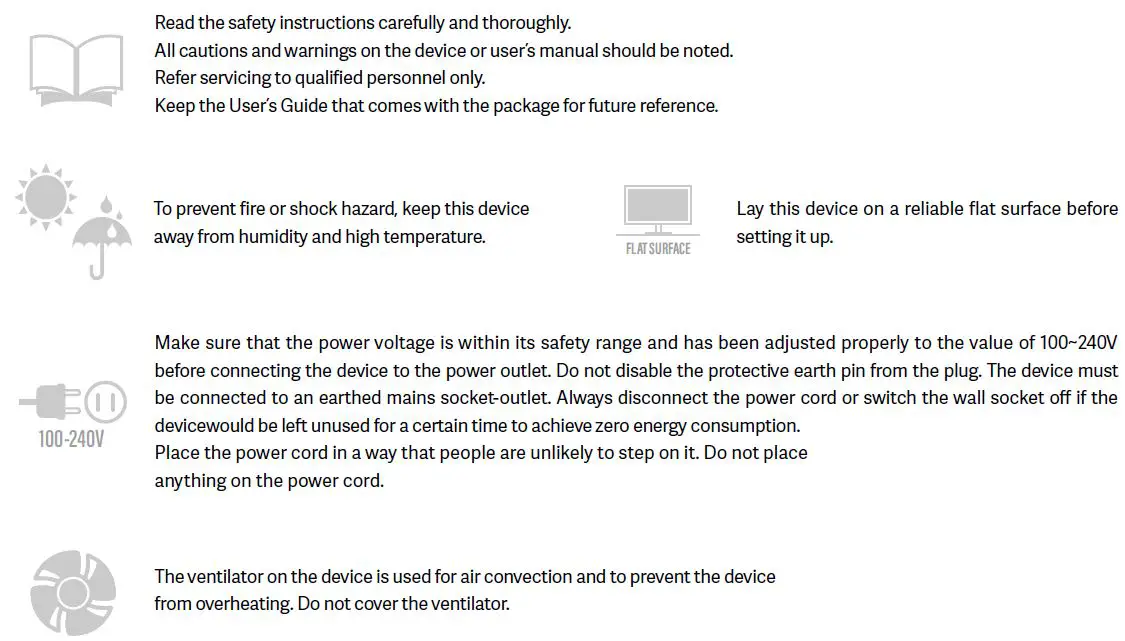
- Please read all the instructions carefully before using this product.
- BE SURE TO unplug the power cord when cleaning LCD. Never clean it with liquid detergent or spraying detergent, but wipe it with wet soft cloth. If it is still not clean, please use special detergent for LCD.
- DO NOT use accessories not authorized by the manufacturer, other wise they may incur danger.
- When disconnecting the power cord of display or power adapter, always remember to hold the plug instead of puling the wire to unplug the power cord.
- Keep the display away from water sources such as bath tub, washbasin, sink or washing machine.DO NOT place the display on wet floor or near a swimming pool, or press LCD surface with fingers or hard objects.
- The grooves and openings on the back and bottom of the shell are for ventilation purpose and also for guaranteeing the reliability of the elements and preventing them from overheating; in order to prevent the vents from blocking; DO NOT place the display on bed, sofa, carpet or other similar surfaces; DO NOT place the display near to or on heat radiator or heater; DO NOT put the display into embedded device, unless it is provided with adequate ventilating equipment.
- Only the type of power source indicated on the nameplate applies to this display. If you have any questions on the type of power source you use, please consult the dealer of the display or local administration of power supply.
- For safety, the display or the power adapter is equipped with three-pin plug power cord. The third pin of this plug is for grounding, and only applicable to socket that is correctly grounded. In case that your socket is not available for the plug, please contact electrician to replace the socket.
- Since there is high voltage or other risks when the shell is opened or moved, please DO NOT repair the display by yourself, but request qualified maintenance staff to carry out.
- In one of the following cases, please unplug the display or the power adapter and ask qualified maintenance staff for help:
- The power cord or the plug is impaired or worn.
- The display falls off or the shell is damaged.
- The display is obviously abnormal.
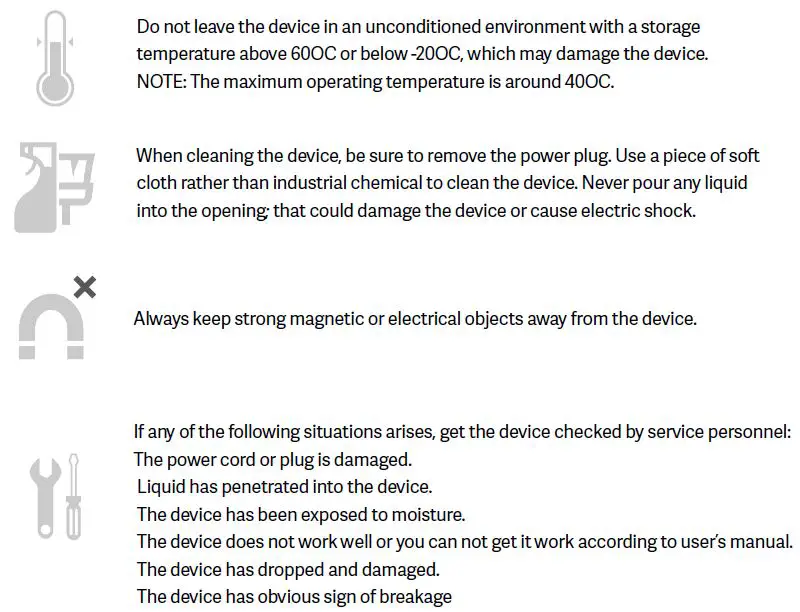
- Please place the display in a cool, dry and well ventilated place.
- Store the display in temperature range of -10°C~60°C, beyond which the display may be damaged permanently.
Power & Electrical Warnings
Warning! Overuse of screens is likely to affect eyesight.
Recommendations:
1. Take a 10-minute break for every 30 minutes of screen time.
2. Children under 2 years of age should have no screen time. For children aged 2 years and over, screen time should be limited to less than one hour per day
Do not expose the monitor to a humid environment, rain or other liquids.
Do not open the monitor housing to avoid any shock due to electrical or mechanical hazards.
Operation
• Keep the monitor out of direct sunlight or other heat sources like stoves.
• Keep the monitor away from any liquid.
• Remove any object that could fall into the ventilation holes.
• Do not block the ventilation holes to avoid overheating.
• Do not knock or drop the monitor.
CAUTION
Unplug the power cable from the outlet before cleaning the monitor.
• To clean your screen, slightly moisten a soft, clean cloth with water.
• Please use a special screen-cleaning tissue if possible.
• Do not use benzene, thinner, ammonia, abrasive cleaners or compressed air.
• Inappropriate cleaning solutions may damage the monitor or leave a milky film on screen or housing.
• Unplug the monitor if you are not going to use it for a longer time period.
• Do not expose the monitor to dust, liquids or a humid environment.
• In case the monitor gets in touch with any liquid, wipe it down immediately using a dry cloth.
• In case any liquid gets spilled into the ventilation holes, do not use the monitor anymore. Please contact a professional service technician.
Product Description
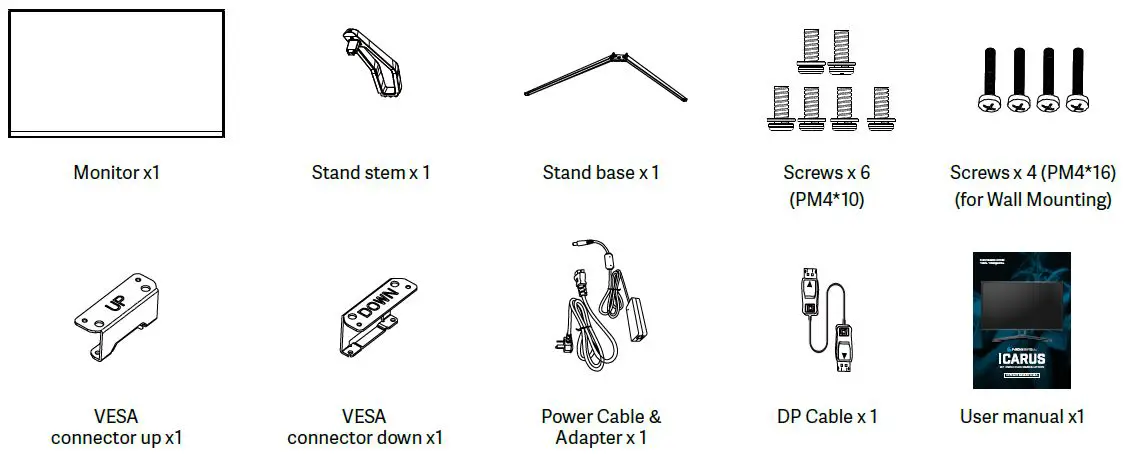
Packing list
Please check the following items in the packing case before installation:
If any of above items is missing, please contact with the dealer.
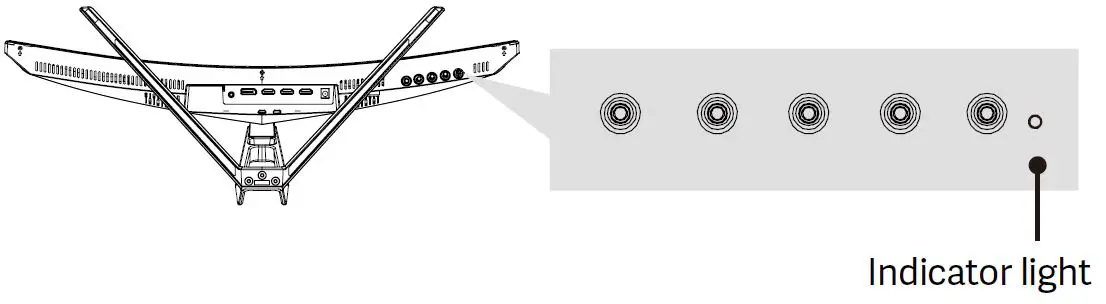
Product Overview
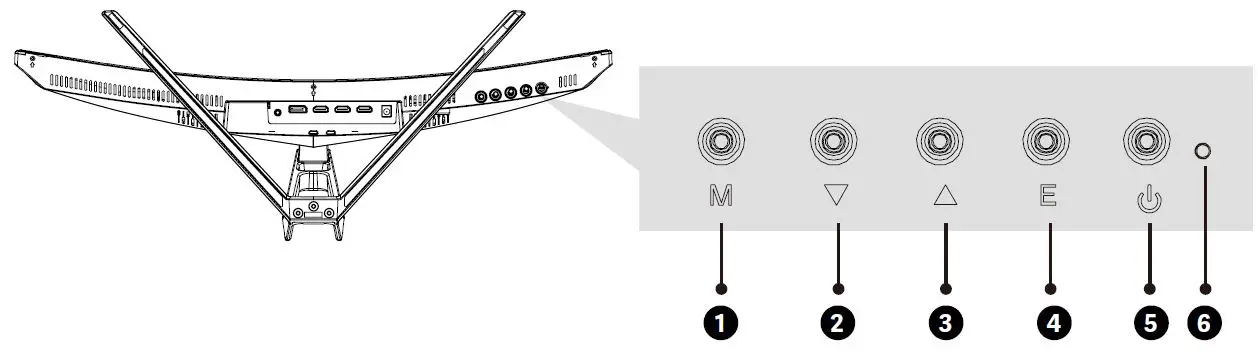
- M Menu Button Press to display the OSD menu or enter sub-menus.
- Down Button Press to move down in the menus.
- Up Button Press to move up in the menus.
- Exit Button Press to exit.
- Power Button Press to turn the monitor on/off.
- LED Indicator Changes colors to indicate status.
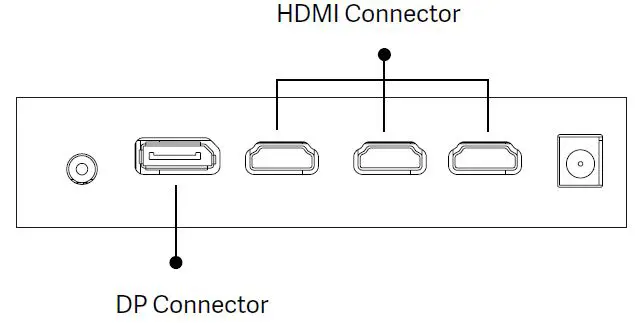
Monitor Ports
Connect the signal line to output interfaces signal of DP/HDMI signals of PC, and then connect the other end of the signal line to the corresponding signal input port of the display.

7. Audio Output Insert one end of the Audio cable into the computer’s Audio output to recevie the Audio signals from your monitor.
8. DP Connectors Insert one end of the DP cable into the computer’s DP output and connect the other end to the monitor’s DP port.
9. HDMI Connectors Insert one end of the HDMI cable into the computer’s HDMI output and connect the other end to the monitor’s HDMI port.
10. Power Connector Insert the power cable to supply power to the monitor.
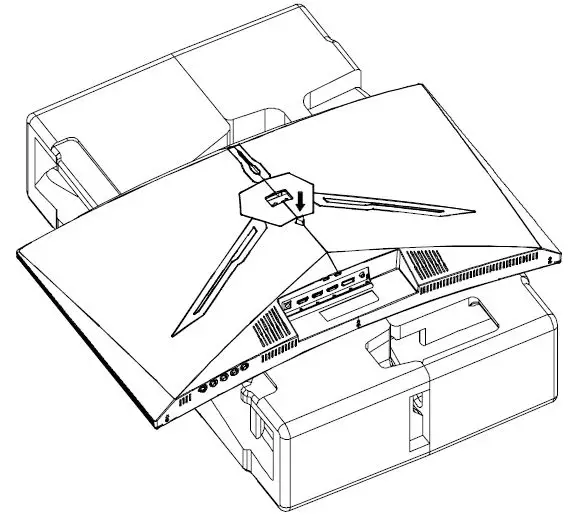
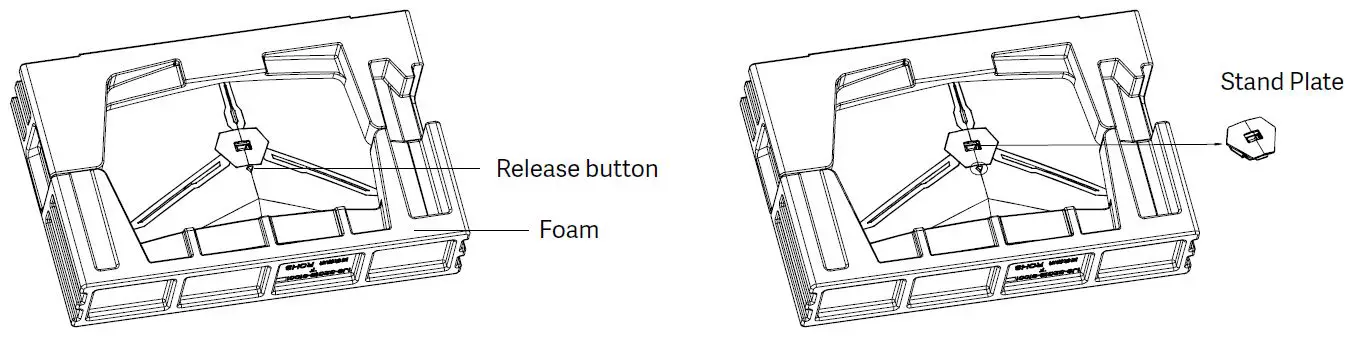
Stand Installation
Keep the foam underneath the monitor before attaching the stand.
- First open the carton, take out the foam and align it on the desktop, remove the PE bag, and place the body on the foam. press the lock down vertically with your hand to remove the hinge assembly.

- Lock the shaft assembly and the bracket with 2 PM4*10mm screws, and then lock the 3 PM4*10mm screws to the base.

- As above, vertically push the lock catch. Put stands assembly parts into slot of back cover accordingly and make them mechanically placed. Hold the middle of stand and make sure the monitor won’t drop out.

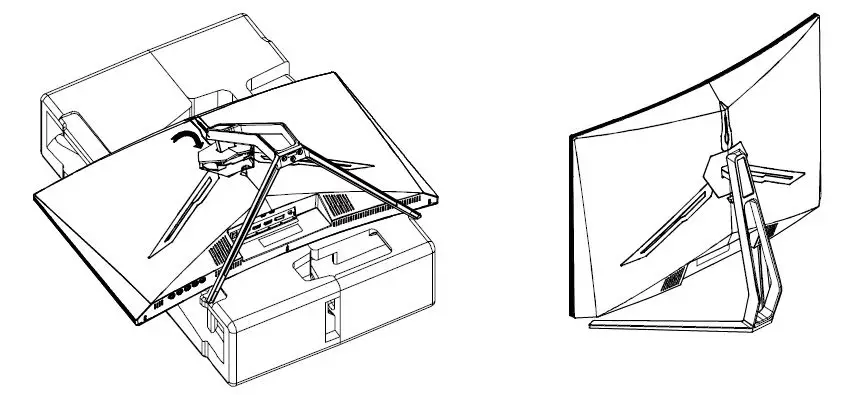
Make sure the monitor is laid on a flat surface before removing the stand.
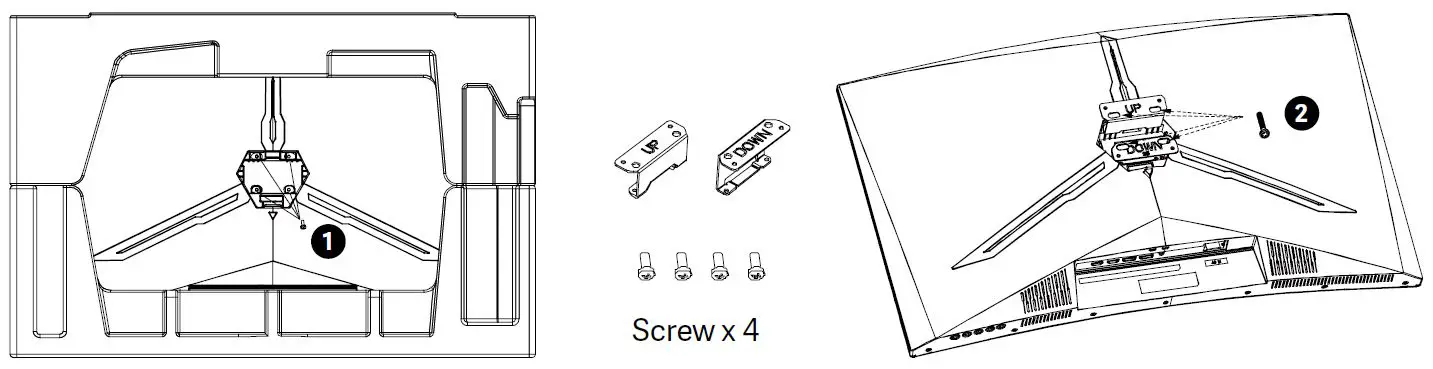
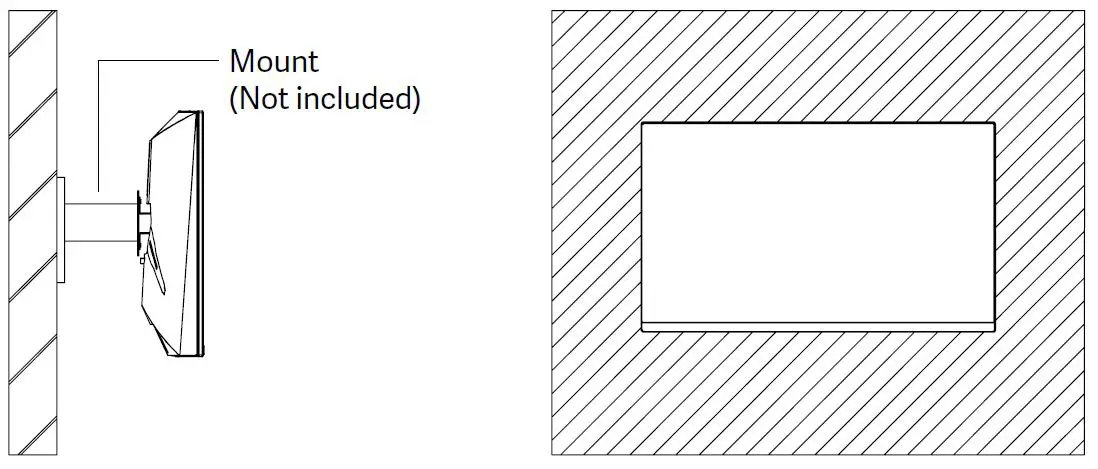
Wall Mounting
This monitor only includes screws which may be used when attaching the monitor to a VESA 75*75mm type mount. No VESA mount or mounting accessory is included.
- Open the package, take out the product with foam still attached, and gently place it on a desktop or table. Remove the extra parts and the foam covering the back of the monitor. Press the release button to remove the stand plate.If the monitor was already attached to the stand, remove the stand.

- Remove the original screws (1 ) from the opening in the back of the monitor. Then use the 4pcs PM4*16 screws to attach the adapters inside the opening.
- Do not discard the original screws.
- Use only the 4pcs PM4*16 screws (2 ) provided.You MUST follow the instructions below for secure installation.

- Your monitor is now ready to be attached to a wall-mounting bracket.
To avoid damage, please do not pinch the screen during bracket installation.
Basic Operation
- Insert one end of the DP cable into your PC’s graphics card. A HDMI cable may also be used. A HDMI cables is not included.
- Connect the other end of the cable to the corresponding connector on your monitor.
- Connect the power cable to your monitor then connect the other end to your power source. It is recommended that you use a surge protector with adequate voltage if a wall outlet cannot be reached directly.
- Press the power button to turn on the monitor.
Connectivity Options
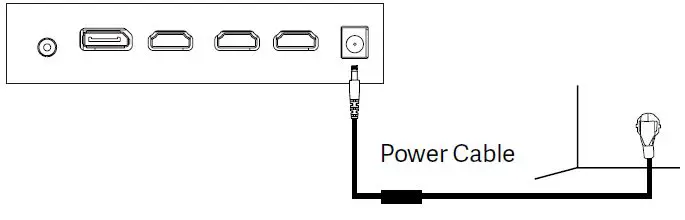
- Connecting the Power Cable
Connect the included power cable to the power connector, and then plug the other end into an wall outlet.
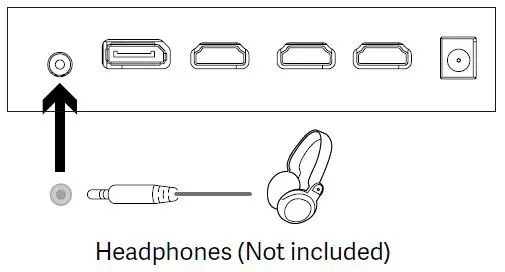
- Connecting Your Earphones
Plug in your earphones to receive audio signals from your monitor. If your earphones are connected to the monitor and audio devices are connected to your computer at the same time, the audio devices will not produce sound. Earphones and other audio devices are not included.
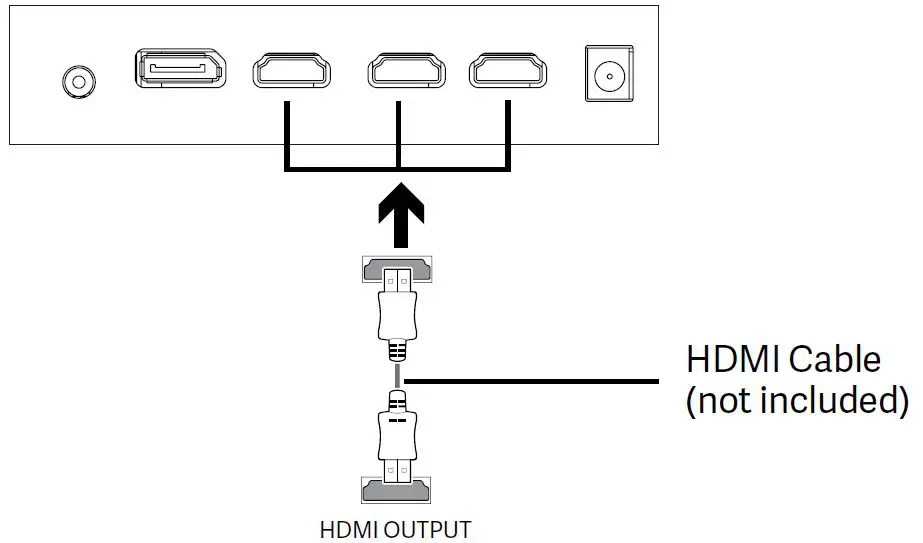
- HDMI Connectivity
In order for the monitor to receive HDMI signals from the comptuer, use the HDMI cable to connect the monitor to the computer.
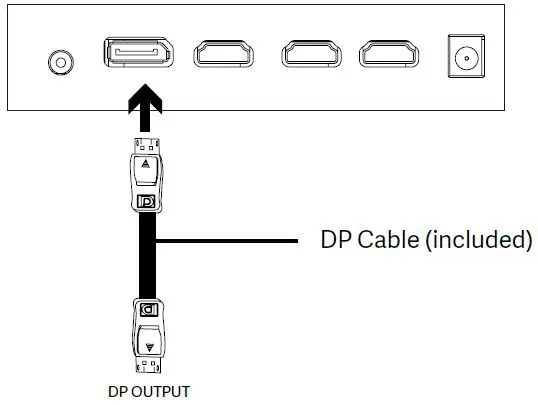
- DP Connectivity
In order for the monitor to receive DP signals from the computer, use the DP cable to connect the monitor to the computer.
Indicator Lights
Solid blue light indicates power is on and the monitor is operating normally. Flashing blue light indicates no video source ,no horizontal or vertical signal has been detectde or voltage is low. Please ensure your computer is on and all video cables are fully inserted and/or connected.
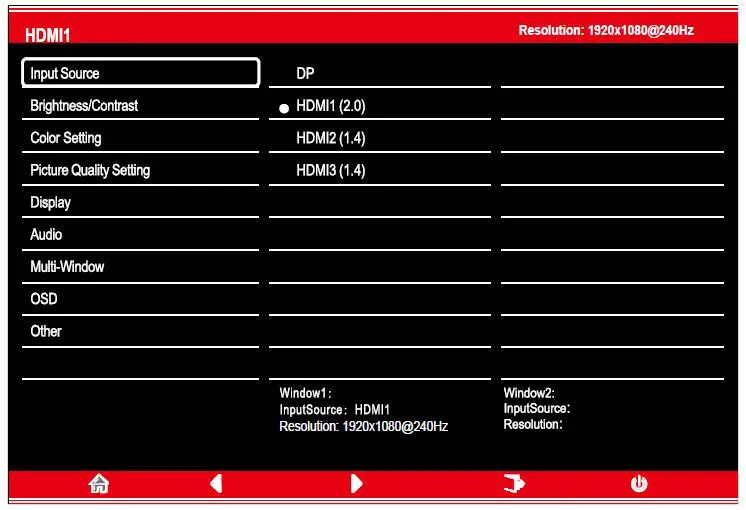
The On-Screen Display (OSD) Menu may be used to adjust your monitor’s settings and appears on screen after turning on the monitor and pressing the M button.
When using the monitor for the first time, settings will automatically adjust to optimal settings according to your computer’s configuration and parts etc.
- Press one of the buttons (M, , , E, ) to activate the navigation window.

- Press M to enter the OSD screen.
- Press down or up botton to browse functions.
- Highlight the desired function, then press M to enter the sub-menu.
- Press or to browse sub-menus, then press M to highlight the desired function.
- Press or to highlight an option, then press M to confirm the settings and exit the current screen.

- Press E to exit the current screen.

| Main Menu | Sub-Menu | Options | Description |
|
Input Source | HDMI1 (2.0); HDMI2 (1.4); HDMI 3 (1.4) | NONE | Switch to HDMI signal input |
| DP | NONE | Switch to DP signal input | |
|
Brightness/ Contrast | Brightness | 0~100 | Adjust display brightness |
| Blacklevel | 0~100 | Adjust display black level | |
| Contrast | 0~100 | Adjust display contrast | |
| DCR | On | Turn on DCR function | |
| Off | Turn off DCR function | ||
|
Color Setting |
Gamma | Gamma 1.8 |
Set Gamma add-in |
| Gamma 2.0 | |||
| Gamma 2.2 | |||
| Gamma 2.4 | |||
| Gamma 2.6 | |||
| Picture Mode | Standard, Photo, Movie, Game, FPS, RTS | Set visual mode according to activity | |
| Color Temperature | Warm, Cool, User | Select color temperature | |
| Low blue light | 0~100 | Set blue light filtering level | |
| Hue | 0~100 | Adjust hue levels | |
| Saturation | 0~100 | Adjust Saturation levels | |
| Picture Quality Setting | Sharpness | 0~100 | Set display sharpness |
| Response Time | Off,High,Middle,Low | Turn On/Off the response time of the monitor | |
| Noise Reduction | Off,High,Middle,Low | Reduce the interference of image noise caused by signal source interference | |
| Super Resolution | Off,High,Middle,Low | When the resolution of the display screen is low, this function can be turned on to enhance the image resolution | |
| Dynamic Luminous control | On,Off | Compensate for gray scale display screen and strengthen the expression of gray scale | |
| MPRT | On,Off | Turn On/Off the MPRT | |
| Display | Aspect Ratio | Wide Screen, 4:3, Auto | Select on-screen aspect ratio |
| LedMode | Normal, Flicker, Off | Select LED modes / turn LEDs on/off |
| Main Menu | Sub-Menu | Options | Description |
| Audio | Mute | On, Off | Turn mute mode on / off |
| Volume | 0-100 | Adjust audio volume | |
| Audio Source | DP1, HDMI1 (2.0), HDMI2 (1.4), HDMI 3(1.4), AutoSource | Select audio signal input via HDMI or DP | |
| Multi-Window | Multi-Window | Off, PIP Mode, PBP 2Win | Select PIP/PBP modes according to the number of input signals etc. |
| Sub Win2 Input | DP, HDMI1, HDMI2, HDMI3 | Select according to input signal for PIP/ PBP mode | |
| PIP Size | Small, Medium, Large | Adjust the PIP/PBP window size | |
| PIP Position | Top Right, Top Left, Bottom Right, Bottom Left | Adjust the PIP/PBP window position | |
| Swap | NONE | Swap the PIP/PBP signal sources | |
| OSD | Language | English, 簡体中文 , 한국 어 ,Pycck i, E panol, 日本語, Francais, Deutsch | Set OSD Language |
| OSD H-Position | 0-100 | Adjust the OSD’s horizontal position | |
| OSD V-Position | 0-100 | Adjust the OSD’s vertical position | |
| OSD Transparency | 0-100 | Adjust OSD’s overall transparency | |
| OSD Time Out | 5-100 | Set how long the OSD remains open after non- use | |
| OSD Rotation | Normal, 90 ,180 ,270 | When the user flips the display, this function can also flip the OSD to achieve the best display angle | |
| Other | DP Version | DP1.2, DP 1.1 | |
| Adaptive-Sync | On,Off | Turn the FreeSync function on/off | |
| Reset | None | Reset monitor configurations |
ECO Modes and Gameplus Switching
- Press any one of the buttons (M, E, ) to activate the navigation window.
- Press button to switch Gameplus modes. According to the needs of your game, choose the corresponding game icon. These game icons are primarily designed to optimize your aim during shooting
games, though they can be used for other scenarios.
- Press button to switch ECO modes. These modes include Standard, Text, Movie, Game, FPS, and RTS and can be used to optimize settings according to your activity. Standard mode is suitable for most activities.


Technical Specifications of Product
| Model | NS-ICARUS-IC27F2-V2Z |
| Screen Size | 27″ |
| Aspect Rstio | 16:9 |
| Curvature | R1500 |
| Brightness | 300nits(Typ), 250nits(Min) |
| Panel | VA |
| Resolution | DP1.2: 1920*1080@240Hz, HDMI2.0: 1920*1080@240Hz, HDMI1.4: 1920*1080@120Hz |
| Refresh Rate | 240Hz |
| Response Time | 1Ms MPRT |
| Viewing Angle | ≥178°(H)°/ ≥178°(V)° |
| Contrast Ratio | 4000:1 |
| VESA Mounting | 75*75mm |
| Colours | 16.7M |
| Adaptive-Sync | Yes |
| Signal Input | DP 1.2*1, HDMI 1.4*2, HDMI 2.0*1 |
| Audio | |
| Speakers | NO |
| Audio Out | Yes |
| Accessories | |
| Power | DC 12V 4.0A |
| Power Adaptor | Yes |
| DisplayPort Cable | Yes |
| Additional Functions | |
| Low Blue Light | Yes |
| Flicker Free | Yes |
| Physical Dimensions | |
| Dimensions (w/ Stand) | 616.2 x 445.7 x 237.4mm |
| Dimensions (w/o Stand) | 616.2 x 367.2 x 100.7mm |
| Net Weight | 4.96Kg |
| Gross Weight | 6.20Kg |


