U King ZQ02061 Mini Gobo Moving Head Light User Manual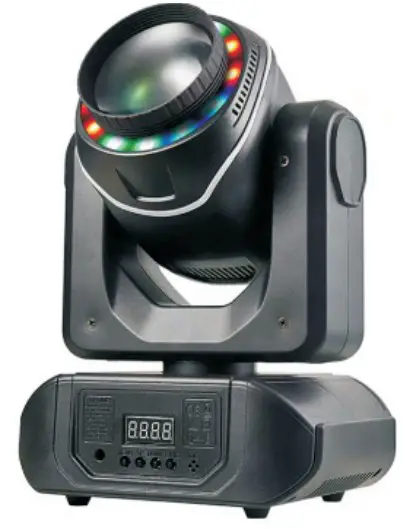
![]() CAUTION! Keep this device away from rain and moisture!
CAUTION! Keep this device away from rain and moisture!
Please read the instructions carefully before use
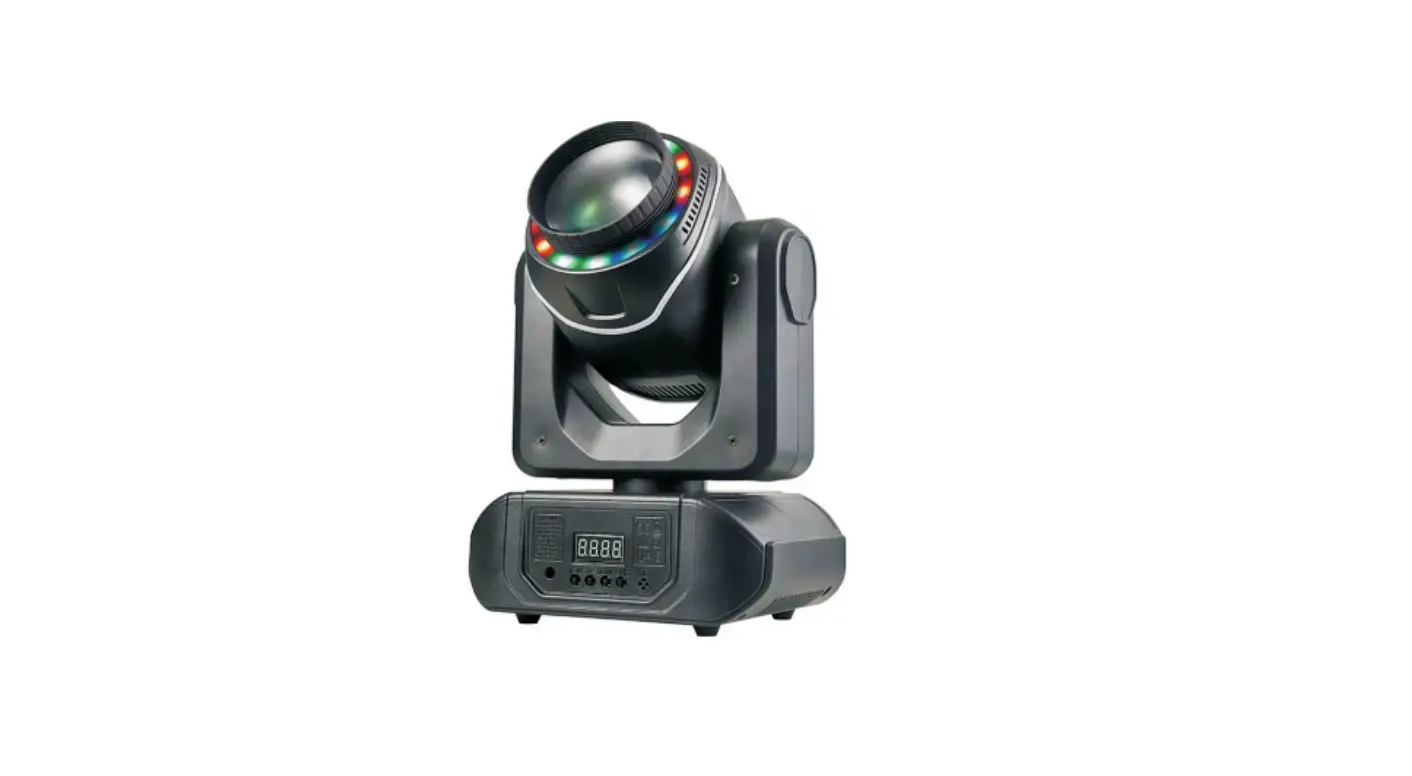
Thank you for using our gobo moving head light Note:This manual contains important information Installation and operation according per manual Please keep this manual properly Start-up steps for the various modes
- Auto model
Press MENU to find SLnd,and press ENTER twice to start the player After starting the automatic play program, press up key to fine shnd, press ENTER key Then press up key or down key to select sh0-3,and then press Enter key to switch the program play effect. - Sound mode
Press Menu to find Sound, then press Enter, and then press up or down to find On and Enter to start Voice Mayer. Note: The speech player must he closed before other players can be started - Master From Machine mode
Set the host to”Auto Mode”or”Voice Mode”in the same steps as 1 or 2 The slave is set to “A001”, operating steps “ENTER” key - Control model
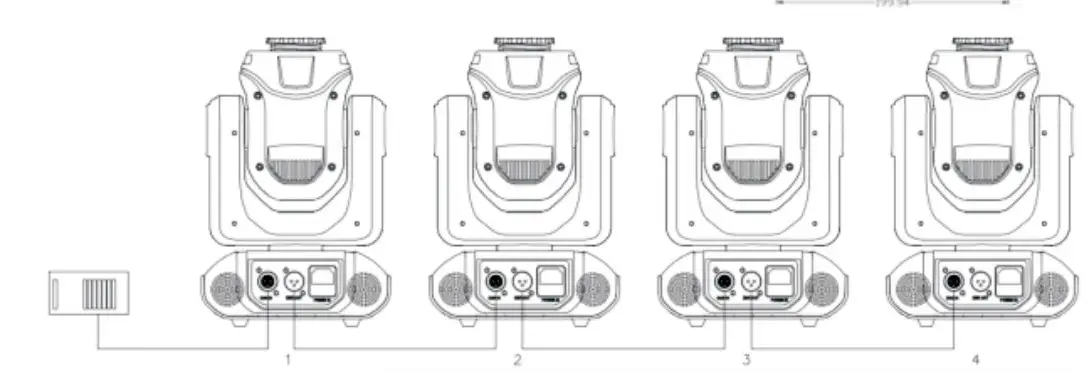
Press the “MENU” button to find “Addr”, then press the “ENTER” button and then press the “UP” or “DOWN” button Find the same “DMX” address, press the “MENU” button, note the DMX192 DMX240 controller, etc.)The DMX address code is general; set to the 16 decimal system, that is, add 16 to the address value of the previous one. For example: The address code of luminaire #1 is “d001”.The 2 light address code is 1 + 16 = 17, i.e.the “d017” No. 3 fight address code is “d033”) Signal connection: connect the controler DMX output to the DMX input of lamp 1 with signal line, and connect the DMX output of lamp 1 to the DMX input of lamp 2 to connect No.4, lio.5
Technical parameters
- Voltage AV100-240V 50/60HZ
- fuse;
Light source: high-power LED beads 1 PCS; 5050 three-in-one LED beads 12PCS - Channel: 12/14 channels; control mode: DMX512, self-propelled, voice control, master-slave
- 10 gobos + 8 colors + 18 prisms + seven colors + RGB LED strip effect; manual focus
- X:540` Y:270″
- NG 3.2k9
- Internal box size 35*26*23CM
Packing instructions
“When you receive the device, open the packaging and check that the contents are complete and intact.lf not, please notify the carrier immediately and keep the packaging. If damage is indicated, keep the packaging and all Packing materials for safe transport to the equipment ”
- 1 light
- 1 power cord
- 1 manual
- 1 bow mount
- 2 hex screws
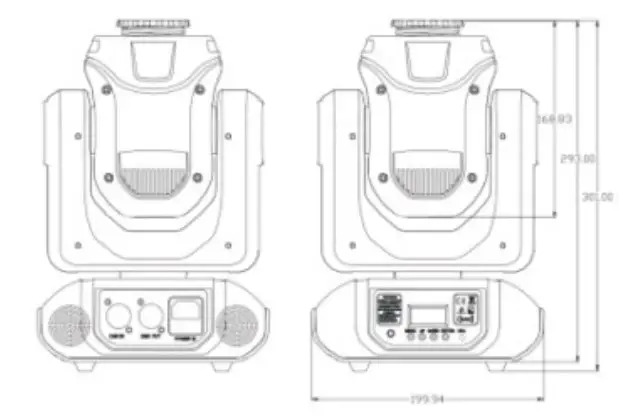
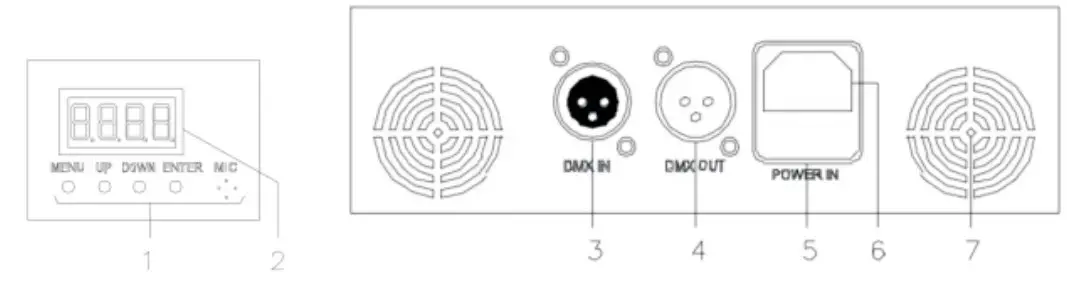
- Control button MENU- UP DOWN ENTER)
- Display
- DMX In
- DMX Out
- Power interface
- Fuse
- Fan heat dissipation
Safety instructions and operating instructions After the power is connected, the display shows “rst”, the wiggling headlamp is set to detect, does not work, and then connects “dmx out” to “dmx in” of the next light and in turn to the “dmx in” of the last light
Safety measures
- The floor operated seat must be used.
- To avoid fire or electric shock, do not expose the device to rain or moisture, and make sure there are no flammable objects during operation.
- Install the device in a wet-ventilated place at least 50cm away from any surface to ensure that the ventilation duct is not blocked.
- Disconnect the device from the power supply before carrying out any work or maintenance
- The ambient temperature should not exceed 40 C, and the maximum ambient temperature is 45 C. Do not operate the device at a higher temperature.
- In case of breakdown, do not repair the device by yourself, because you should stop using the device immediately. Improper maintenance can lead to damage and failure. Please contact Technical Support for approval. For repairs or replacements, use only the same accessories as the original parts to ensure that the power cord does not become blacked or damaged.
- Lights and lanterns for decorative purposes only, not suitable for ordinary household lighting.
- Spare fuse: Disconnect the device from the power supply and remove the fuse seat with a screwdriver. Remove the blown fuse, replace the same features and connect the device to the power supply.
- Warning: If the fuse stil burns after replacing it, stop using it. See below for further instructions. Please contact customer service, continued use may cause serious damage.
- Fix the device to the bracket with screw holes to ensure that the device is securely fixed to prevent vibration and movement during operation, and start to check whether the structure of the supporting device is strong enough to at least 10 times the weight of the device, please read this manual carefuly before operating this product
- product scrap; This sign indicates that the product must not be thrown in our household waste.To protect the environment and human health, waste is recycled in a responsible manner to support the sustainable reuse of resources. For information on recycling used devices, go to Device manual collection point or contact the retailer where you purchased the product who arranges for the ecological recycling of the product
Description Of The Mounting Bracket Steps
Shows the bow mount Add the screws to fix it after installation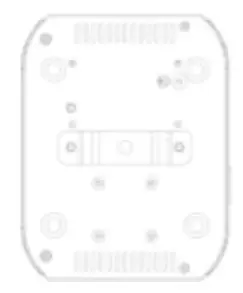
Displays the hook mount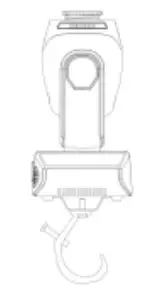
Make sure your mount is installed correctly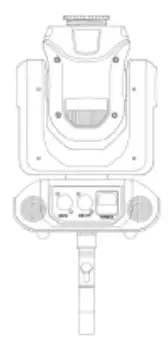
Confirm your mount is successfuly instated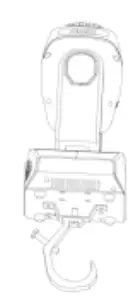
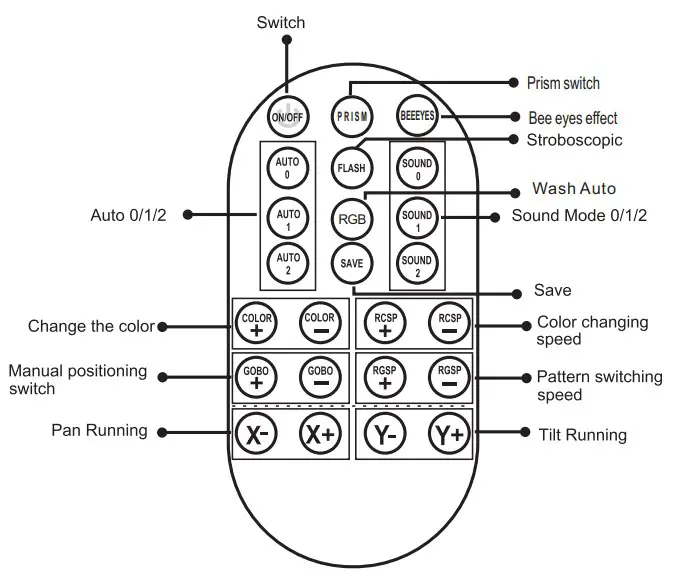
- ON/OFF : Lights on/off
- FLASH : Strobe light (valid in custom mode)
- SAVE :Save
- AUTO 0,1,2:Auto Effect 0, 1, 2
- Sound 0,1,2:Sound Control 0,1,2;
- X+: X-axis position plus/manual positioning switch
- X-: X-axis position minus
- Y+: Y-axis position plus
- Y-: Y-axis position minus
- Color+: Choose a colour in the positive direction
- Color-: Choose a colour in the opposite direction
- RCSP+: Automatic colour wheel change interval+
- RCSP-: Automatic colour wheel change interval-
- GOBO+: Positive selection mode
- GOBO- : Reverse selection mode
- RGSP+: Automatic switching interval+
- RGSP-: Automatic switching interval-
- RGB: Farbe selbstfahrend
- PRISM:Prism effect switch
- RAINBOW: Rainbow effect switch
Function Instruction
| dr | A001-A512 | 512 Address Set |
| SLnd | Auto | Auto Mode |
| SL 1 | DMX512 Mode | |
| SL 2 | Slave Mode | |
| CHnd | 14CH | 14 Channel Set |
| 12CH | 12 Channel Set | |
| SHnd | SH 0 | Effect0(Recommend) |
| SH 1 | Effect1 | |
| SH 2 | Effect2 | |
| SH 3 | Effect3 | |
| Soud | on | Open the sound control mode |
| oFF | Close the sound control mode | |
| SEnS | 0-99 | Adjust the sensitivity of sound |
| LEd | oFF | Close the screen after 5 seconds |
| on | Screen open all the time | |
| dISP | no | Display reverse |
| YES | Display forward | |
| rPN | no | X dynamo corotation |
| YES | X dynamo reverse rotation | |
| rTiL | no | Y dynamo corotation |
| YES | Y dynamo reverse rotation | |
| REST | YES | System Reset |
| Ir | Iron | Remote control Open |
| IroF | Remote control Close |
Channel List
| Function | Description | 12ch | 14ch |
| Horizontal Operation | 0-255 | 1 | 1 |
| Horizontal Fine-tuning | 0-255 | 2 | |
| Vertical Running | 0-255 | 2 | 3 |
| Vertical Fine-tuning | 0-255 | 4 | |
| Horizontal Vertical Speed | 0-255 | 3 | 5 |
| Dimming | 0-255 | 4 | 6 |
| Strobe | 0-255 | 5 | 7 |
| Colour | 0-127 Select color 128-255 Auto color change from slow to fast | 6 | 8 |
| Pattern | 0-159 Select pattern 160-255 Auto pattern change from slow to fast | 7 | 9 |
| Prism Motor Operation | 0-99 Off 100-127 Open 128-255 Fast to slow prism rotation | 8 | 10 |
| 7-color Effect | 0-127 Off 128-255 Open | 9 | 11 |
| Self-walking Mode | 0-59 Others 60-75 Auto1 ;76-90Auto2 91-105 Auto3 ;106-120 Auto4 121-135 Auto5 ;136-159 Auto6 | 10 | 12 |
| Voice-activated Mode | 160-175 Sound 1 ;176-190 Sound 2 191-205 Sound 3 ;206-220 Sound 4 221-235 Sound 5 ;236-255 Sound 6 | ||
| Reset | 250-255(5 seconds) | 11 | 13 |
| Strip Effect | 5-255 Strip Effect | 12 | 14 |


