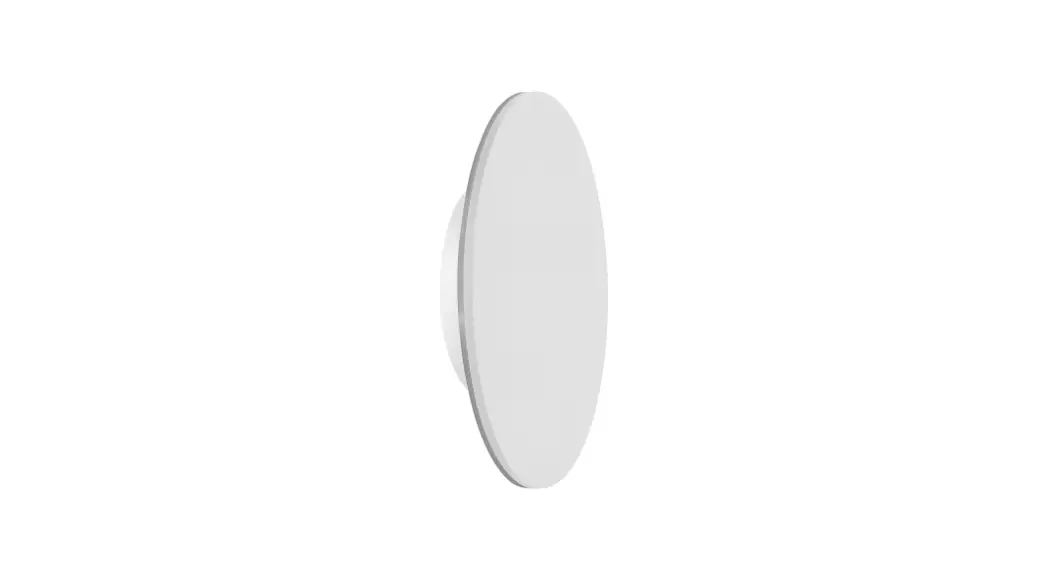
![]() Halo Wall Light Installation Instructions
Halo Wall Light Installation Instructions
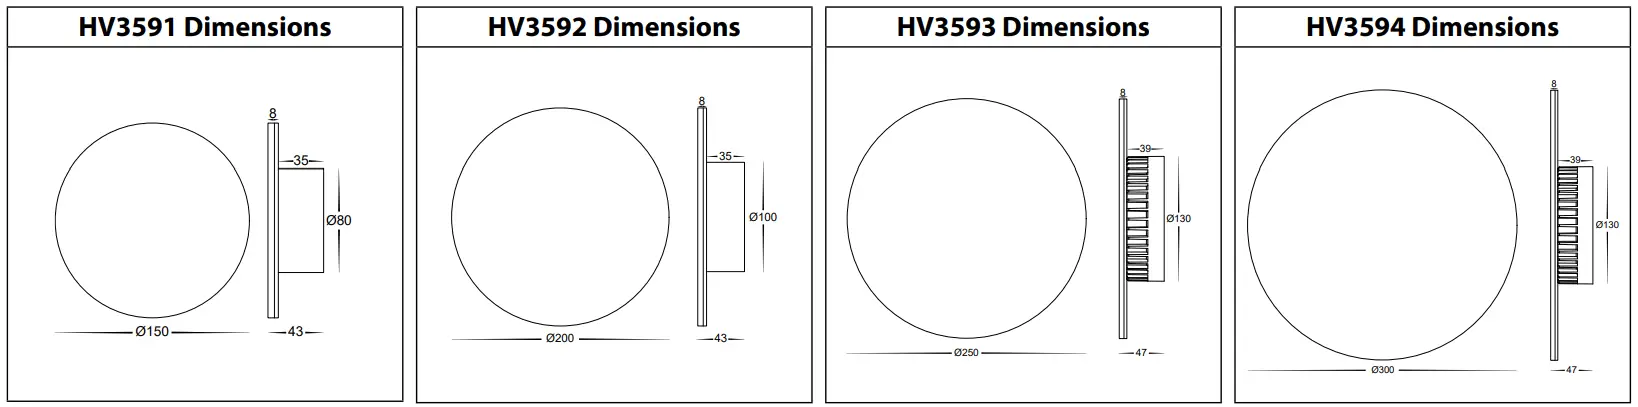
| Product Specifications | ||||||||
| Model No. | HV3591 RGBW-BLK | HV3591 RGBW-WHO | HV3592RGBW-BLK | HV3592RGBW-WHT | HV3593RGBW-BLK | HV3593RGBW-WHT | HV3594RGBW-BLK | HV3594RGBW-WHT |
| Name | Halo | |||||||
| Material | Aluminium | |||||||
| Colour | Black | White | Black | White | Black | White | Black | White |
| IP Rating | IP65 | |||||||
| Input Voltage | 12v DC | |||||||
| Protection Class | 3 (Low Voltage) | |||||||
| Lamp Base | Built-in LED | |||||||
| Lamp Wattage | 1 x 7w | 1x12w | 1x18w | 1x24w | ||||
| Colour Temp | RGBW (Red, Green, Blue + 3000k) | |||||||
| Lumens | 2501m (3000k) | 3001m (3000k) | 3501m (3000k) | 4001m (3000k) | ||||
| CRI | > 80 | |||||||
| Wiring | Parallel | |||||||
| Dimmable | Yes | |||||||
| Warranty | 3 Years Replacement* | |||||||
Important Safety Issues:
- This product must be installed by a qualified electrician according to AS/NZS 3000.
- Ensure all electrical mains are disconnected before any installation.
- Modification of this product will void any warranty.
- Havit Lighting does not take responsibility for wrong installation, incorrect use, or use of installation material that does not belong to the system.
- Aluminum and 304SS fittings must not be installed within 5km of any saltwater environments.
- All o-rings and seals must be in place correctly to maintain warranty
- This form may be updated at any time due to product improvements, please check the online installation form for the most current version.
Steps for Installation:
- Make sure that the electrical circuit is free of voltage (master switch off )
- Loosen Allen screws on side of the fitting
- Remove base plate from fitting
- Install base plate to the wall in the desired location using appropriate screws for application.
- Seal all holes including cable entry hole and mounting screws.
- Use an appropriate 12v DC LED Driver – DO NOT CONNECT LIGHT FITTING DIRECT TO 240V
- Connect the cable, Connect life then neutral wires.
- Reattach fitting to base plate making sure Allen screws are tight to avoid water penetration
- Apply silicon around the edge of the base to prevent any water from getting inside to electrical connections.
- See APP Installation Instructions for connection to tablet or smartphone.
- All connections must be carried out carefully, inspect all contacts before switching back on the electric circuit.
Steps for Connection to Smartphone or Tablet:
- Download EASYLIGHTING App from APP Store or Scan QR Code
- Change WIFI to Easylighting
- Open APP on Smartphone or Tablet
- Use a direct connection with WIFI Controller
- Press Learn button on receiver
- Press Wheel on APP
- Light will flash when pairing is Successful.
 http://download.appglobalmarket.com/happylightingdownload.html
Steps for Connection to Home Network:
- Connect Controller to the home network
- Press I got it and then Yes
- Select WIFI you wish to connect to.
- Enter Password
- Close APP and Reopen
- Controller will now be connected to Home Network
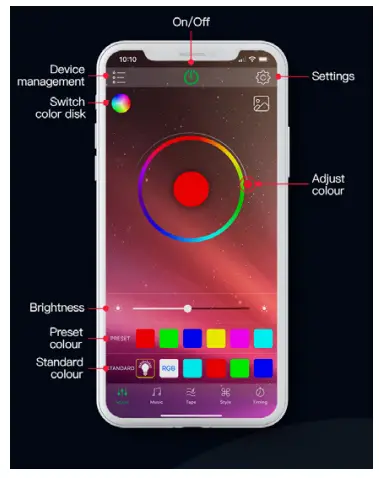
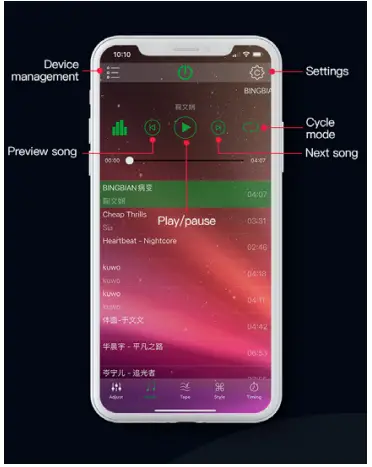
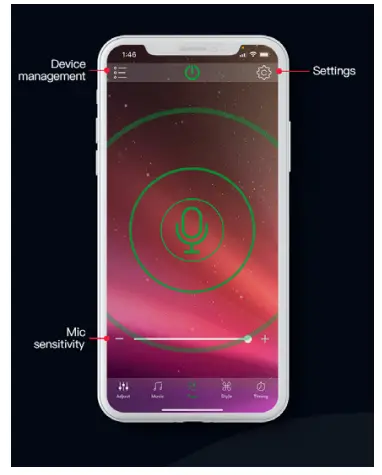
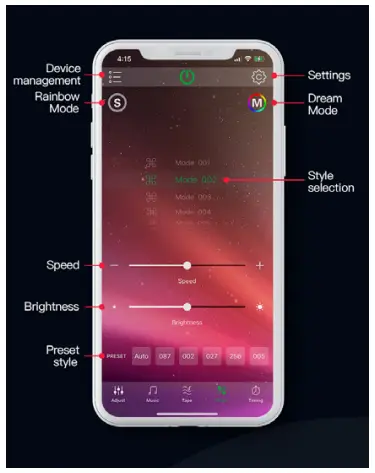
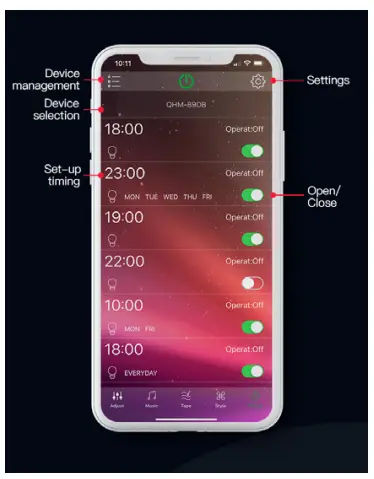
Controls for Smartphone or Tablet:
| Main User Interface to adjust colors and brightness | Music Play music and Fitting will change with the beat | Tape Change colours using the microphone |
 |  |  |
| Saved Modes Change Colour with saved modes | Saved Modes Change Colour with saved modes | Shake Shake phone to change colours |
 |  | 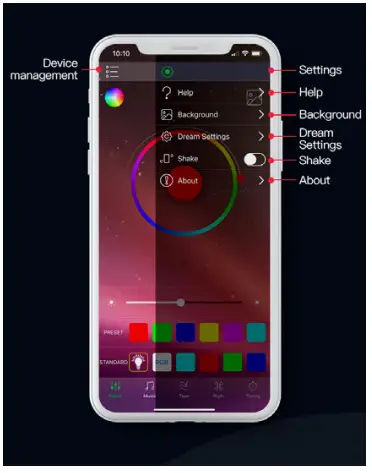 |
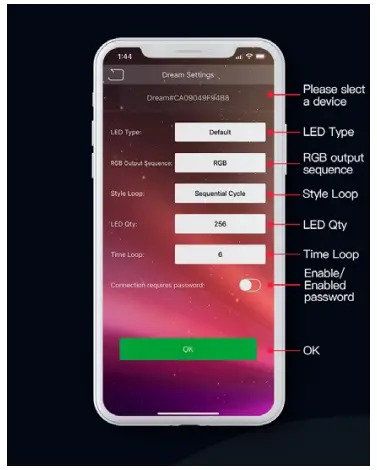
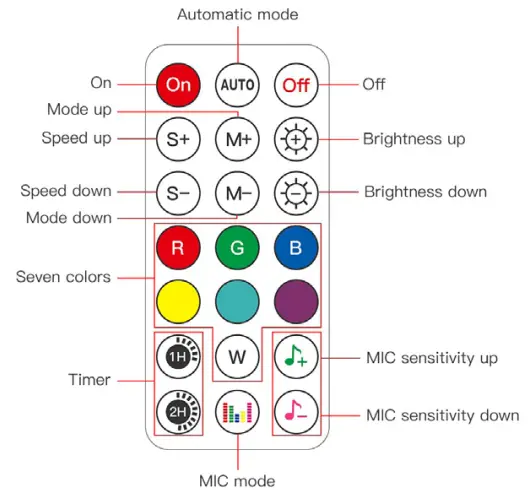
| Dream Setting When dream mode is active, LED The strip can be set to individual settings | Remote Remote control settings |
 |  |
Must be installed by a licensed electrician
Contact Details:
143 Beauchamp Road Tel: 02 9381 8300
Matraville NSW 2036 Fax: 02 9666 8881
Australia Email: [email protected]
Web: www.havit.com.au
Warranty Terms & Conditions* https://havit.com.au/pages/warranty-terms-and-conditions
Additional Information https://havit.com.au/


