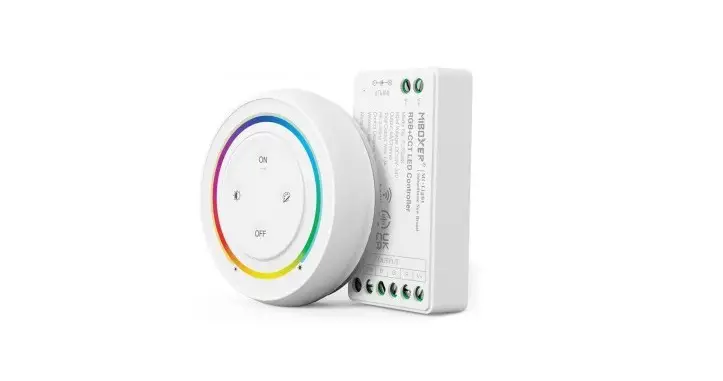
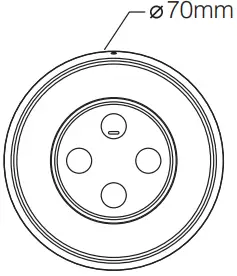
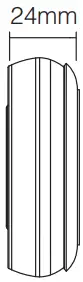
MIBOXER FUT039SA RGB+CCT LED Controller Kits User Manual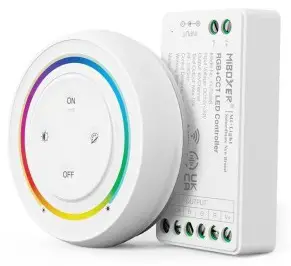
Introduction
Controller adopt the widely used 2.4G wireless technology with the features of low power consumption, long signal transmitting and strong anti-interference, etc. Controller has auto-transmitting and auto-synchronizing function. Widely used on the controlling of hotel lighting and home lighting.

brightness, saturation, color temperature, RGB use together. (It turns to adjust brightness by default if remote is not operated for 3 seconds)
Parameters
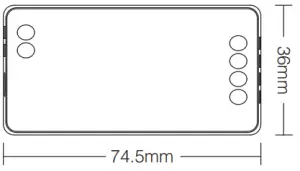
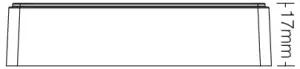
- LED Controller
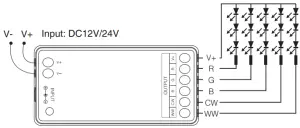
Working Voltage: DC12V~24V
Output: 6A/Channel
Total Output: Max 12A
RF: 2.4GHz
Control Distance: 30m
Working Temperature: -10~40°C
Output Connection: Common anode- 6 Millions of colors to choose

- Color temperature adjustable
- Dim brightness / saturation
- 2.4G RF wireless transmission technology
- 6 Millions of colors to choose
- Rainbow Remote
Working Voltage: 3V(AAA*2PCS)
Transmitting Power: 6dBm
Standby Power: 20uA
RF: 2.4GHz
Modulation Method: GFSK- Remote control Control distance 30m
- Smartphone App control (2.4GHz gateway is needed)
- Support third party voice control (2.4GHz gateway is needed)
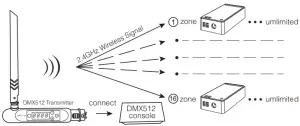
- DMX512 controllable (DMX512 LED transmitter is needed)

- Remote control Control distance 30m


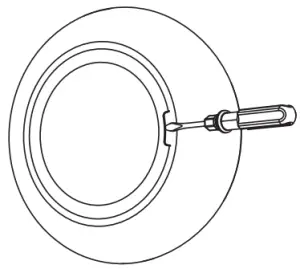
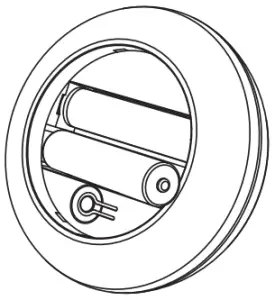
Install The Battery For Remote
Note: 2*AAA Battery need to buy separately.
- Open battery cover behind remote.

- Install battery correctly and close battery cover.

Remote Instruction
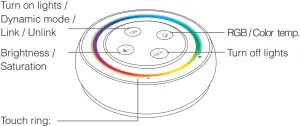
- Adjust RGB
Short press key twice in succession, and then touch
  to adjust RGB.
 - Adjust color temperature
Short press key once, then touch to adjust color temp. - Adjust saturation
Press key twice in succession, and then touch to adjust color saturation of lighting. - Adjust brightness
Short press key once, then touch to adjust brightness. - Dynamic mode switching
Long press key until indicator light flashes twice, then
short press key to cycle switch.
(Note: it will exit automatically if no operation after 3 seconds).
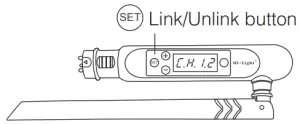
Linking Code / Unlinking Code Instructions
Attention: No need to match code since its already matched code in factory setting.
Linking Code Instructions
- Switch off controller, after 10 seconds then switch on again.

- Short press “ON” button 3 times within 3 seconds when light on.

- Lights blink 3 times slowly means linking is done successfully.


![]() Linking failed if light is not blinking slowly, Please follow above steps again.(Note: controller that have linked can’t link again)
Linking failed if light is not blinking slowly, Please follow above steps again.(Note: controller that have linked can’t link again)
Unlinking Code Instructions
- Switch off controller, after 10 seconds then switch on again.
- Short press “ON” button 5 times within 3 seconds when light on.
- Lights blink 10 times quickly means unlinking is done successfully.
![]() Unlinking failed if light is not blinking quickly, Please follow above steps again.(Note: controller haven’t linked that don’t need to unlink)
Unlinking failed if light is not blinking quickly, Please follow above steps again.(Note: controller haven’t linked that don’t need to unlink)
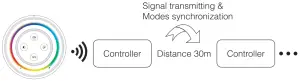
Signal transmitting
One controller can transmit the signals from the remote control to another controller within 30m, as long as there is a controller within 30m, the remote control distance can be limitless.
Modes synchronization
Different controllers can work synchronously when they are started at different times, controlled by the same remote, under same dynamic mode and within 30m distance.
PWM high frequency / low frequency switching
Switch to high frequency (8KHz): on the condition of turning on the light
- Short press the “OFF” button of the remote control once;
- Short press the “ON” button 5 times within 3 seconds, the white light blink 2 times quickly, indicating successfully.
Switch to low frequency (500Hz): on the condition of turning off the light
- Short press the “ON” button of the remote control once;
- Short press the “OFF” button 5 times within 3 seconds, the white light blink 2 times slowly, indicating successfully.
Dynamic mode table
Number | Dynamic Mode | Brightness / Saturation |
1 | Mardi Gras | Adjustable |
2 | Automatic color change | |
3 | Sam | |
4 | Gemstone | |
5 | Twilight | |
6 | American | |
7 | Fat Tuesday | |
8 | Party | |
9 | Slow Color Splash |
Attention
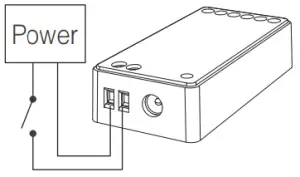
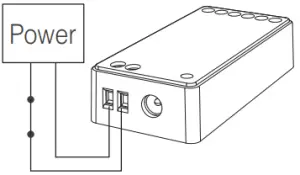
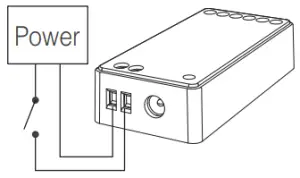
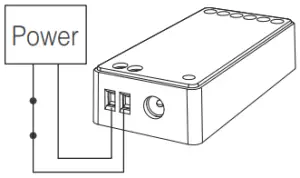
- Please check whether the voltage of the power supply is in accordance with the controller, and please check the connection of both the cathode and anode, otherwise the controller will be broken.
- Please don’t connect wires with power on. Please turn on again only when it is in right connection and no short circuit.
- Please do not use the controller in the place with widely range metal area or strong electromagnetic wave nearby, otherwise, the remote distance will be seriously affected .
Controller can not use in humid area
Compatible with DMX512 LED Transmitter (Purchase separately)
Linking Code / Unlinking Code
- Choose the zone for the controller by pressing ‘ + ’ or ‘ – ’ (e.g. ‘CH12’ means zone 12)


Link Code
- Switch off controller, after 10 seconds then switch on again
- hort press ”
 ” button 3 times within 3 seconds when light on.
 - Lights blink 3 times slowly means linking is done successfully.
Unlinking Code
- Switch off controller, after 10 seconds then switch on again.
- Short press ” ” button 3 times within 3 seconds when light on.
- Lights blink 3 times slowly means linking is done successfully.
![]() If the link or unlink failed, please follow the above steps again. (Note: controller that have linked can’t link again, controller haven’t linked that don’t need to unlink).
If the link or unlink failed, please follow the above steps again. (Note: controller that have linked can’t link again, controller haven’t linked that don’t need to unlink).