Cell2 SL209 Exterior Scene Light

SL209 Exterior Scene Light Manual
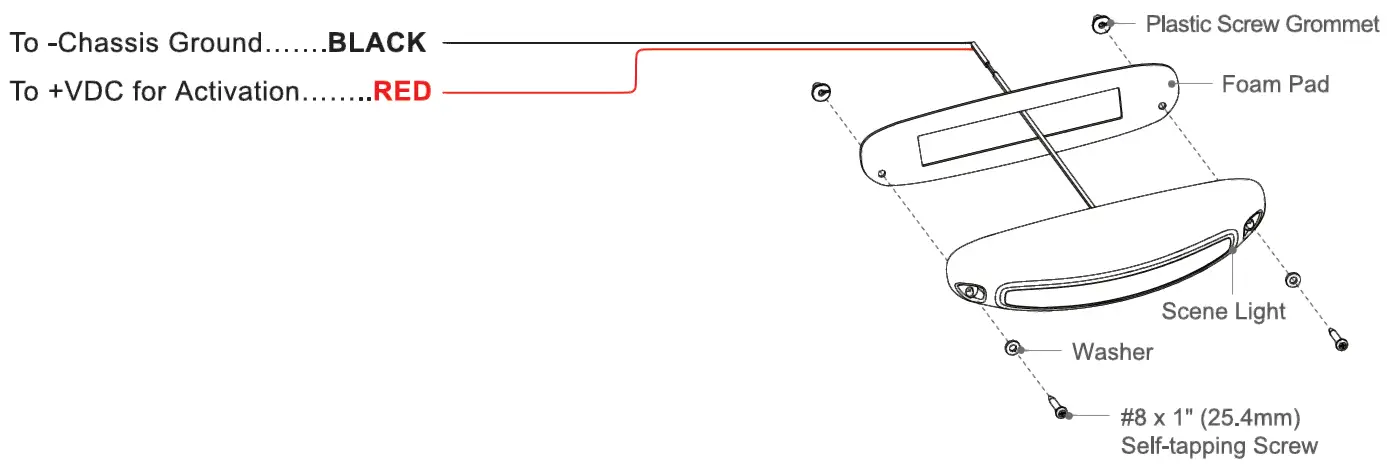
WIRING:
INSTALLATION
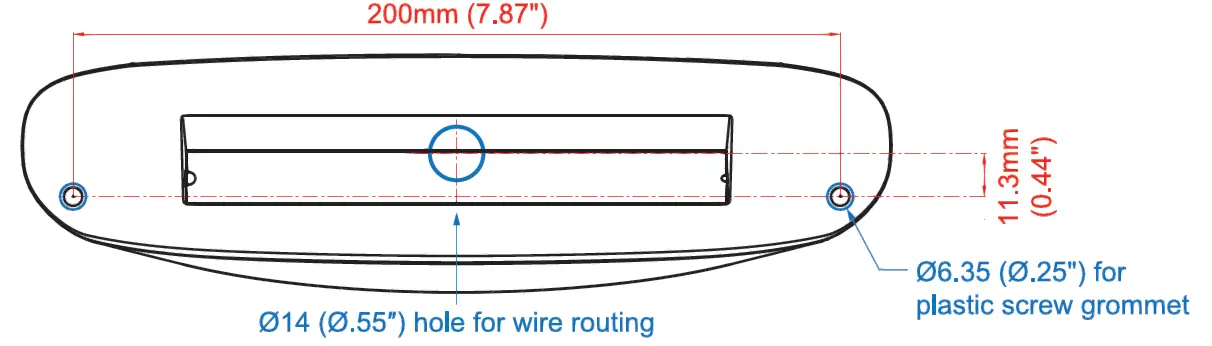
- Place the foam pad onto the desired mounting surface and mark the location for the two mounting screws and the wire routing hole location between the two screw holes
Note: Please refer to the illustration below to ensure the exact location for wire routing. - Drill two 06.35 (0.25″) pilot holes for plastic screw grommets and one for wire routing. Then refer to the exploded-view drawing shown to install two washers and two self-tapping screws properly. Self-tapping screw
Note: Deburr the wire routing hole thoroughly before feeding the wire. - Feed the wires through the foam pad and wire routing hole and mount the scene light with the supplied self-tapping screws.
Note: Apply silicone around the mounting holes and wire routing hole for sealing if necessary.
MOUNTING DIMENSIONS