BenQ V7000i Laser TV Projector
IMPORTANT
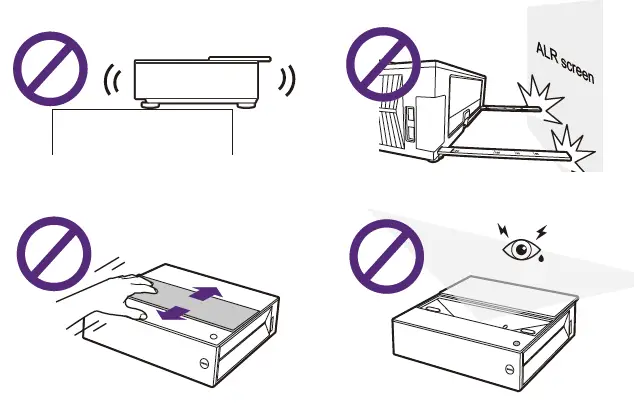
To install the projector properly, you are strongly recommended to follow the steps and safety precautions in this document.
Lesar TV Projector | V7000i / V7050i
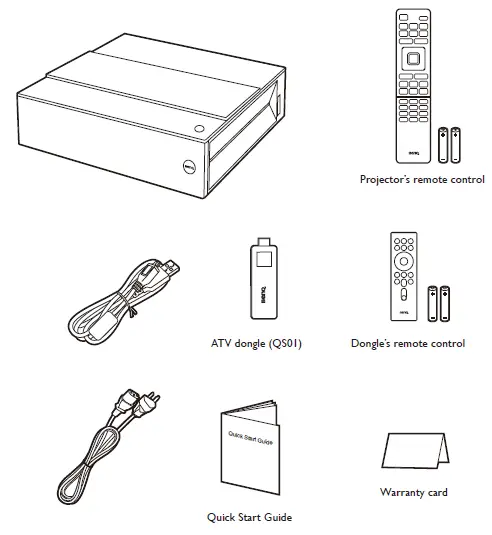
WHAT IS INSIDE BOX
CUSTOMER SUPPORT

Before getting started
Check the size of your projection wall/screen and determine where to install the projector.
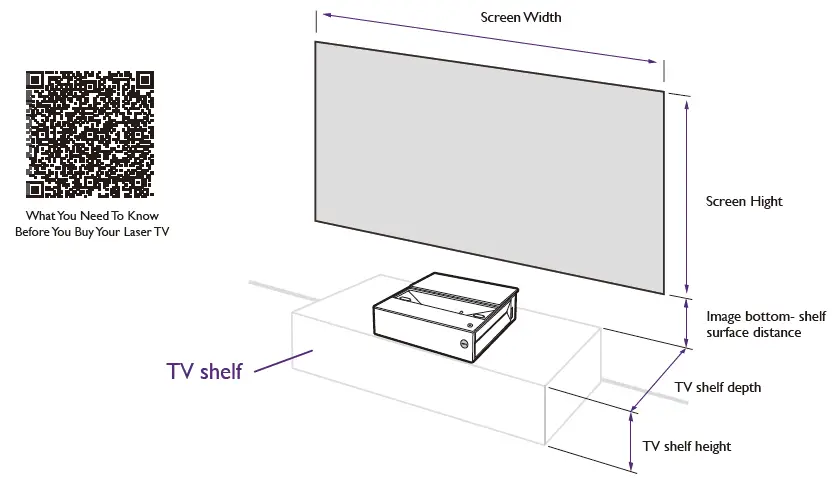
Note For details for projector placement, see “Measurements” on page 6.
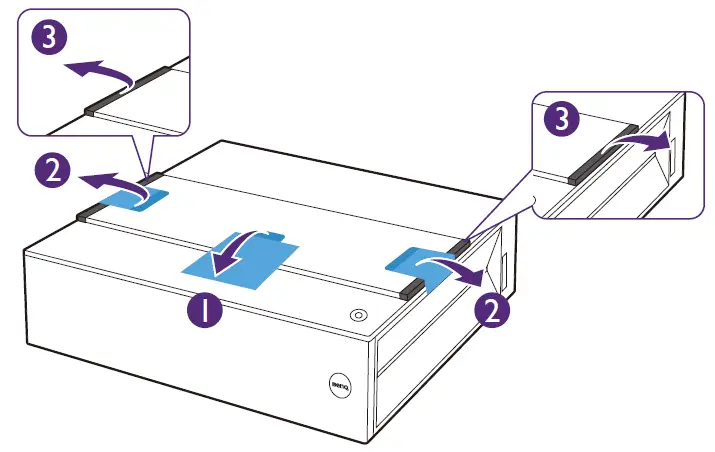
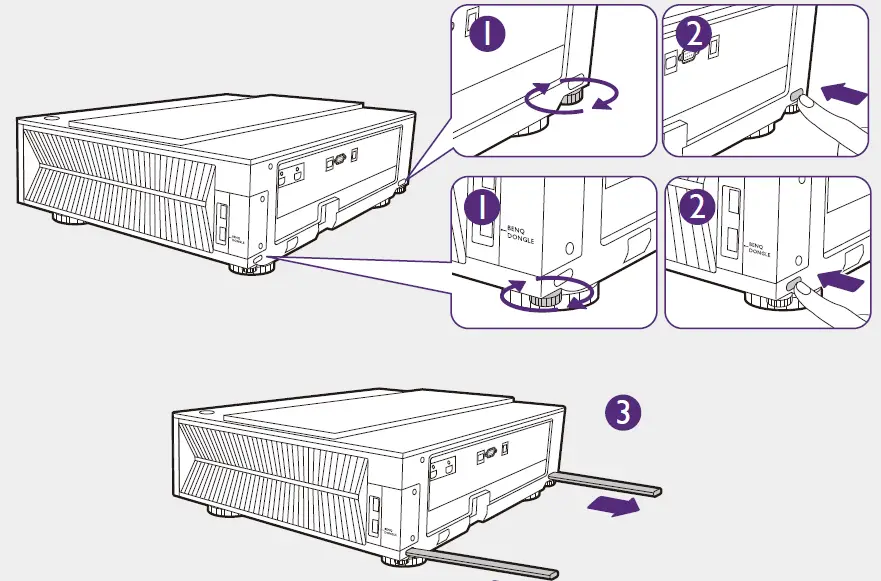
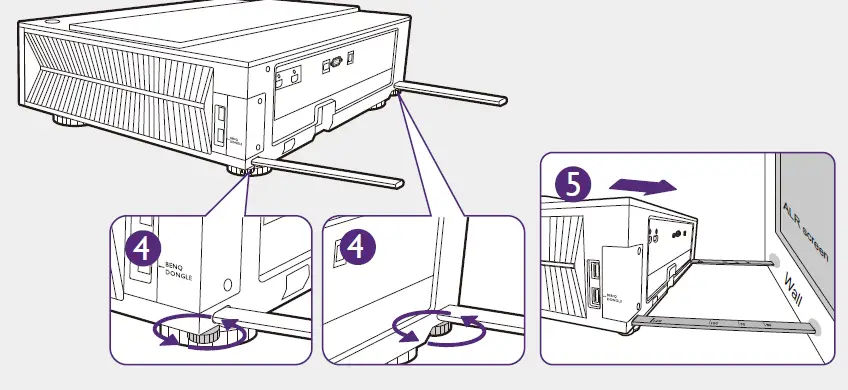
Remove packing materials
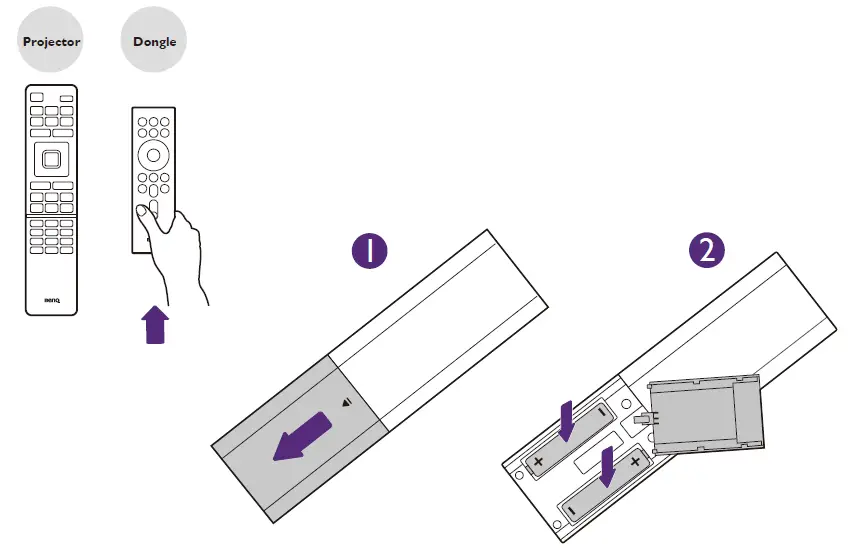
Install batteries to dongle’s remote control
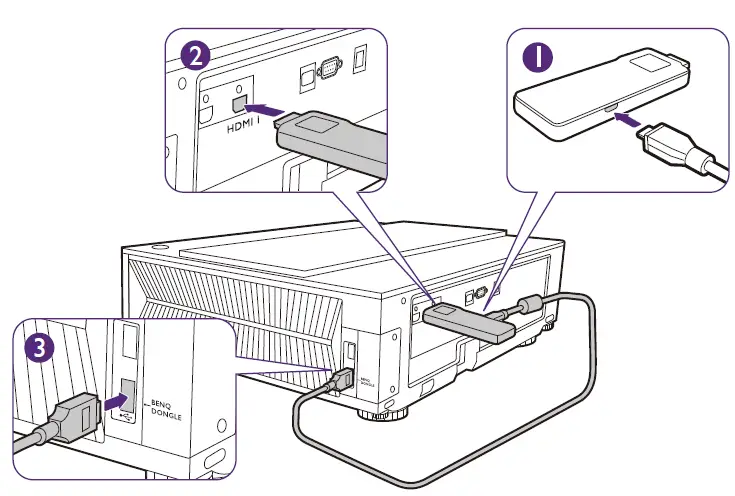
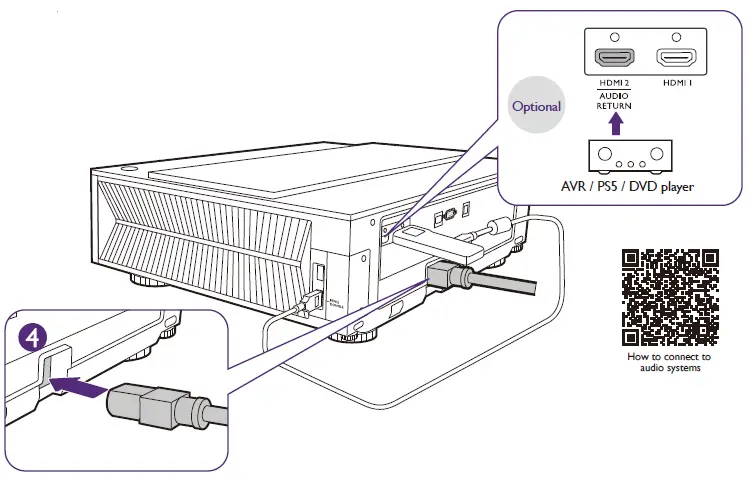
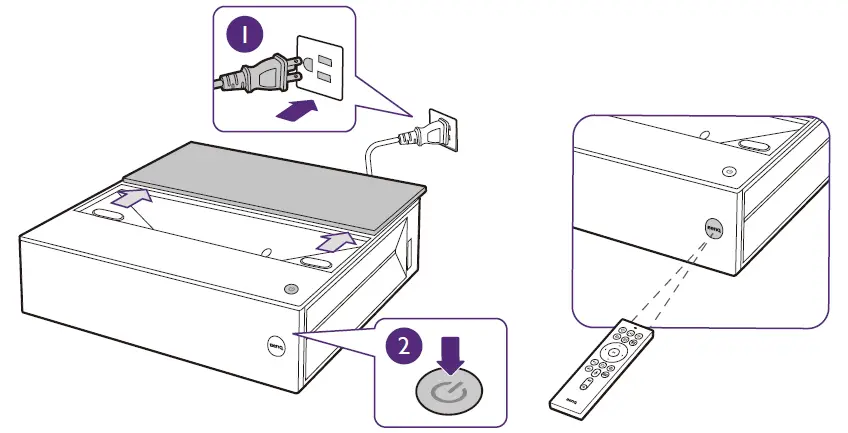
Connect ATV dongle and power cord.
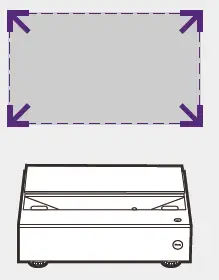
Place the projector
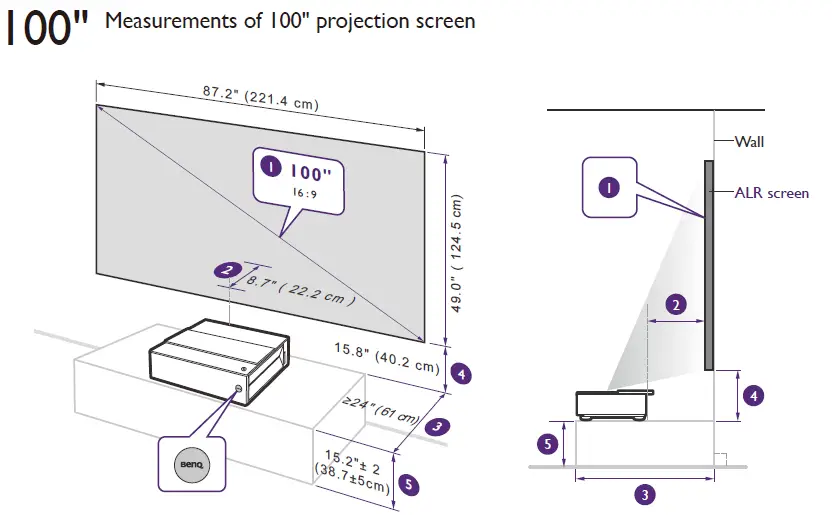
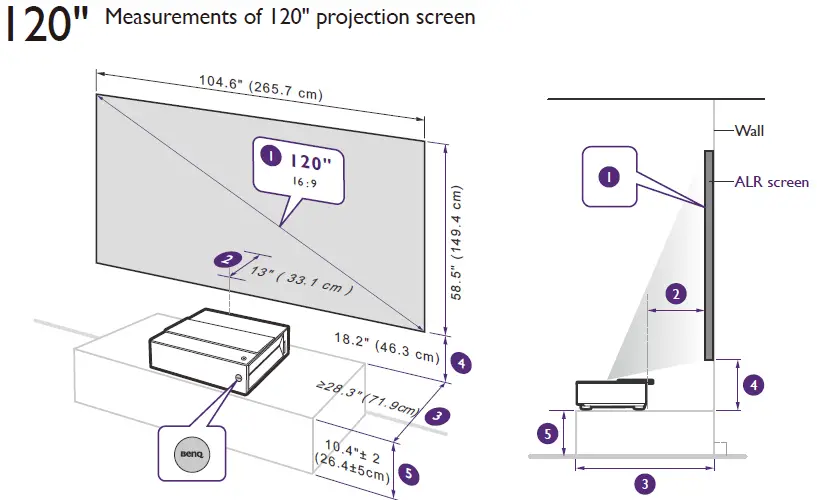
| 1 | 2 | 3 | 4 | 5 | |
| Image size & aspect ratio | Image dimensions | Projector-screen surface distance | TV shelf depth (Immobile) | Image bottom- shelf surface distance | TV shelf height (While image center at 1.4m high) |
Note Values are provided for your quick installation. Fine adjustments may be required according to your needs.
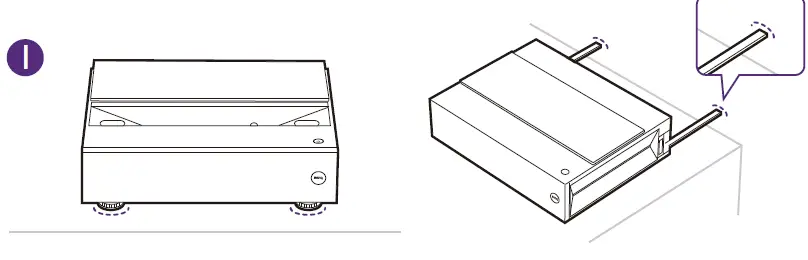
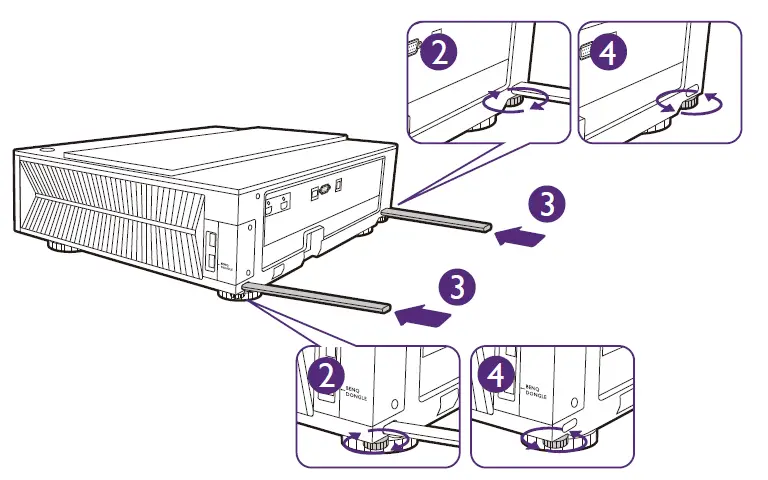
Using the integrated measuring tool
to measure distance from projector to the wall
 Distance to the wall
| 120 | 100 BENQ ALR SCREEN | 100 | 90 | 80 |
Recommended for 100” ALR screen with frame depth of 2.8 cm.
- 100 BENQ ALR SCREEN
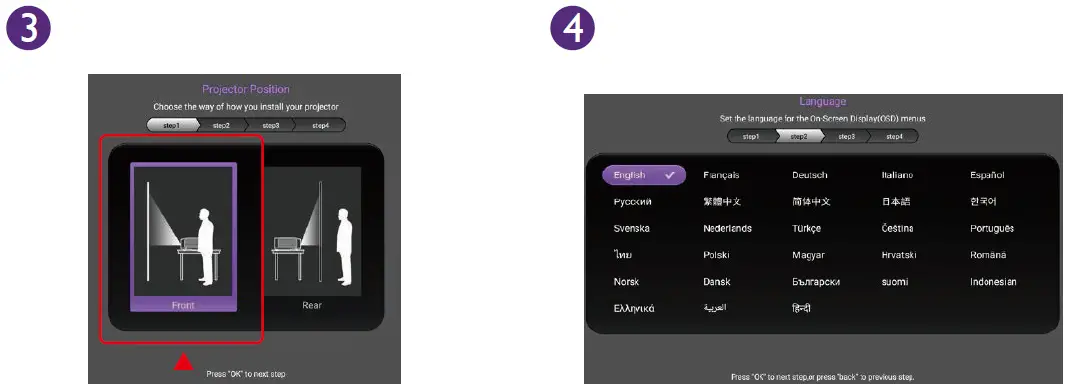
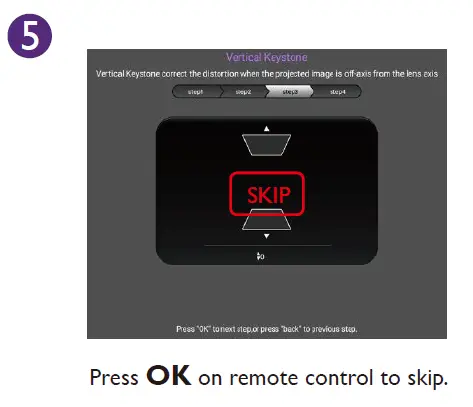
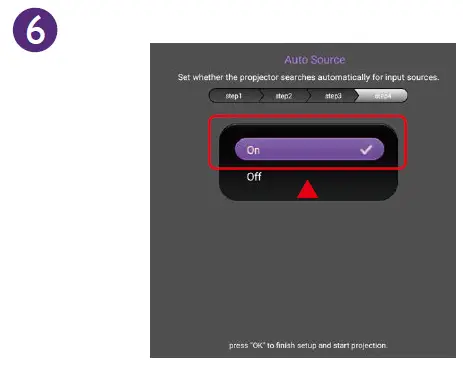
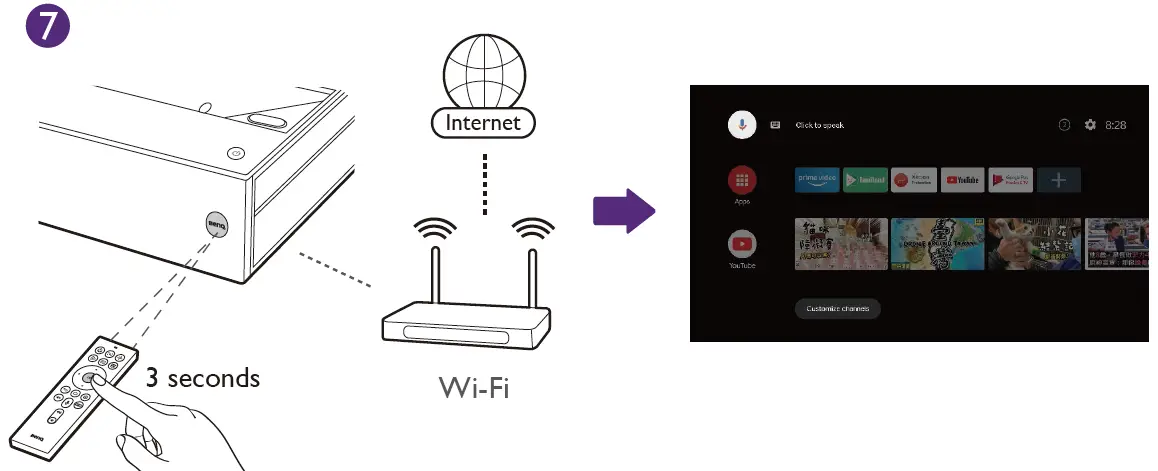
Power on and complete initial setup
Note See “6. Screen adjustment” on page 9 for details.
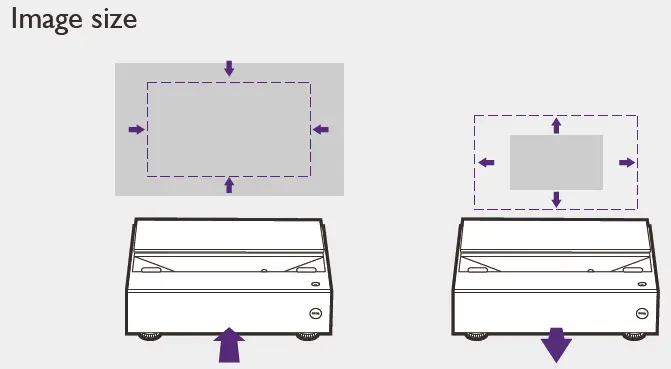
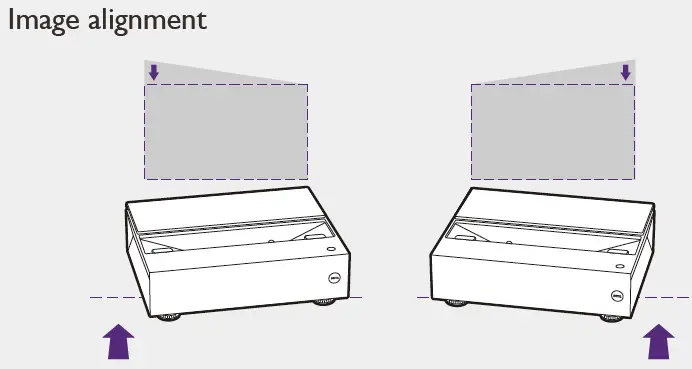
Screen adjustment
Focus adjustment
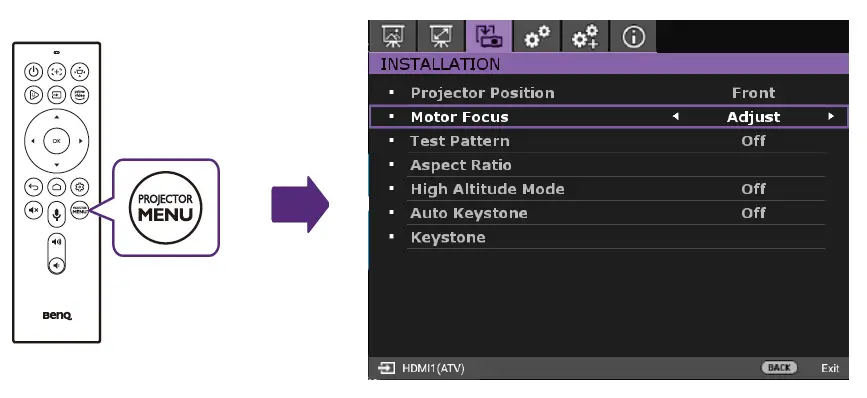
INSTALLATION > Motor Focus > Adjust
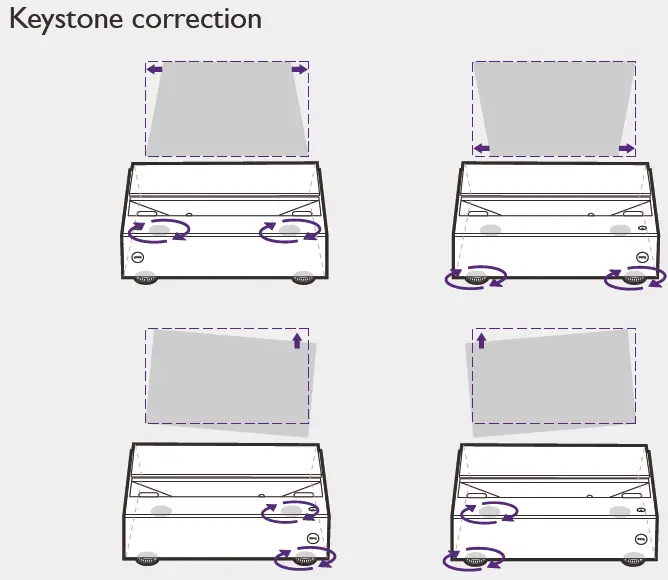
Disable auto keystone
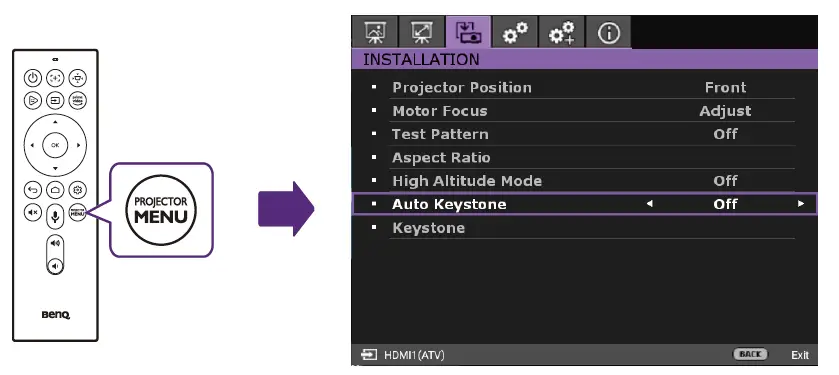 INSTALLATION > Auto Keystone > Off
 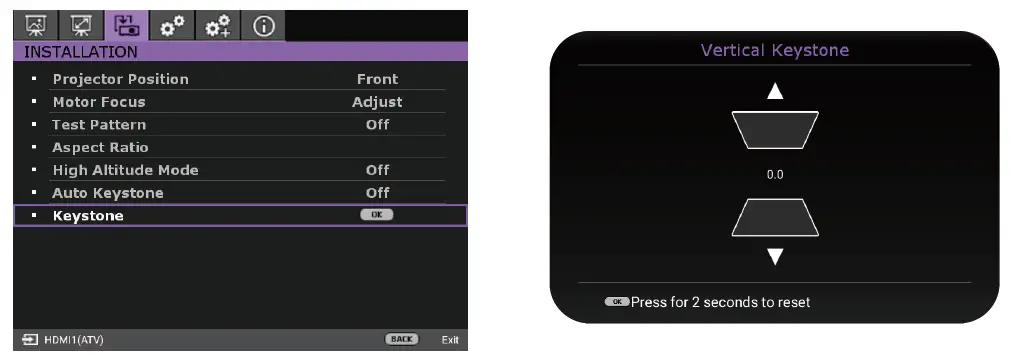 INSTALLATION > Keystone > 0.0
Screen edge adjustment
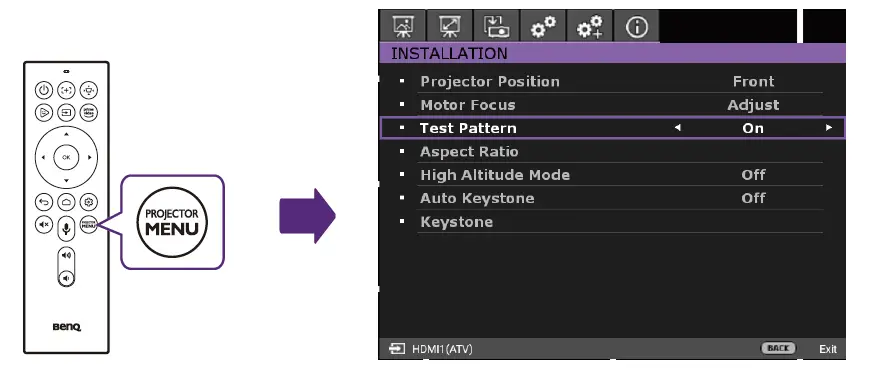
INSTALLATION > Test Pattern > On
Complete screen adjustment
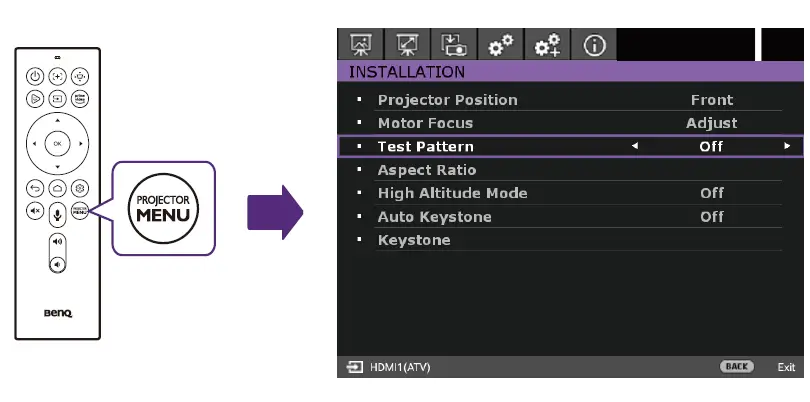
INSTALLATION > Test Patter > Off
Mark the position.
The projector placement is complete. Mark the position if possible so you can align the projector again quickly once it is moved