Fiilex Q8 COLOR LR Light User Guide
Safety Instructions
- DO NOT disassemble Q8 Color. This will void the warranty.
- DO NOT install Q8 Color in damp or wet locations.
- DO NOT obstruct the fixture’s air vents.
- Use safety cable (not included) when rigging Q8 Color overhead.
- Only use Fiilex approved power supply and accessories. Failure to do so may damage the fixture.
- Shields, lenses or ultraviolet screens shall be changed if they have become visibly damaged to such an extent that their effectiveness is impaired, for example by cracks or deep scratches.
- The lamp shall be changed if it has become damaged or thermally deformed.
- The luminaire is intended for professional use only.
- Do not look into the light source with any instrument that could concentrate the light output: this includes magnifiers, binoculars, telescopes, etc.
- This fixture corresponds to Risk Group 1 according to EN 62471 under normal operation condition, which considers all photo biological risks. It corresponds to Risk Group 1 according to EN 62778 under those conditions, which considers risk from blue light only.
- The light output can potentially cause eye injury if stared at for a prolonged period of time
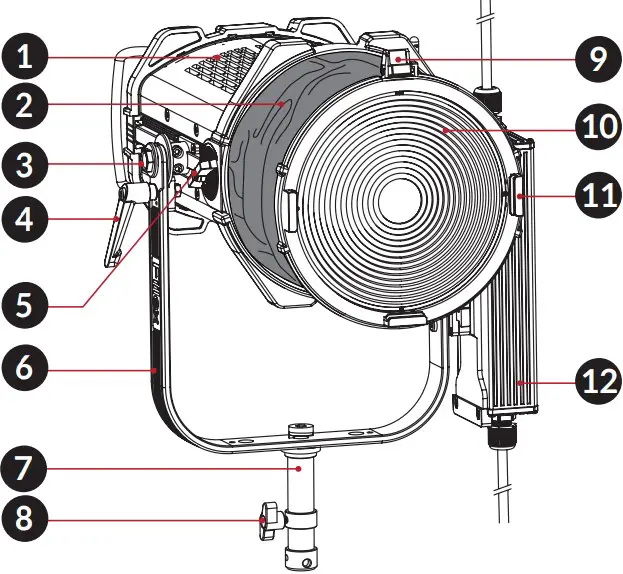
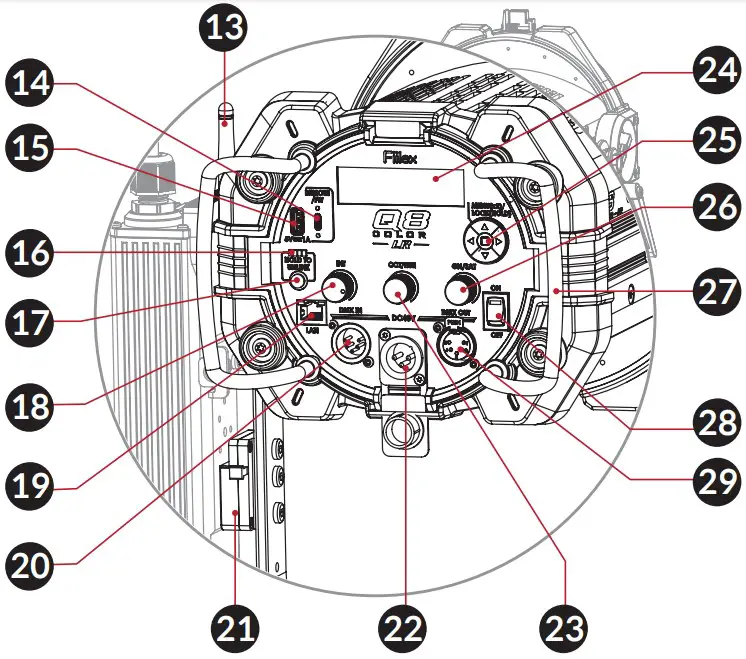
Parts Diagram
- Vent Holes
- Water Repellent Fabric
- Yoke Bolt
- Tilt Lock Lever
- Beam Adjustment Knob (Spot to Flood)
- Yoke
- Junior Pin Receiver
- Mount Tightening Knob
- Latch
- Fresnel Lens
- Fresnel Lens Holder
- Power Supply Unit (PSU)

- Antenna
- USB Type-C Port (For updating firmware)
- USB Type-A Port (5V/1A Power)
- Wireless Signal Indicator
- Unlink Button (For disconnecting the wireless signal)
- Intensity Control Knob
- LAN Port
- DMX Input (XLR-Male 5-pin)
- Dual Locking V-Mount
- DC Input Port
- CCT/HUE Knob
- OLED Display
- Navigation Pad
- GN/SAT Knob
- Handles
- ON/OFF Switch
- DMX Output (XLR-Female 5-pin)
Fixture Operation
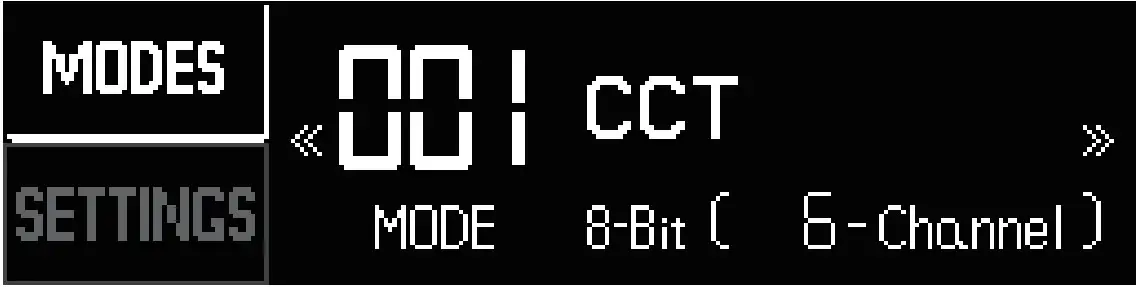
- Mode Selection
Use Navigation Pad to enter MODES menu, then navigate to select the desired mode.
- Fixture Control
- Manual / Local :
Use Intensity Control Knob or the Navigation Pad to control the parameters.
- For CCT modes and HSI modes, use either CCT/HUE
Knob and GN/SAT Knob or the Navigation Pad - DMX / RDM / Ethernet (ArtNet / sACN) :
Display shows DMX connection status, NO DMX or
DMX OK.

Settings
Use Navigation Pad to enter and edit SETTINGS. Navigate to the right to access additional settings
Fan speed options
| Off | The fan is completely off. (Operation time is limited.) |
| Variable | The fan speed varies based on light intensity |
| Silent | The fan operates at reduced speed. |
| Full Speed | The fan operates at full speed. |
| Dimming options | |
| Sharp | Best for flash and strobe effects. |
| Smooth | Best for gradual fades. |
Ethernet
Modify ArtNet and sACN settings of the fixture.
Info
View current fixture firmware versions and fixture temperature
1689 Regatta Blvd. Richmond, CA: 94804 | (510) 620-5155 | [email protected]
www.fiilex.com


