![]() INST-3304
INST-3304
INSTALLATION INSTRUCTIONS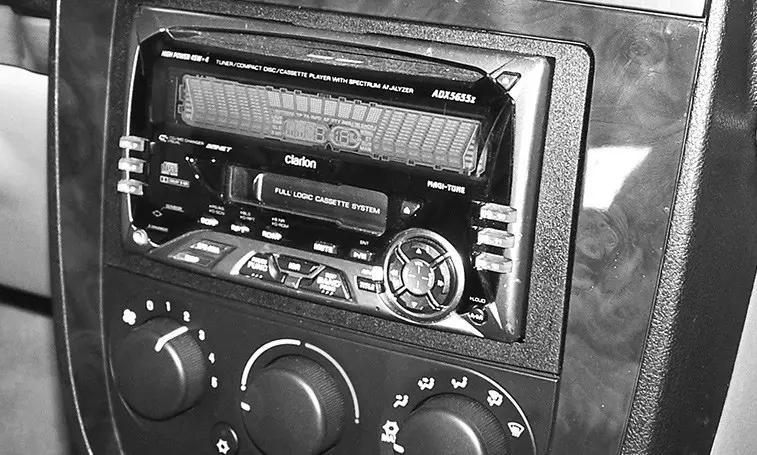
INST-3304 Dash Kit
Buick/Chevy/Hummer/Pontiac/Saturn
Multi-Kit 2005-2013
Visit MetraOnline.com for more detailed information about the product and up-to-date vehicle specific applications.
Buick
Terraza ……………………….. 2005-2008
Chevrolet
Corvette ……………….. 2005-2013
Uplander ……………………………… 2005-2008
Hummer
H3 …………………………. 2006-2010
H3T ……………………………………… 2009-2010
Pontiac
Montana
(SV6 only) ……………… 2005-2006
Saturn Relay ………………………… 2005-2007
WIRING & ANTENNA CONNECTIONS (sold separately)
Wiring Harness:
- GMOS-01 – GM OnStar & chime harness 2002-up
- GMOS-04 – GM OnStar & chime and amp harness 2002-up
Antenna Adapter:
- 40-GM10 – GM antenna adapter 1988-up
KIT FEATURES
95-3304
- Double DIN radio provision
- Stacked ISO DIN radio provision
99-3304
- DIN radio provision with pocket
- ISO DIN radio provision with pocket
KIT COMPONENTS
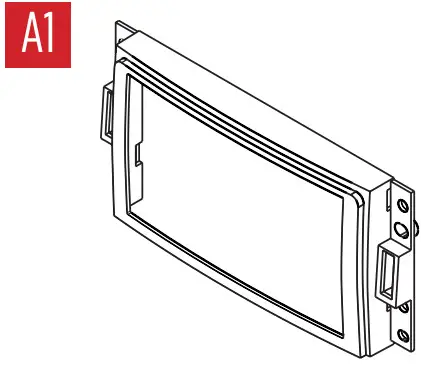 | 95-3304: • A1) Trim plate |
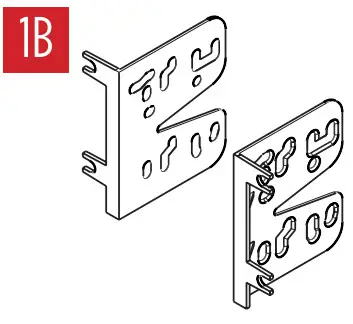 | • B1) ISO brackets |
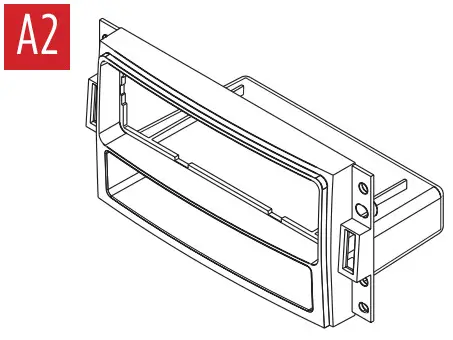 | 99-3304: • A2) Radio housing |
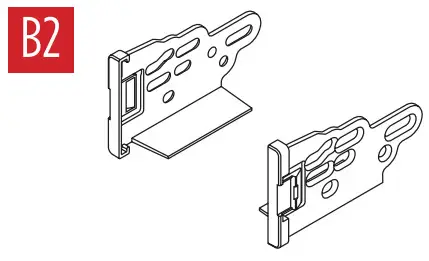 | • B2) ISO brackets |
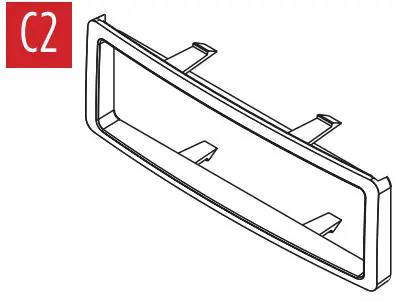 | • C2) Trim plate |
Visit MetraOnline.com for audio/video and steering wheel control interface options.
ATTENTION: With the key out of the ignition, disconnect the negative battery terminal before installing this product. Ensure that all installation connections are secure before cycling the ignition to test this product.
NOTE: Refer to the instructions included with the aftermarket radio.
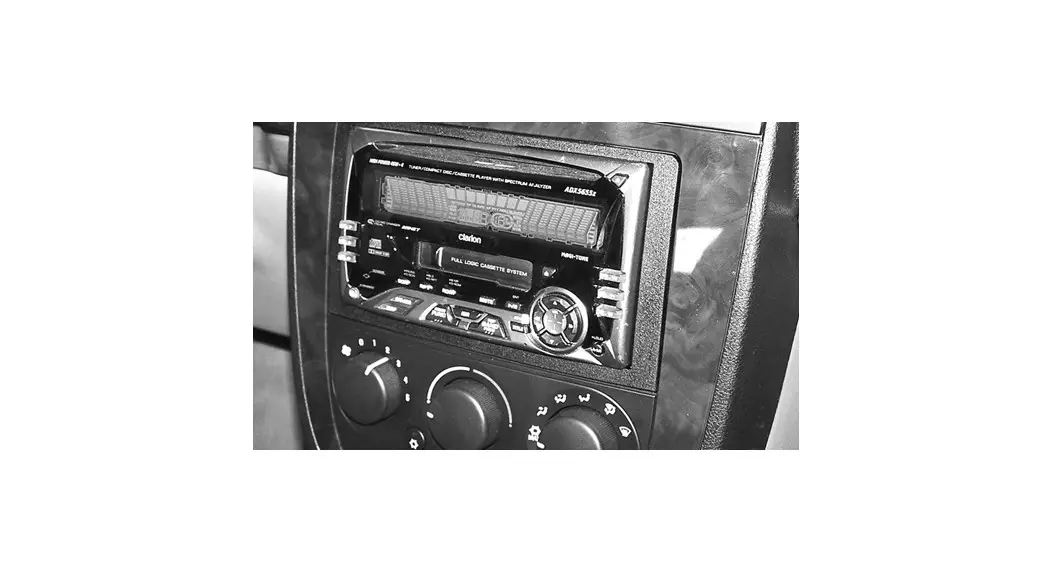
DASH DISASSEMBLY
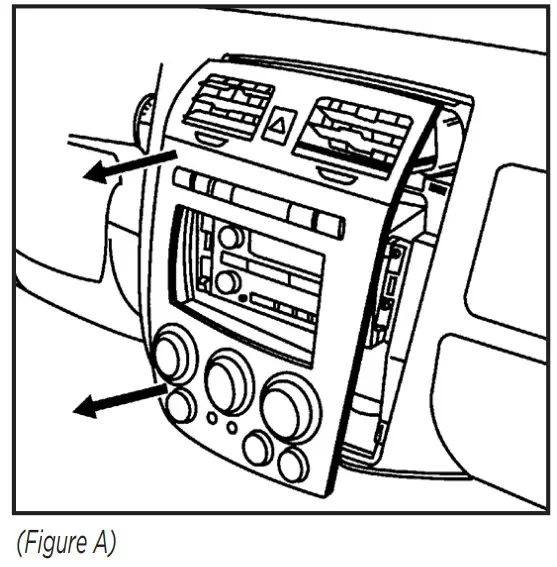
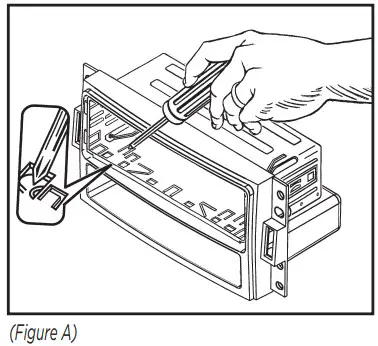
Buick Terraza/Chevy Uplander 2005-2008, Pontiac Montana SV6 (SV6 only) 2005-2007, Saturn Relay 2005-2007
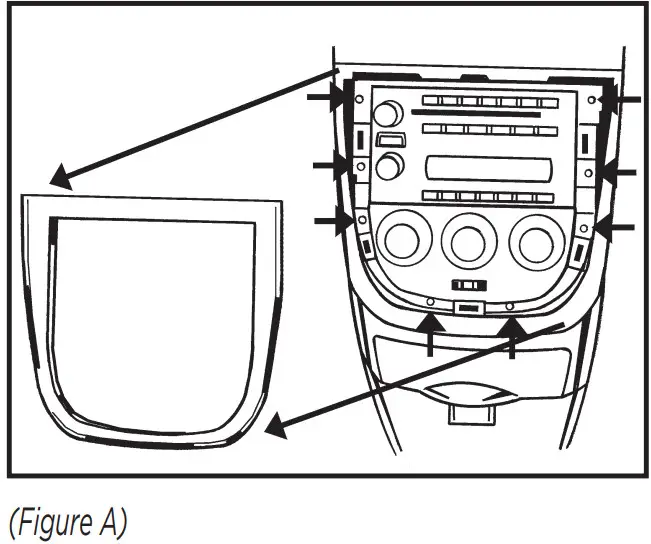
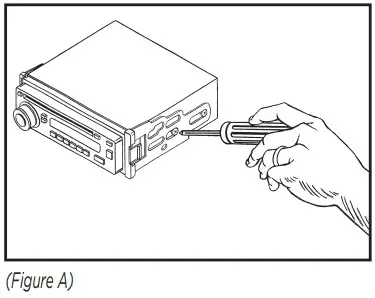
- Unclip and remove the trim panel from around the radio and A/C assembly. (Figure A)

- Remove (8) 9/32″ screws to extract radio and A/C controls from sub dash.
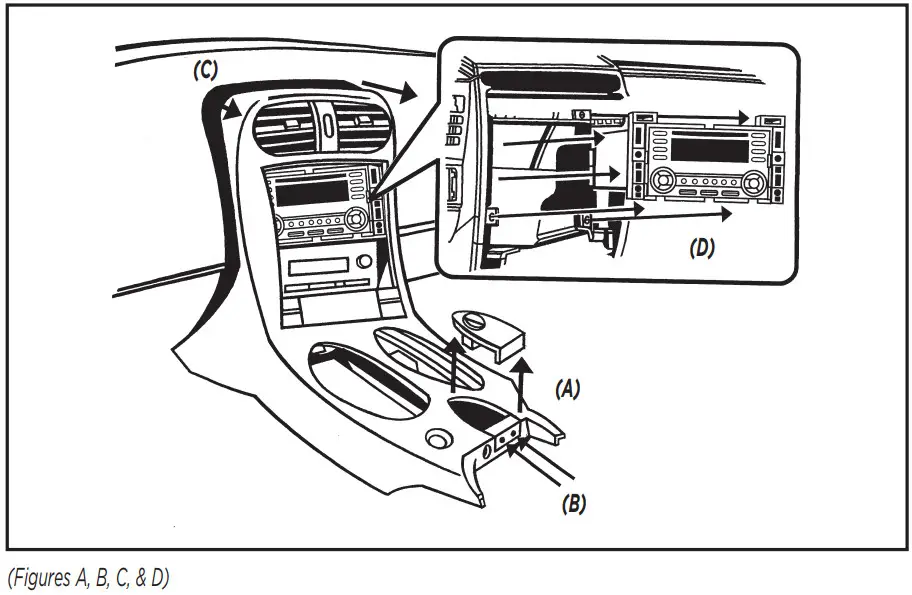
Chevrolet Corvette 2005-2013
- Unclip and remove ride control switch/blank plate at the front edge of the center console lid. (Figure A)
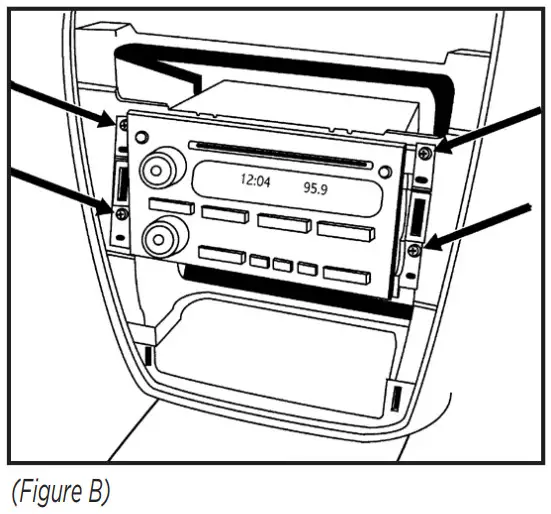
- Remove (2) 9/32″ screws from the back of the center console. (Figure B)
- Unclip and remove entire panel surrounding radio including A/C controls. (Figure C)
- Remove (4) 9/32″ screws securing radio then extract from sub dash. (Figure D)

Hummer H3 2006-2013
- Unclip and remove trim panel around radio and A/C controls. (Figure A)

- Remove (4) 9/32″ screws securing the radio. (Figure B)

- Unplug and remove radio.
KIT ASSEMBLY 95-3304
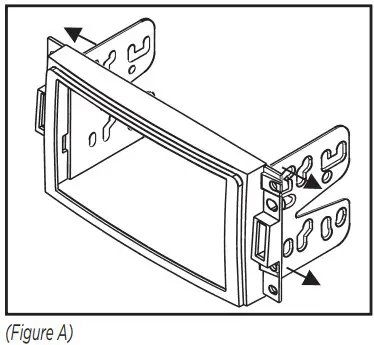
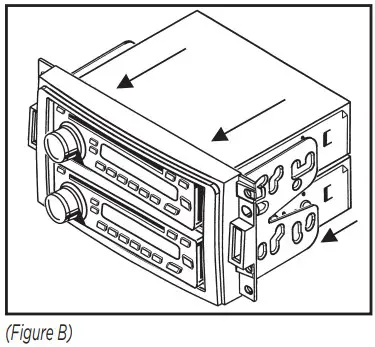
Double DIN radio provision
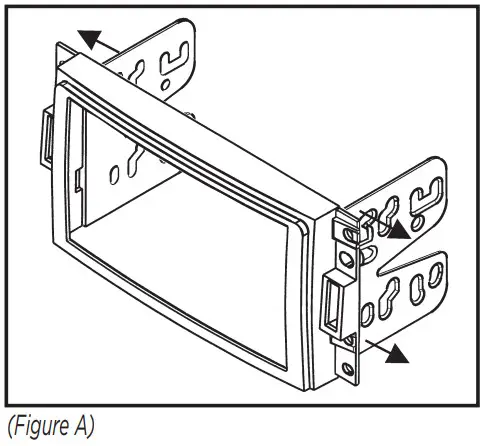
- Slide the appropriate bracket into the trim plate, aligning the holes in the trim plate to the clips on the bracket. (Figure A)

- Slide the DDIN radio unit into the trim plate bracket assembly and secure the unit to the kit using the screws supplied with the aftermarket radio. (Figure B)

- Locate the factory wiring harness in the dash. Metra recommends using the proper mating adapter from Metra or AXXESS.
- Re-connect the negative battery terminal and test the unit for proper operation.
- Reassemble dash in reverse order of disassembly.
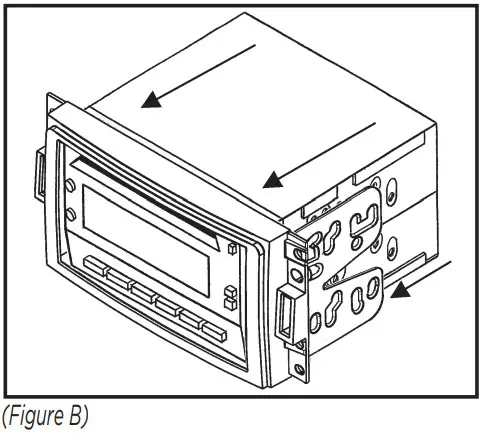
Stacked ISO DIN radio provision
- Slide the appropriate bracket into the trim plate, aligning the holes in the trim plateto the clips on the bracket. (Figure A)

- Slide the stacked ISO DIN units into the trim plate bracket assembly and secure the unit to the kit using the screws supplied with the aftermarket radio. (Figure B)

- Locate the factory wiring harness in the dash. Metra recommends using the proper mating adapter from Metra or AXXESS.
- Re-connect the negative battery terminal and test the unit for proper operation.
- Reassemble dash in reverse order of disassembly.
KIT ASSEMBLY 99-3304
DIN radio provision with pocket
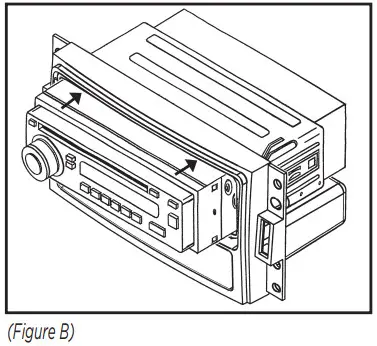
- Slide the DIN cage into the radio housing and secure by bending the metal locking tabs down. (Figure A)

- Slide the aftermarket radio into the cage until the side clips engage. (Figure B)

- Locate the factory wiring harness in the dash. Metra recommends using the proper mating adapter from Metra or AXXESS.
- Re-connect the negative battery terminal and test the unit for proper operation.
- Reassemble dash in reverse order of disassembly.
ISO DIN radio provision with pocket
- Attach the ISO brackets to the aftermarket radio with the screws supplied with the unit. (Figure A)

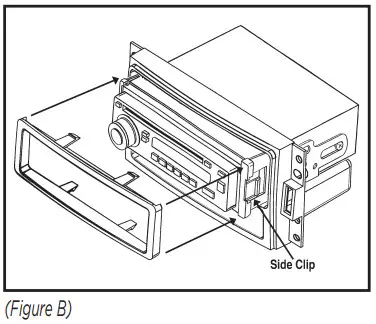
- Slide the aftermarket radio into the cageuntil the side clips engage. (Figure B)
- Snap the trim plate into the radio housing. (Figure B)

- Locate the factory wiring harness in the dash. Metra recommends using the propermating adapter from Metra or AXXESS.
- Re-connect the negative battery terminaland test the unit for proper operation.
- Reassemble dash in reverse order of disassembly.

Having difficulties? We’re here to help.![]() Contact our Tech Support line at: 386-257-1187
Contact our Tech Support line at: 386-257-1187![]() Or via email at: [email protected]
Or via email at: [email protected]
![]() KNOWLEDGE IS POWER
KNOWLEDGE IS POWER
Enhance your installation and fabrication skills by enrolling in the most recognized and respected mobile electronics school in our industry.
Log onto www.installerinstitute.edu or call 386-672-5771 for more information and take steps toward a better tomorrow.
![]() Metra recommends MECP
Metra recommends MECP
certified technicians
Metra. The World’s Best Kits.®
MetraOnline.com
© COPYRIGHT 2021 METRA ELECTRONICS CORPORATION
REV. 8/27/21 INST-3304


