ADL220-B Keyless Entry Door Lock Deadbolt
Smart Lock Installation Guide V1.0.0
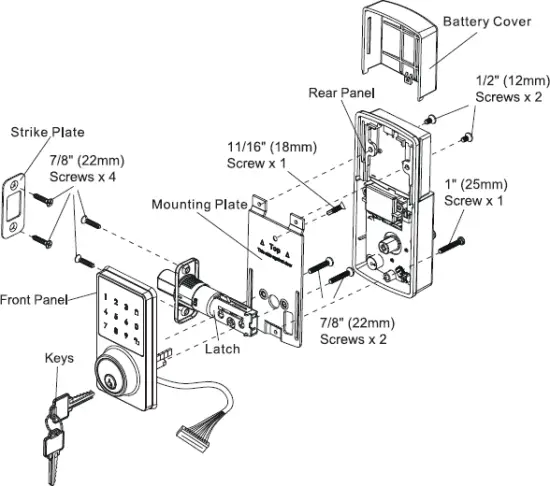

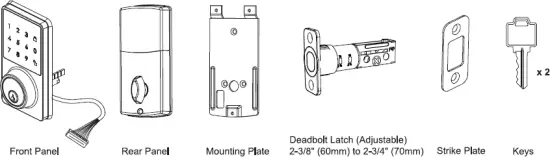
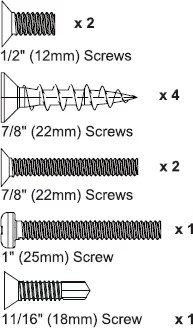
Component List
Tools Needed
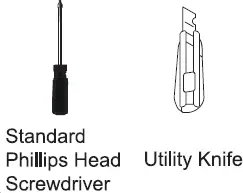
Tools Necessary only for new doors or adjusting existing prep.

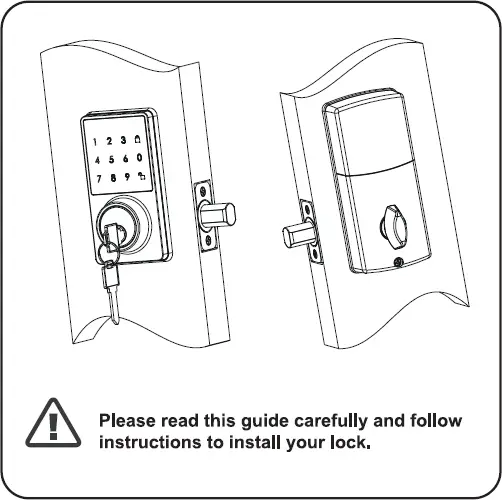
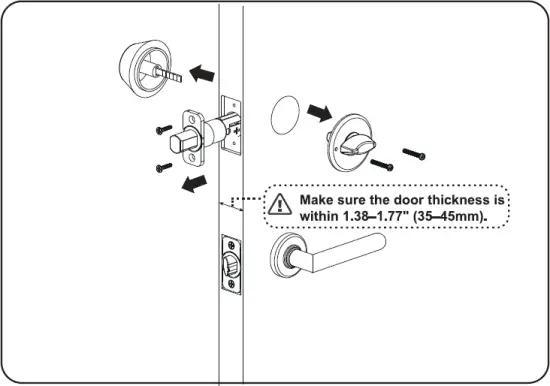
Before you begin, open door and remove your existing deadbolt.
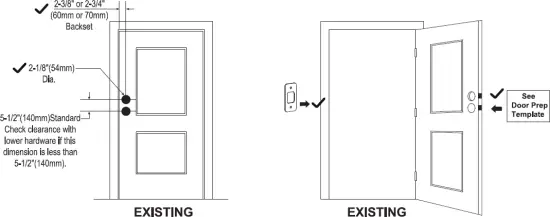
Before you begin, double check your door prep measurement.
1 Drilling Holes (for New Doors or Adjusting Existing Prep.)

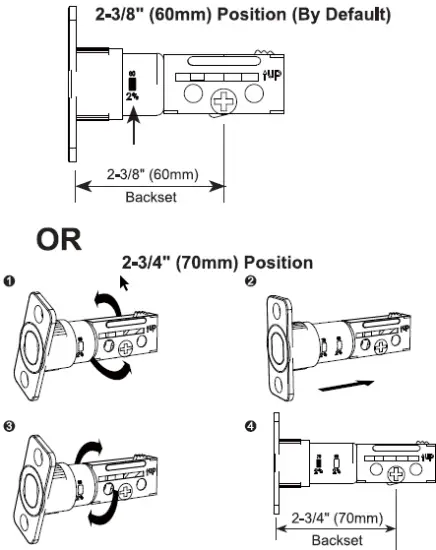
2 Installing the Deadbolt Latch
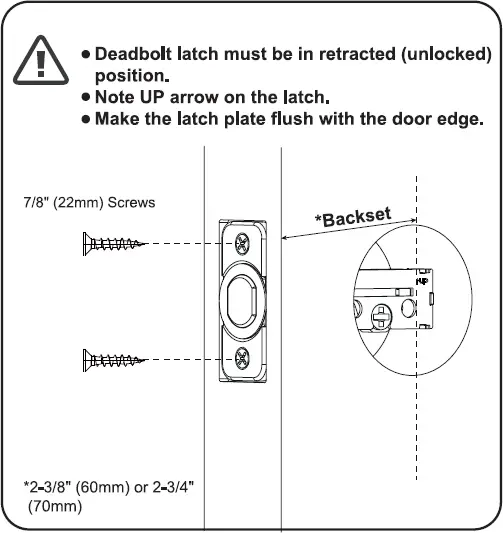
3 Installing the Strike Plate

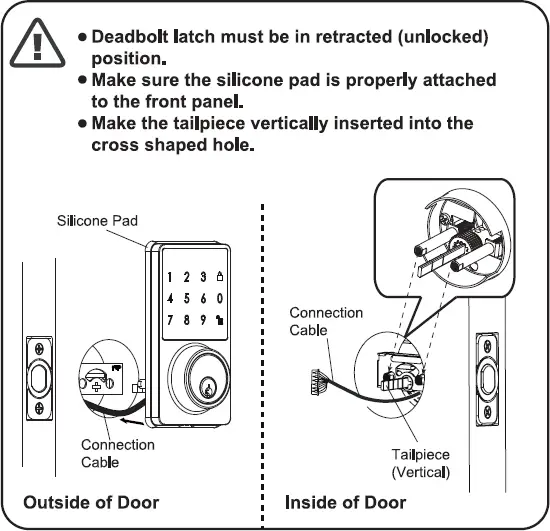
4 Installing the Front Panel
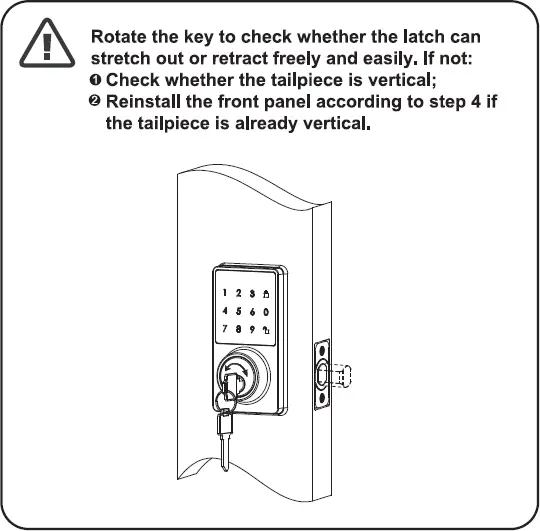
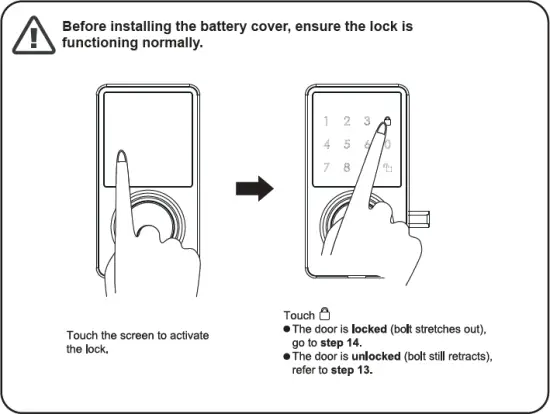
5 Testing Operation
6 Installing the Mounting Plate

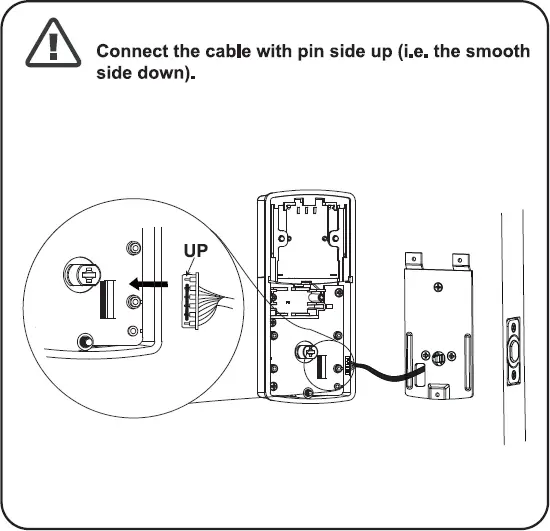
7 Attaching the Connection Cable
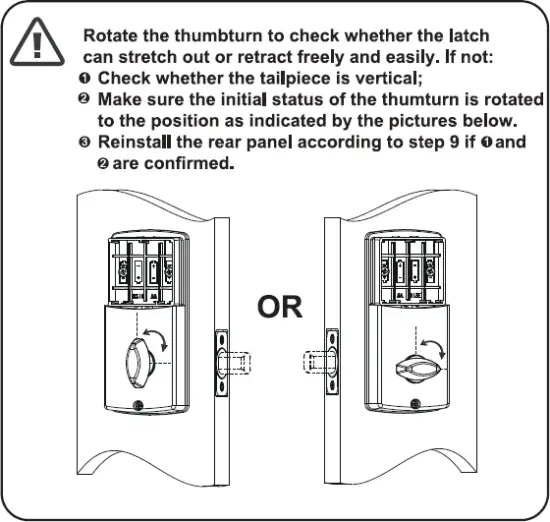
8 Confirming the Thumb turn Position

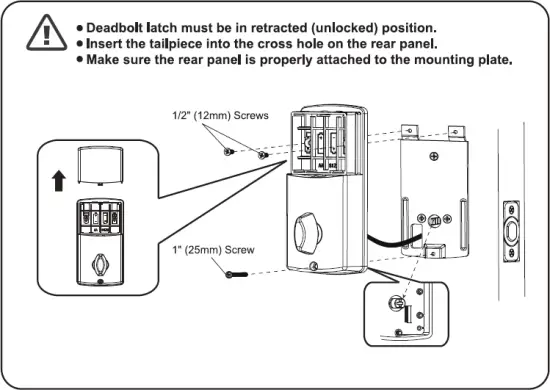
9 Installing the Rear Panel
10 Testing the Lock
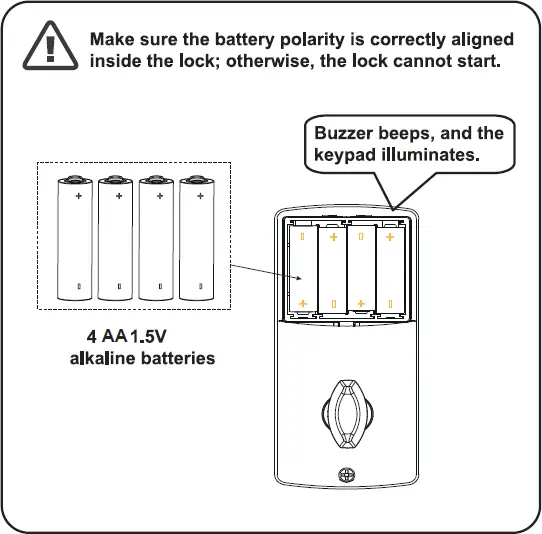
11 Installing Batteries
12 Testing the Keypad
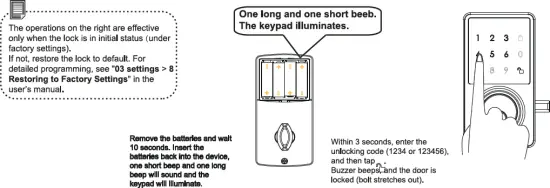
13 Changing the Lock Installation Direction
- The installation is completed, but the door is unlocked after tapping , and it is locked after entering the user code and tapping .
- The lock installation direction is changed on the door (from left to right, or from right to left).
14 Installing the Battery Cover

Slide the battery cover back onto the lock. You have not finished installing your lock. Please read the user’s manual carefully for programming instructions.


