![]() PV-EG10CL
PV-EG10CL
PV-EG10DL
720p Eye Glasses DVR
LawMate, innovation never stops

Name and Parts
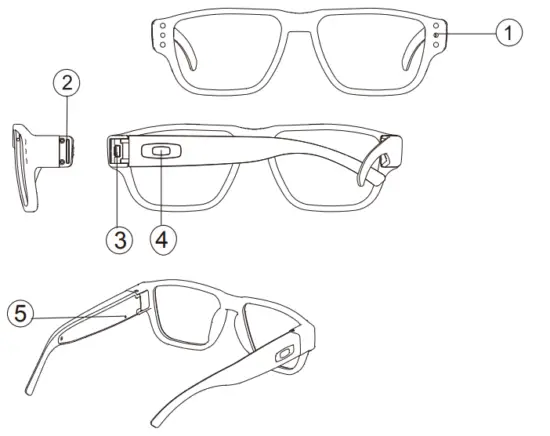
- Camera lens
- Memory card slot
- Mini USB port
- Power on/ off
- Reset key
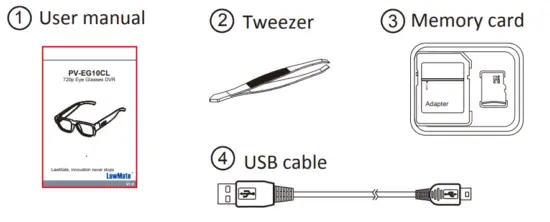
Package Content
Charge the Battery
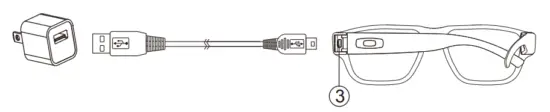 Plug the mini USB end of the cable into the USB port 3; plug the other end into a USB power source.
- A solid green LED – charging.
- Green LED goes off – fully charged.
Insert Memory Card
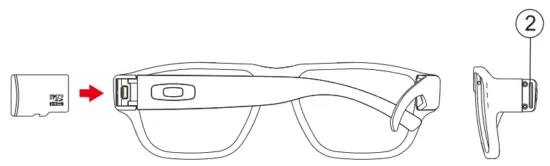
After charging, with golden contact facing inside the glasses, insert the memory card into 2 your hand.
If the card is inserted on the wrong side, it may cause the card to be damaged. To take out the memory card, please use the tweezer provided in the package to remove it.
Note: When no card is inserted, the device vibrates 20 times and powers off. When the memory is full, the device vibrates 5 times and powers off.
Date & Time setting (for Windows system)
- From the desktop right-click to open Notepad, create a text (.txt) file named set time
- On the first line of the file, enter date and time information as a year. month.day hours.minutes.seconds. For example, suppose the time is October 16th, 2017 15:00. Then, please enter 2017.10.16 15:00:00
Note: There should be a space left between date and hour; the time format should be the 24-hour format. - Save the file to the root directory of the memory card.
Note: If the setting is completed, the settime.txt file will not be visible when you connect the device to the computer again.
Format Memory Card
Please format the card on the computer.
Operation
- Power on: Press 4 for 3 seconds. With one long vibration, the recording starts automatically when power is on.
- Power off: Press 4 for 3 seconds. With two short vibrations, the device powers off.
Note: The device will shut down itself when the card is full or when no card is inserted. - Reset the device: Press 5 once, and the device will be powered off.
- Low battery alert: The device vibrates 3 times.
Download Video to PC
- Make sure the memory card is inserted into the device.
- Power on the device and connect the device to the PC with the USB cable.
- The card will be recognized as an external drive on the PC.
And you could start to retrieve files from the card.
Specification
| Built-in Camera Module | |
| Built-in Image Sensor | 1/4″ progressive CMOS sensor |
| Sensor Resolution | 1280X960 |
| Sensor Sensitivity | 3.3 Lux @F 2.8 |
| Lens F/No. | F0,3. |
| Focal Length | 3.7mm |
| Angle of View | 67′ |
| Video Spec. | |
| Algorithm | MJPG |
| File Format | AVI |
| Video Recording Mode | Continuous Video Recording |
| Recording Capability | 1280×720 |
| Frame Rate | Up to 30 fps |
| Storage & I/O | |
| Memory Type | Micro SD Card ( Support SDHC max. 32GB) |
| Data Interface | Micro USB 2.0 |
| Misc. | |
| Date/Time Table | YYYY.MM.DD HH:MM: SS |
| Power | |
| Power Input | DC 5V |
| Power Consumption | 150nnA-180nnA |
| Battery Input | DC 3.7V / 270mA polymers battery (XK601245) |
| Battery Lifetime | Continuous Video Recording 70min |
| Physical | |
| Glasses Dimension | Arm(146)xBridge(11)xTota I Width(142)xTotal Height(43)mm Lens Height(37) x Lens Width(54) mm |
| Weight | 40g |


