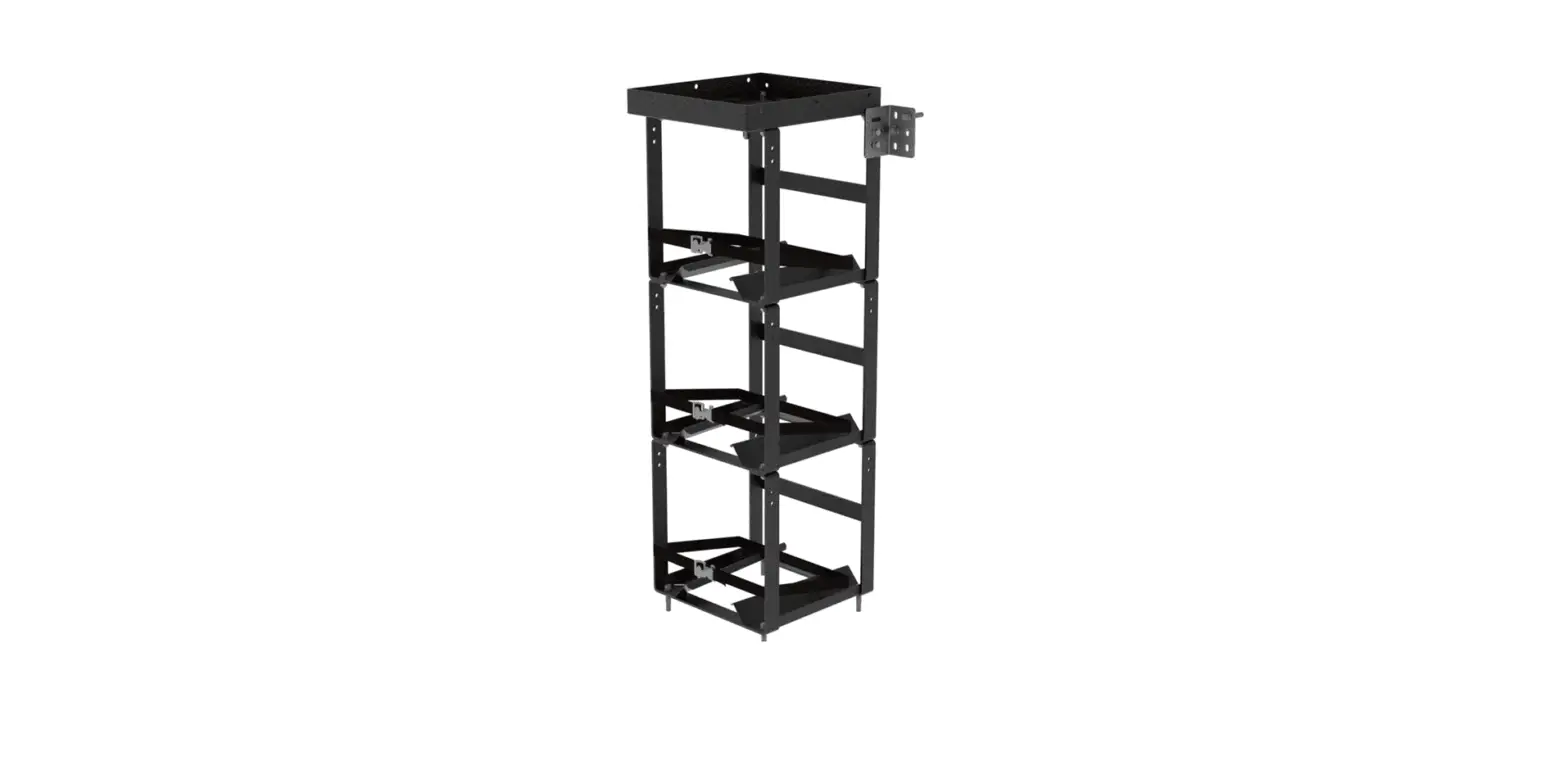
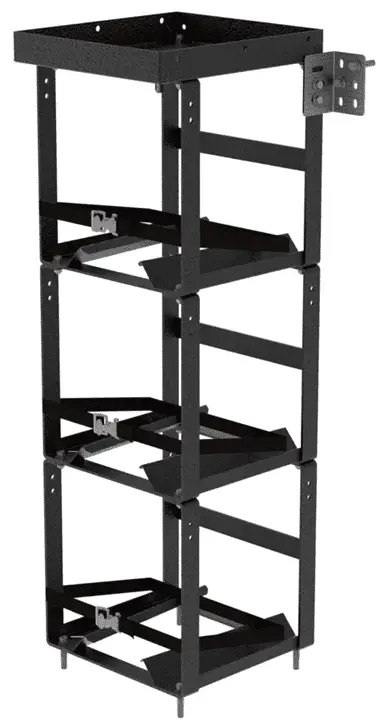
RANGER DESIGN 6013-3 Steel Bottle Holder
INSTALLATION GUIDE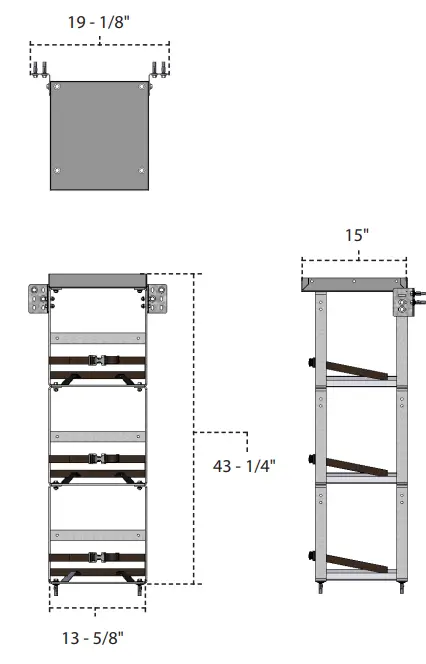
REQUIRED ITEMS
- Cordless Drill
- Cordless Impact
- 3/8″ Drill Bit
- 1/2″ Socket
- Marker
- Knife
PHASE 1 – ASSEMBLY
SETUP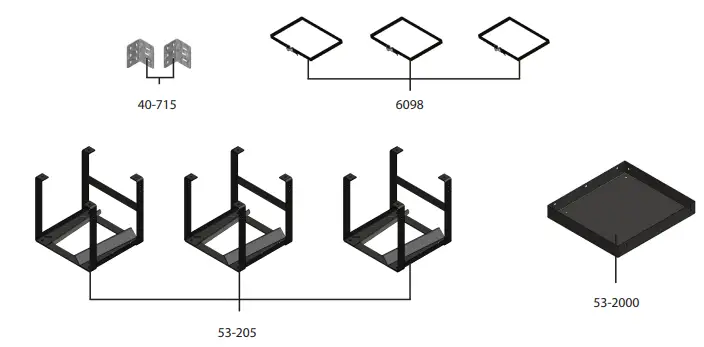
Verify all parts are present.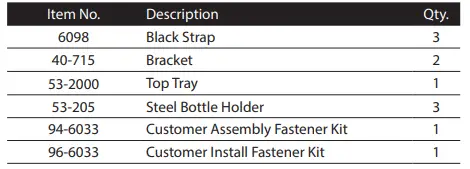
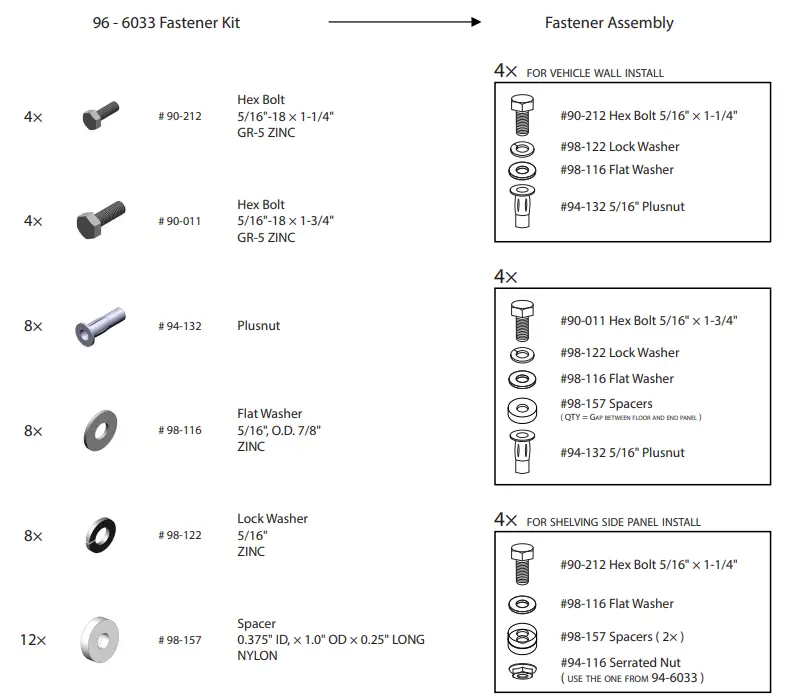
Fastener kits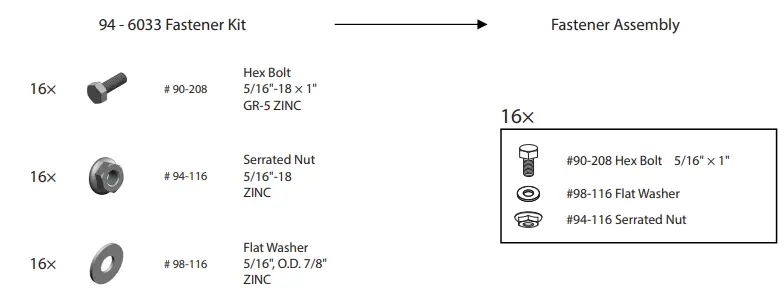
BOTTLE HOLDER ASSEMBLY
Assemble the steel bottle holder as shown.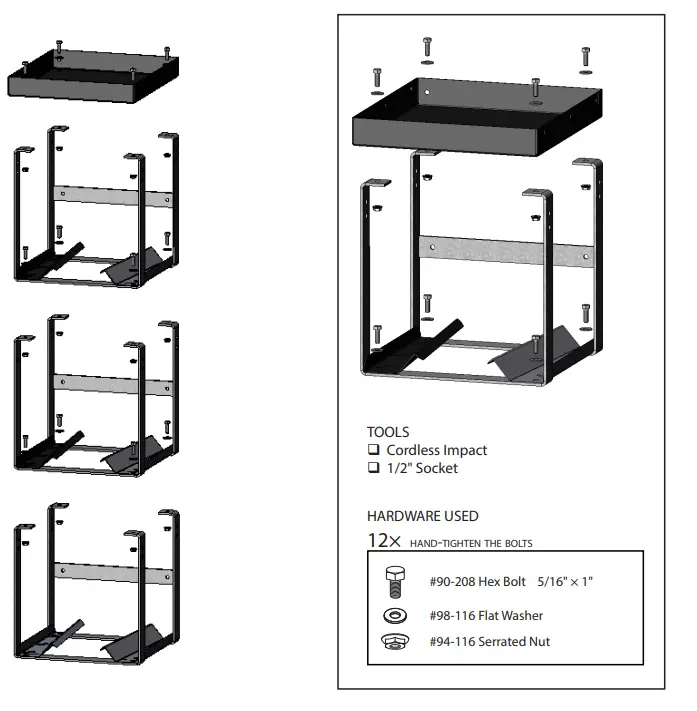
PHASE 2 – INSTALL
BOTTLE HOLDER INSTALLATION WITH BRACKET
- Lift the assembled bottle holder to the vehicle, then put it in place.
- Attach the bracket to the bottle holder aligning the brackets to the horizontal rim of the vehicle
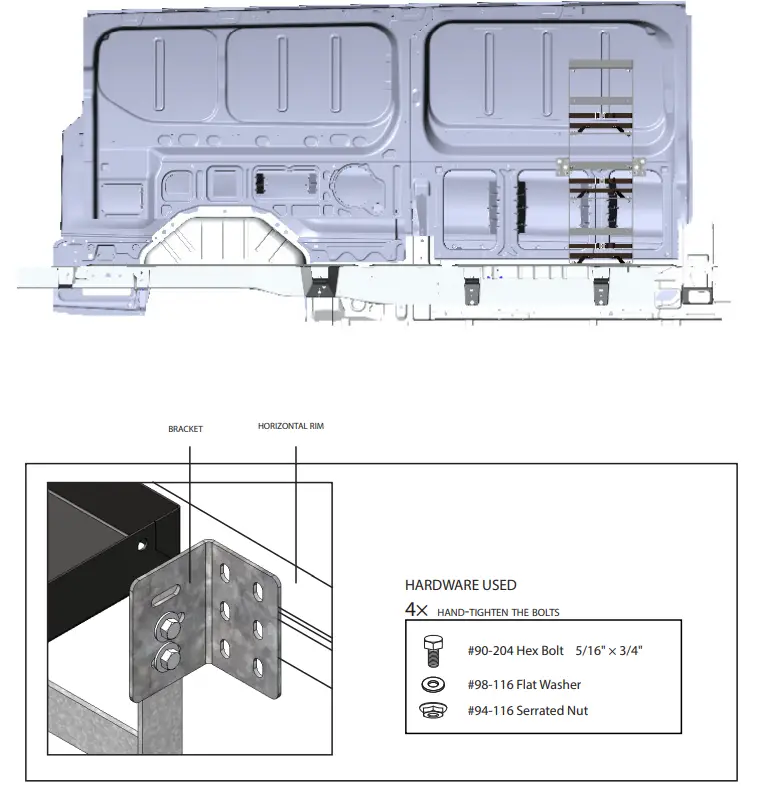
- After attaching the brackets mark the holes on the brackets and the 4 holes on the bottom bottle holder to the vehicle.
- Lift the assembled shelf on the side.
- Drill all the marks using 1/2″ drill bit w/ drill collar, then attach plus nuts to the holes
NOTE: Use 1/2″ drill bit with drill collar to stop drill at 1/2″ depth.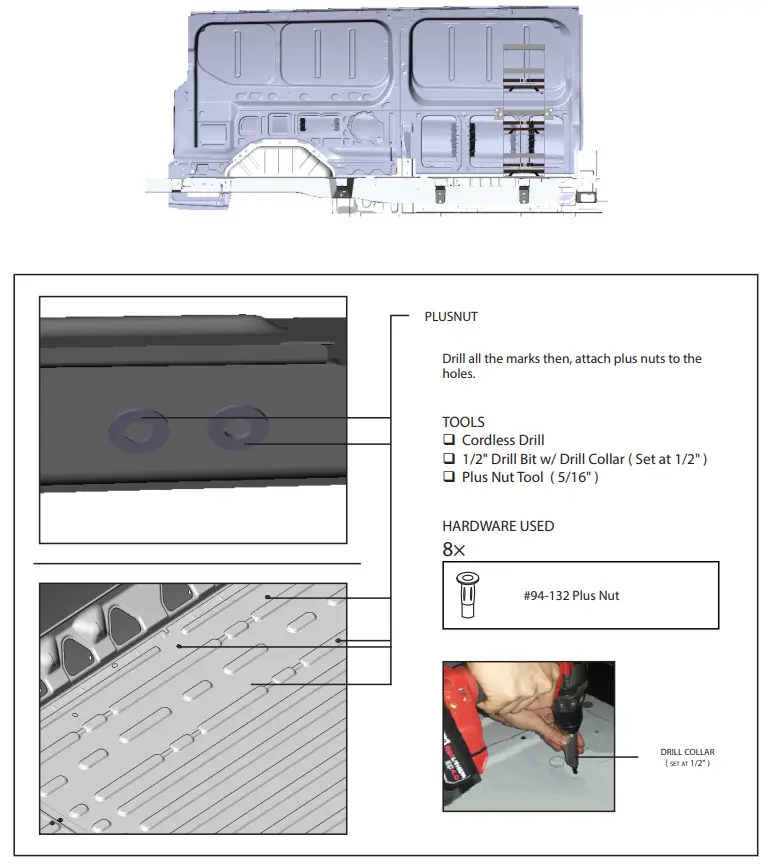
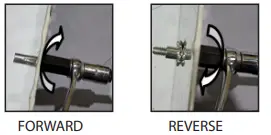
Using plus nut gun
STEP: Put the plusnut on the plusnut gun, then attach the plus nut in the hole by turning the gun forward until the plus nut locks, then remove the gun by turning in reverse.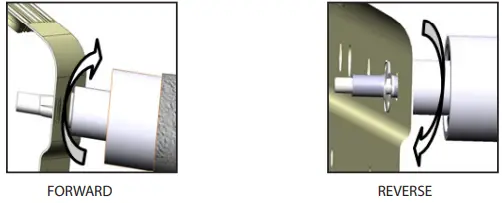
Using the 6491 plusnut too
NOTE: The hardware used for the 6490 plusnut tool is not included in the fastener bag. The 6490 plusnut tool can be ordered separately upon demand at no charge.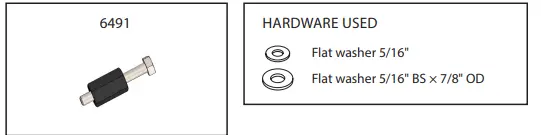
TOOLS
- Cordless Impact
- 1/2″ Socket
- 9/16″ Wrench
STEP
- STEP 1: Assemble the 6491 plusnut tool with the hardware needed, plus nut and the 9/16″ wrench as shown.
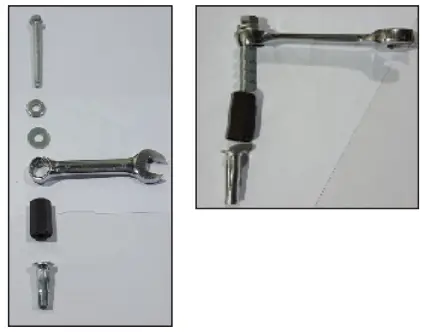
- STEP 2: Attach the plus nut in the hole by turning the bolt forward using an impact with a 1/2″ socket until the plusnut locks, then remove the bolt by turning the impact in reverse.
Put the assembled bottle holder back in place aligning the holes to the plusnuts, then install the bottle holder to the plus nuts.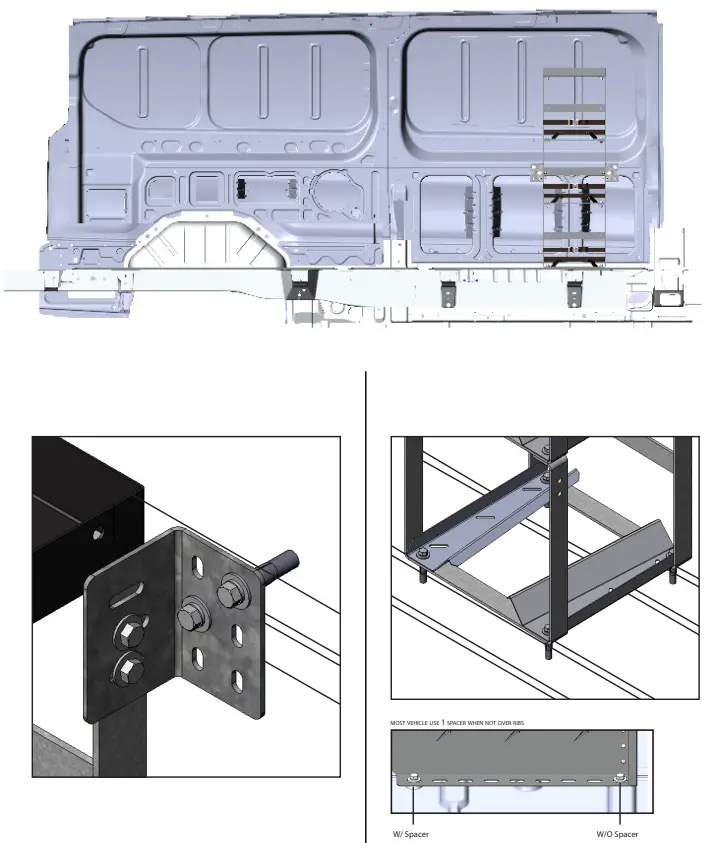
BOTTLE HOLDER INSTALLATION IN SHELVING SIDE PANEL
- Put the steel botle holder in place, then follow step 2.1.2 for floor mounting ( attaching plusnut ).
- After attaching the plusnut to the floor attach the bottle holder on the shleving side panel and vehicle floor.
NOTE:
- This step show how to attach the side of the steel bottle holder to the shelving side panel, don’t forget that you still need to attach the steel bottle holder to the floor using plusnut ( step 2.1.2 to 2.1.3 ).
- You can drill holes in shelving side panel if needed.
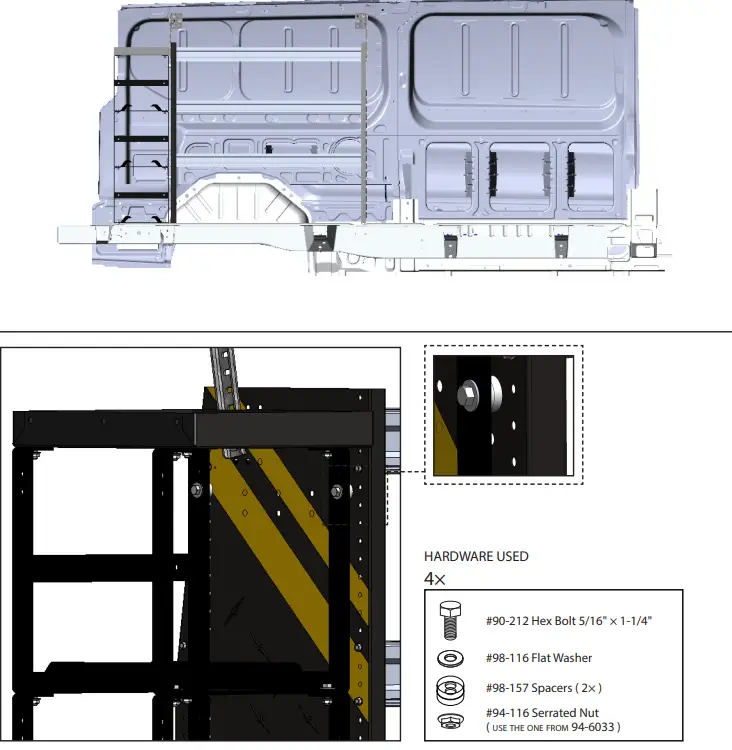
HARDWARE USED
- Put the steel bottle holder in place, then follow step 2.1.2 for floor mounting ( attaching plus nut ).
- After attaching the Plusnet to the floor attach the bottle holder on the shelving side panel and the vehicle floor.
NOTE: This step shows how to attach the side of the steel bottle holder to the shelving side panel, don’t forget that you still need to attach the steel bottle holder to the floor using plus nut ( step 2.1.2 to 2.1.3 ).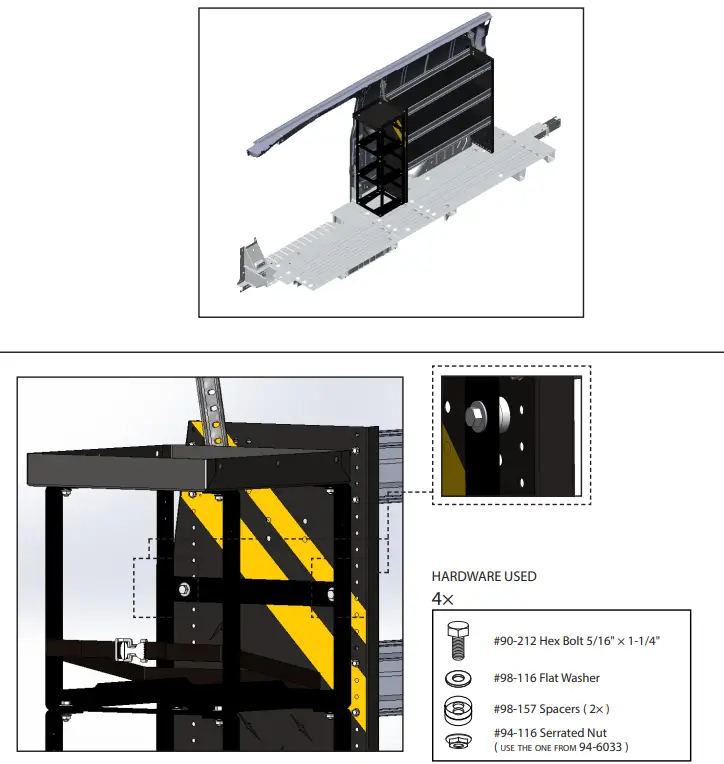
After installation is complete attach the strap on the bottle holder as shown.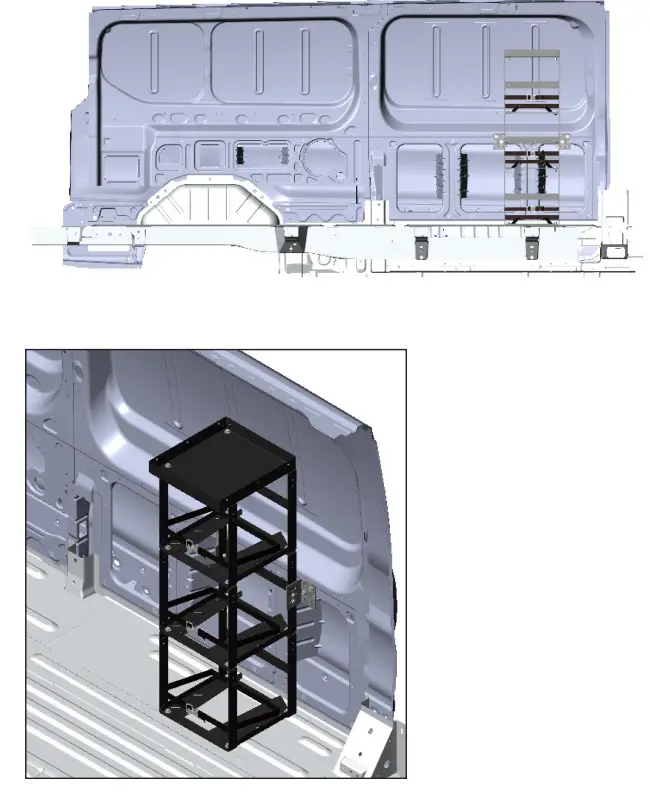
“You have successfully installed your Steel Bottle Holder Thank you for doing business with us.”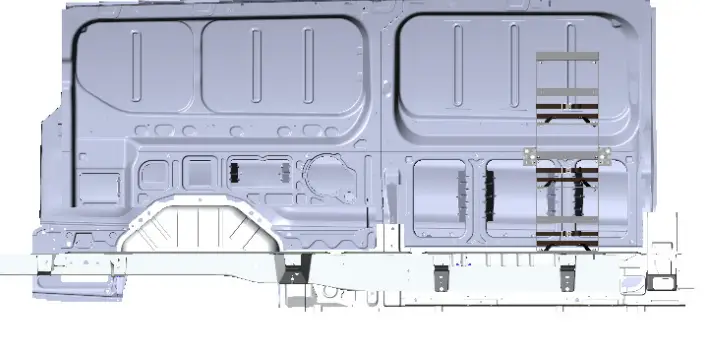
NEED HELP
For any feedback or suggestions, you may have, please contact: [email protected]


