![]() INSTALLATION GUIDE
INSTALLATION GUIDE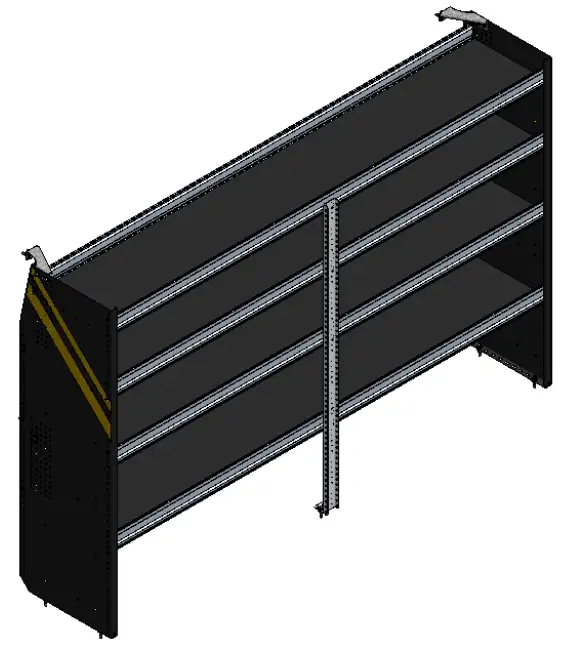
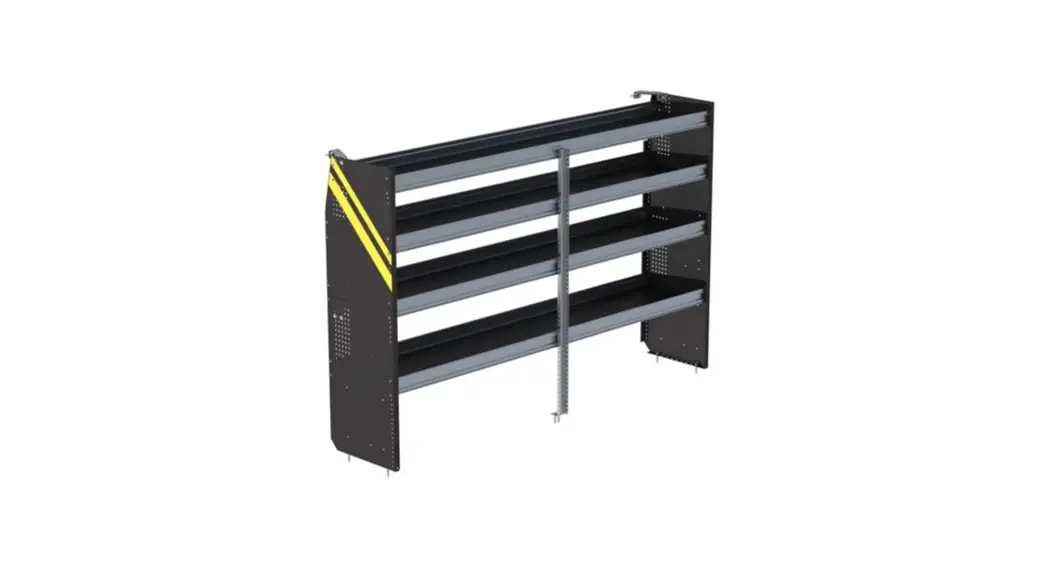
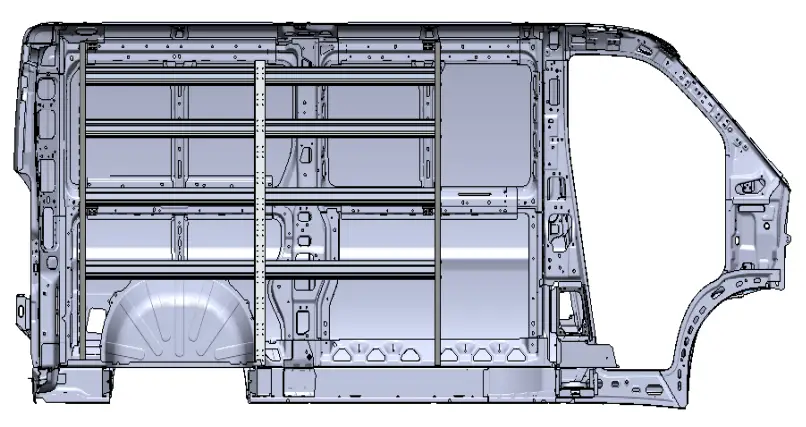
N5-DS96-4 Shelving Unit
N5-DS96-4 Shelving ( steel )
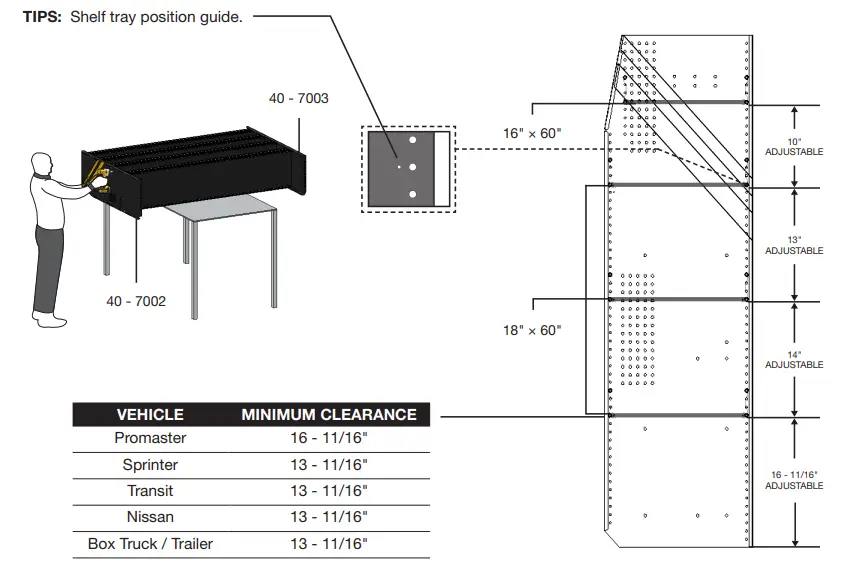
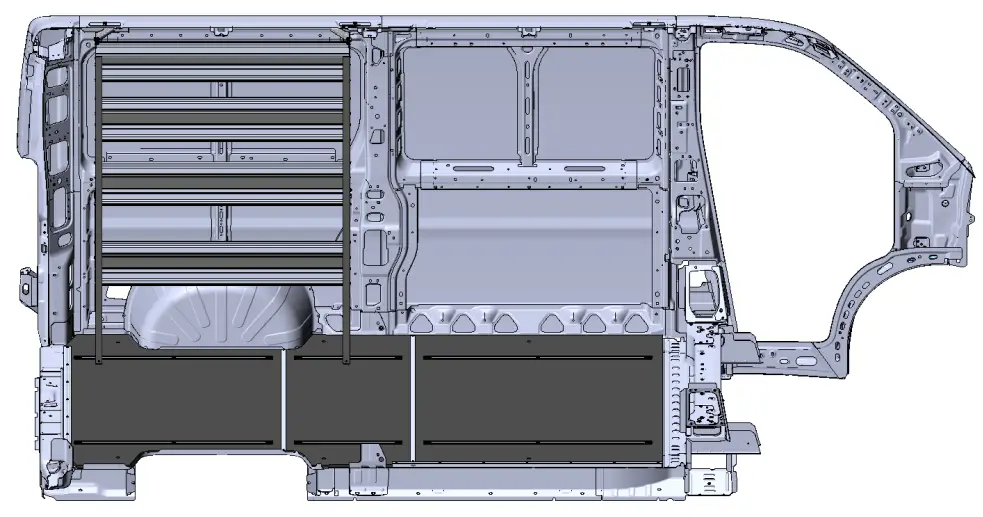
Transit High Roof & Medium Roof
Promaster Standard Roof & High Roof
Nissan NV High Roof
Sprinter Low Roof & High Roof
Box Truck / Trailer
REQUIRED ITEMS
 2
2
PERSONS
- Cordless Impact
- Cordless Drill
- Tape Measure
- Marker
- 1/2″ Socket
- 1/2″ Drill Bit w/ Drill Collar ( Set at 1/2″ )
- 3/8″ Driver Bit
- Knife
- Plusnut Tool / Plusnut Gun ( 5/16″ )
PHASE 1 – ASSEMBLY
1.1 SETUP
1.1.1 Unpack components; compare with the bill of materials.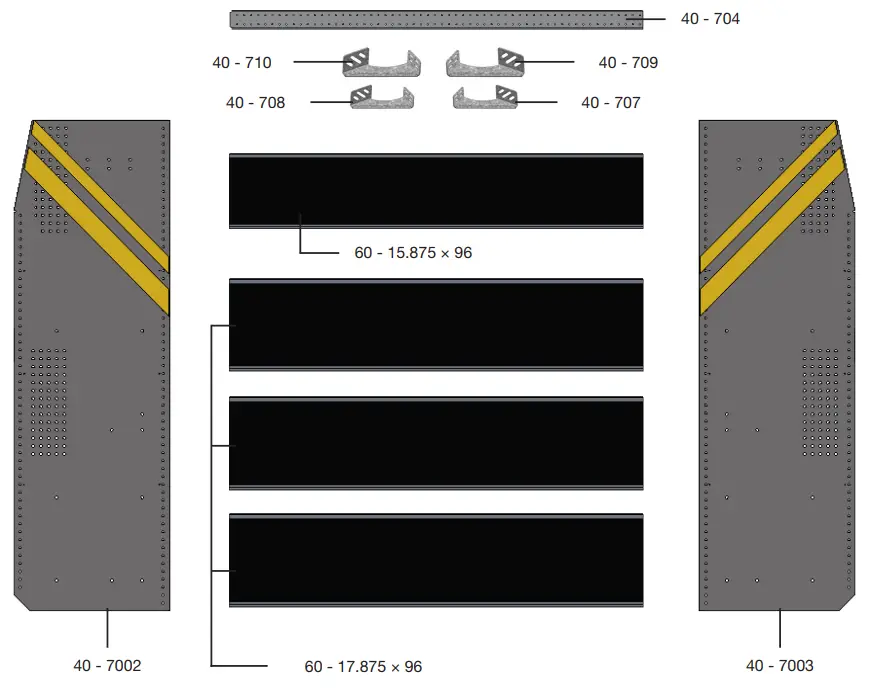
1.1.2 Verify all parts are present.
BILL OF MATERIALS
| Item No. | Description | Qty. |
| 40 – 704 | Center Post | 1 |
| 40 – 707 | Short Corner Bracket ( Left ) | 1 |
| 40 – 708 | Short Corner Bracket ( Right ) | 1 |
| 40 – 709 | Long Corner Bracket ( Left ) | 1 |
| 40 – 710 | Long Corner Bracket ( Right ) | 1 |
| 40 – 7002 | End Panel ( Left ) | 1 |
| 40 – 7003 | End Panel ( Right ) | 1 |
| 60 – 15.875 × 96 | Shelf Tray, Black Plywood, Usable 16″ × 96″ | 1 |
| 60 – 17.875 × 96 | Shelf Tray, Black Plywood, Usable 18″ × 96″ | 3 |
| 94 – 4026 | Assembly Fastener Kit | 1 |
| 96 – 4026 | Install Fastener Kit | 1 |
1.1.3Fastener kits.
94 – 4026 Fastener Kit
| 8× |  | # 90-204 | Hex Bolt 5/16″-18 × 3/4″ GR-5 ZINC |
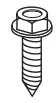
| 8x | 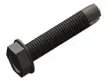 | # 92-200 | Screw HFH #10 – 16 × 3/4″ ZINC |
| 32x |  | # 92-102 | Screw HWH #14 × 1″ ZINC |
| 8x |  | # 94-116 | Serrated Nut 5/16″-18 ZINC |
| 8x |  | # 98-116 | Flat Washer 5/16″ – 18 × 1″ ZINC |
| 6x | 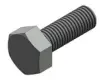 | # 90-011 | Hex Bolt 5/16″-18 × 1-3/4″ GR-5 ZINC |
| 8x | | # 90-212 | Hex Bolt 5/16″-18 × 1-1/4″ GR-5 ZINC |
| 14x |  | # 94-132 | Plusnet |
| 14x | | # 98-116 | Flat Washer 5/16″, O.D. 7/8″ ZINC |
| 14x |  | # 98-122 | Lock Washer 5/16″ ZINC |
| 6x |  | # 98-157 | Spacer 0.375″ ID, × 1.0″ OD × 0.25″ LONG NYLON |
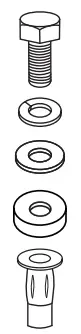
Fastener Assembly
8×
 | #90-204 Hex Bolt 5/16″ × 3/4″ |
| #98-116 Flat Washer | |
| #94-116 Serrated Nut |
8×
| #92-200 Screw #10 – 16 × 3/4″ |
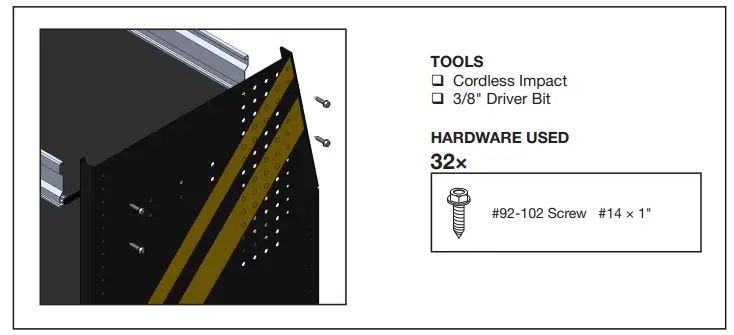
32×
 | #92-102 Screw #14 × 1″ |
8×
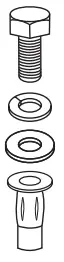 | #90-212 Hex Bolt 5/16″ × 1-1/4″ |
| #98-122 Lock Washer | |
| #98-116 Flat Washer | |
| #94-132 5/16″ Plusnut |
6×
 | #90-011 Hex Bolt 5/16″ × 1-3/4″ |
| #98-122 Lock Washer | |
| #98-116 Flat Washer | |
| #98-157 Spacers ( QTY = Gap beTween floor and end panel ) | |
| #94-132 5/16″ Plusnut |
1.2 SHELF ASSEMBLY
1.2.1 Attach both panels to the shelf trays.
NOTE: You can adjust the bottom shelf location to maximize or minimize your space over the wheel.
IMPORTANT: Always handle panels on a smooth, protected, and clean surface to avoid unnecessary scratching.
 1.2.2 Attach the center post to the center front face of the shelf.
IMPORTANT: The center post should be attached to the center of the shelf.

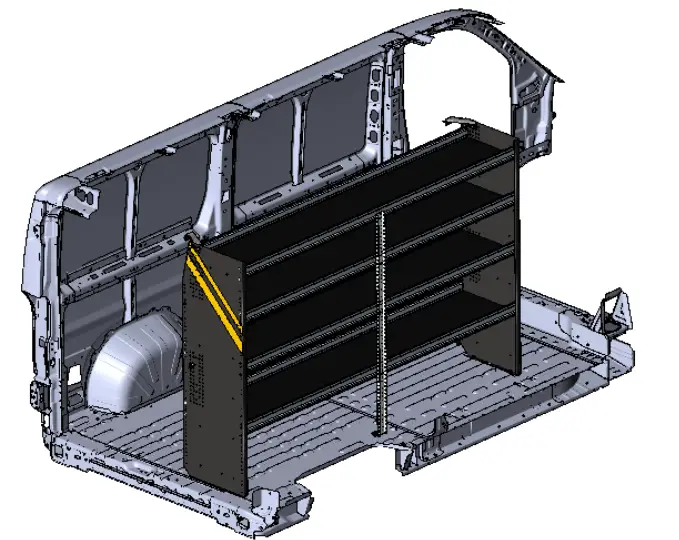
PHASE 2 – INSTALLATION
2.1 ATTACH WALL BRACKETS TO THE END PANELS
IMPORTANT: For all Box Trucks, make sure that the shelving is securely fastened to the structure of the truck.
2.1.1
- Lift the assembled shelf to the vehicle, then put it in place.
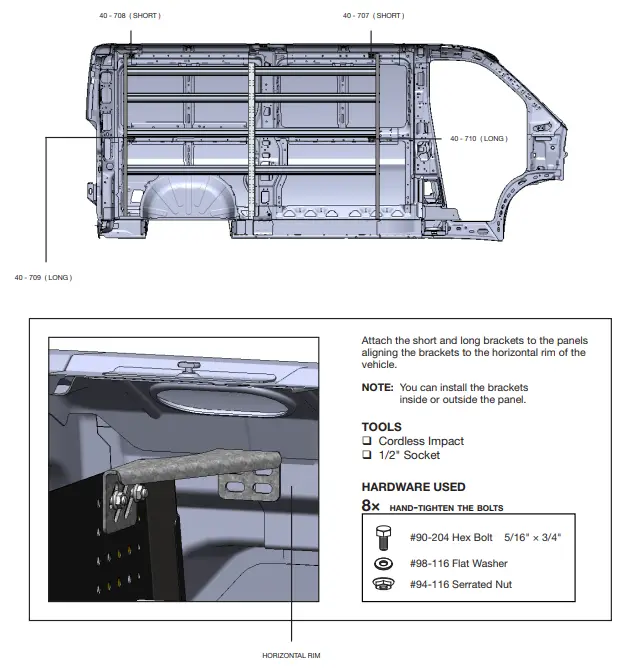
- Attach the short and long brackets to the panels aligning the brackets to the horizontal rim of the vehicle.
NOTE: Handle with care.
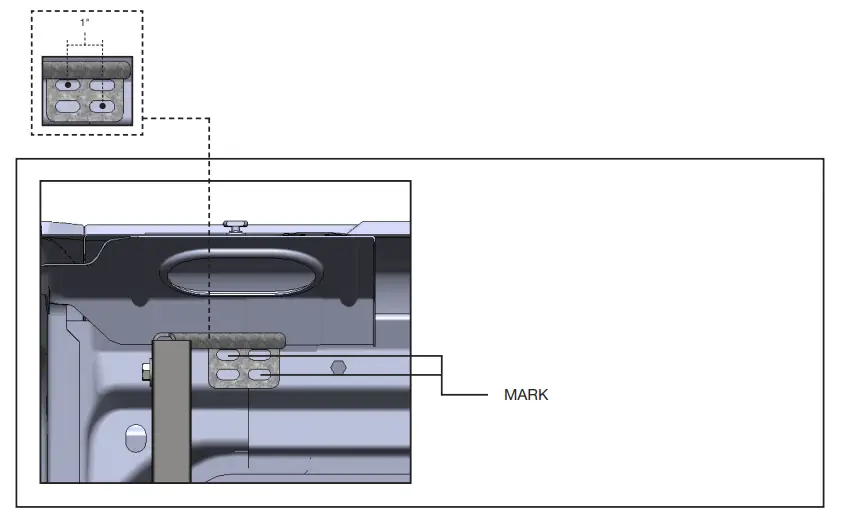
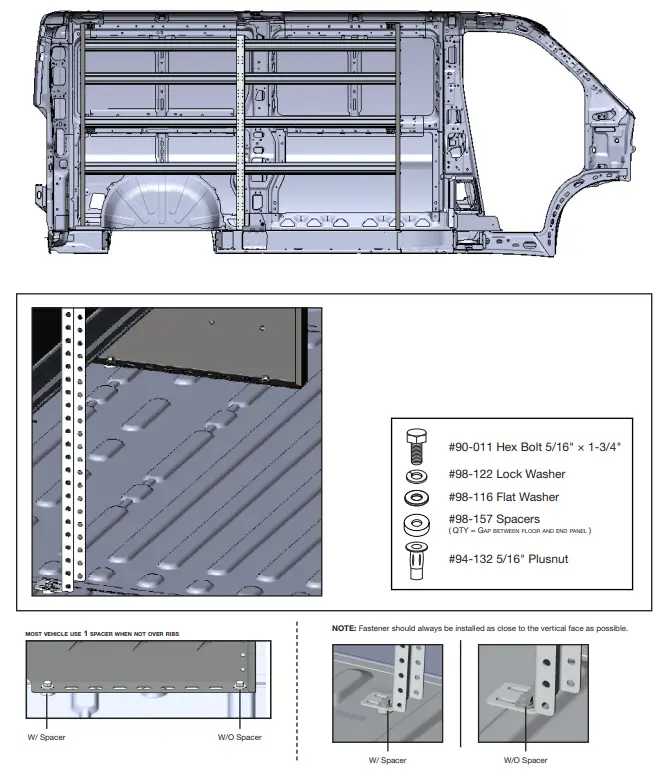
2.2 MARK HOLES FOR PLUS NUTS
2.2.1 After attaching the brackets mark the holes on the brackets, end panels, and center post to the vehicle.
NOTE: The distance between the two holes should be no less than 1″, to avoid plus nut overlap
Mark 2 holes of the short and long brackets on the vehicle’s horizontal rim.
NOTE: If you are using Ranger wall kits, please go to page 14.
TOOLS
- Marker
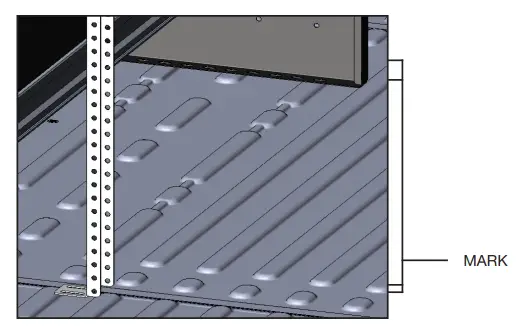
 Mark 2 holes in each end panel and mark also the 2 holes of the center post on the vehicle floor.
NOTE: If you are using the Ranger floor, please go to page 12.
TOOLS
- Marker

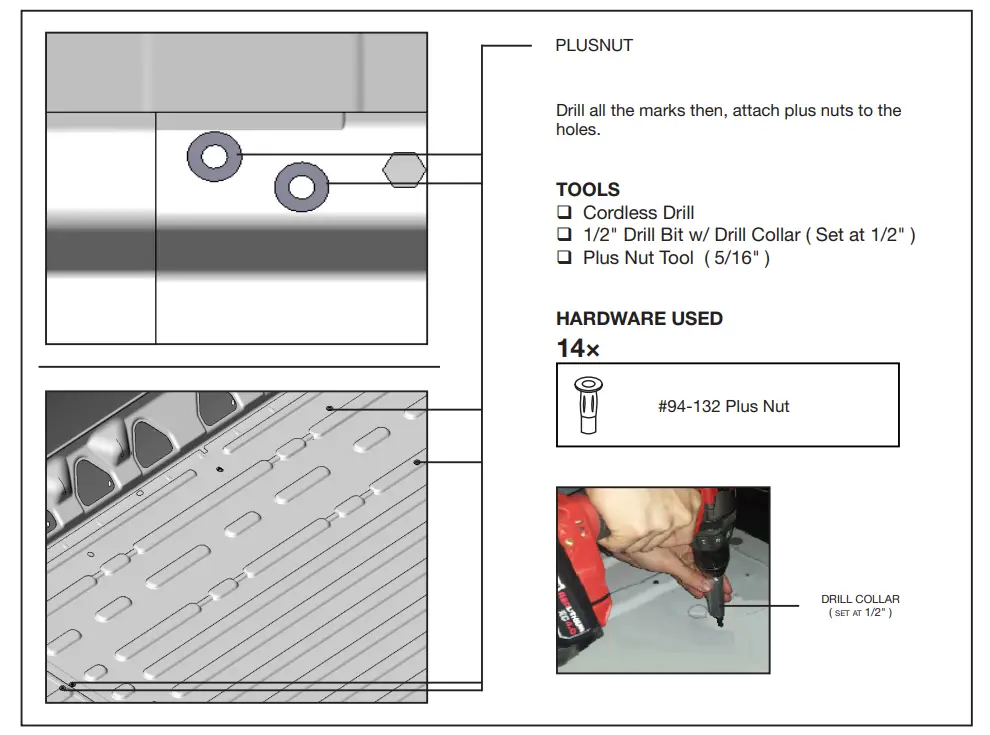
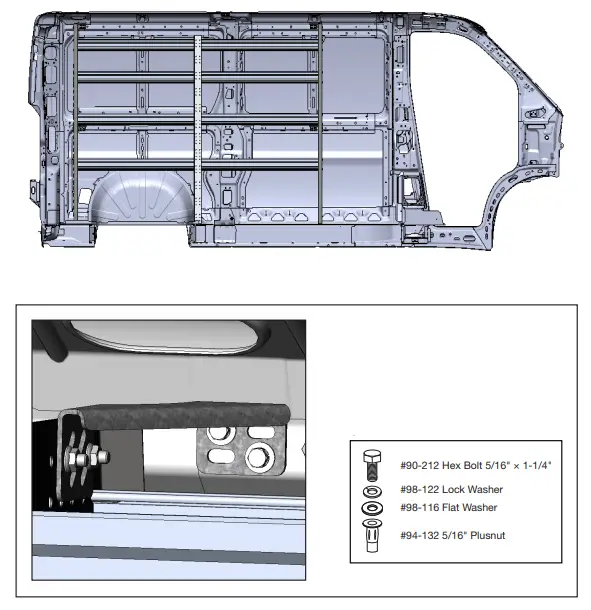
2.3 ATTACH PLUS NUTS
2.3.1
- Lift the assembled shelf to the side.
- Drill all the marks using a 1/2″ drill bit w/ drill collar, then attach plus nuts to the holes.
NOTE: Use a 1/2″ drill bit with a drill collar to stop the drill at 1/2″ depth.
WARNING: Before drilling, ensure that you will not hit any critical parts of the vehicle like the Gas tank, Wiring Harness, and Hose.


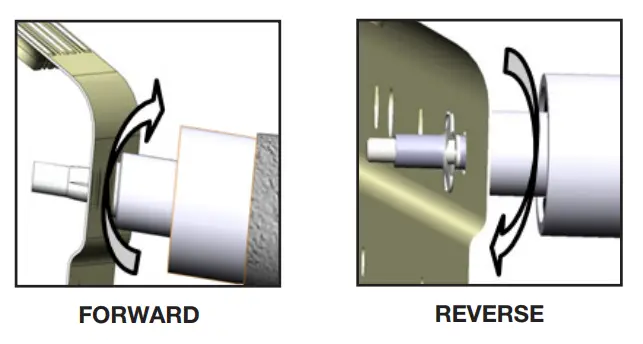
2.3.2 How to attach plus nut.
- using plus nut gun
STEP: Put the plus nut on the Plusnet gun, then attach the plus nut in the hole by turning the gun forward until the plus nut locks, then remove the gun by turning it in reverse.
- using the 6491 plus nut tool
NOTE: The hardware used for the 6490 plus nut tool is not included in the fastener bag.
The 6490 plus nut tool can be ordered separately upon demand at no charge.
TOOLS
- Cordless Impact
- 1/2″ Socket
- 9/16″ Wrench
| 6491 | HARDWARE USED |
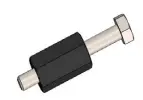 | Flat washer 5/16″ BS × 7/8″ OD |
STEP 1:
Assemble the 6491 plus nut tool with the hardware needed, plus the nut and the 9/16″ wrench as shown.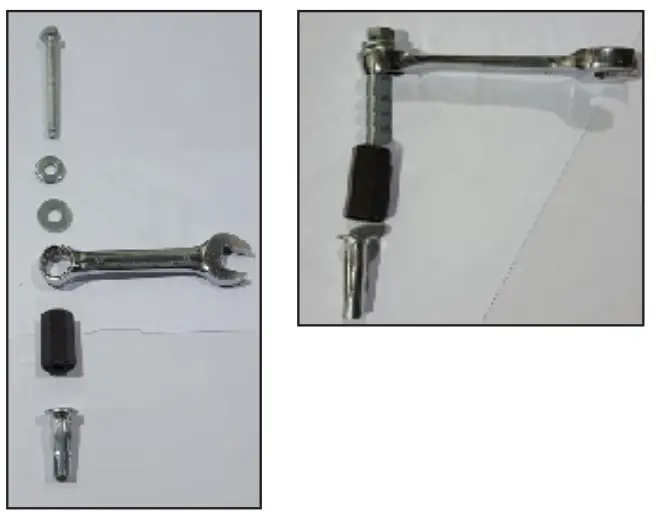
STEP 2:
Attach the plus nut in the hole by turning the bolt forward using an impact with a 1/2″ socket until the plus nut locks, then remove the bolt by turning the impact in reverse.

2.4 ATTACH SHELF UNIT TO THE FLOOR
without ranger floor
2.4.1 Put the assembled shelf back in place aligning the holes to the plus nuts, then install the end panels and center post to the plus nuts.
TOOLS
- Cordless Impact
- 1/2″ Socket
HARDWARE USED
6×
with ranger floor
2.4.2
- Lift the shelving unit inside the van, then put it in place.
- Install the shelving unit to the floor mounting track by sliding bolts in the mounting tracks, and putting a screw in the last rear slot of the end panels of the shelving unit.
TOOLS
- Cordless Impact q 3/8″ Driver Bit
- 1/2″ Socket
HARDWARE USED
2× floor fastener kit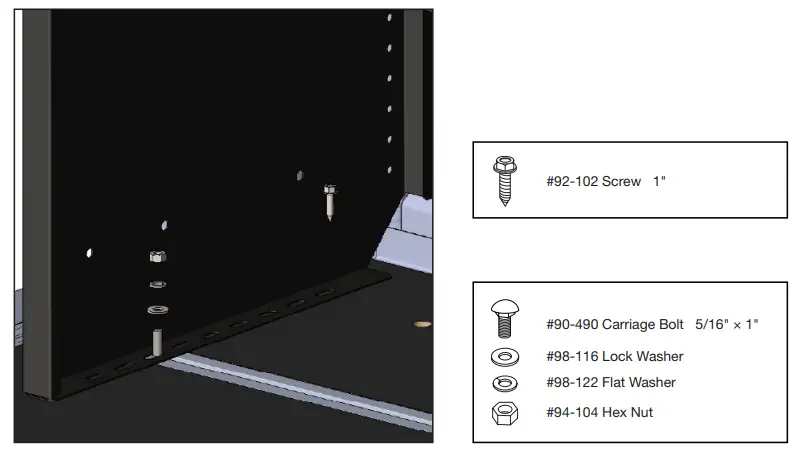 2.5 ATTACH WALL BRACKETS
without ranger wall kits
2.5.1 Aligned the wall brackets to the plus nuts, then install the wall brackets to the wall.
NOTE: Tightened the bolts that are used to attach the wall bracket to the wall or wall kits 1 st before the bolts that are used to attach the wall bracket to the end panel.
IMPORTANT: After installation is completed, ensure all bolts are tightened.
TOOLS
- Cordless Impact
- 1/2″ Socket
HARDWARE USED
8×
with ranger wall kits
2.5.2 Aligned the wall brackets to the wall mounting track kits, then install the wall brackets to the wall mounting track kits using channel nuts.
NOTE: Tightened the bolts that are used to attach the wall bracket to the wall or wall kits 1 st before the bolts that are used to attach the wall bracket to the end panel.
IMPORTANT: After installation is completed, ensure all bolts are tightened.
TOOLS
- Cordless Impact
- 1/2″ Socket
FASTENERS USED
8× wall kits fastener kit
 “You have successfully installed your
N5-DS96-4
Thank you for doing business with us.”
For any feedback or suggestions, you may have, please contact: [email protected]


